Using CapCut on mobile can get exhausting at times, and you may want the comfort of a mouse and keyboard. Is that even possible?
As it turns out, it is… Here’s you use CapCut on your PC:
- Go to BlueStacks.com
- Download the BlueStacks app
- Install the BlueStacks app
- Click on the lower-left icon
- Go to “Google Play Store“
- Search for CapCut
- Download CapCut
- Open CapCut and edit your videos
Check out this writeup if you’re confused about downloading, installing, or matching BlueStacks with CapCut.
I’ve included helpful screenshots to help you follow along… which you’ll be needing as this process isn’t that simple (well, relatively speaking…).
Summary: In this article, I explain how to use CapCut on your computer by utilizing BlueStacks to emulate your phone on a desktop.

Step-by-Step Guide to Using CapCut on Your Computer:

1. Download and Install BlueStacks:
   - Go to the BlueStacks website and download the installer.
   - Run the installer and follow the on-screen instructions to complete the installation.

2. Log Into Your Google Account:
   - Open BlueStacks and log into your Google account to access the Google Play Store.

3. Download CapCut Through BlueStacks:
   - Search for CapCut in the Google Play Store within BlueStacks.
   - Download and install the CapCut app.

4. Use CapCut to Edit Your Videos:
   - Open CapCut within BlueStacks.
   - Edit your videos just like you would on a mobile device, but with the added comfort of using a mouse and keyboard.

5. Save and Share Your Edited Videos:
   - Once your video is edited, download it to your computer.
   - Easily post your newly-edited videos on social media platforms.

By following these steps, you can take full advantage of CapCut's features on your computer, enhancing your video editing experience with the convenience of a larger screen and more precise controls.

1. Go to BlueStacks.com
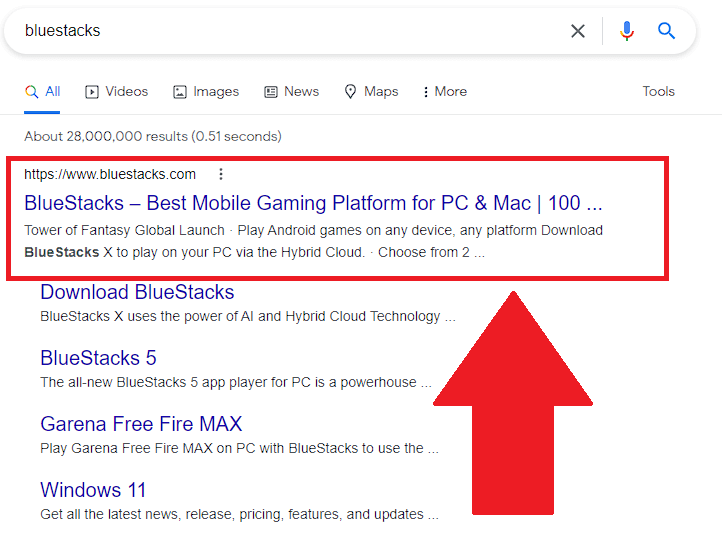
Start by finding BlueStacks on Google. Type in “bluestacks” on Google, or any other search engine you’re using, and select the first link (the “www.bluestacks.com” one).
(But make sure it really is www.bluestacks.com – anything else is not the official website)
Also, you shouldn’t worry; both the website and the app are safe based on user and expert feedback. I’ve also tested it myself, and totally safe for sure.
BlueStacks is an official company that works with Intel, AMD, Nvidia, and other reputable companies, so they’re 100% reliable and trustworthy. So there’s that…
2. Click on “Download“
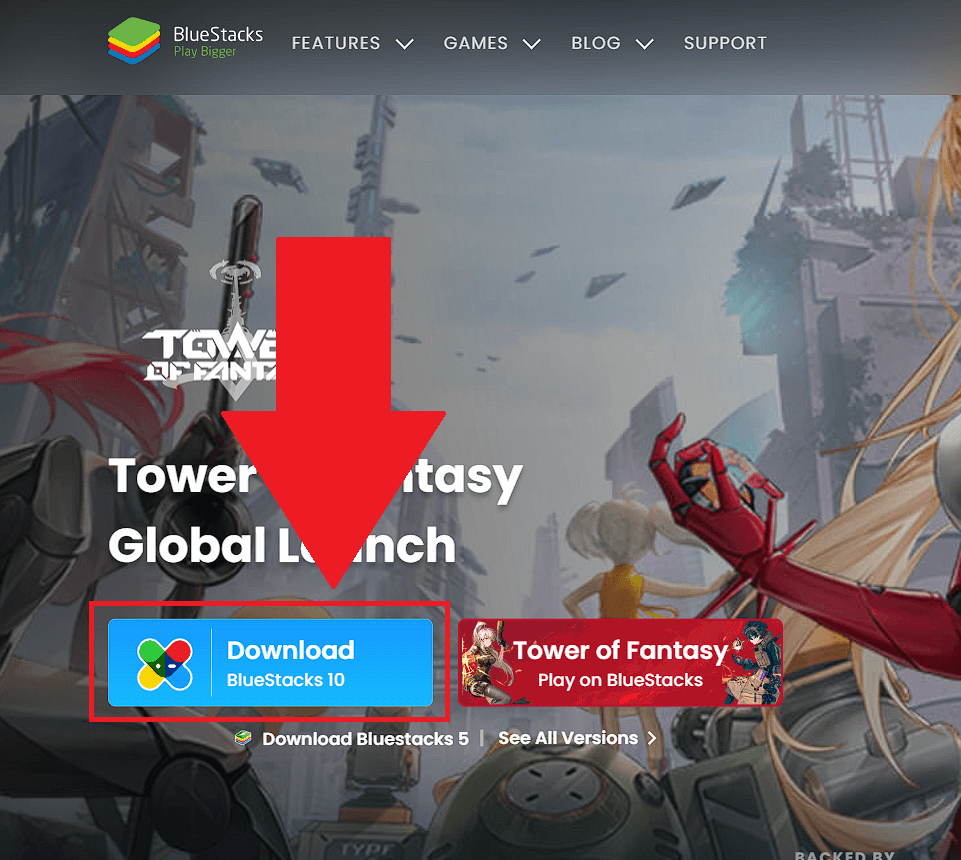
After opening the official BlueStacks website, look around for the blue “Download BlueStacks 10” button. It should be in the center of the page but if you can’t see it, consult the screenshot above.
3. Install BlueStacks
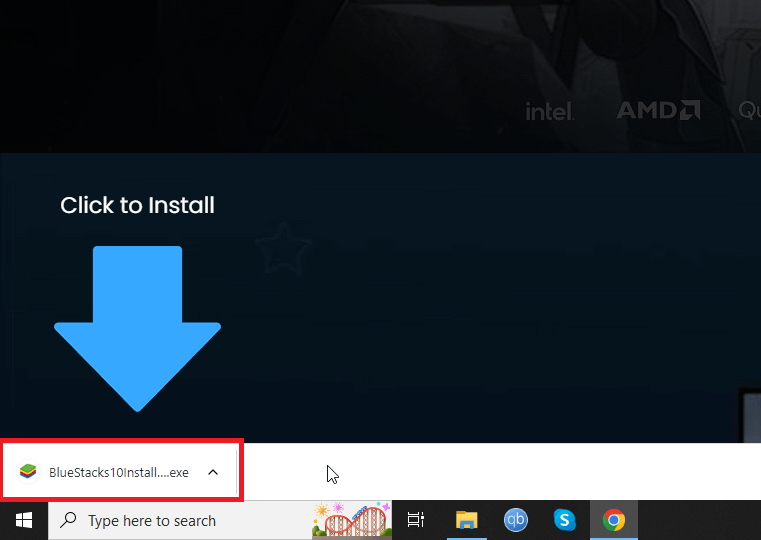
Clicking on “Download BlueStacks 10” will do just that – download the program to your computer (either to your Desktop or the “Downloads” folder).
Once you download BlueStacks, it’ll appear on a notification bar in your browser (see the image above). Click on that BlueStacks notification to begin the installation process.
4. Wait for it to install
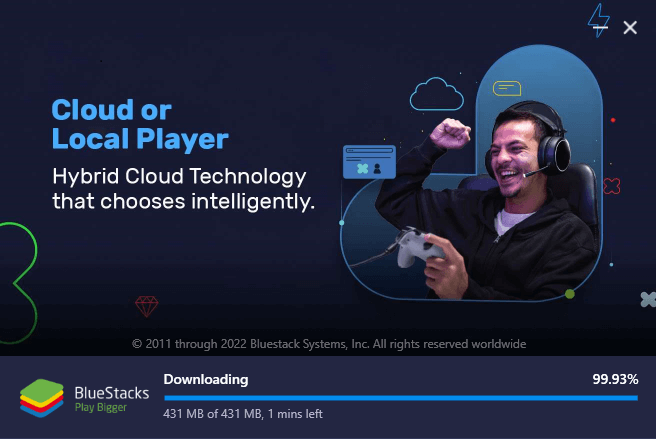
After clicking on the BlueStacks notification in the browser bar, next, you’ll have to select an installation destination (leave the default path). Do that and wait for it to finish installing.
5. Click on the lower-left icon in the BlueStacks app
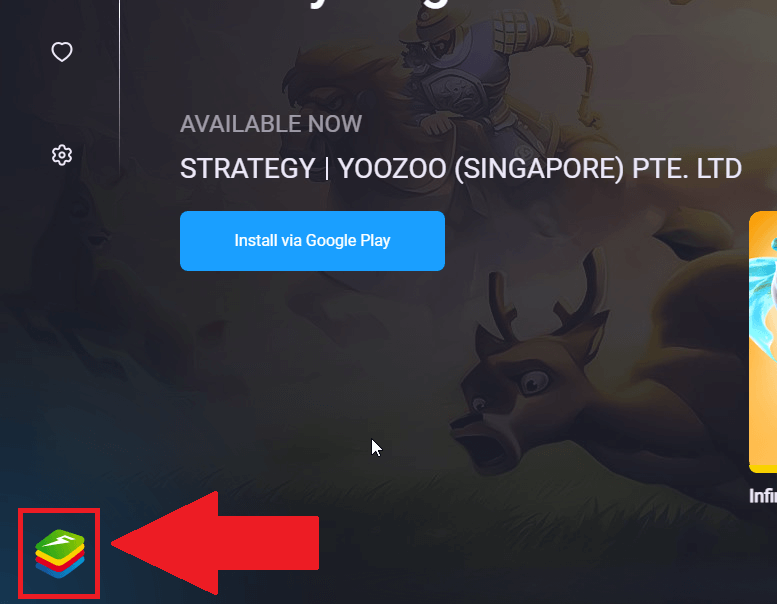
Did it finish installing? Good, the next step is selecting the colored “stacks” icon in the lower-left corner of the app.
Consult the screenshot above to see where to find the icon I’m talking about.
6. Open the Play Store
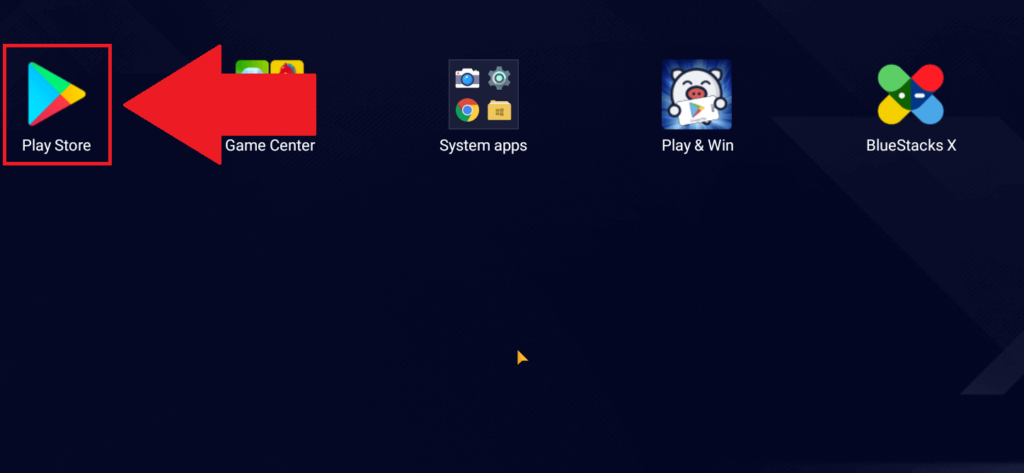
Once you’ve selected the “stacks” icon in the previous step, a menu will open where you’ll see several options, including the “Play Store” app option.
Select the Play Store because up next, you’ll have to install CapCut on the BlueStacks app, and the Play Store is the first step in that process (yeah, this is why I said it’s a bit confusing).
7. Select “Sign in“
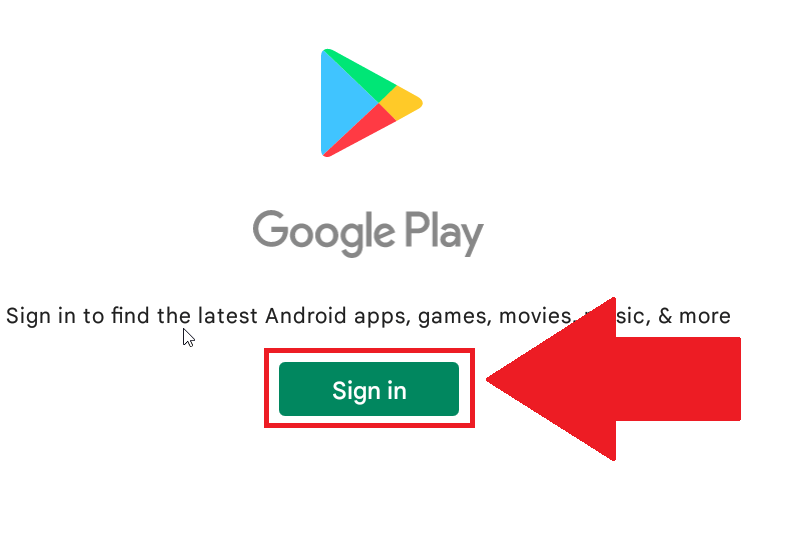
After opening the Google Play app, you’ll be asked to sign in to your Google account.
Click on “Sign in” to do that, since you can’t use Google Play without logging in (just like on a mobile device).
8. Enter your email address
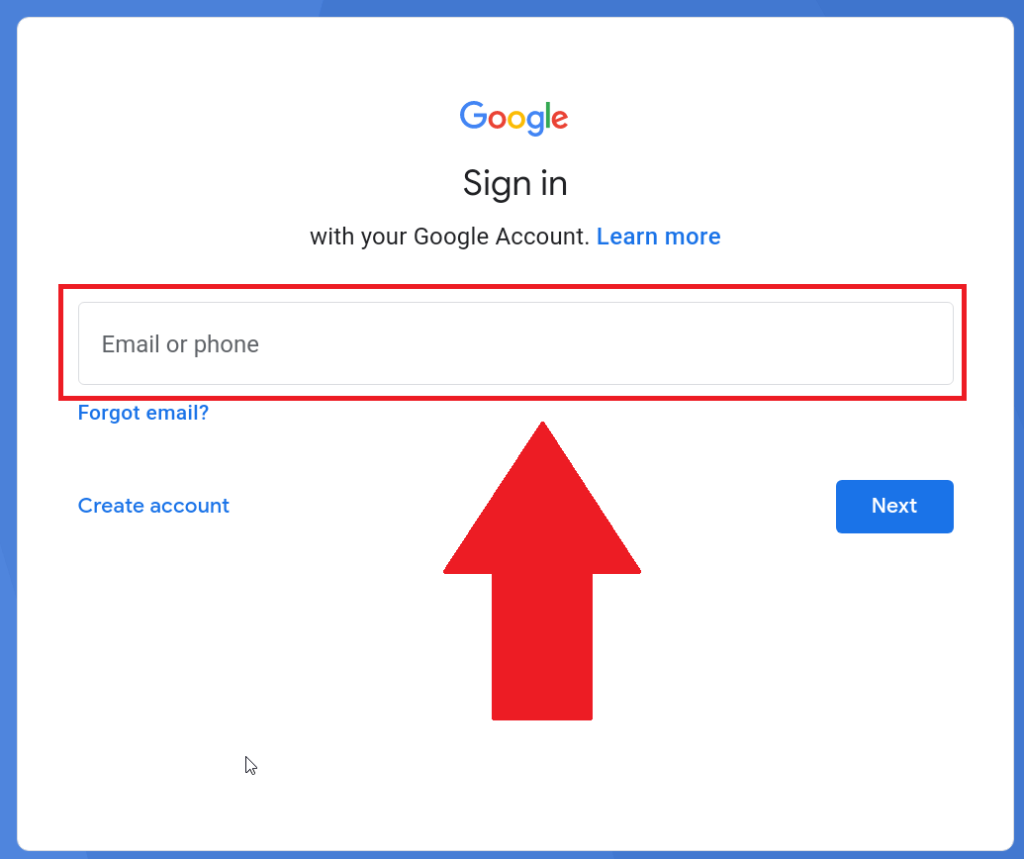
Your email address comes first – type it in the text box and then click on “Next” in the bottom-right corner to move to the next step.
9. Enter your password
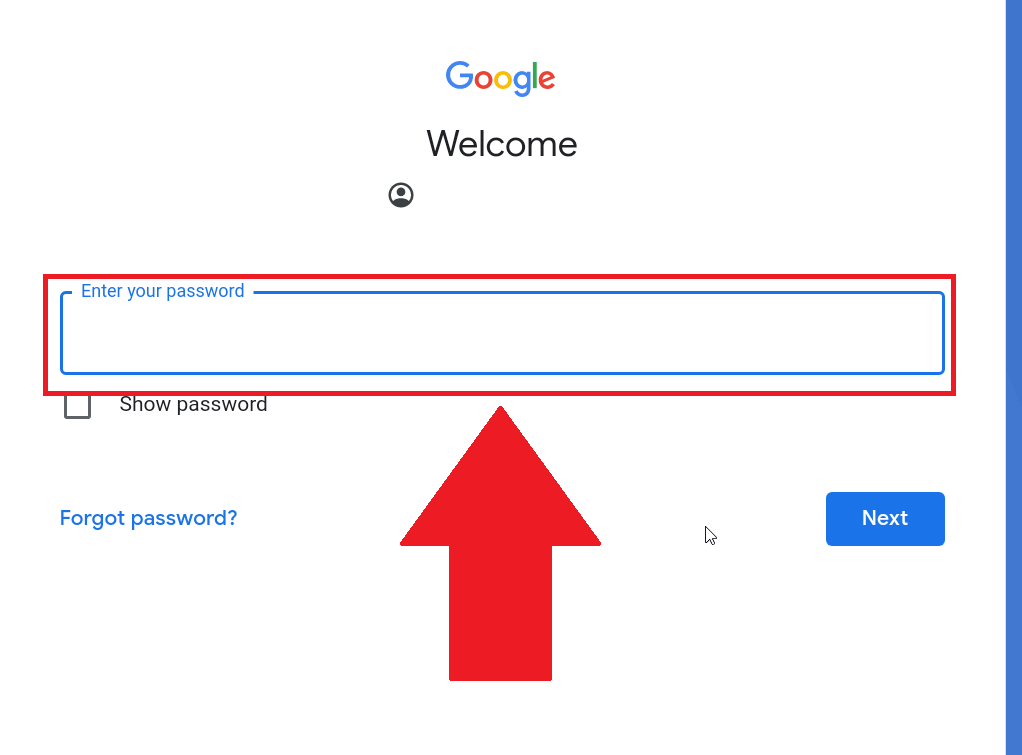
Next, you’ll need to enter your Google password. Don’t worry… this data is kept safe by BlueStacks, and no one has access to it. Well, the NSA might see it, but eh, that’s just how it is apparently these days… ¯\_(ツ)_/¯.
After entering the password, click on “Next” and go to the next step:
10. Confirm your identity on your phone
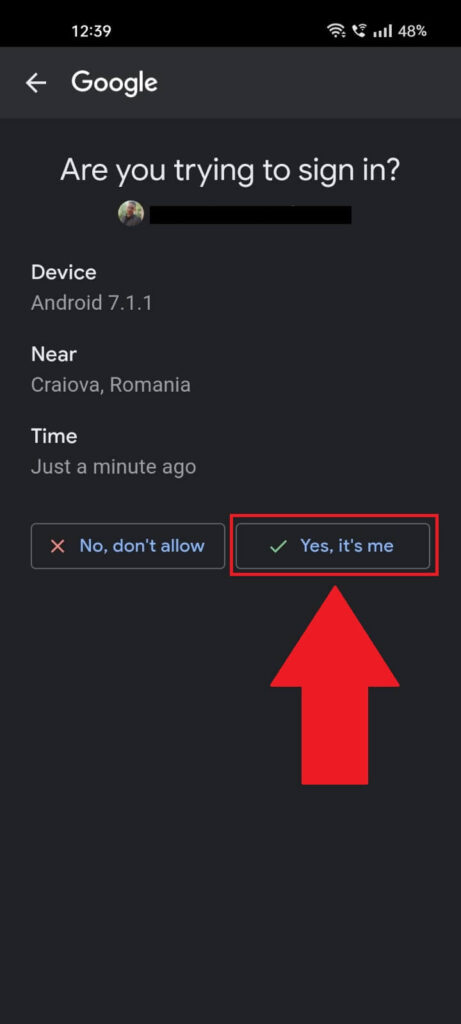
Once you enter both your email address and password, you’ll be asked to confirm your identity through your phone.
Grab your phone, unlock it, and open the fresh notification you’ve just received from Google. Inside, you should see information regarding a recent connection to your Google account (it was you trying to connect from BlueStacks).
Select “Yes, it’s me” in your Google app to confirm it was really you.
Next:
11. Search for CapCut
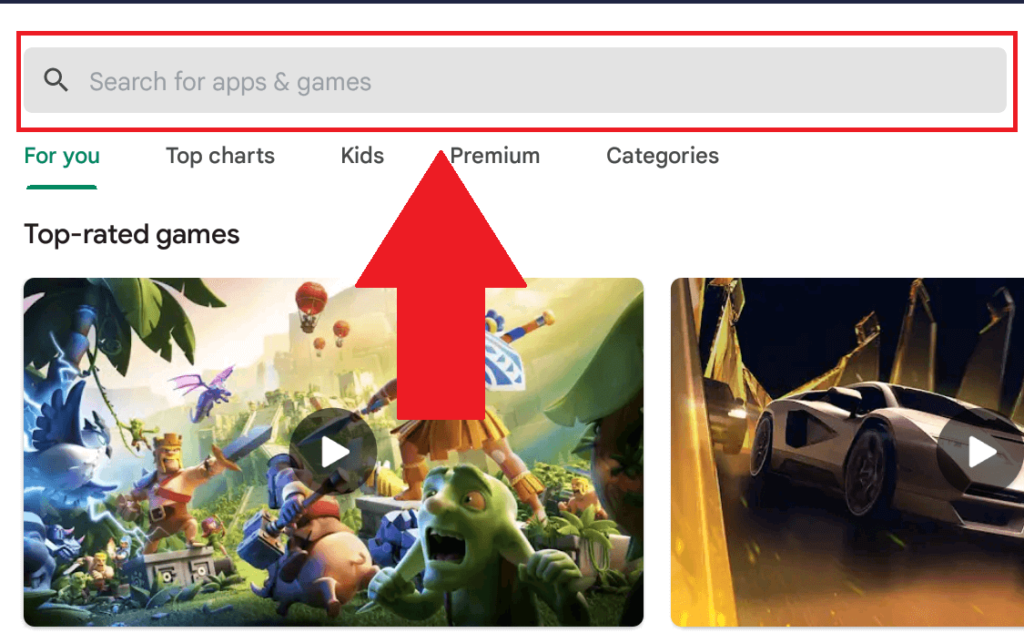
After confirming your identity on Google, return to BlueStacks on your computer. The Google Play app should have opened by now.
Next, you will have to search for CapCut by using the search bar at the top of the screen… just like you would on a mobile device.
12. Install CapCut

After you find CapCut, click on the “Install” button on the right of the screen. The interface looks identical to the Google Play app on your phone, so this should be easy to follow.
13. Use CapCut on your computer
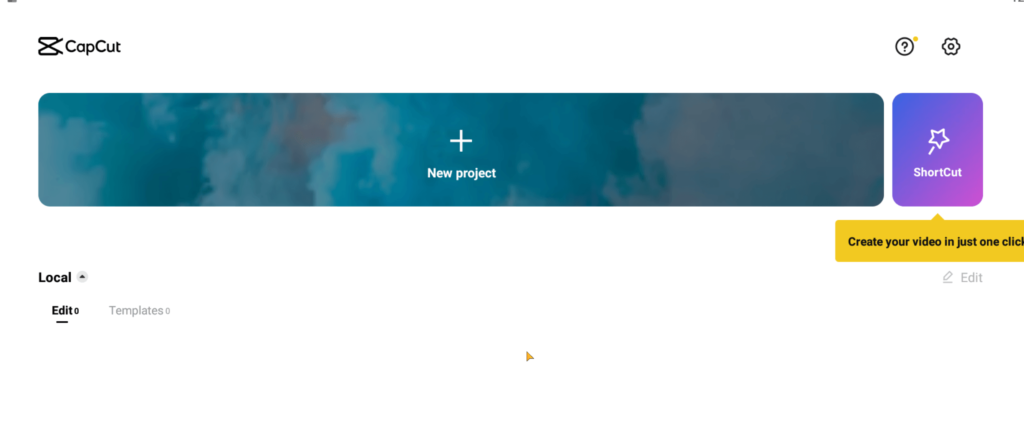
And this is pretty much all there is to it… really.
With CapCut installed on your computer now, you’ll be able to use it just like you would on a mobile device.
Only that now, you have a mouse and keyboard for much better ease of use; which is exactly what you wanted. Good stuff.
Let’s summarize all of this…
To get CapCut on your PC, you must use BlueStacks to emulate your phone on a desktop computer.
Download BlueStacks, install it, log into your Google Account, download CapCut through BlueStacks, and use it to edit your videos.
It’s as simple as that and won’t even take more than 5 minutes (I had to do this a few times to make good screenshots, it’s really simple, trust me).
Moreover, you can download the newly-edited videos on your computer, which lets you easily post them on social media platforms. This is another great benefit of using this app on your computer.
If you’d like to learn anything about BlueStacks or CapCut, or if CapCut is not working on your computer, please leave a comment below, and I’ll try to help!


