Adding text on CapCut should be straightforward, but for some weird reason, this app makes this much more complicated than it should be.
But don’t despair, I’m here to help you. 🙂
It REALLY isn’t that complicated once you check out my guide below:
- Select “New project” to add a video for editing
- Select the video and tap on “Add“
- Tap on “Text“
- Select “Add text” / “Text template” / “Add captions” or “Auto lyrics“
- Type in your text and save the changes
Still looks complicated? Not to worry, I have your back. Read the detailed steps below and you’ll get this done quickly!
Summary: In this article, I guide you through the process of adding text to your videos using the CapCut app. The steps are straightforward:

1. Start a New Project: Open the CapCut app and select "New Project."
2. Add Your Video: Choose the video you want to edit and add it to your project.
3. Select the Text Option: Tap on the "Text" option from the toolbar.
4. Choose a Text Style: Pick a text-related option that suits your style, such as "Default Text" or "Text Template."
5. Add Your Text: Type in your desired text and customize it using the available tools.
6. Save Your Changes: Once you're happy with the text, save the changes to your video.

By following these simple steps, you can easily enhance your videos with text using CapCut.

1. Select “New project“

Start by opening CapCut and tapping on “New Project” in the top-left corner. The button is big and it’s blue, so you should find it easily.
So far it’s pretty simple, right?
2. Select a video and tap “Add“
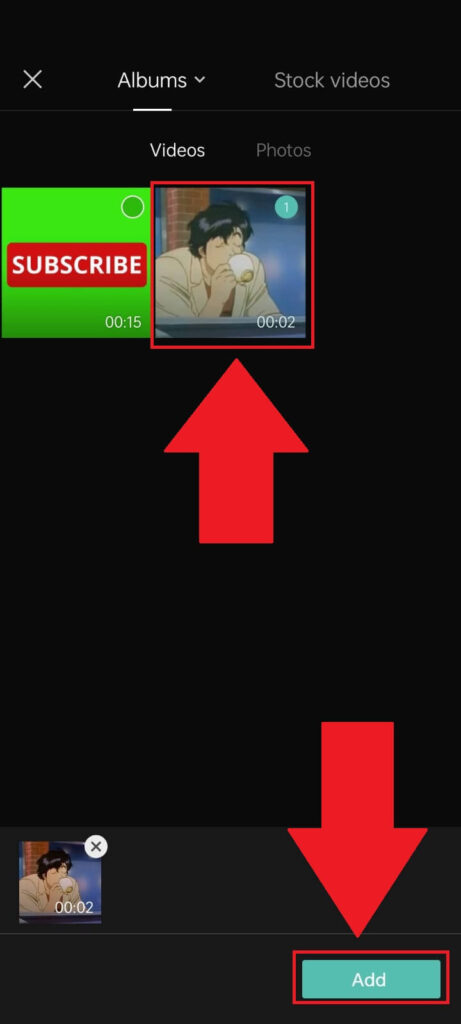
Next-up, you’ll get to the “Albums” page, where you can select photos or videos. Choose whichever you want and then tap on “Add“.
Still simple for now!
3. Select “Text“
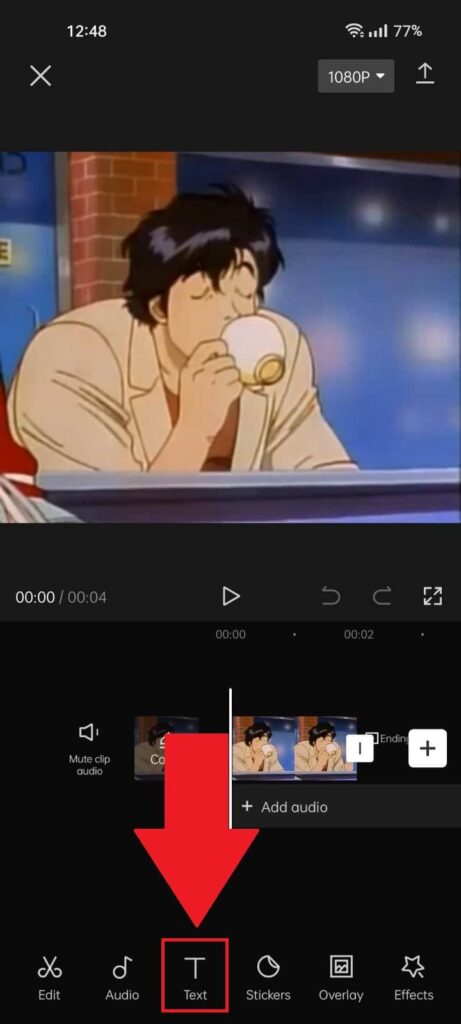
Now, your video will be uploaded to CapCut and you can get started on adding the text. See the “Text” button on the bottom-side bar?
Yeah, that one. Select it (see screenshot above for further info).
4. Select a text option
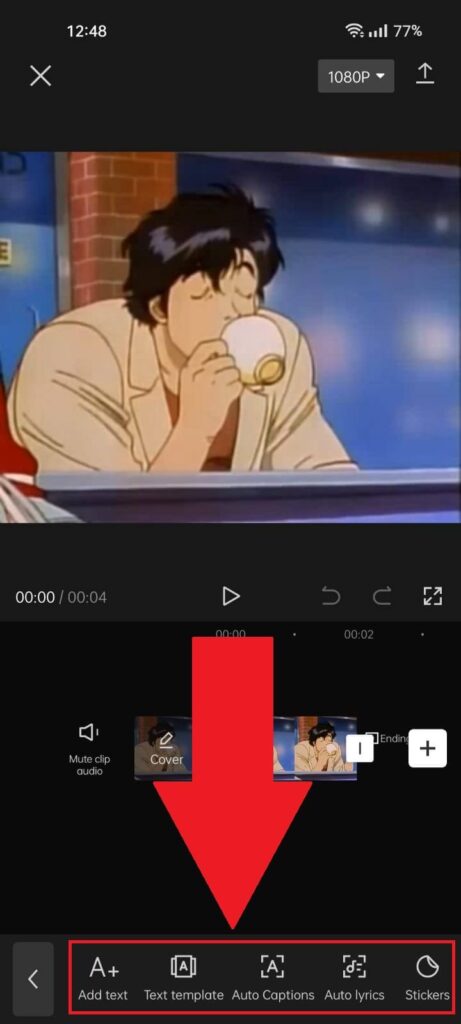
Now, you’ll need to choose one of the text-related options on CapCut. The “Add text” option works great if you want to add simple text but experiment with the others to see what’s what.
I’ll go with “Add text” for this guide, so keep reading:
5. Add your text and tap the checkmark icon
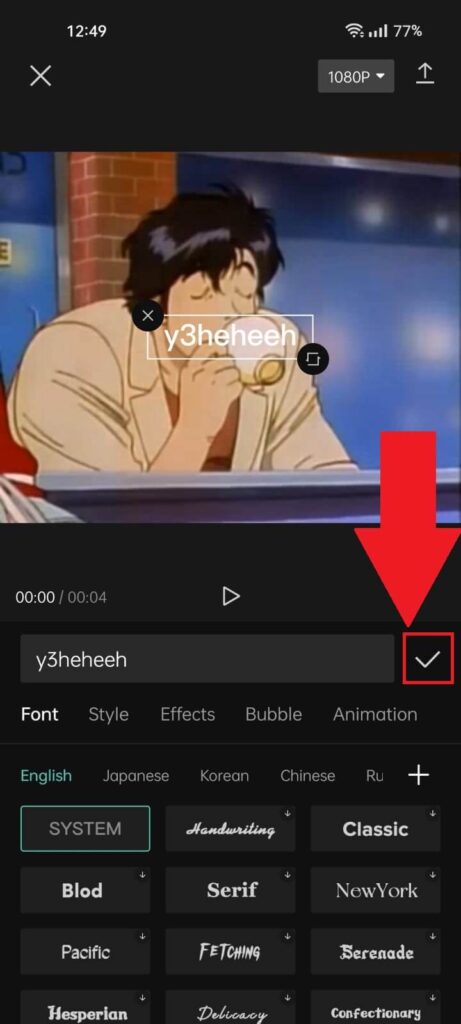
Once you tap on the “Add text” button, aa text box will appear on the video. Type in your text, then tap on the checkmark icon (see the screenshot above) to save the changes.
And that’s all. Huh… I remember it being more complicated.
Well, leave a comment below if this guide was helpful or if you stumbled with any of the steps and I’ll try to help you!


