Reversing on CapCut will let you pull off some really slick effects, if you know how to do it right. Fortunately, you have me.
Here’s how to reverse a video in CapCut the right way:
- Tap on “New project” on CapCut
- Add a video you want to reverse by selecting the video and tapping “Add“
- Select “Edit“
- Tap on “Reverse“
- Wait for the process to finish
If you need easy-to-follow instructions on how to reverse in CapCut, I’ll break down all the steps (with screenshots) below, so keep reading!

1. Tap on “New project“
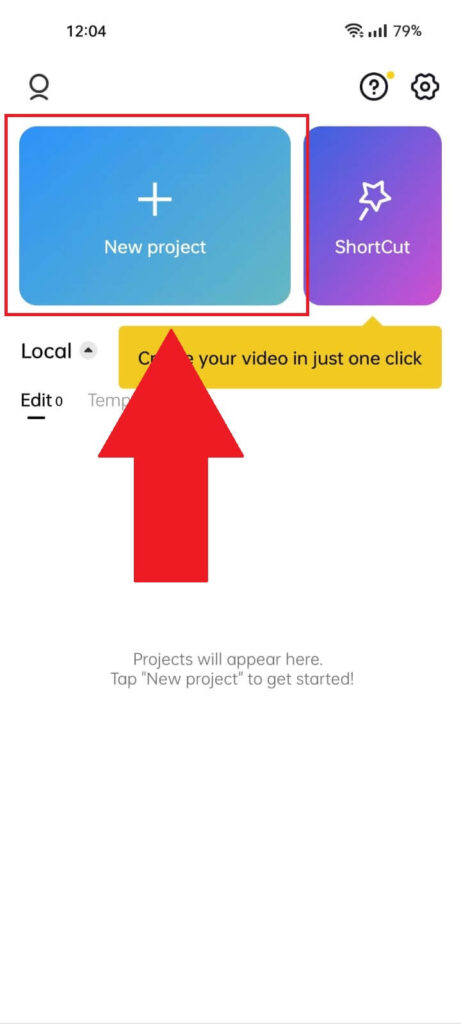
First step – open CapCut. And then tap the “New project” button (it’s blue and it’s in the top-left corner of the page). Check the screenshot above if you can’t find it.
2. Select a video and tap “Add“
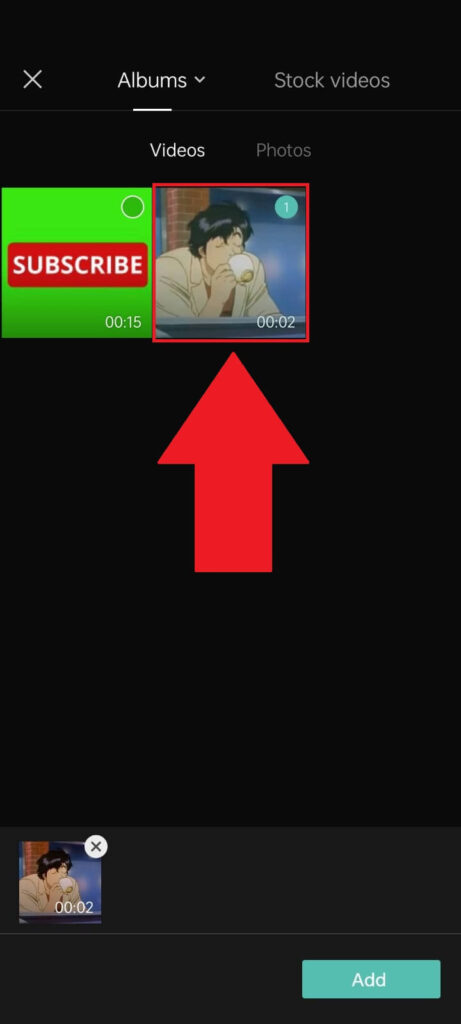
Tapping “New project” will redirect you to the “Albums” page. Once you’re here, select the “Videos” category and then select one of the videos inside.
You’ll need to edit a video if you want to apply Reverse to it, you know…
3. Tap on “Edit“
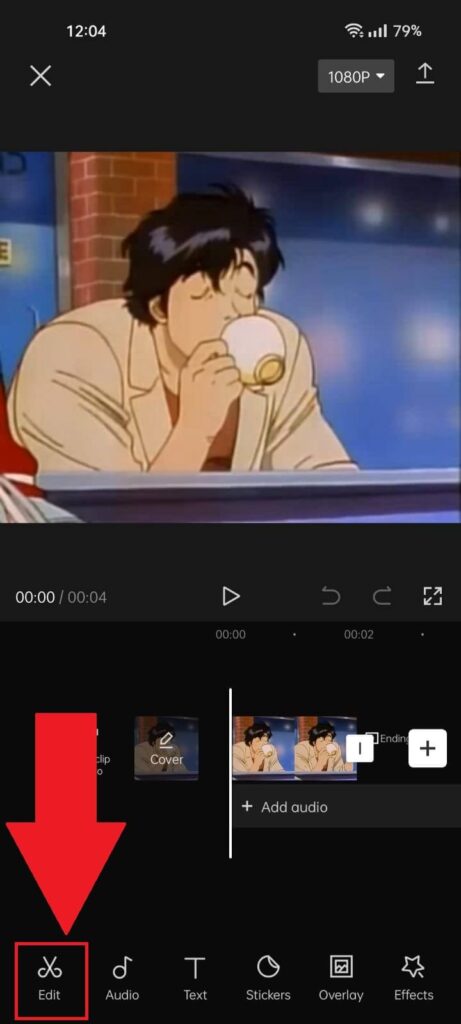
Good, once you’ve uploaded the video to CapCut, look for the “Edit” option in the bottom-left corner (next to the “Audio” button).
Tap on it to continue.
4. Select the “Reverse” option
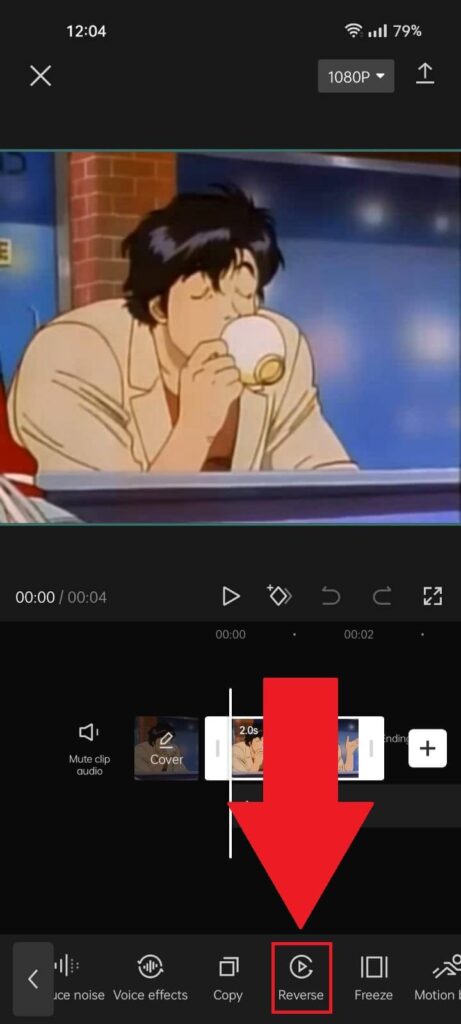
Once you tap “Edit“, you’ll access additional settings on the bottom menu bar (see the image above). Scroll through them until you find the “Reverse” option and select it.
5. Wait for the video to reverse
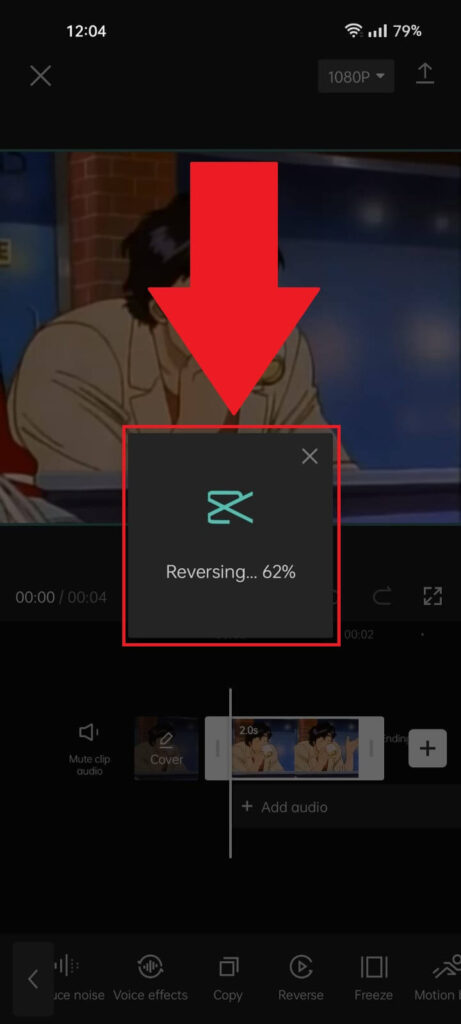
Lastly, you must wait for the video to finish reversing. It only takes a second, and you don’t need to save the changes—the program does that for you automatically 😀
After the video has been reversed, you can share it on social media or play it to see the “Reverse” feature in action.
And that’s it!
Anyone can do it, and you may not even need a guide. CapCut’s features can be hidden behind various menus and settings, so finding the “Reverse” feature might be tricky.
If you have any further questions about reversing videos on CapCut, leave a comment below, and I’ll reply as soon as possible!
Can I cancel the reverse function on CapCut?
Yes, you can. You need to tap on “Reverse” again, and the video will revert to its original form.
This is useful when you want to test things and not irreversibly modify your videos.
After you hit “Reverse”, CapCut will reverse your video without needing to save the changes.
But you can also cancel the reversion by tapping the “Reverse” button again. Once you come back to the original video, you can resume the edits.
Can I reverse the audio of a video in CapCut?
Technically, you can’t reverse audio only on CapCut. The app doesn’t have this function yet.
However, there’s a way around this.
You can edit a video “with audio“, and the audio will be reversed too. To do this, upload a video without audio and then use the “Add audio” button to add the audio.
Then, export the entire video to your phone.
Create a new project on CapCut, upload the video you just exported, and reverse it. You’ll notice that the audio will be reversed too.


