Did you put the wrong frame on your Facebook profile picture, and do you want to take it off (preferably as soon as possible)?
Do these to remove a frame from the Facebook profile picture:
- Open Facebook (computer)
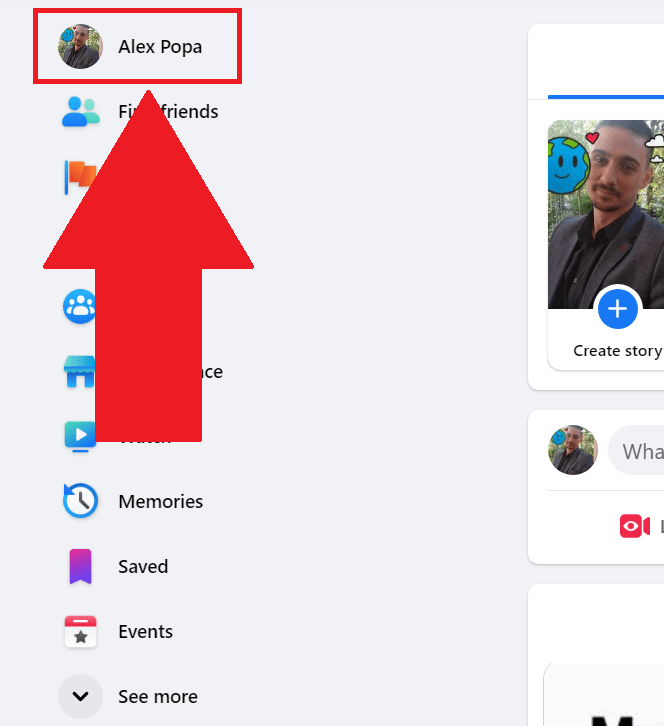
- Click your profile picture in the top-left corner
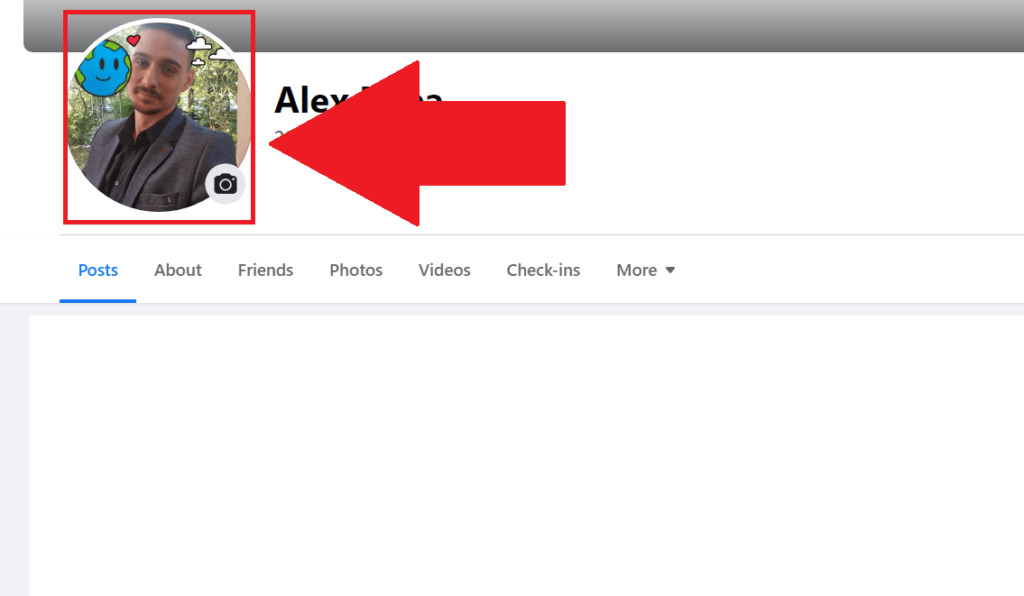
- Click your profile picture on the profile page
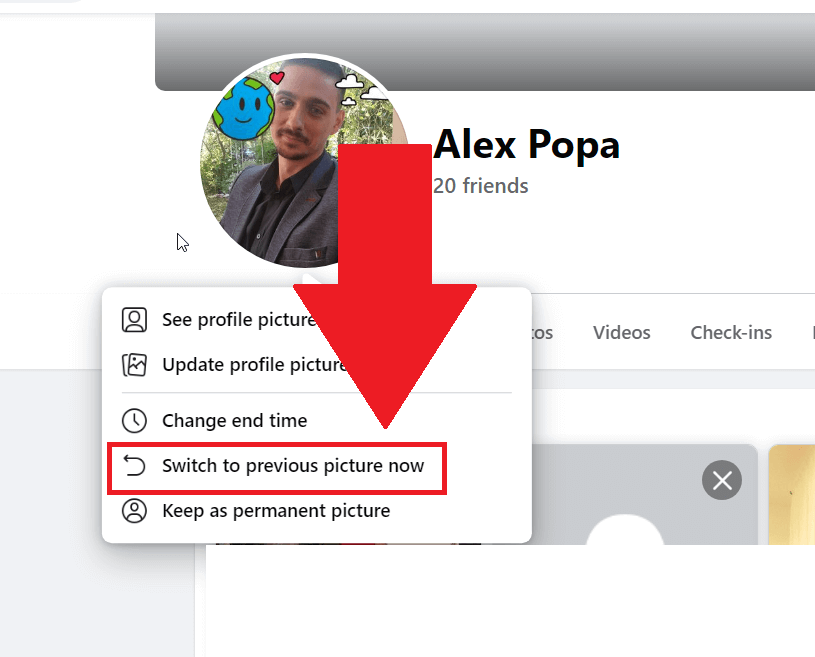
- Select “Switch to previous picture now“
- Select “Confirm“
And that’s it. This isn’t going to take long, but I’ll guide you step-by-step and use screenshots to help you understand better. Keep reading 😀
1. Select your profile picture

Start by opening Facebook on your computer and selecting your profile picture and profile name in the top-left corner.
That’ll take you to your profile page.
2. Click your profile picture

You should have arrived on your profile page by now. Good; the next step is clicking on your profile picture (not the camera icon), as highlighted in the picture above.
3. Select “Switch to previous picture now“

Here we are—once you access the profile picture settings, you’ll see the “Switch to previous picture now” option, which is the fourth on the list.
Select that, and…that’s it! You’ll notice the frame is now gone, with your previous profile picture restored. If you want, you can choose a new frame, and you’re all set!
I told you this wouldn’t take too long. If you need help with anything else, feel free to let me know in the comments below 😀


