Trying to remove grass in Roblox Studio as a beginner will make you cry like a baby in frustration. It’s far from intuitive and it’s annoying. Trust me, I know…
Well, let me save you all that waste time – you have two options at your disposal:
Remove the grass completely:
- Open the “Workspace” top-down menu on the right-hand side Explorer tab
- Select “Terrain“
- Disable the “Decoration” option
Replace portions of the grass with another material:
- Go to the “Edit” tab on the left-hand side Terrain Editor tab
- Select “Paint“
- Scroll down and select a suitable material
- Paint over the grass to replace it with your chosen material
Unless you’re a sucker for pain and frustration, I wholly recommend following the guide below to see what’s what!
Summary: To remove grass in Roblox Studio, you can either remove it completely or replace portions of it with another material.

To remove grass completely:
1. Open the "Workspace" menu.
2. Select "Terrain."
3. Disable the "Decoration" option.

To replace portions of the grass:
1. Go to the "Edit" tab.
2. Select "Paint."
3. Choose a suitable material.
4. Paint over the grass to replace it with the chosen material.
Use the Decoration Option
The first way to remove the grass on your terrain is by disabling the “Decoration” option under the “Terrain” option in the Explorer tab.
Follow the steps below to do this:
1. Select “Workspace” on the right-hand side
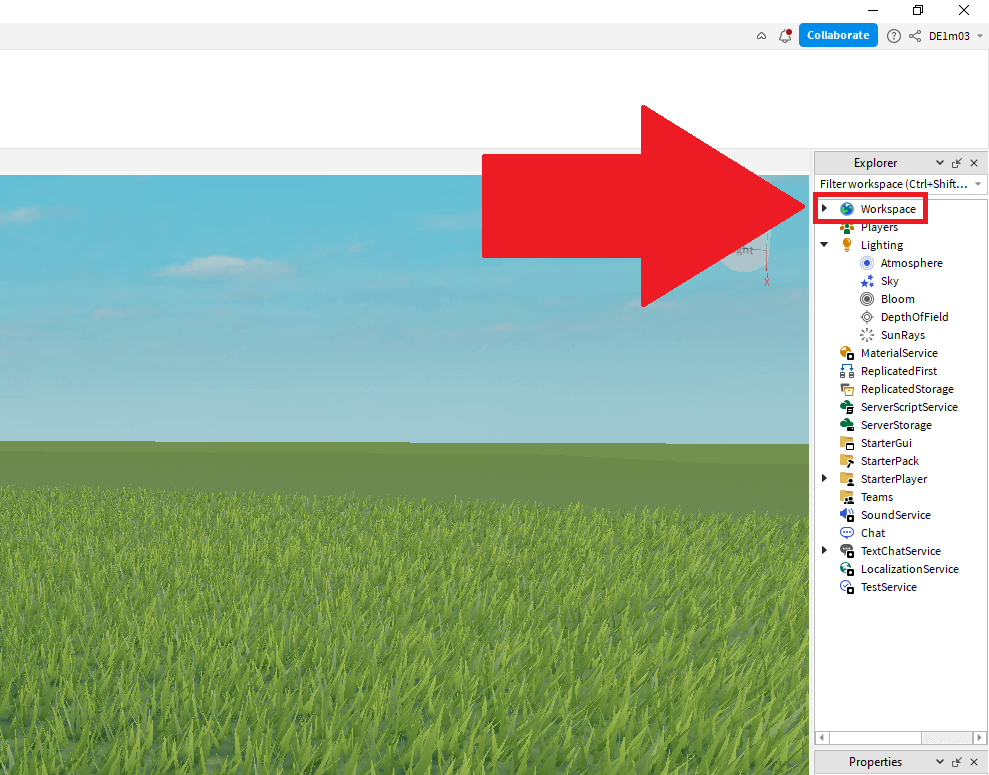
The first step – look on the right-hand side Explorer tab for the “Workspace” option. Please tap the black arrow next to it to open the drop-down menu.
2. Select “Terrain“
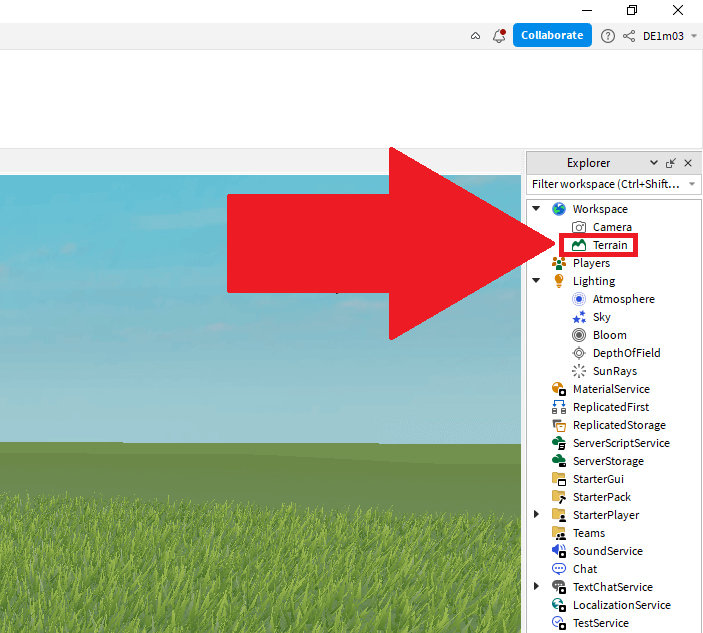
Tapping on the “Workspace” option will reveal two other options – Camera and Terrain. Select “Terrain” and follow my next instructions:
3. Disable the “Decorations” option
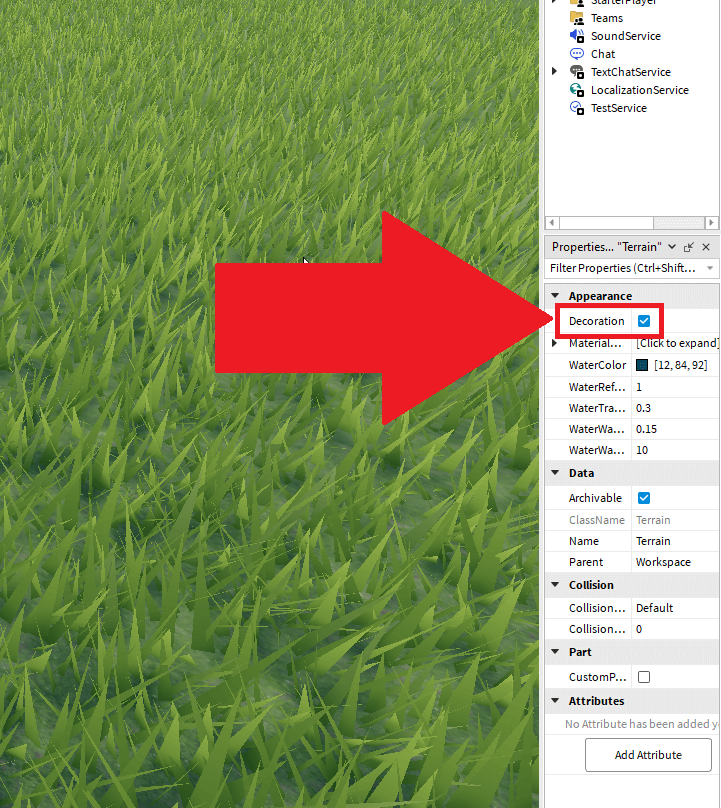
Once you select the “Terrain” option, a new menu will appear on the lower-right side of the Explorer tab. Find the “Decoration” option under the “Appearance” tab and disable it.
4. See the results
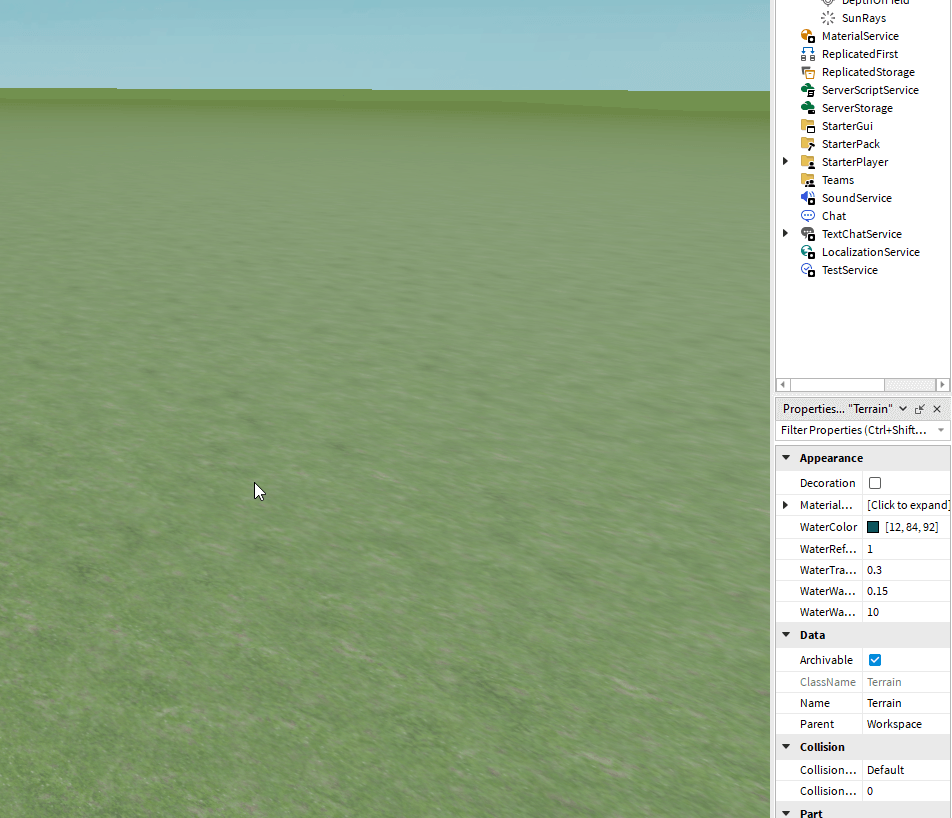
After you disable the “Decoration” option, all the grass in your background will disappear (grass is decoration).
This is helpful if you want to add grass only on certain ground portions and use other materials for the rest of the map.
Paint the Terrain with Another Material
But what if you want to keep most of the grass and add another terrain only in specific places? You can do that by “painting” the terrain. Here’s how to do it:
1. Select “Edit” in the top-left corner
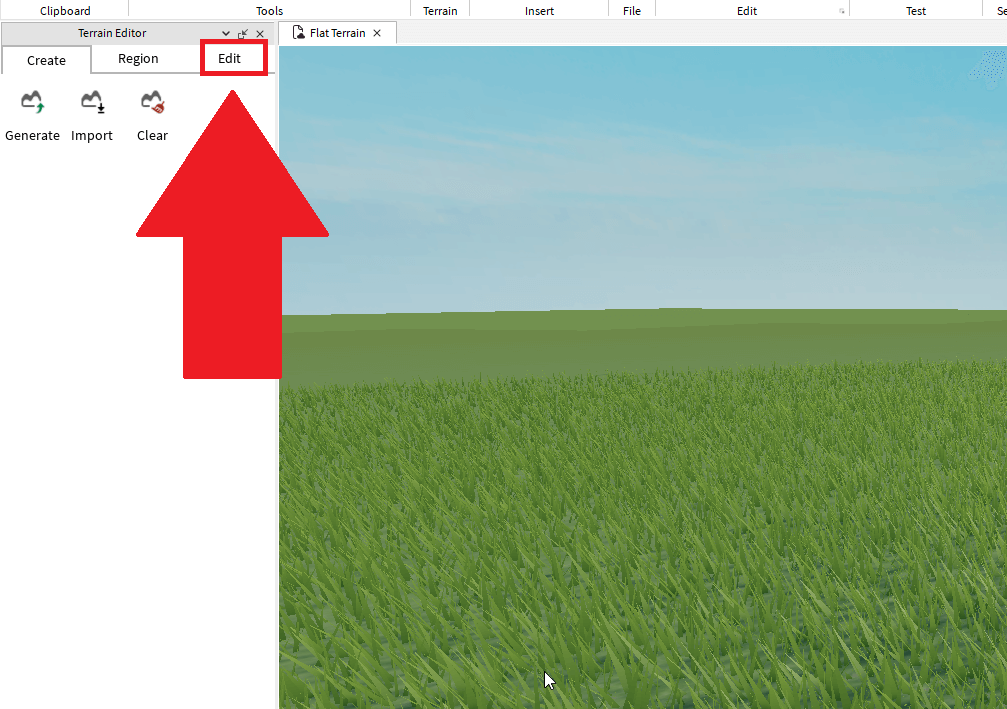
To paint the terrain, you’ll need to open the editing options. Select the “Edit” option under the “Terrain Editor” tab in the top-left corner.
2. Select “paint“
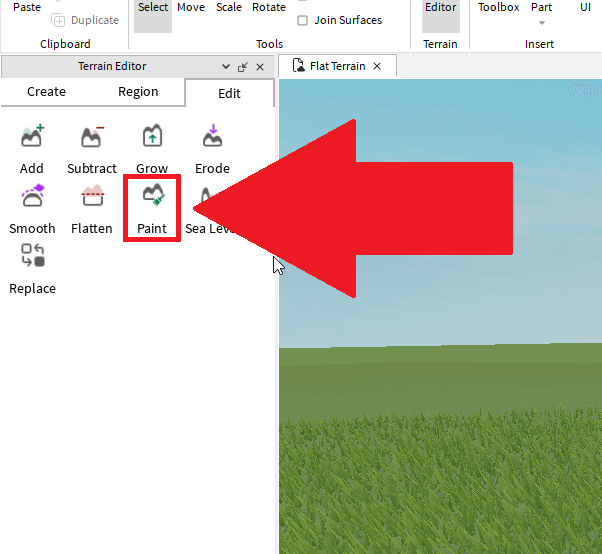
After you select “Edit“, several options will appear below (Add, Subtract, Grow, Erode, Smooth, Flatten, Paint, Sea Level, and replace).
Select “Paint“!
3. Select a suitable material
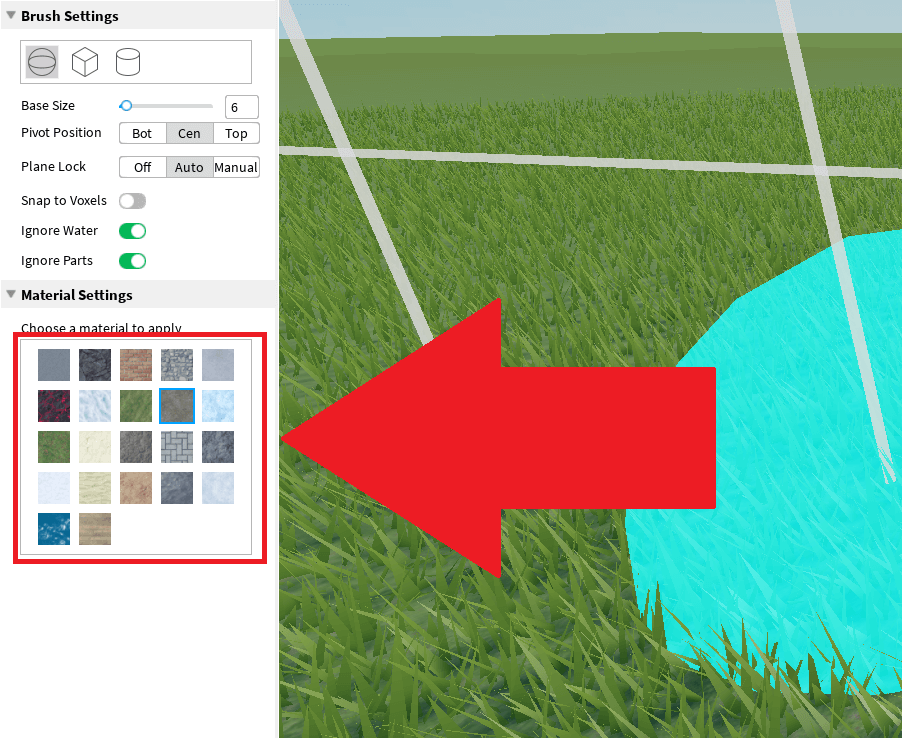
After selecting “Paint“, you’ll see the “Material” settings appear below. You can select any material type and start experimenting with each.
For this guide, I’ll select the “Ground” option.
4. Paint the terrain
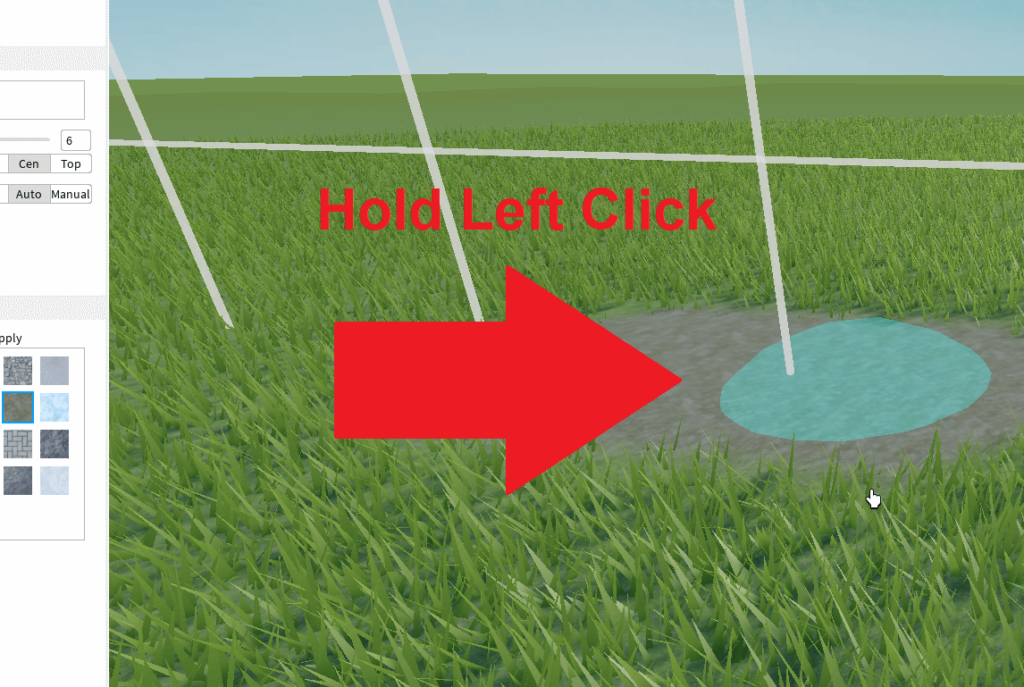
Once you select the material, you can start painting over the grass with another material. You’ll be effectively replacing the grass with something else, in this case, common ground.
This is useful when you only want to remove the grass in a specific place and leave the rest intact. With these two methods, you’ll be able to add and modify the terrain to your liking!
I know, it looks simple enough to do but as a beginner, you don’t know left from right inside the Roblox editor.
Let me know if there’s anything else I can help you with in the comments below!