If you want to play Roblox on a school computer, you’ll need to install a VPN. A VPN stands for Virtual Private Network.
The VPN changes your computer’s IP address, allowing you to access content otherwise blocked on your computer.
To understand how VPNs can help you play Roblox on a school computer, we should first understand what VPNs do and why they do that.
Keep reading to learn more about using VPNs to play Roblox on a school computer!
Summary: In this article, I explain that to play Roblox on a school computer, you’ll need to install a VPN.

A VPN encrypts your internet connection and changes your IP address, allowing you to access content otherwise blocked on your computer.

I provide a step-by-step guide on how to use ProtonVPN to play Roblox on a school computer.
What Do VPNs Do?
A Virtual Private Network, VPN for short, is a program that encrypts your internet connection/traffic, changes your IP address, and lets you access restricted websites.
Your IP address is like a unique internet signature attached to your device, in this case, the school computer.
If they know your IP, someone can block your access to certain websites or apps on that computer. In this case, the school administrator restricts you from playing Roblox.
A VPN changes your IP address and allows you to bypass domain restrictions (it lets you access the Roblox website again).
A VPN reroutes your internet connection through another server located in a different location and allocates you to a different IP address.
Technically, you’ll appear to your school’s network as though you’re not using the school network but rather a separate, isolated one.
This means that the administrator’s restrictions no longer restrict you, and you’ll be able to play Roblox.
How Do I Use a VPN to Play Roblox on a School Computer?
First, you must choose which VPN you’re going to use. There are multiple VPN options, but I recommend a free one.
ProtonVPN should do just fine. Look for “ProtonVPN” on Google and go through the following steps to create an account and use the VPN:
1. Open the ProtonVPN website
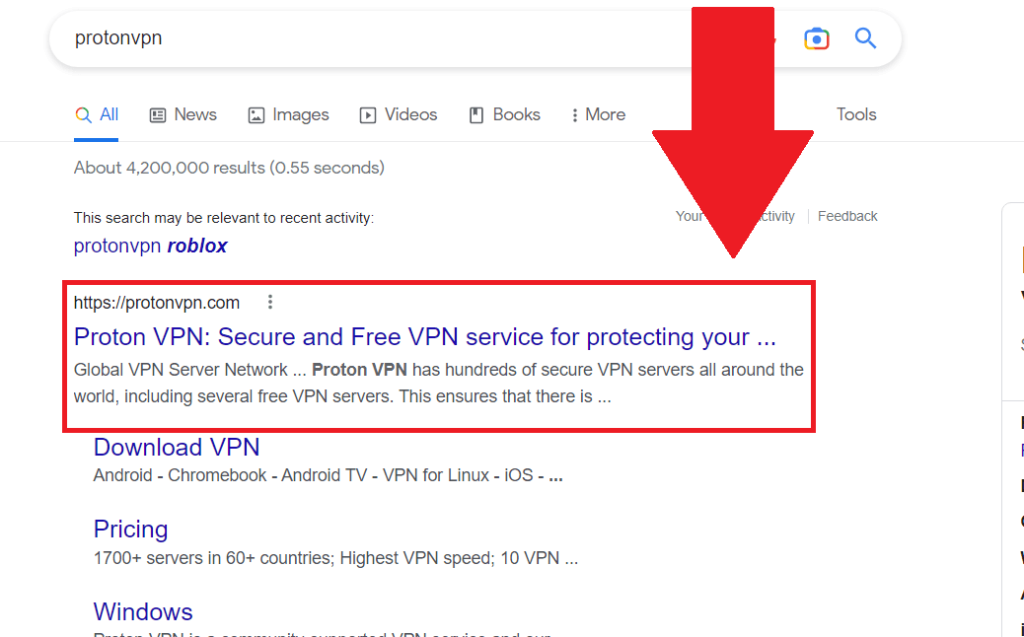
Once you open your internet browser, search for ProtonVPN and open the first link.
2. Select “Get ProtonVPN Now“
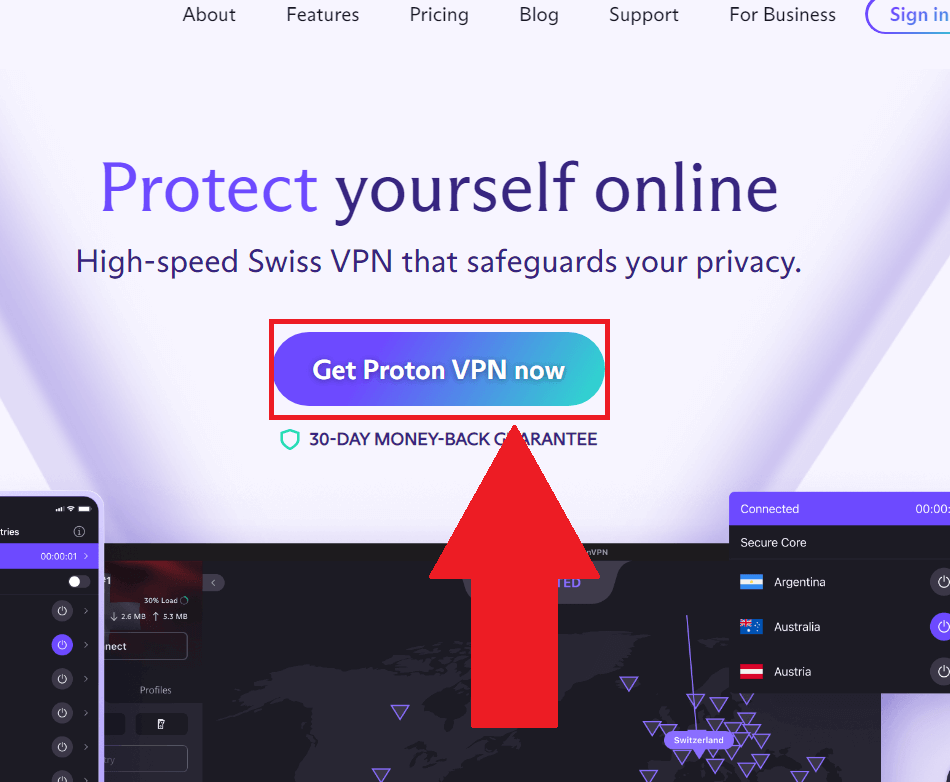
After you open the official ProtonVPN website, click on the “Get ProtonVPN Now” button in the center of the homepage.
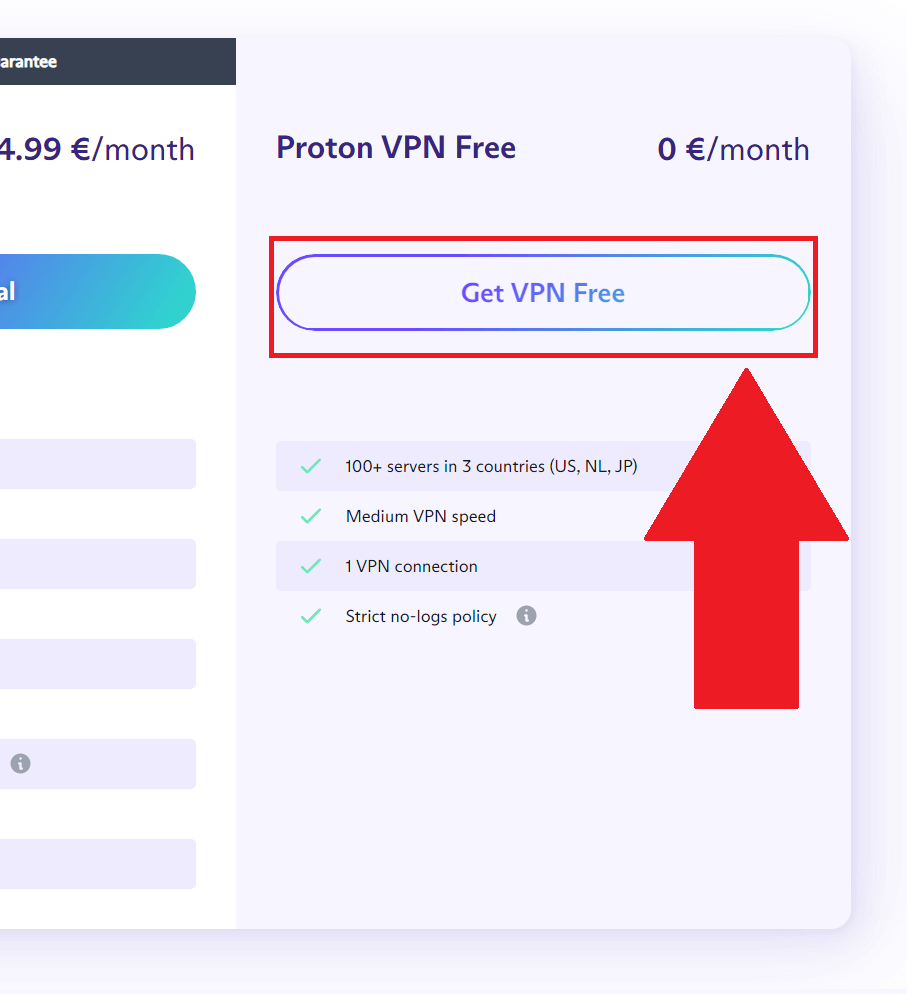
3. Select “Get VPN Free“
After you select “Get ProtonVPN Now“, you’ll be taken to a page where you’ll be told to buy the VPN. Ignore that and just scroll down.
Find the “Get VPN Free” button and click on it!
4. Fill in your account data and click “Create Account“

Once you select “Get VPN Free“, you’ll be asked to create an account before downloading the program. Enter a username, password, and email address, and then click “Create account“.
Be careful about the email address you enter – you’ll need to open it to get a code later on!
5. Select “Get Verification Code“
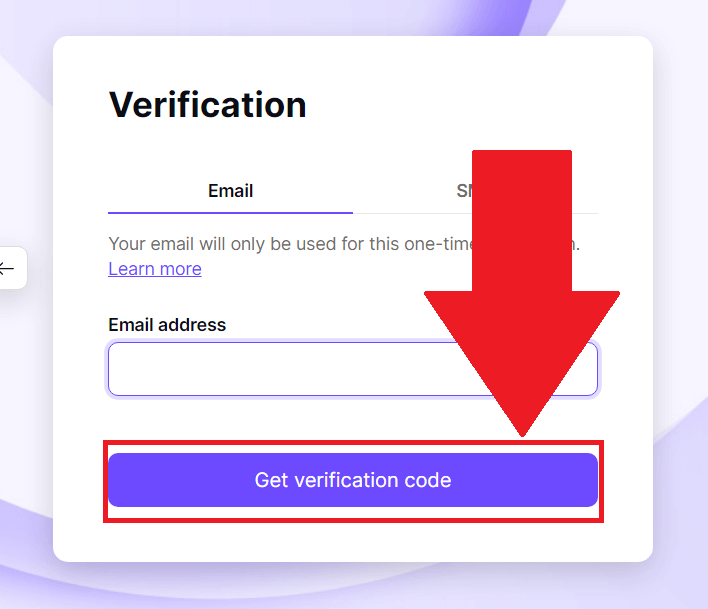
The next step requires you to get a verification code. Now, you can either get the code on your email address or your mobile number.
I chose the email option for this guide, but you can select your phone number.
6. Get the code from your email address
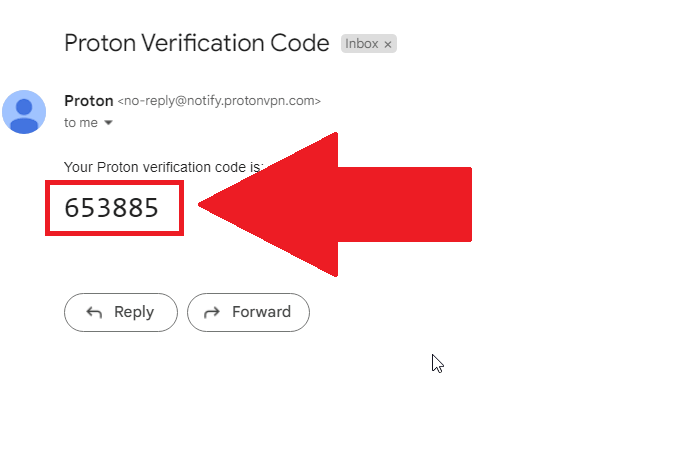
Open your email provider on the computer or your mobile device, and find the email from ProtonVPN. In it, you’ll find a 6-digit verification code.
Copy that in your clipboard (right-click after you select it and then “Copy” or press CTRL+V on your keyboard).
7. Enter the verification code
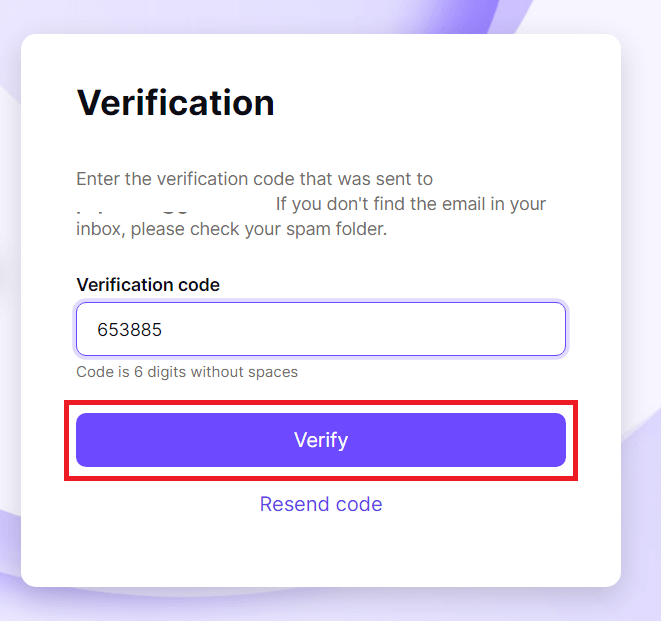
You’ll need to paste the verification code you copied earlier in this step. Right-click on the text field and select “Paste” or press CTRL+V on the text field.
Then, click on “Verify“. After you do this, the ProtonVPN app should start downloading. If it doesn’t, look for a “Download ProtonVPN” button somewhere and click on it.
8. Open the ProtonVPN installer
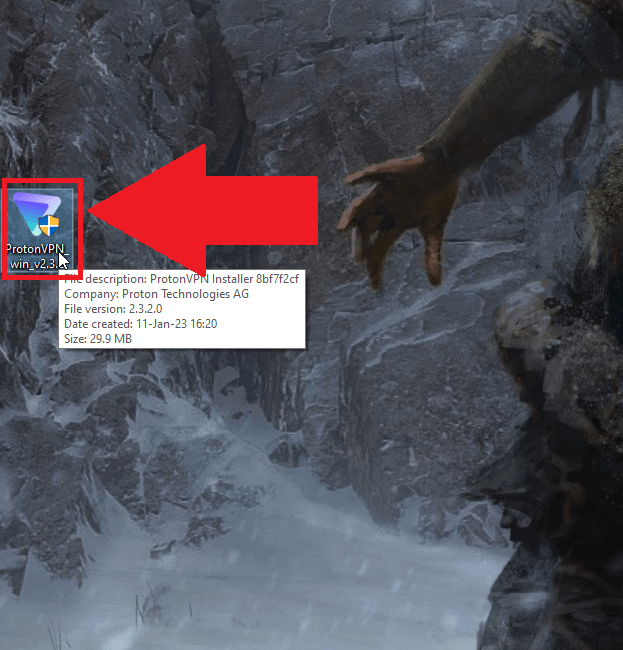
After ProtonVPN finishes installing, open it. You should find it on your desktop or in the “Downloads” folder in “My Computer“.
Find it and double-left-click on it!
9. Select “Next“
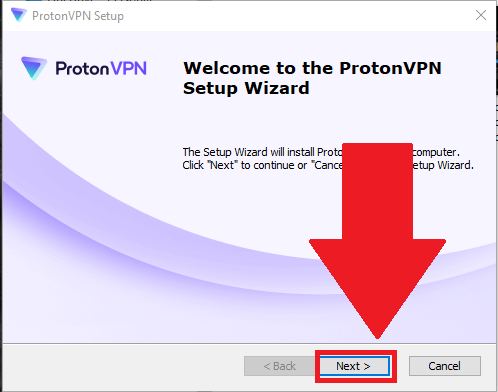
Once you open the ProtonVPN installer, you’ll see this window. Select “Next” to start the installation process.
10. Select “Next” again
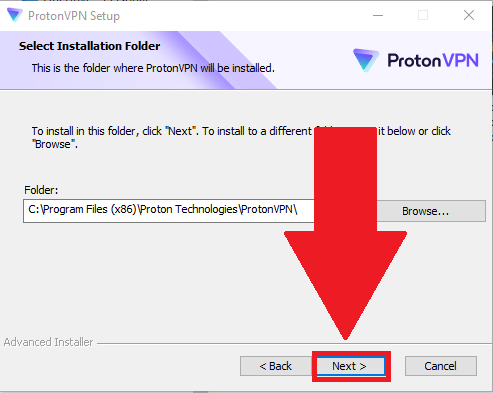
Once you click on the first “Next“, the installer will advance to the next step. This is where you’ll need to choose where ProtonVPN installs.
Don’t worry. Leave the default installation path as is. It should be in Program Files. Click on “Next” to proceed!
11. Select “Install“
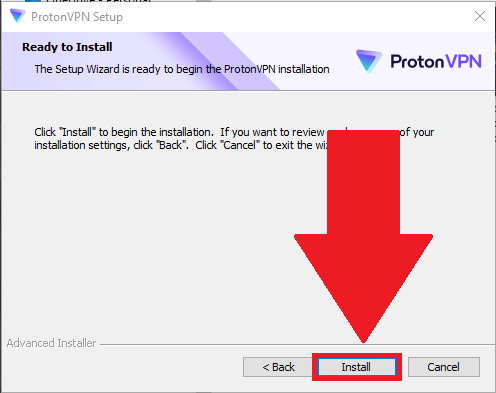
The final step of the installation procedure is clicking on “Install“. Then, you’ll have to wait for the program to finish installing.
12. Open ProtonVPN and log in
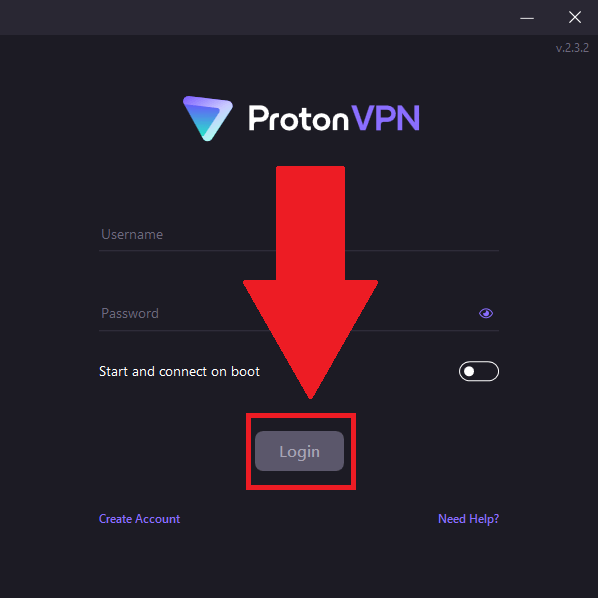
Once ProtonVPN finishes installing, it should boot up by itself if it doesn’t, double-click on the ProtonVPN icon on your desktop to open it.
Then, you’ll see this window, the ProtonVPN login screen. Enter the username/email address and the password from earlier when you created your account.
Then, select “Login“
13. Select “Quick Connect“
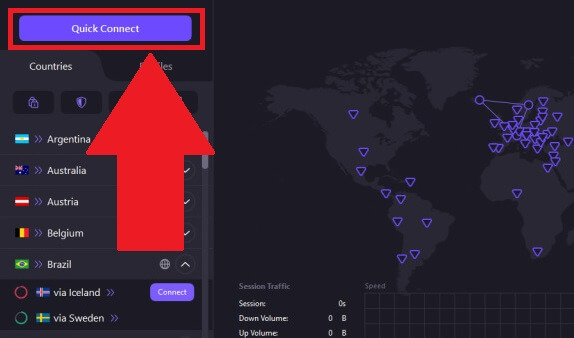
After you log in, ProtonVPN will show you this interface. You’ll see the main map filled with servers and the list of countries on the left.
Ignore that. Look for the “Quick Connect” button in the top-left corner and click on it.
This will connect you to the nearest and fastest server. Once that happens, download Roblox and have fun playing!
If you have questions about playing Roblox on a school computer, let me know in the comments below!