CapCut does have a watermark that applies automatically when you create/edit a video using the app.Facebook?
However, removing it is very easy, and it’s free. Just do this:
- Open your project
- Select the “ending” part of the video
- Hit “Delete
- You’re done
Yep, it’s that easy, and you’ll be done in no time. Still, read my guide below if you need help!
Summary: In this article, I explain that CapCut does have a watermark when creating or editing a video. However, removing it is simple and free.

I walk you through the steps to delete the watermark from your project: selecting your project, selecting the watermark ending, deleting the ending, and then downloading or sharing your video.

No external tools or premium features are required.

1. Select your project

Begin by opening CapCut and selecting your current project (the one you want to save without a watermark). It should be under the “Local” header (see picture above ).
2. Select the watermark ending
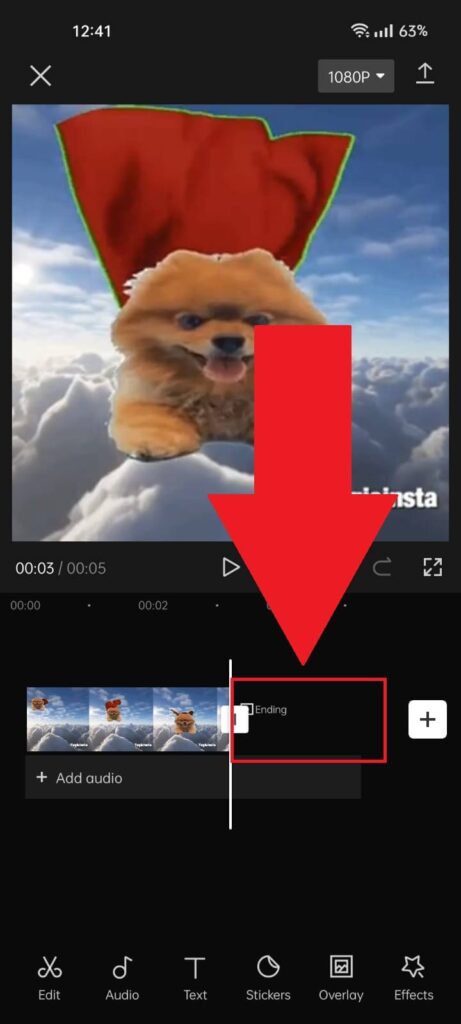
Once the video editing screen opens up, select the “Ending” part (which contains the watermark). See the screenshot above for more information.
3. Select “Delete“
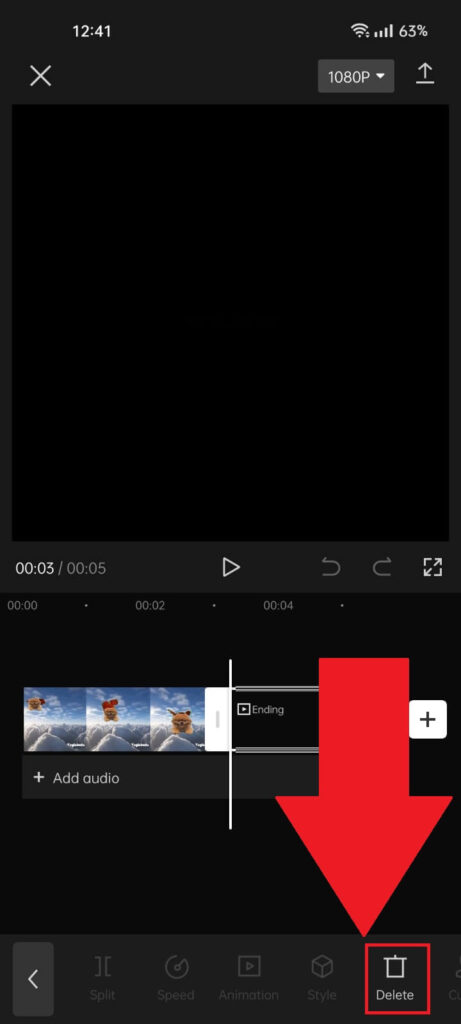
As soon as you select the ending of the video, look for the “Delete” option in the bottom-right corner and select it.
4. Download the video
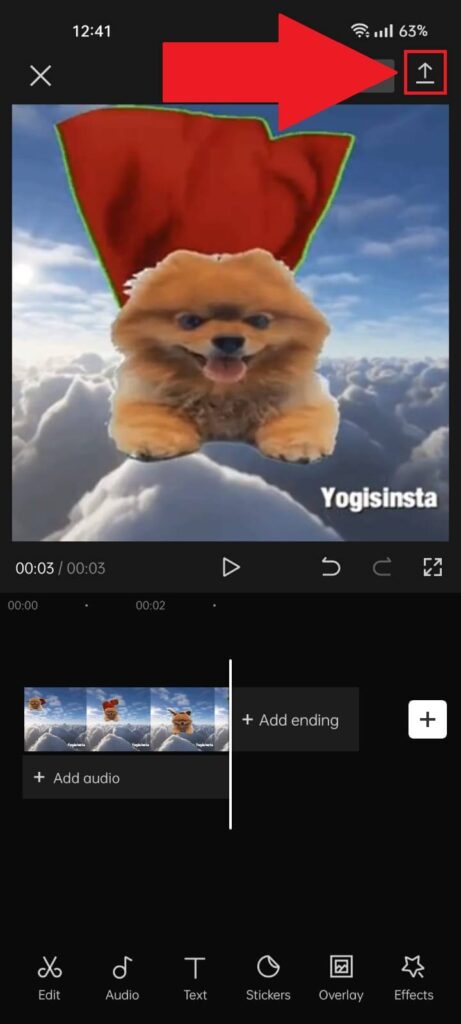
After removing the watermark ending, you can add a custom ending or do whatever. Once you finish editing, you can download the video using the “Download” icon in the top-right corner.
5. Share it
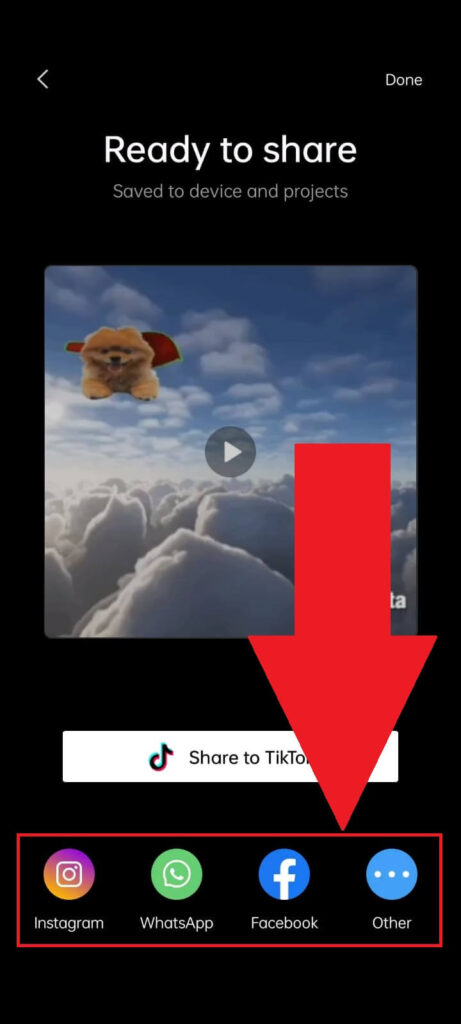
On this screen, you can choose how to share the video if you want to do that. There’s also a reliable option for sharing on TikTok (see above).
Either share the video or save it on your phone by tapping “Done” in the top-right corner.
That’s all it takes to remove the watermark on a CapCut project. You don’t need external tools, and it’s not a premium feature either.
Any video you edit in CapCut comes with a watermark automatically, but you can easily delete it if you want to.
If you have any questions, feel free to comment below, and I’ll reply as soon as possible. Until then, stay tuned for other CapCut articles!