Overlays are the domain of advanced video editors, the one thing that differentiates the “meh” from the “wow” videos.
And in today’s article, I’ll teach you how to add and edit them like a real pro using CapCut.
Here’s how to add a video overlay on CapCut:
- Tap on “New project” when you first open CapCut
- Select a video and tap “Add“
- Select “Overlay” on the bottom menu
- Tap on “Add Overlay“
- Select another video for overlay and tap “Add“
- Edit the overlay
And here’s how to add a text overlay on top of a video or picture:
- Create a new project
- Add a text with a random background
- Save the text image
- Create another project and add another picture
- Select “Overlay“
- Add the text image as an overlay
- Select “Splice“
- Customize the opacity and overlay types
This is going to be a long one (¯\_(ツ)_/¯), so sit comfortably, grab a few snacks, and follow my instructions while checking the screenshots to get this done faster.

CapCut Video Overlay Explained
Video overlays are the absolute basic when it comes to CapCut overlays. Greenscreens fall in this category too. Check this guide if you want to learn how to apply green screens yourself.
Otherwise, follow my instructions below to add a video overlay:
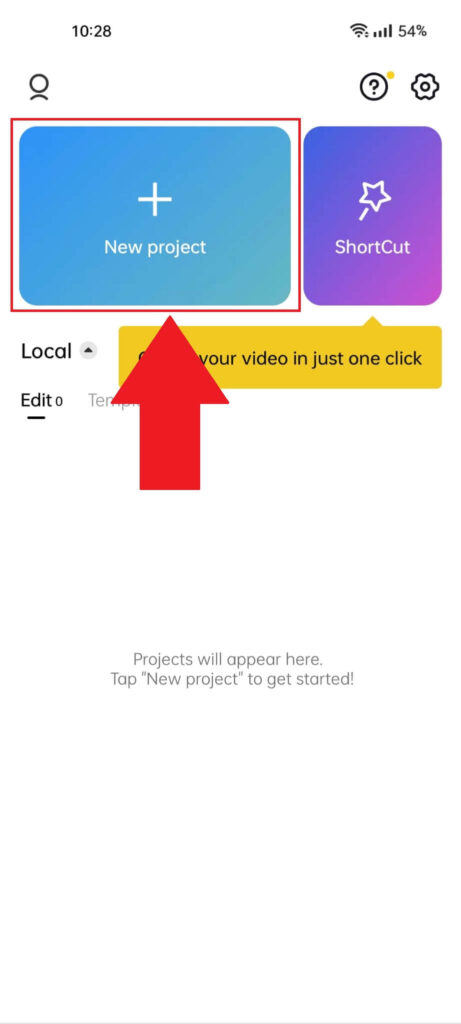
1. Tap on “New project“
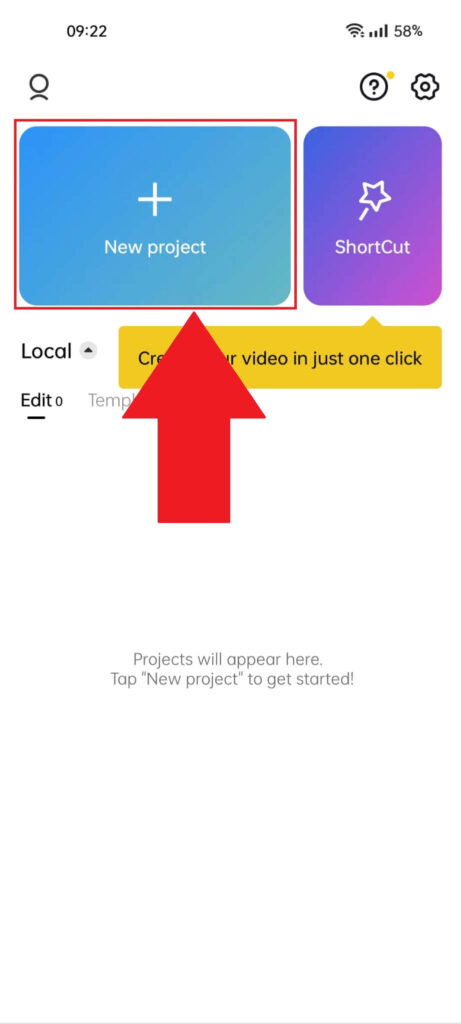
As always, we’ll begin by creating a new project in the app. Select “New project” (blue button) in the top-left corner to do this.
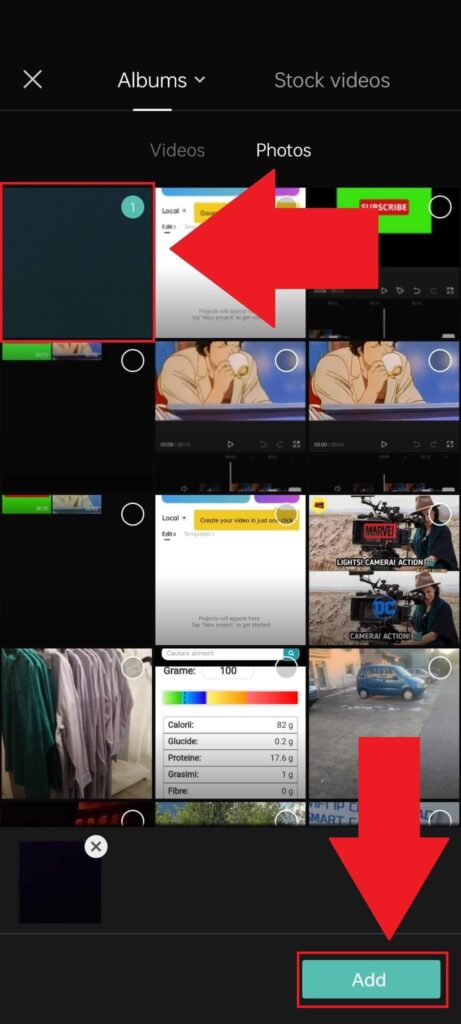
2. Select a video and tap “Add“
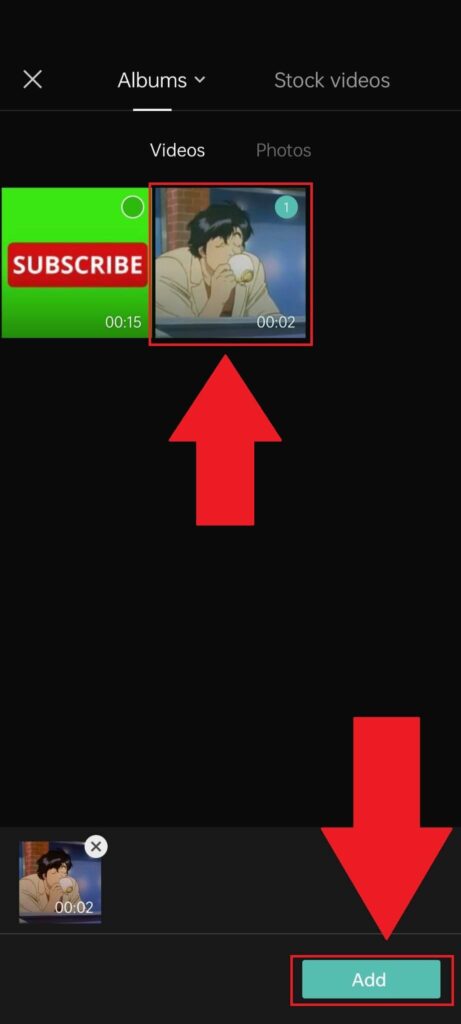
Once you’re in the “Albums” section, you’ll need to select a video and tap “Add” (the cyan-looking button). You can also use a stock video from CapCut for the purpose of this guide.
3. Tap on “Overlay“
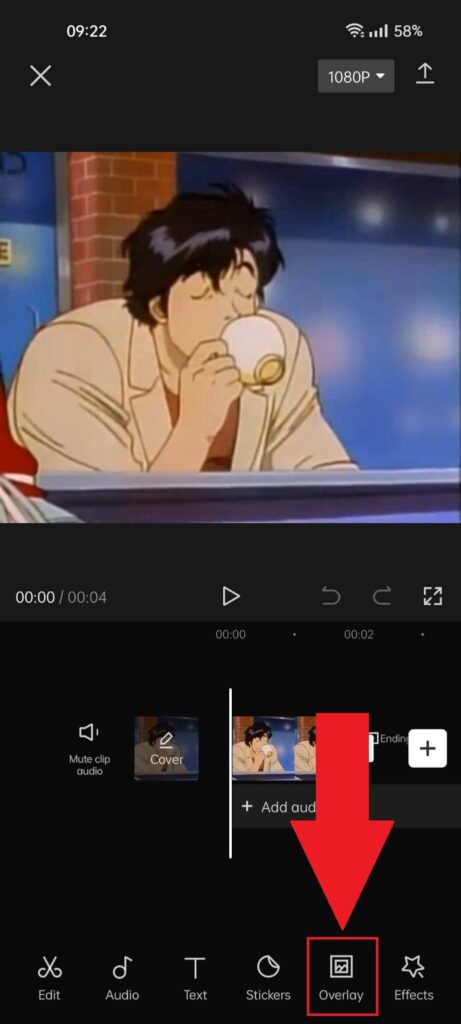
Once the video has been uploaded and you’re on the editing screen, look for the “Overlay” icon in the bottom-right corner and select it.
4. Select “Add Overlay“
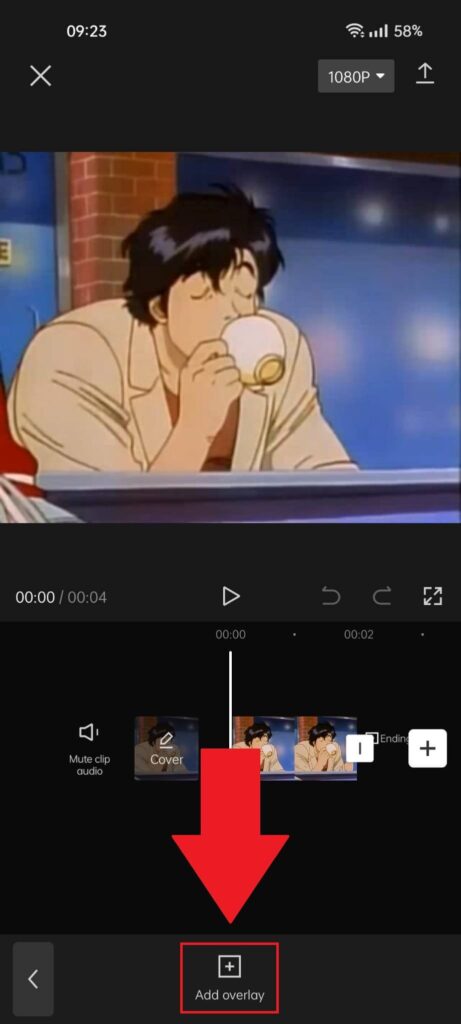
Next, you’ll have to tap “Add overlay“, for some reason. But yeah, do that and keep reading:
5. Select an overlay video and tap “Add“

Select an overlay video and tap “Add“
Now, you’re going to choose a video to add as an overlay (the video on top of the original video, which can also act as a green screen). Once you select it, tap “Add” in the bottom-right corner.
6. Adjust the length of the overlay
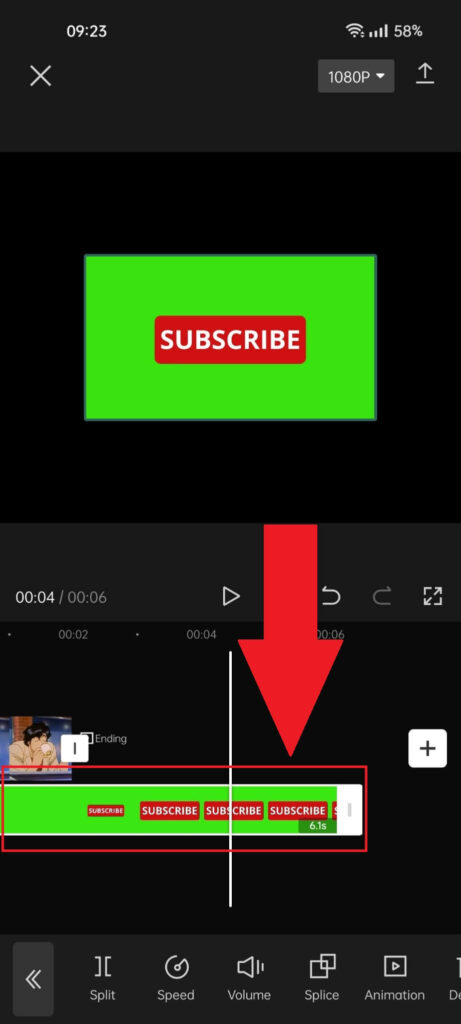
Remember, the overlay should be as long as the main video itself, so remember to adjust the length of the overlay using the white marker.
Hold-tap on it and move it to the left, matching it with the end of the main video. Then, you’re free to edit the overlay however you want.
Text Overlay
Moving to text overlays, here’s how to add them on top of videos:
1. Tap “Add project“
Like before, select “New project” to add a picture to CapCut. That’s your starting point, so do that 😀
2. Select a black background photo and tap “Add“
It’s best to choose a monochromatic background picture (all black or all white) for this. This is just for testing purposes, so you learn how to add a textual overlay.
Check out my related guide on adding text to CapCut videos for more context.
Once you select the picture, tap “Add” and continue reading:
3. Select “Text“
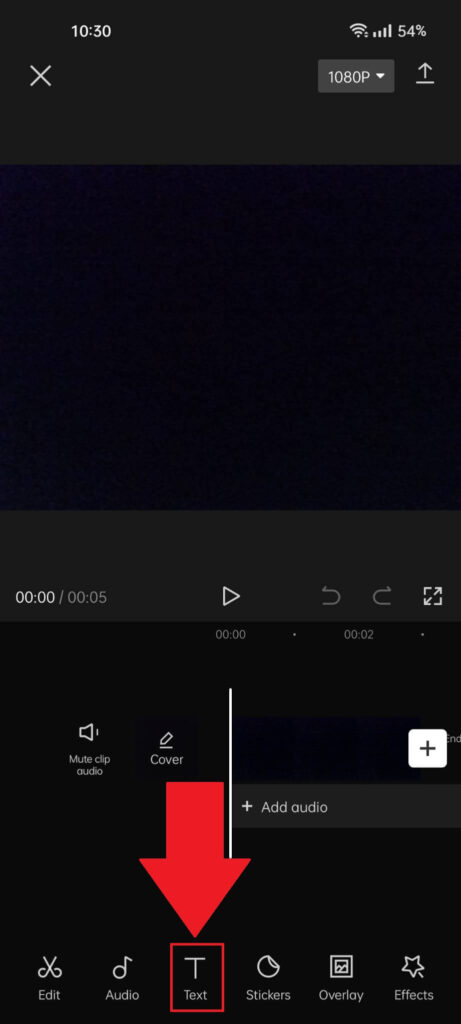
After the photo is uploaded, you’ll be back on the editing screen. Find the “Text” button on the bottom-side menu and select it. It’s the T icon. T stands for text, you get it…
4. Tap on “Add text“
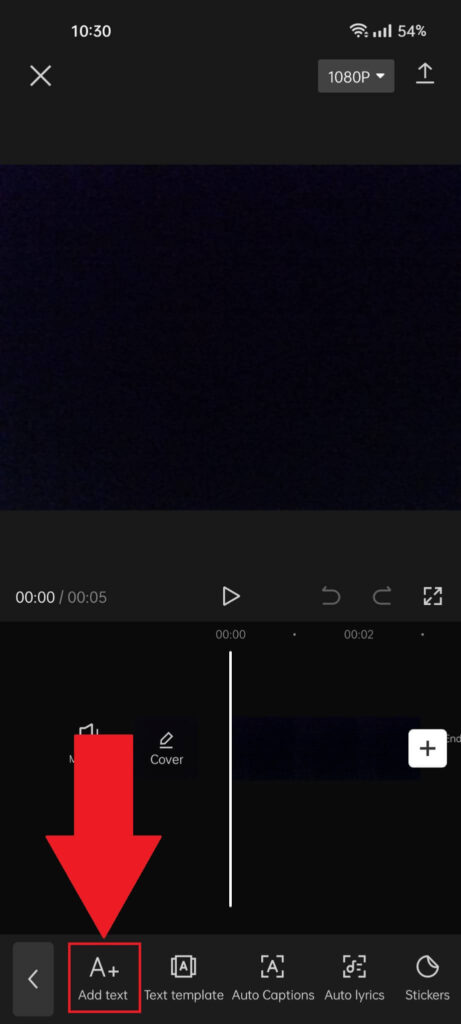
Next, you’ll see several more options on the bottom-side menu. Select “Add text“, the option to the very left (check the screenshot), and continue.
5. Add your text, customize it, and download the picture
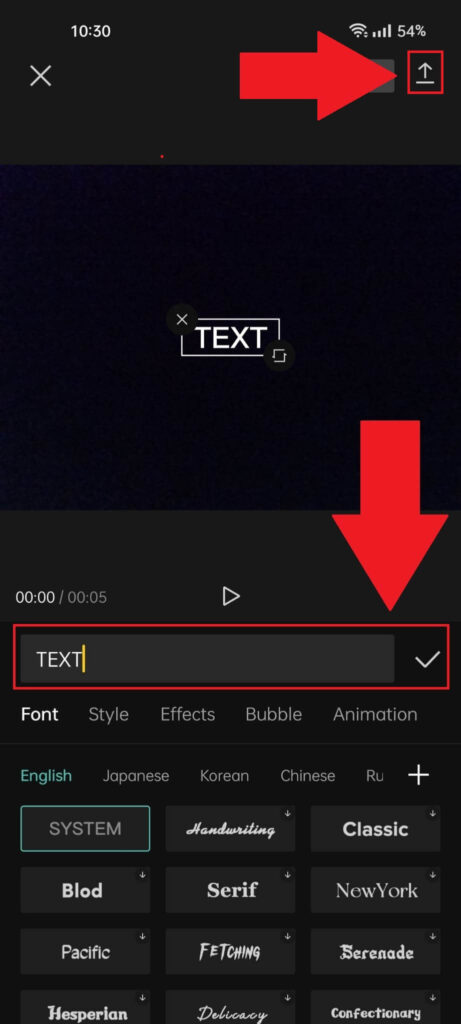
This is where you’ll be adding your text and customizing it. Follow the instructions in the picture above to write your text.
You may also select a text style, any effects, or animation you want and customize the font.
When you’re done, tap on the “Download” icon in the top-right corner. You’ll need to download this text picture to use it as an overlay later on.
6. Create a new project

Next, you’ll need to create a new project with the main image you want to edit. This is the image you want to add to the text overlay.
Select “New project,” and when CapCut asks you to select a video/picture, go to the “Photos” tab, select a photo, and tap “Add“

Remember, you must select the main photo to which you want to add the text overlay.
7. Select “Overlay“
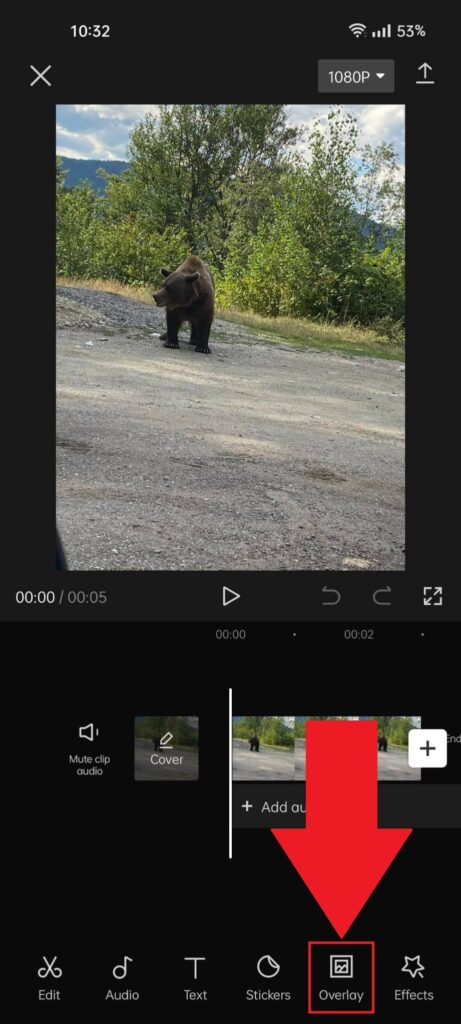
After uploading the main image for editing, select “Overlay” on the bottom menu. Just like in the video overlay guide above.
Read below:
8. Add the text photo as an overlay
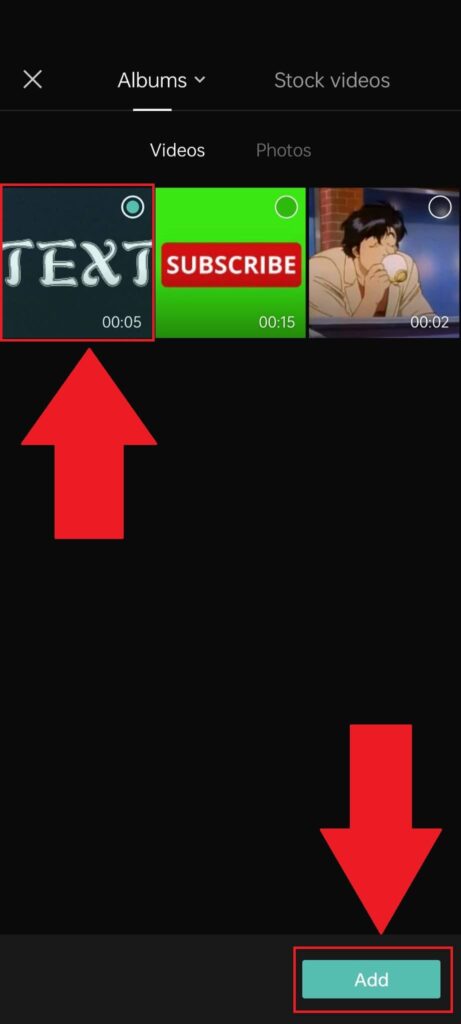
You should find your text video in the “Videos” section, so select it and tap “Add“.
9. Select “Splice“
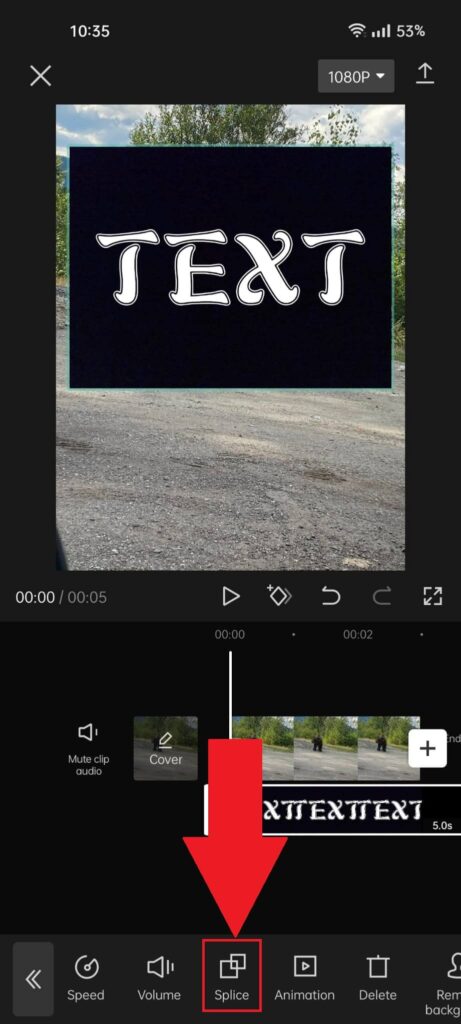
Once you add the text video as an overlay over the main video, you need to select “Splice“. This will let you adjust the overlay picture.
You can find the “Splice” option on the bottom-side bar.
10. Adjust the opacity and choose a style
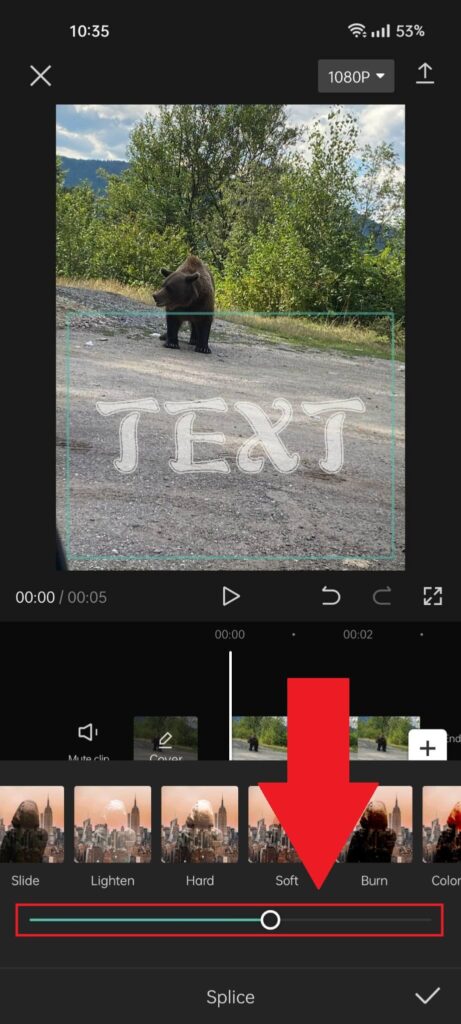
In the “Splice” menu, you can adjust the opacity of the text overlay and choose a style for it. Make the text more transparent to match the photo and save the changes.
That’s it. You’ve learned how to do video and text overlays in CapCut! You’re one step closer to achieving mastery of CapCut…
How Can I Make a Circle Overlay?
Making a circle overlay on CapCut is just a matter of changing the shape of the overlay video once you add it. Follow the steps below to do that:
1. Select “Mask“
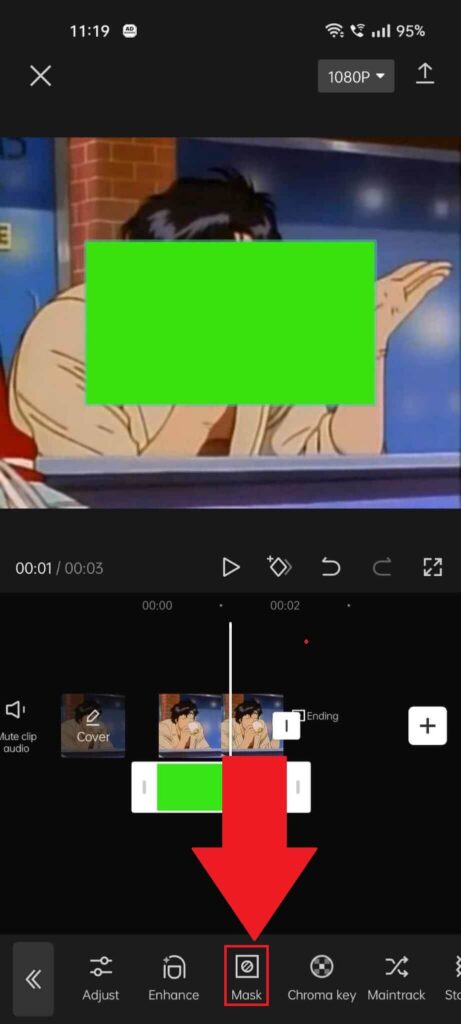
After you add the overlay, you might want to change its shape, and that’s where the “Mask” option comes into play.
Make sure you select the Overlay itself (green screen or whatever you added) and then look for the “Mask” option on the bar at the bottom of the screen.
You’ll have to scroll through the options until you find them. Use the screenshot above if you’re having trouble finding it.
2. Select “Circle“
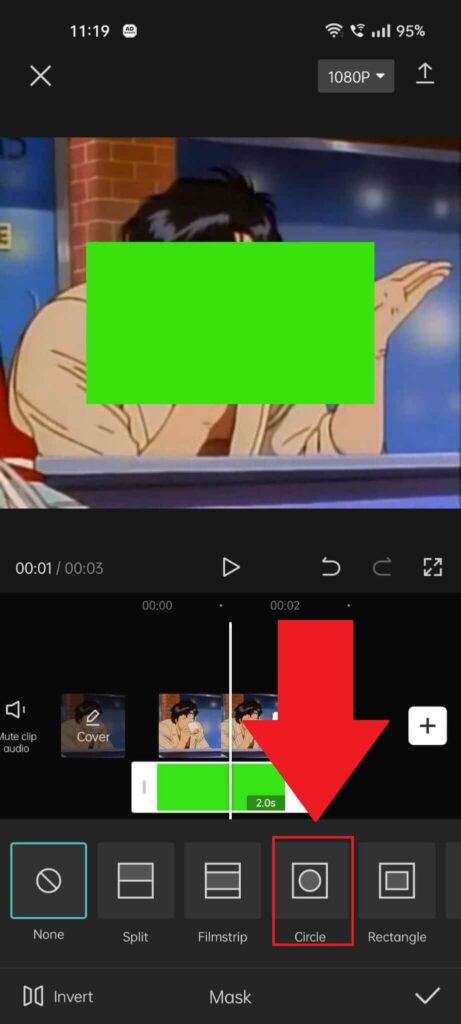
Once you select the “Mask” option, a new menu will open at the bottom of the screen. Look for the “Circle” option and select it.
You won’t need to scroll through the options to find it because it’s the fourth option on the list!
3. Adjust the overlay
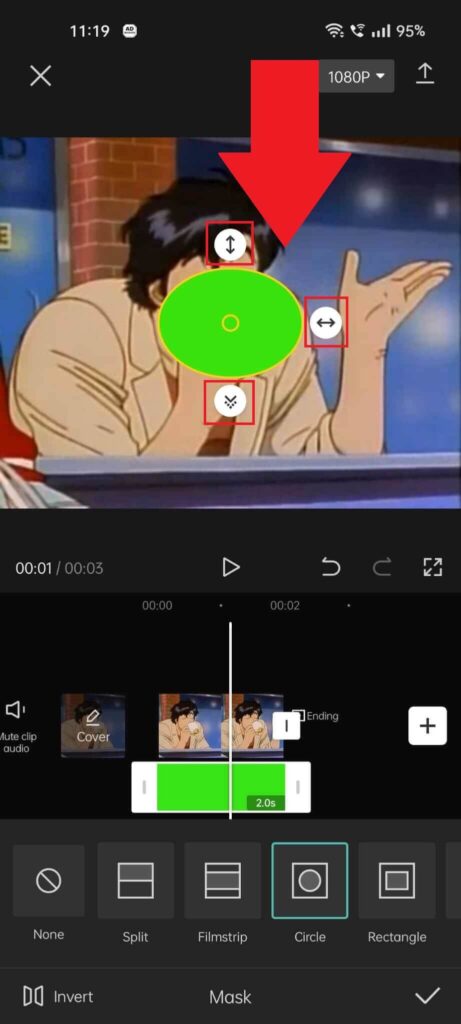
After selecting the circle shape for the overlay, you’ll see three arrow buttons appear on the overlay. Use those arrows to control the shape of the overlay.
4. Save the changes
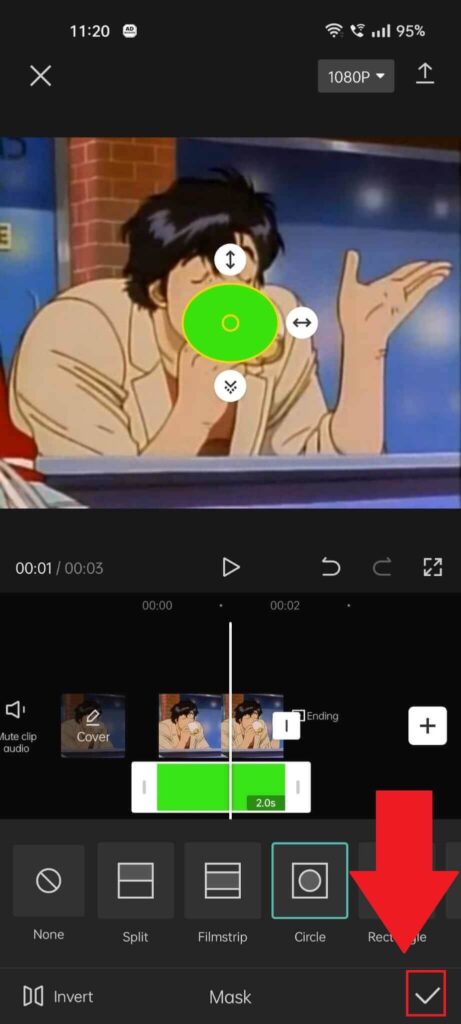
After you finish editing the overlay shape, save the changes by tapping on the checkmark icon in the bottom-right corner!
Conclusion
To summarize, you can create two types of overlays in CapCut: video overlays and text overlays.
Video Overlays:
Video overlays often involve using green screens to add one video on top of another.
Text Overlays:
Text overlays allow you to add customized text to a picture or combine text with an image in unique ways. Here’s how to create a text overlay:
- Create the Text Video:
- Start with a black background.
- Add and customize your text as desired.
- Download this text video to your phone.
- Create the Main Project:
- Create a new project with your main video.
- Add the text video as an overlay.
- Adjust the Overlay:
- Modify the overlay style to match the main video.
I hope you’ve found this guide helpful! If you have any questions or run into issues with CapCut, please let me know in the comments below!
You can also find additional CapCut tips in my guides, like, the one about recovering deleted CapCut videos and how to reverse videos created with CapCut.