So, you’ve heard about the Discord token and want to find out which one is yours? It’s a bit complicated, but I can show you if you’ve got the time.
This is how you can find your Discord token:
- Open Discord on your browser
- Open the Developer Console (Ctrl+Shift+i by default)
- Choose “Network“
- Refresh the page (F5)
- Type in “/api” in the filter box
- Select the “Library” entry
- Look for the “authorization” entry
The “Authorization” entry is your Discord token. I know, the steps above look a bit complicated but trust me, it’s easier than you think.
Follow my steps below, and you’ll see 😀
1. Open the Developer Console
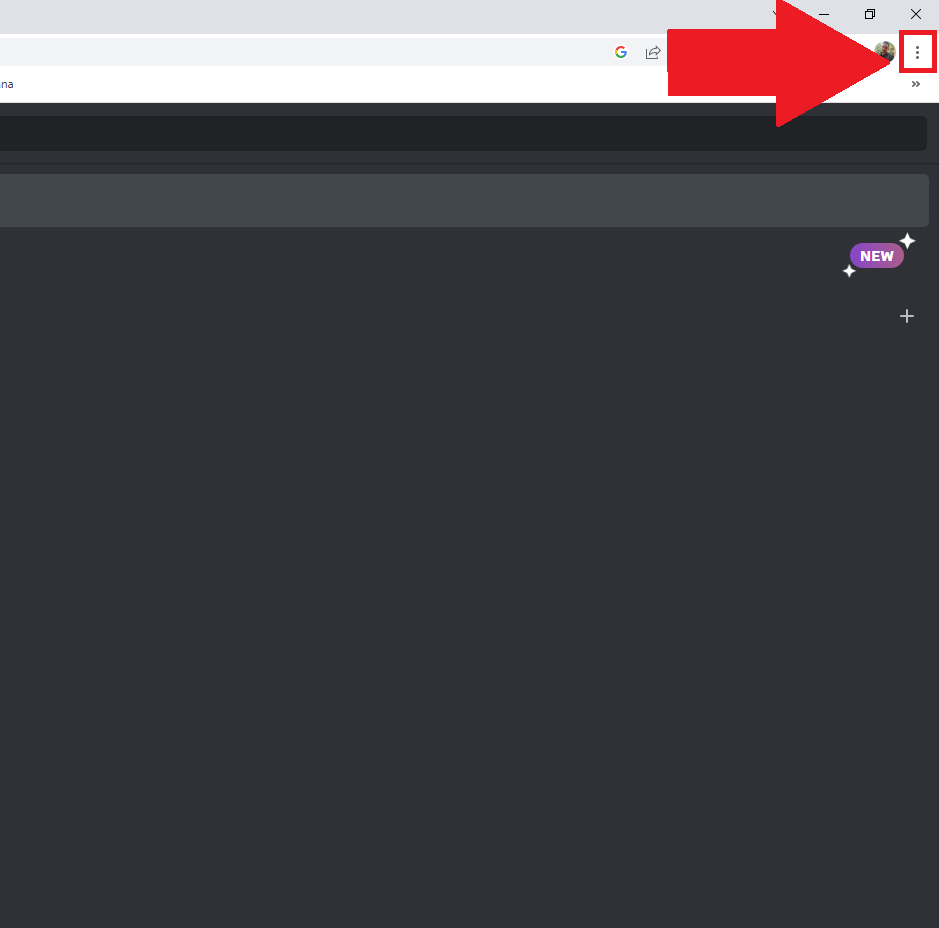
Alright, so the first step is opening your browser (I’ll use Chrome for this guide) and opening the Discord website. Log into your account, and then click the three-dot icon in the top-right corner of the window.
It’s next to your profile picture, but check the screenshot above to make sure you have the right one.
2. Go to “More Tools” – “Developer tools“
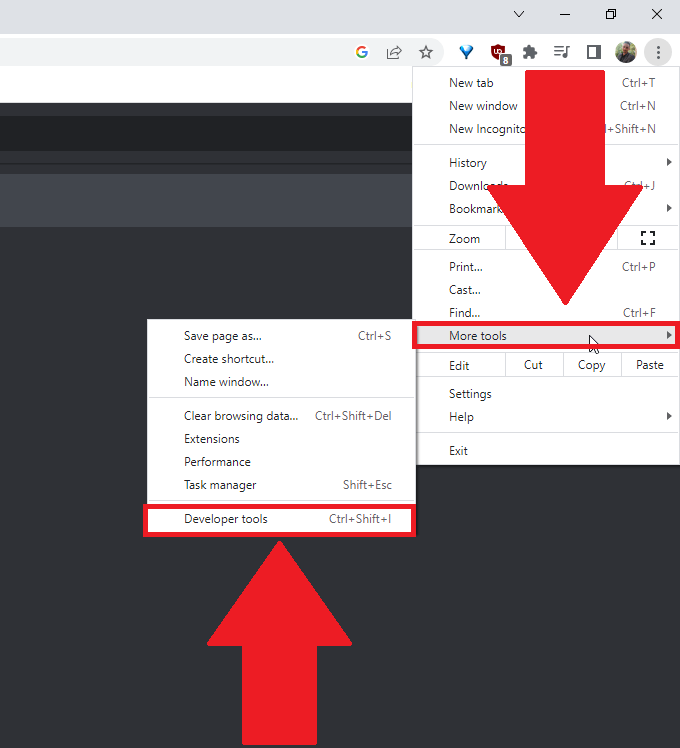
After clicking on the three-dot icon, a window will open where you’ll see various options. Look for the “More tools” option and hover over it.
This will open another window with several other options. Find the “Developer tools” option and click it. Then, read my instructions below!
3. Tap the arrow icon
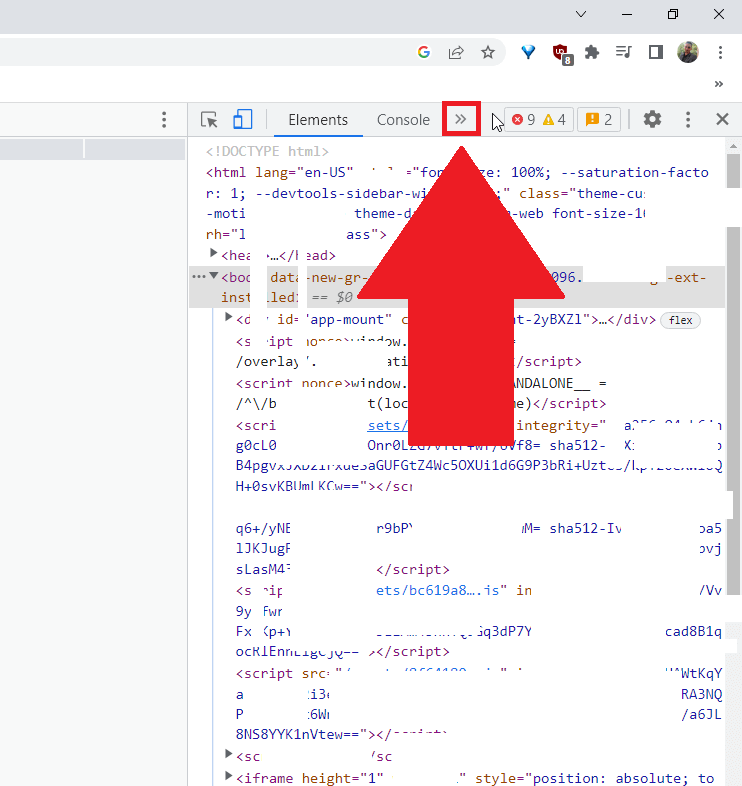
Now, the developer console should have opened, and you’ve nearly shat your pants from all the lines of code glaring at you.
Don’t worry, you don’t need those (for now). Instead, look for a double-arrow icon that’s pointing to the right.
You can see it highlighted in the picture above. It’s next to the “Console” option!
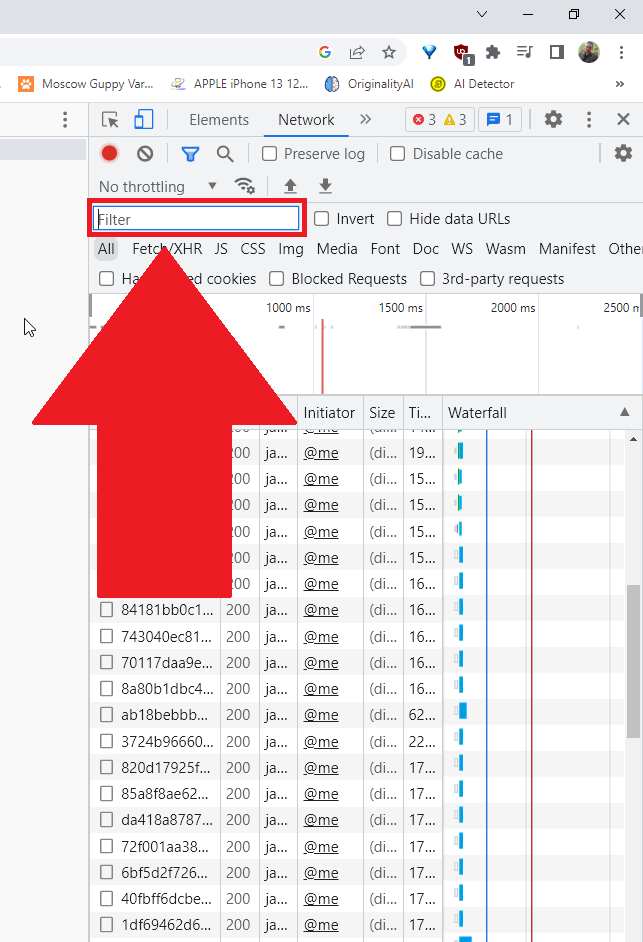
4. Select “Network“
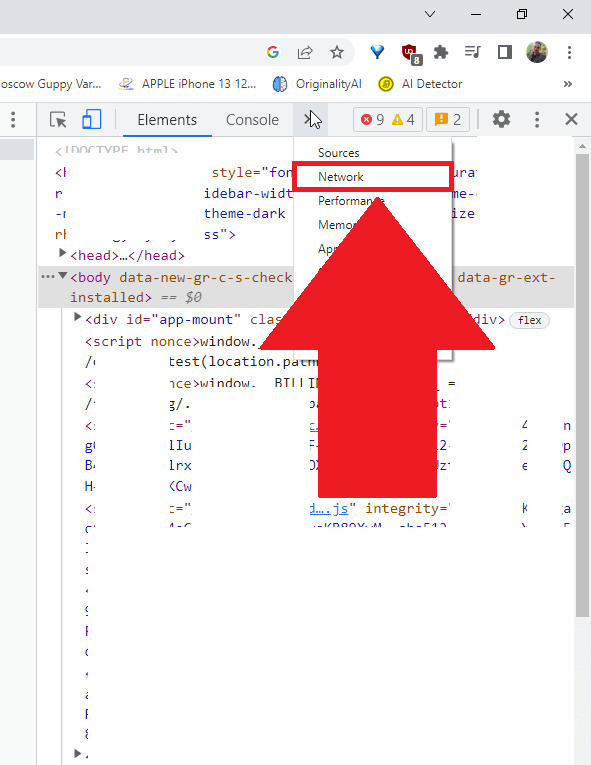
After selecting the arrow icon (the one mentioned above), a drop-down menu will open where you’ll see several options.
The one you need is “Network“. Select it and then refresh the page (F5). This step is NECESSARY, so don’t ignore it.
5. Type in “/api” in the “Filter” box
Once you refresh the page, you should see a boatload of new entries on the main section in the developer console. Ignore those.
Instead, find the “Filter” text box at the top (highlighted in the picture above) and type in “/api“.
6. Select the “Library” entry with a left click
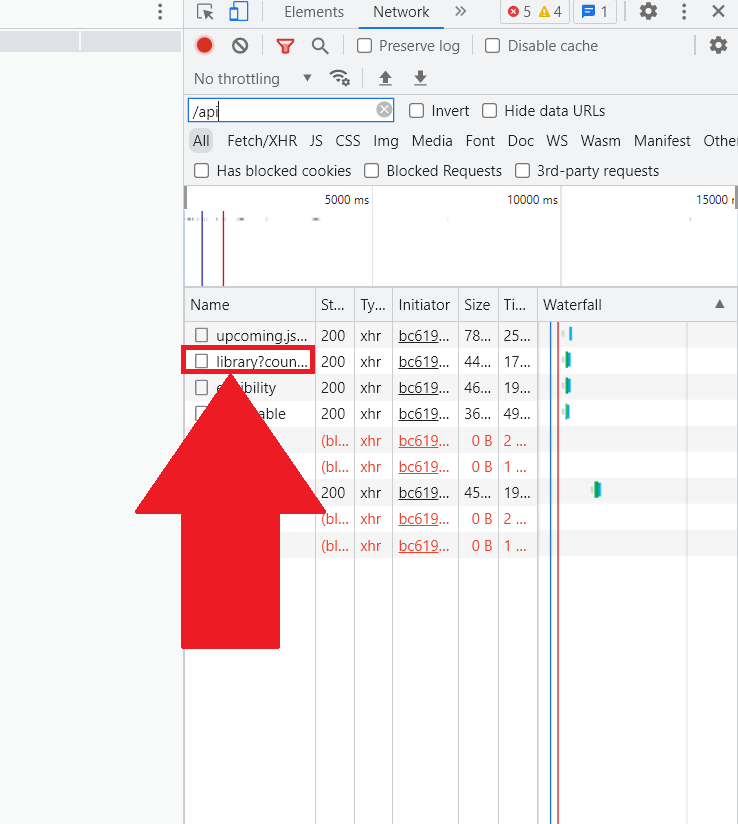
Did you type in “/api” in the Filter text box yet? Good, then you must have filtered the results, and you’ll now see only a couple of results below (screenshot above).
Among the entries, there is one that begins with “library“. Select it with a left-click now!
7. Look for the “authorization” entry
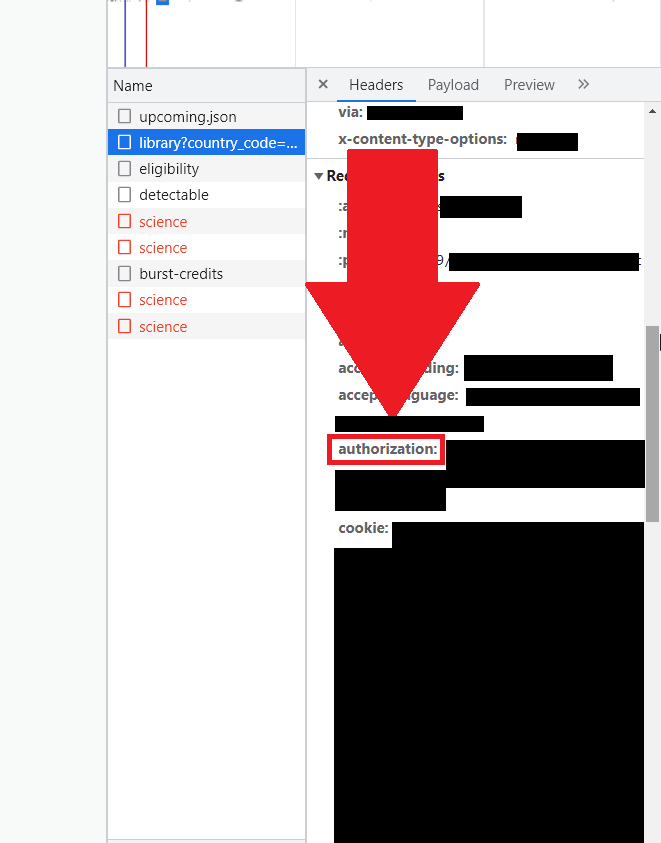
This is it – under the Library entry, you should see multiple lines of code and information (the Heading” category is selected).
Scroll through them until you see the “authorization” entry (shown in the screenshot above). What follows after “Authorization” is your Discord Token.
So, the alphanumeric code after “Authorization:” is your Discord Token. I don’t know what you want to do with it, but I advise you to keep it a secret. You don’t want anyone to know your token.
Is It Dangerous if Others Know my Discord Token?
Yes, very.
When someone gains access to your Discord token, they’ll also gain access to your account and everything inside. They’ll be able to:
- Change the email address connected to the account
- Change your password
- Create or delete servers
- Talk to your friends in your place
- Control your account completely
You DON’T want others to know your Discord Token, trust me. I don’t know why you want to discover it, but the good news is that the token changes every time you change your password.
So, if you’re worried that someone might know your Discord Token, just change your password.
Alright, that’s all. If you have any questions, let me know in the comments below, and I’ll try to help you!