Improving the quality of CapCut videos is a lengthy process takes into account several elements, including:
- Brightness
- Contrast
- Saturation
- Vignette
- Exposition
- Highlight
You’ll have to adjust these settings manually and play around with them until you find the sweet spot. And that’s far from easy but hey, if you’re determined to do this, I’ll help you.
Below you’ll find a detailed guide on how to start editing a video as well as recommendations for each of the element mentioned above. So, keep reading!
Summary: In this article, I explain how to enhance the quality of your CapCut videos by manually adjusting six essential elements: Brightness, Contrast, Saturation, Exposure, Vignette, and Highlight.

Step-by-Step Guide:

1. Brightness: Adjust to make your video lighter or darker.
2. Contrast: Increase or decrease to make the details in your video stand out.
3. Saturation: Modify to enhance or mute the colors.
4. Exposure: Fine-tune to control the amount of light in your video.
5. Vignette: Add to create a subtle darkening around the edges of your frame.
6. Highlight: Adjust to emphasize or soften the brightest parts of your video.

Detailed Instructions:

I provide a comprehensive guide on how to navigate the app and share suggested values for each setting. However, it’s crucial to experiment and find the adjustments that work best for your specific video.

Important Note:

CapCut compresses your videos to a maximum resolution of 1080p, but with the right tweaks, you can still achieve excellent quality.

By following these steps and experimenting with different settings, you can significantly improve the visual quality of your CapCut videos.

What’s the Highest Resolution for CapCut Videos?
There are two things you need to consider regarding video resolution when it comes to CapCut editing:
- The imported video resolution – Videos you import for editing into CapCut
- The exported video resolution – Edited videos you export/download from CapCut (after editing)
There is no maximum imported video resolution for CapCut. You can edit 720p, HD, Ultra HD, or 4K resolution videos in CapCut.
However, there’s a catch. When you upload a video on CapCut, no matter its original resolution, the app will compress it into a 1080p resolution.
And you can only export the video on a 1080p resolution at maximum. You can’t export 4K-resolution videos from CapCut.
This will drop the quality a bit. However, you can make up for it using the options I told you about.
Six Ways to Improve Video Quality on CapCut
You’ll need to tweak six settings to make your videos look better in CapCut. Read below to find out more about these settings and where to find them:
1. Select “New Project“

Begin by opening CapCut and importing a new video to it. Tap the “New project” button in the top-left corner of the app (is colored in blue).
2. Select your video and tap on “Add“
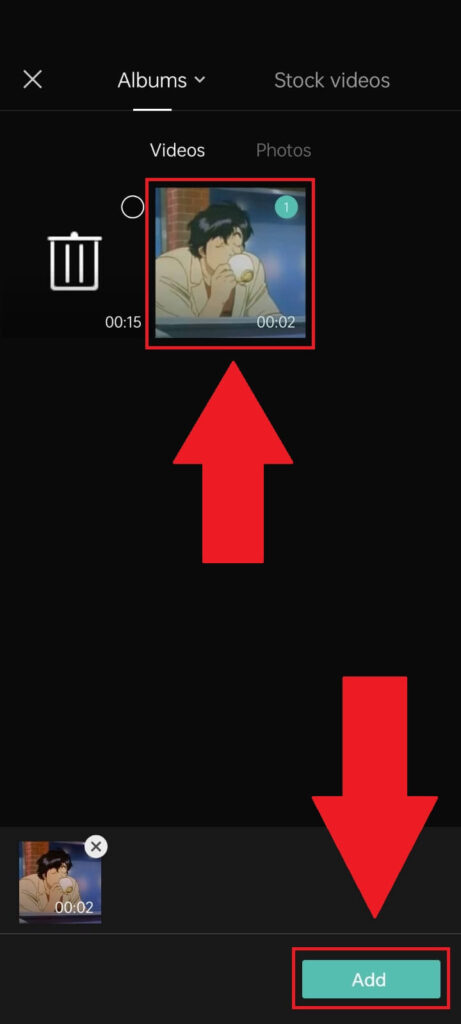
This next window (see above) will house all our videos and pictures. Make sure you select the “Videos” category, and then select a video. Tap “Add” to upload it.
3. Select “Edit“
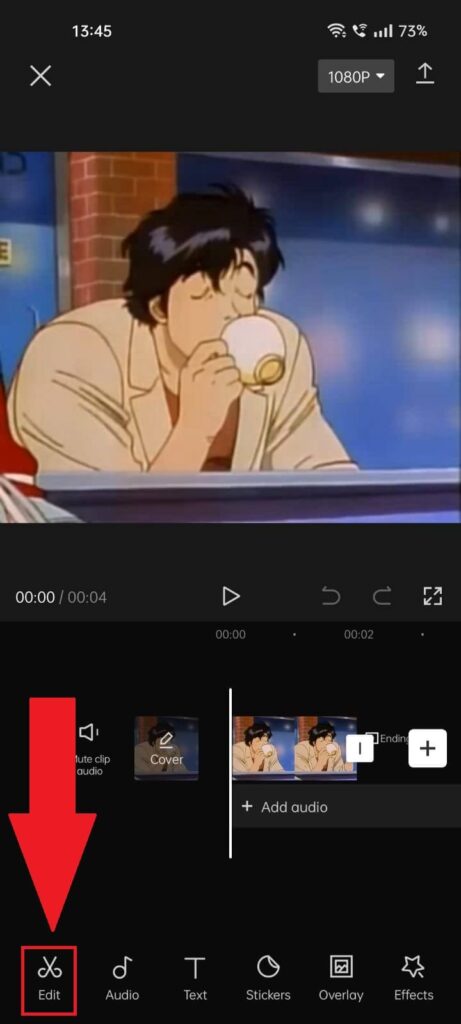
Once you import the video, CapCut will take you to the editing screen. You’ll see several options here but not the ones you need.
Select “Edit” in the bottom-left corner to proceed.
4. Go to “Adjust“
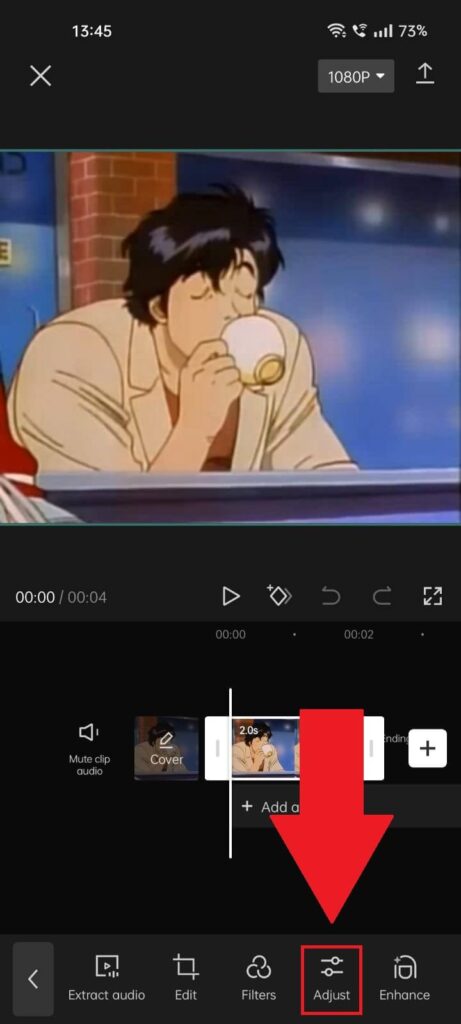
You should see a host of new options at the bottom, including “Extract audio“, “Edit“, “Filters“, and “Enhance“.
Select “Adjust” to open the more advanced editing options.
5. Tweak the six settings
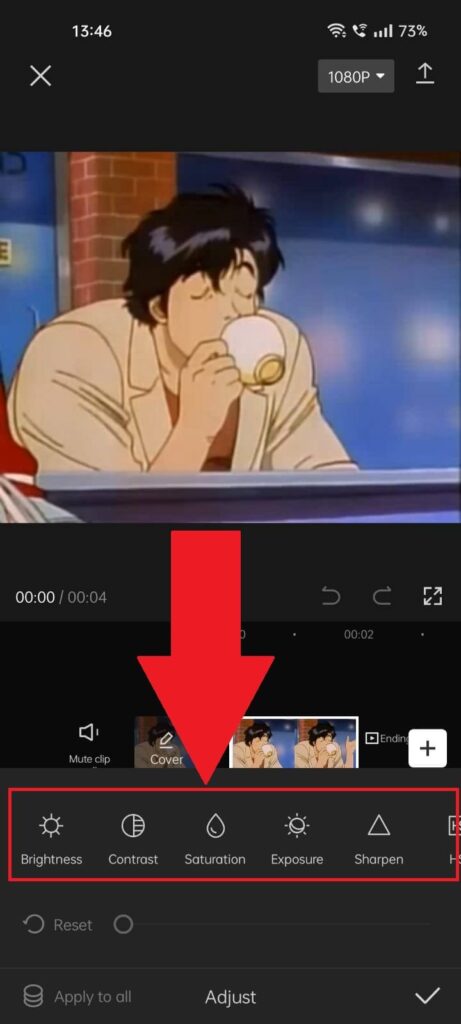
In the “Adjust” screen, you’ll find the settings I told you about earlier. They are:
- Brightness
- Contrast
- Saturation
- Exposure
- Vignette
- Highlight
Please scroll through the menu to find them all. You’ll also notice that there are many more options than the ones listed above.
I recommend testing them out and seeing which one can improve the image further. The ones I listed above are the main quality controllers, though.
After doing some tests, these are the values I recommend for those six settings:
- Brightness – From -5 to -10, depending on the photo itself
- Contrast – From +20 and above
- Saturation – Approximately +10 for brighter colors
- Exposure – Between -20 to +20
- Vignette – Between +20 and +30
- Highlight – Approximately -15 to -20
Of course, these values aren’t great for all videos. The context is also essential in determining the type of visual improvement you need.
Experiment with these values and find the correct values for your video.
If you need assistance or you have questions about video quality on CapCut, let me know in the comment section below!