Green screens transform CapCut from a seemingly basic editing tool to a masterclass in creativity (or at least close enough :-P), but first, you’ll need to learn how to use it.
Let’s get to the point then… do these to use the CapCut green screen feature:
- Download a green screen video from Pixabay or Pexels
- Open CapCut
- Create a new project with the video background
- Add the green screen video as an overlay
- Go to the “Chroma Key” option
- Select the green color with the “Color Picker” option
- Increase the intensity until the green screen disappears completely
The process is simple enough, and you’ll be a better video editor at the end of it.
But there may be some confusing steps, and if that’s the case, check the in-depth guide I prepared below (with cute screenshots 🙂 )!
Summary: In this article, I provide a step-by-step guide on how to use the CapCut green screen feature.

Step-by-Step Guide:

1. Download a Green Screen Video:
   - Visit websites like Pixabay or Pexels to download a green screen video.

2. Open CapCut:
   - Launch the CapCut app on your device.

3. Create a New Project:
   - Start a new project and add your chosen video background to the timeline.

4. Add the Green Screen Video:
   - Import the green screen video and add it as an overlay on top of the background video.

5. Use the Chroma Key Option:
   - Select the overlay and go to the "Chroma Key" option.

6. Select the Green Color:
   - Use the “Color Picker” tool to select the green color in the green screen video.

7. Adjust the Intensity:
   - Increase the intensity until the green screen disappears completely, leaving only the desired overlay content.

By following these steps, you can effectively use the green screen feature in CapCut to create engaging and professional-looking videos.

1. Go to Pixabay/Pexels
Before you start editing your video in CapCut, you’ll need a green-screen video. If you already have one, skip to Step 4.
If you don’t have one, go to Pixabay/Pexels to find a green screen you like.
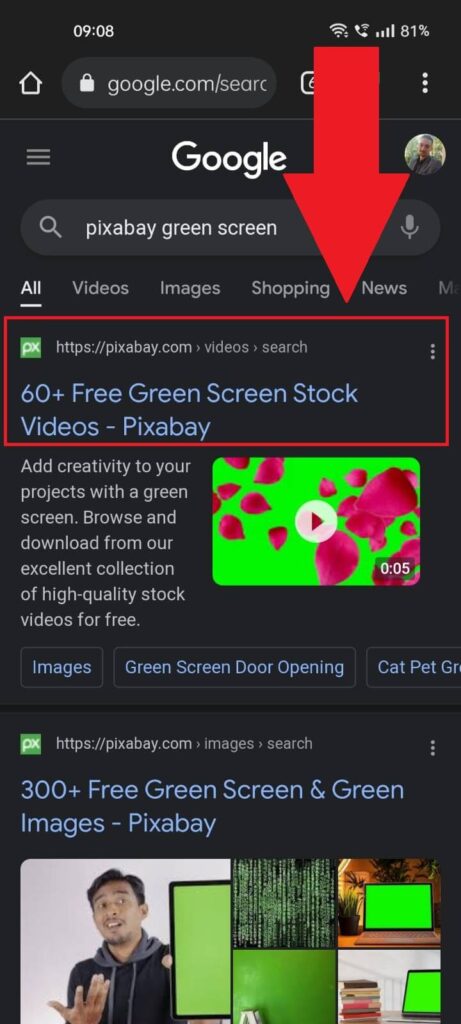
Search for Pixabay or Pexels on Google and open the appropriate link (www.pixabay.com or www.pexels.com).
I will use Pixabay for this guide (no offense, Pexels ¯\_(ツ)_/¯).
2. Select a green-screen video
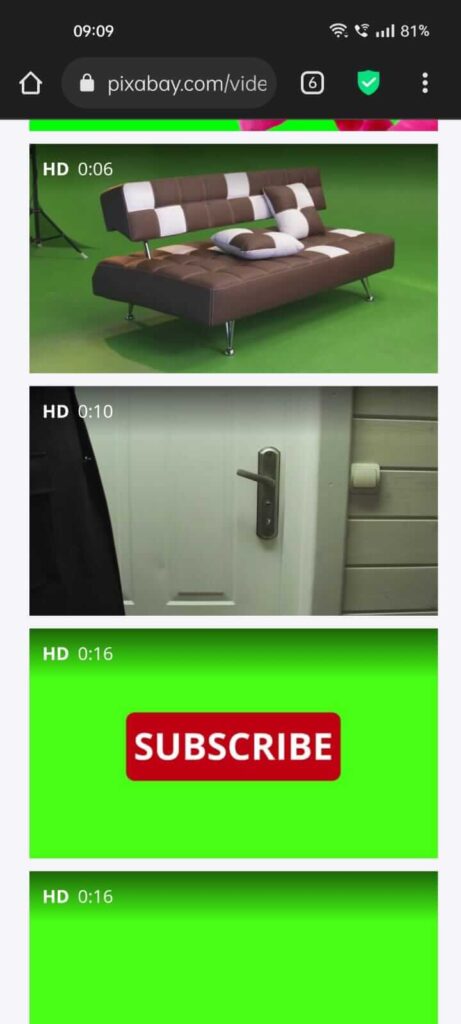
Pixabay has plenty of green screens to choose from. Just scroll through them and find one you like.
Remember, I’m only doing this for the purpose of this guide. For personal projects, you may need more professional green screens.
But for now, let’s just keep going…
3. Select “Free Download“
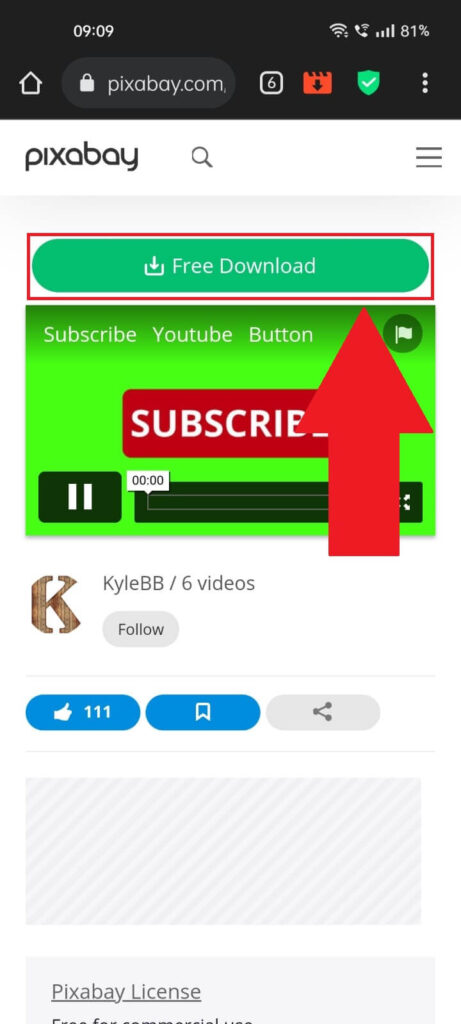
After you select a green screen video, you’ll be taken to a page where you can watch it and check if it’s good enough, etc.
If it suits your needs, then tap “Free Download” (it’s that green button – check the screenshot) to get the green screen.
4. Tap on “New Project“
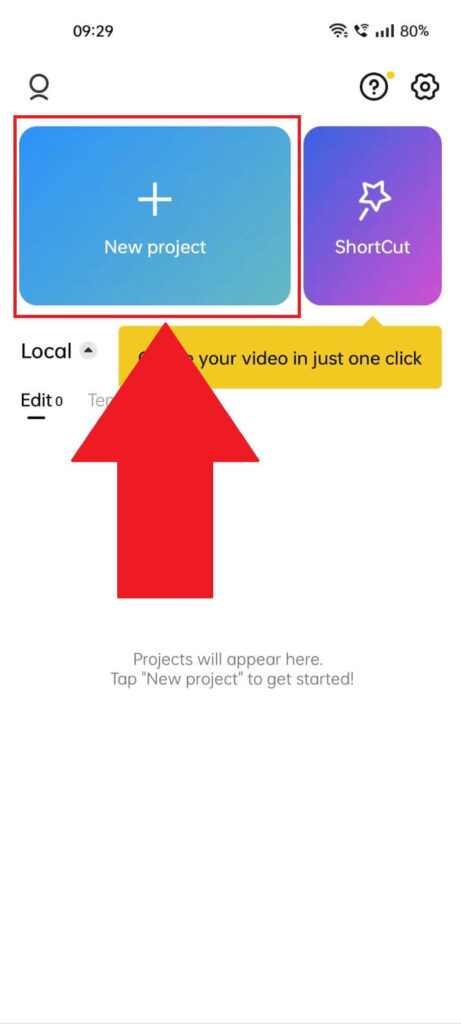
With the green screen downloaded, it’s now finally time to apply it to your video. Have you prepared a video yet?
We’ll start by opening CapCut and going to “New Project“. It’s better to start a new one just in case we’ll ruin an existing one…
5. Select the background video and tap “Add“
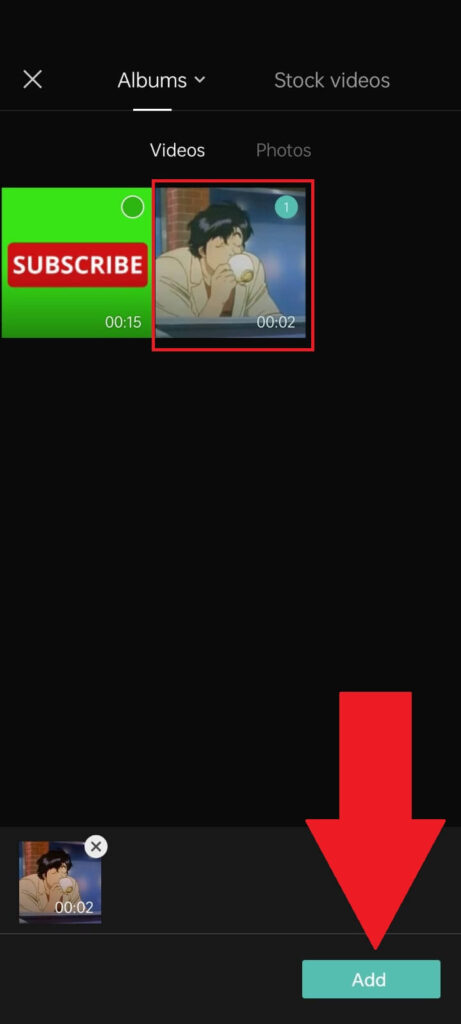
Once you tap on “New Project,” you’ll be taken to the “Albums” page, where you can select a video to add to CapCut.
Look for the background video you want to use, select it, and tap on “Add” in the bottom-right corner.
6. Select “Overlay“
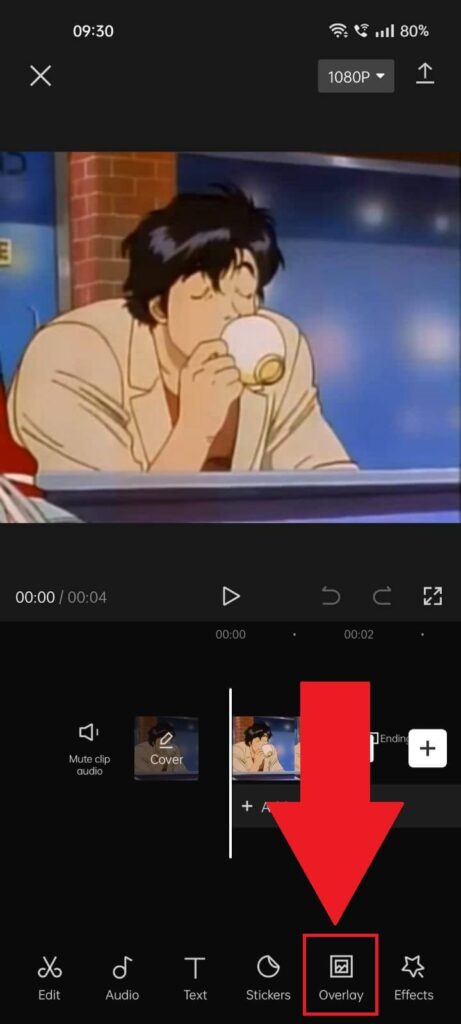
After selecting the background video, you’ll be taken to the main editing screen on CapCut. The next step is finding the “Overlay” feature on the bottom menu bar (see the screenshot above).
Once you find it, tap on it.
7. Select “Add Overlay“
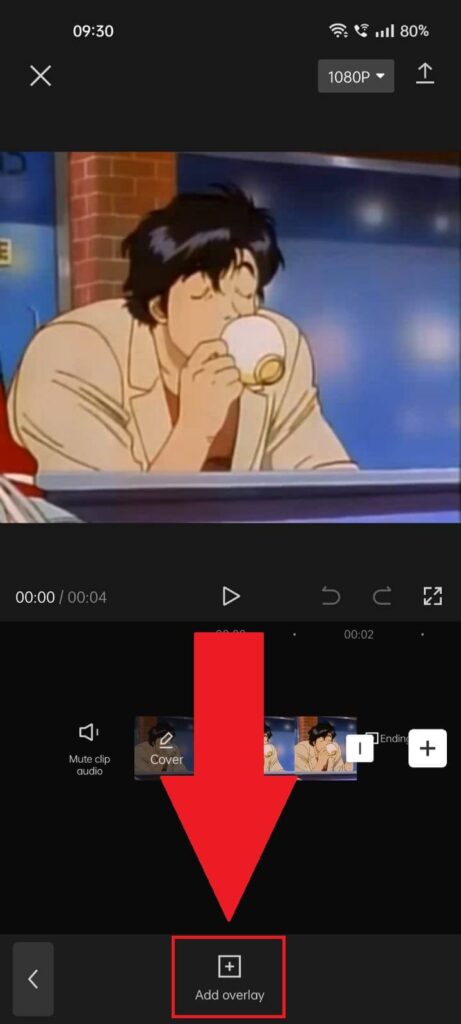
Selecting “Overlay” will reveal the “Add overlay” option, which you will have to tap. Then, please keep following the next few steps to see what’s next:
8. Select the green screen video and tap “Add“
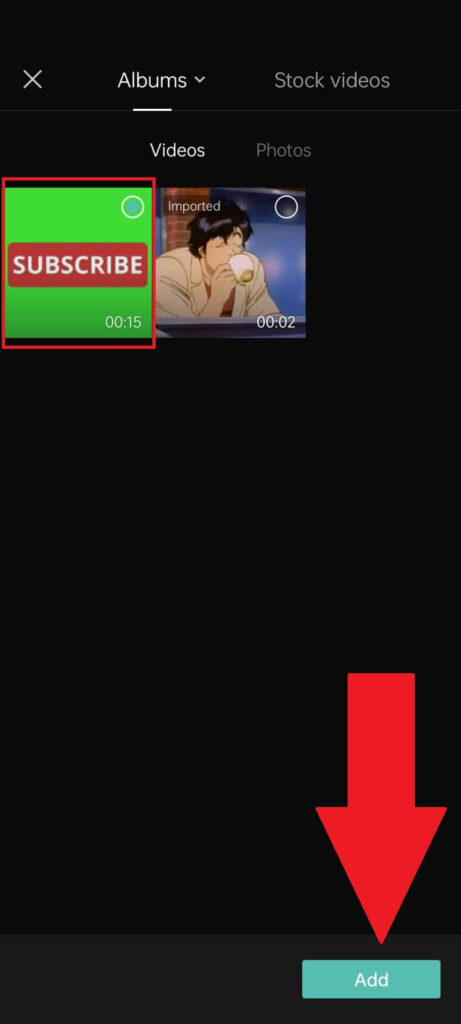
Next up, you’ll need to add the green screen video (the one you downloaded earlier…) as an overlay.
Select the green screen and tap “Add” to apply the changes.
9. Select “Chroma Key“

After adding the green overlay, you’ll see it pop up on the screen. Select it with a finger tap and then look for the menu at the bottom.
Scroll through the options until you find the “Chroma Key” feature. This option is the key you need when working with green screens on CapCut.
Select it to finally start playing around with the green screen… (which is why you are here for, after all…)
10. Select “Color Picker“
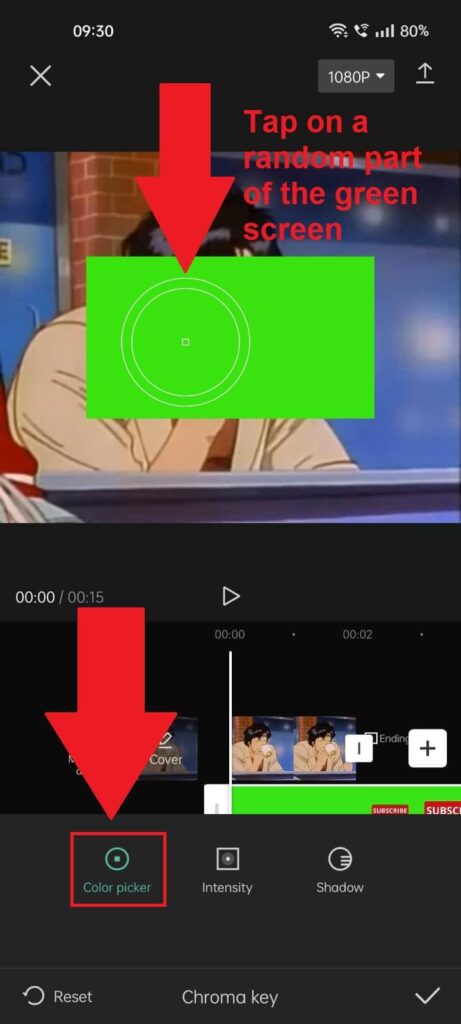
After you select “Chroma Key“, three new options will appear – “Color picker“, “Intensity“, and “Shadow“.
First, we’ll be using the “Color picker“. Select it and then move the cursor in the video (the circle cursor that the arrow in the screenshot is pointing at) to a random part of the green screen by tapping there.
11. Select “Intensity“
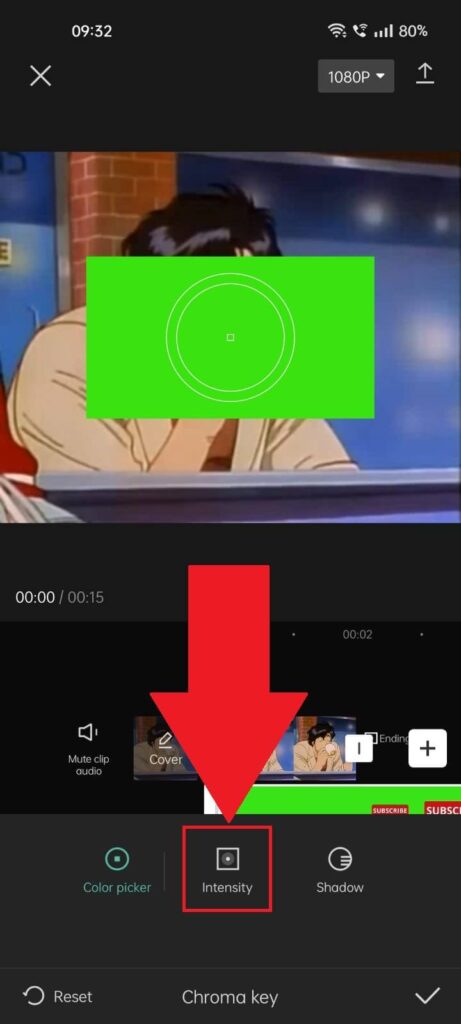
Once you pick a color, the next thing you will need to do is adjust the intensity. Tap on the option and see how to use it below:
12. Increase the intensity
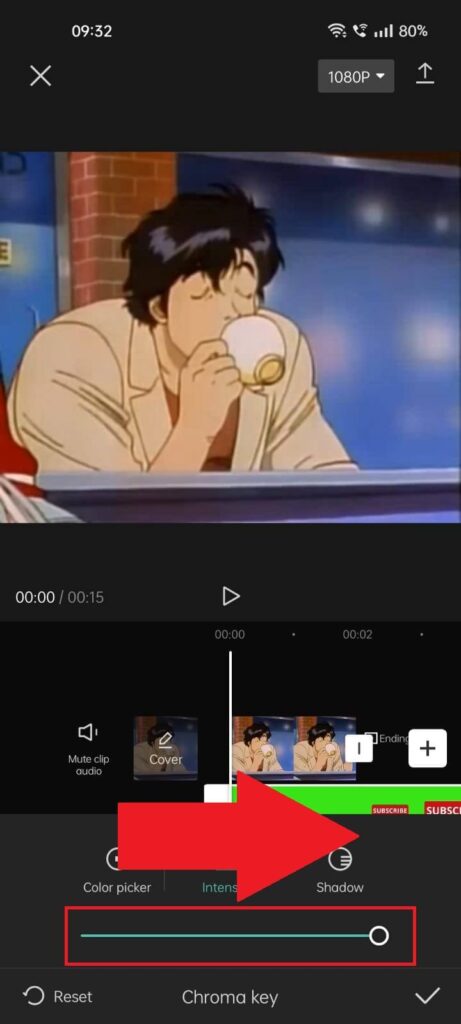
After selecting “Intensity“, a bar will appear with a marker on it (the cyan-ish line in the image above). Take it all the way to the right to make the green screen disappear from the video.
Now it’s all (finally!!) coming full circle… Tap the checkmark icon in the bottom-right corner to save your changes and then play around with the green screen to see what can be done with it.
Pfew… so many steps! Let’s summarize it again:
To summarize, a green screen allows you to add an element from one video to another, effectively placing that element in another background in a seamless transition.
To do this on CapCut, you’ll need a green screen video and a video background. Once you have that, follow these steps to remove the green screen:
- Create a new project with the video background
- Add the green screen video as an overlay
- Go to the “Chroma Key” option
- Select the green color with the “Color Picker” option
- Increase the intensity until the green screen disappears completely
Once you increase the intensity, the green screen background will disappear. However, the object in the green screen video will be left behind… which is basically why the green screen feature exists.
If you have further questions about using green screens or if something doesn’t work, feel free to ask me below!