There is one way you can rearrange Instagram photos after you’ve already posted them, and there’s a necessary requirement to do it:
- The photos need to be part of a Carrousel (at least three photos in a single post)
Here’s what you have to do:
- Tap the three-dot icon on the Carrousel post
- Select “Edit“
- Scroll through the post until you find a photo that you want to rearrange
- Tap the bin icon to delete it, and then confirm
- Do this for the rest of the photos that you want to rearrange (keep in mind that once the carrousel only has 2 photos in it, you won’t be able to keep deleting photos)
- Open your profile page
- Tap the three-line icon in the top right corner
- Select “Settings“
- Use the search bar to find the “Recently deleted” folder
- Select one of the photos, tap the three-dot icon, and select “Restore“, then confirm
- Do this for every other photo you want to rearrange
Important detail—when you restore a deleted photo this way, that photo will move to the front of the carousel. So, pay attention to the order in which you’re restoring the photos.
This process is a bit unconventional and complicated because it’s technically not the intended way to do this. But then again, there is no official way to rearrange photos once you’ve posted them. Instagram strikes again!
But don’t worry; I’ll walk you through all of these steps with screenshots. Keep reading for a super easy guide 😀
1. Tap the three-dot icon on your Carrousel post

Begin by finding your Carrousel post, the one with the photos that you want to rearrange. Then, tap the three-dot icon in the top-right corner (like in the image above).
Then, keep reading!
2. Select “Edit” from the options list
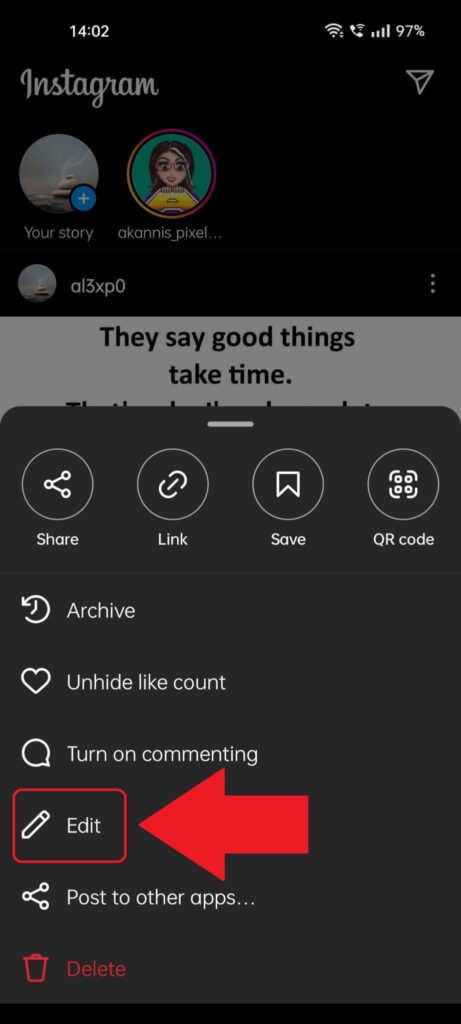
The next step is selecting the “Edit” option from the menu that appears at the bottom of the screen. Just follow the instructions in the image above, and you’ll be fine.
3. Go to one of the pictures that you want to rearrange and delete it
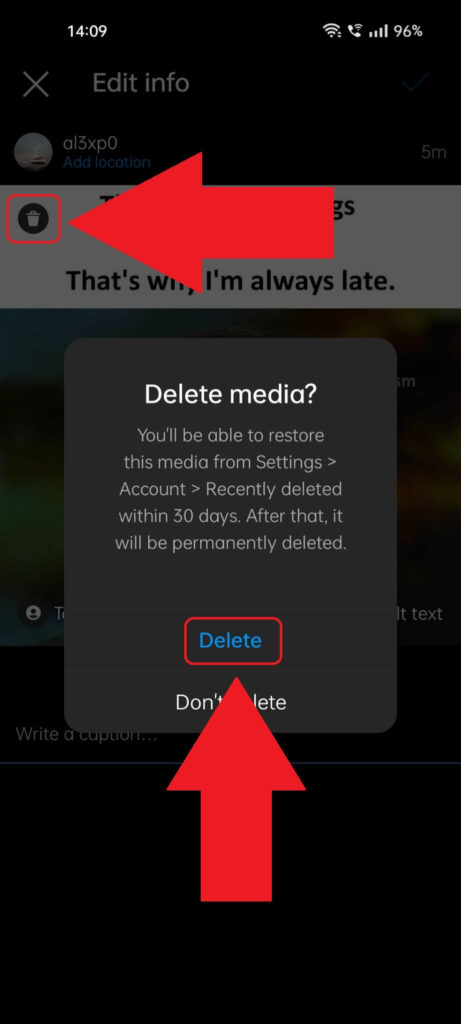
Once you’re inside your Carrousel post, navigate to one of the photos that you want to rearrange and then tap the Bin icon in the top-left corner (you can see it highlighted above).
Then, a confirmation window will appear in the center of the screen. Just select “Delete” (button in blue) to delete the photo.
Now do this for all the other photos that you want to rearrange.
REMEMBER that once the post reaches the last two photos, you won’t be able to delete them. That’s because your post is not a Carrousel anymore. It needs at least three photos for that.
4. Save your changes

Next, you’ll want to save your changes (deleting those photos) because if you don’t, Instagram will revert everything you did.
You can do that by tapping the blue checkmark in the top-right corner of the Carrousel post. Once you do that, follow my next instructions carefully:
5. Tap your profile picture

Next, you’ll want to access the “Recently deleted” folder and restore those photos in a particular order. To do that, you’ll have to access your profile settings, so your profile page is our next destination.
Tap your profile picture in the bottom-right corner, please 😀
6. Tap the three-line icon

Assuming you’ve reached your profile page, find the three-line icon in the top-right corner and select it. That’ll open up a menu at the bottom of the screen.
See which option you need to choose below:
7. Select “Settings”
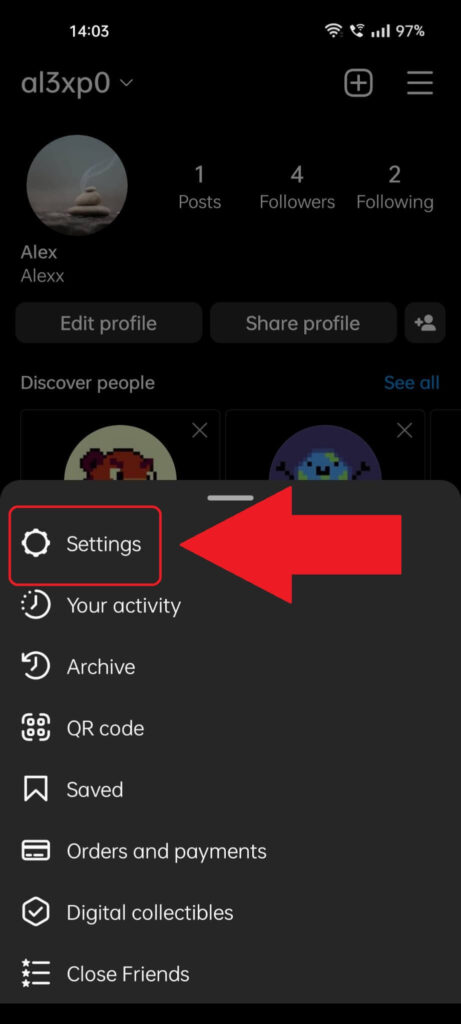
Now that the profile menu has appeared (shown in the picture above) select the first option on the list – “Settings“.
Then, keep reading!
8. Tap the search bar
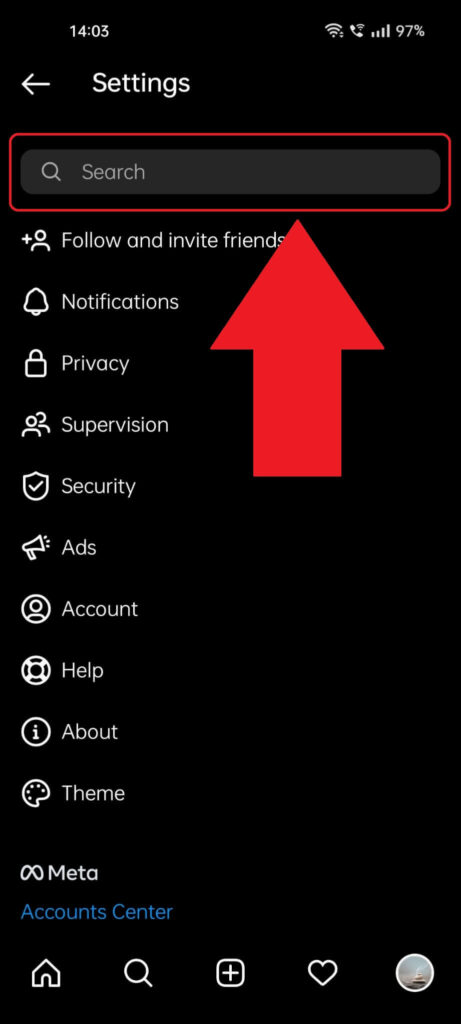
On this step, you should already be on the setting page (shown above). Ignore all the options listed there. Instead, focus on the search bar at the top.
Give it a tap to start typing!
9. Look for the “Recently deleted” folder
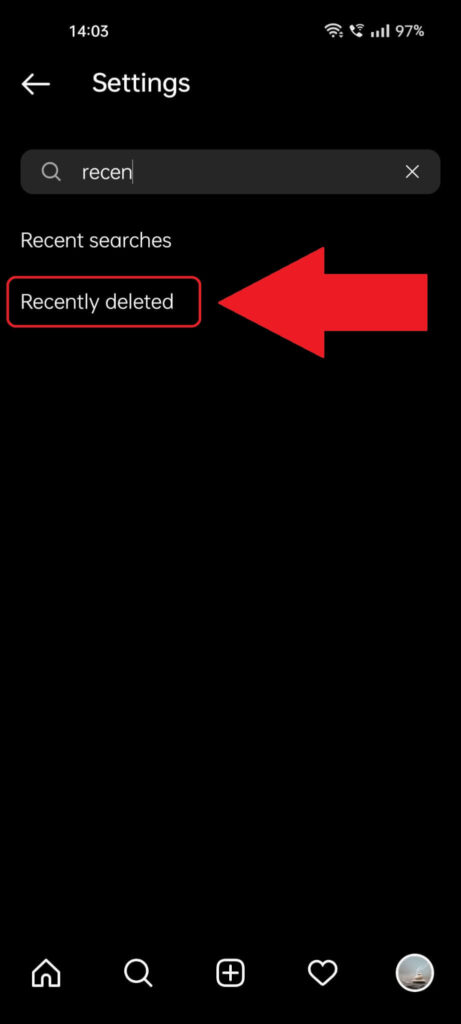
If you’re wondering what to type in the search bar, it’s “Recently deleted“. That’s the folder you need, so start typing and select the option once it appears, just like in the image above.
Then, continue reading 😀
10. Select one of the pictures to restore

This is where it gets a bit more complicated. Before I show you how to restore your photos, I need to make sure you understand the order in which you have to restore them.
The idea is that the photo you restored will go at the FRONT of your Carrousel, so it will always be the first photo in the Carrousel.
For instance, if your Carrousel has 3 photos inside now, every photo will be marked with 1/3, 2/3, and 3/3, depending on their order.
Once you restore a deleted photo from this folder, that photo will become 1/4, taking the place of the photo that was 1/3 before it (this one now becomes 2/4, and so on).
I hope this is clear enough. Now, with all this in mind, select the first photo that you want to restore!
11. Tap the three-line icon

Once you select one of the photos you deleted, Instagram will automatically zoom in on it. You should see a three-dot icon in the top-right corner, just like in the image above.
Select it!
12. Select “Restore“
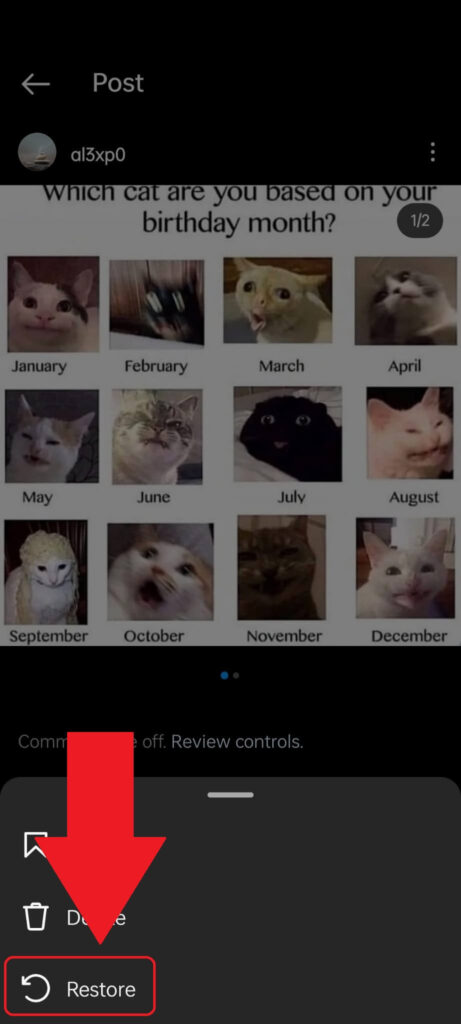
Once you tap the three-dot icon during the previous step, this menu (shown above) will pop up at the bottom of the page.
There are three options inside it:
- Save
- Delete
- Restore
You need the “Restore” option, so select that and keep reading!
13. Confirm the restoration
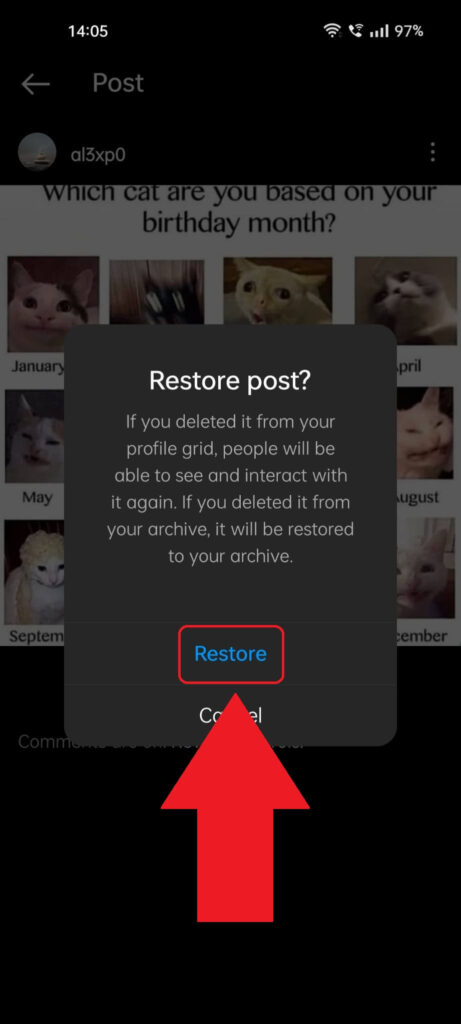
The next step is confirming that you want to restore the photo. Instagram will show you a notification window with two options – Restore and Cancel.
Select “Restore” to… restore that photo to the Carrousel.
Now, continue doing this for all the photos you deleted, but REMEMBER that every photo that you restore will become the first photo inside the Carrousel (1/4, 1/5, 1/6, etc.)
You’ll have to do some mental math to figure out how to obtain your desired order by restoring every photo in the correct sequence.
14. Open your Carrousel post to check on it
The best way to do this is to check your post after every photo you restore just to make sure that the photos are in the order you want them to be.
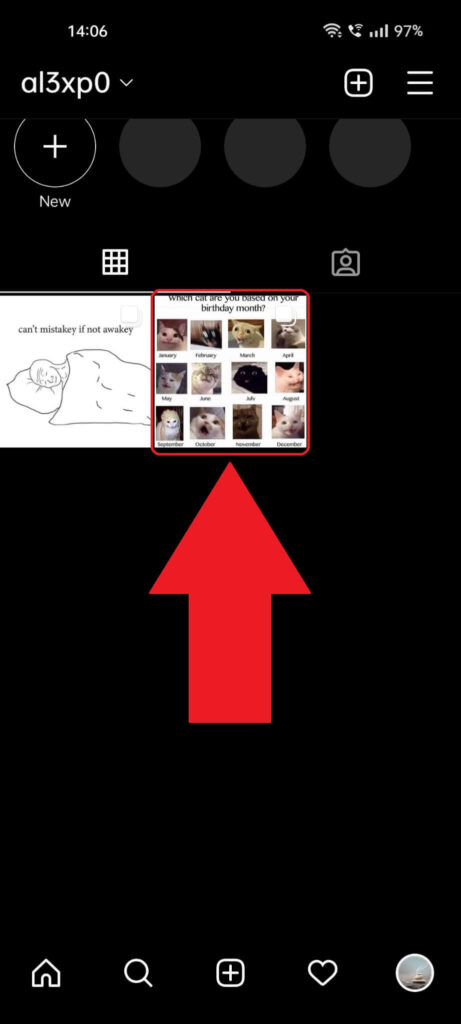
You can do this quickly from your profile page. Scroll down until you see all your posts. Find the Carrousel post and select it!
15. Check the order of the photos

Once you zoom in on the Carrousel post, you can see which post is in what position by checking the order number in the top-right corner, as shown in the image above.
The good thing about this trick is that you can perform it as many times as you want. If you restore the photos in the wrong order, delete them again, go to the “Recently deleted” folder (as shown during the previous steps), and restore them in the right order.
This is the ONLY way you can rearrange photos on Instagram once you’ve already posted them, and it only works when the post is a Carrousel (at least three photos).
I hope this guide was clear enough, but if you stumbled on any of the steps above, please contact me below, and I’ll gladly help you!