Has Snapchat done it again and deleted your messages like the hoodlums they are? Sad moment but there’s a solution to this problem (albeit not quite handy).
Do this to recover your deleted Snapchat messages:
Download your data from Snapchat!
Once the messages have been deleted, you won’t be able to find them anywhere on the Snapchat app. Trust me, I’ve tried. A lot.
But if you request a copy of your data, you’ll receive an archive with all your private messages, among other cool stuff.
Keep reading to see how you can do that (step-by-step, with pretty images)!
Summary: In this article, I explain how to recover deleted Snapchat messages by downloading your data from Snapchat.

While you won’t be able to find deleted messages on the app itself, requesting a copy of your data will provide you with an archive that includes all your private messages.

I provide a step-by-step guide on how to do this by tapping on your profile picture, going to “My Data,” entering your password, and selecting a period for the account data.

After submitting your request, you’ll have to wait for Snapchat support to send you the data archive which may take a few days.

I also mention that you can save messages before they get deleted by holding-tapping on the text message and selecting “Save in Chat.”

1. Tap on your profile picture
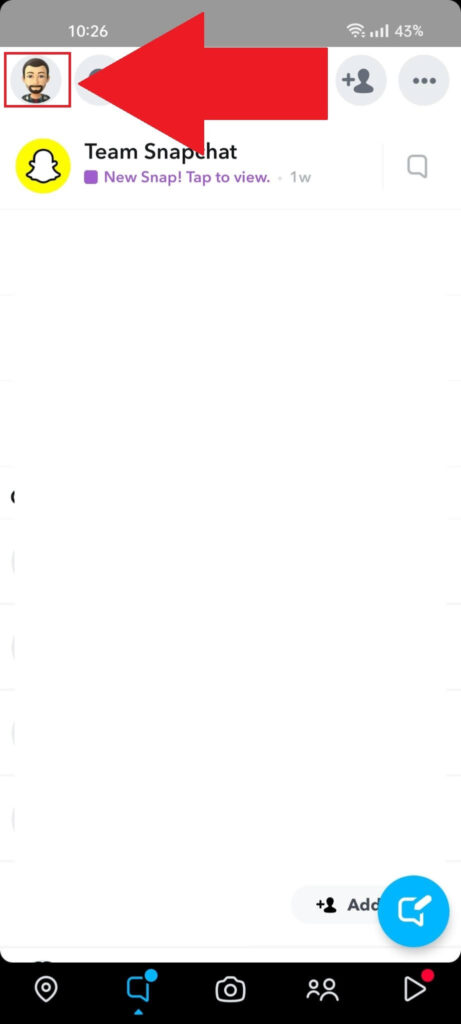
To get a copy of your chat history, you’ll need to open the Snapchat settings.
But before you do that, how about you open the Snapchat app first? I bet you didn’t see this coming!
With Snapchat opened, go to your profile page by selecting the Profile icon in the top-left corner of the chats page.
Next…
2. Tap the Gear icon
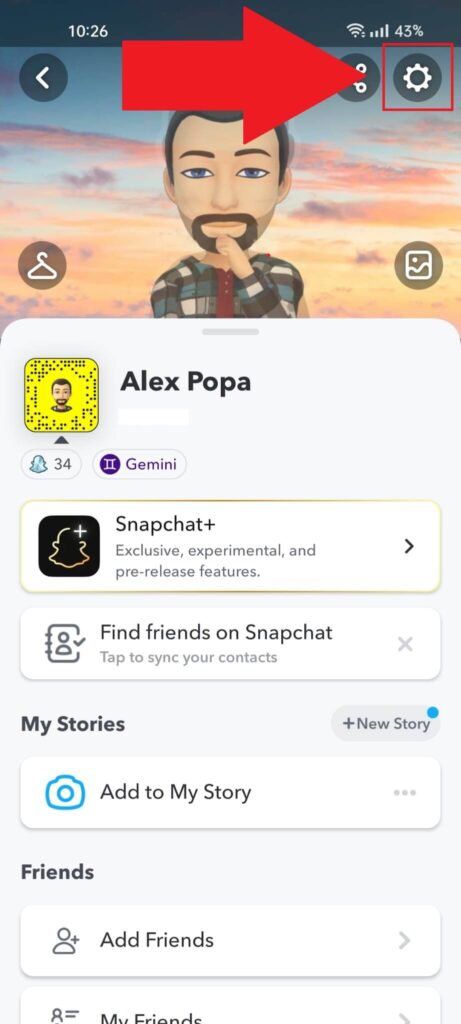
Once you’re violently redirected to your profile page, look in the top-right corner for the Gear icon and select it with a tap. Or several, depending on how old your touchscreen is.
That will take you to the Snapchat settings!
3. Go to “My Data“
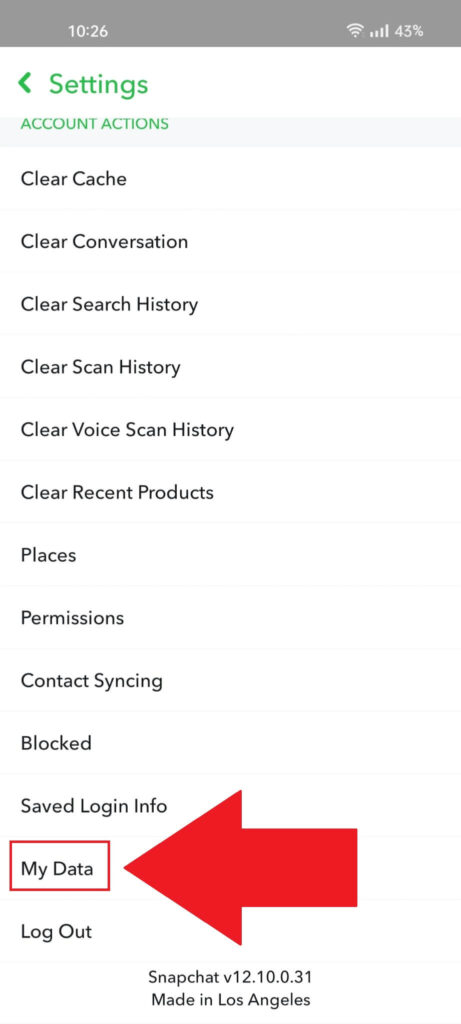
On the Snapchat settings, you’ll need to scroll down to the bottom and select “My Data“. It’s the option above the “Log Out” option. You can’t miss it!
Once you give “My Data” a tap, see the next steps!
4. Enter your password
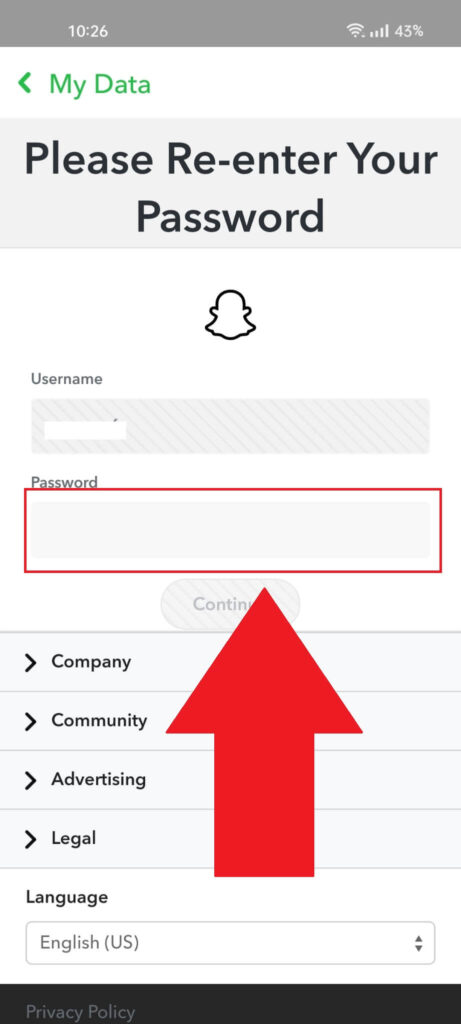
Selecting “My Data” will take you to a security page asking where you’ll be asked to enter your password. I hope you still remember it.
Enter it in the “Password” field (duh) and then select “Continue” to proceed.
5. Check to see if you’ll receive the chat history

Once you enter your password, Snapchat will show you a list of the data you’ll receive after downloading the data archive.
Scroll through, and you’ll see the “Chat History” mentioned, which includes the “Received Chat History” and “Sent Chat History“.
Now keep reading, pretty please!
6. Select a period, confirm your email address, and select “Submit Request“
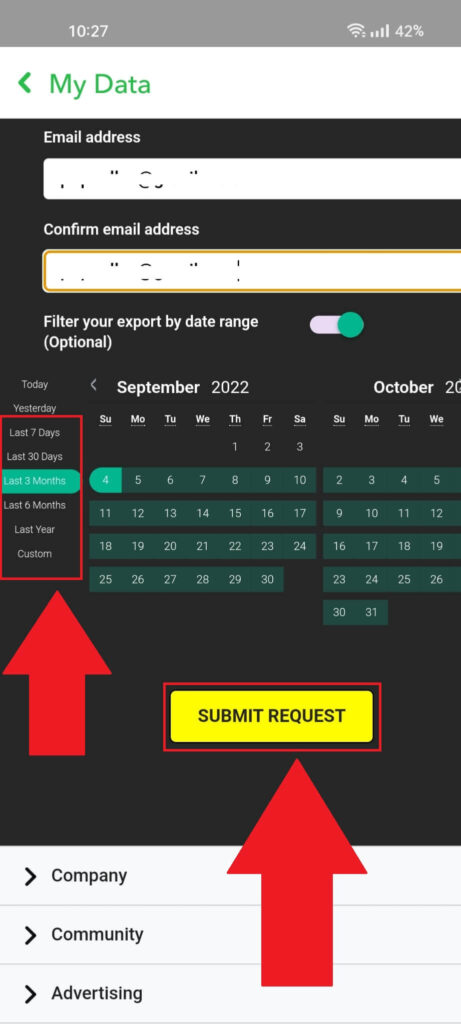
Scroll down to the end of the “My Data” page, and you’ll see a field where you can confirm your email address, followed by a calendar where you can select the period for the account data.
You’ll see a period list on the left side of the calendar, which includes options like “Last 7 Days“, “Last 30 Days“, “Last Year“, and so on.
Select the period you need, confirm your email address, and tap the big yellow “SUBMIT REQUEST” button to wait for the support team to prepare the data.
You didn’t think you’d just download the data right away, right? No, no, no… That’s not how it works with Snapchat.
7. Wait for Snapchat support to send you the data
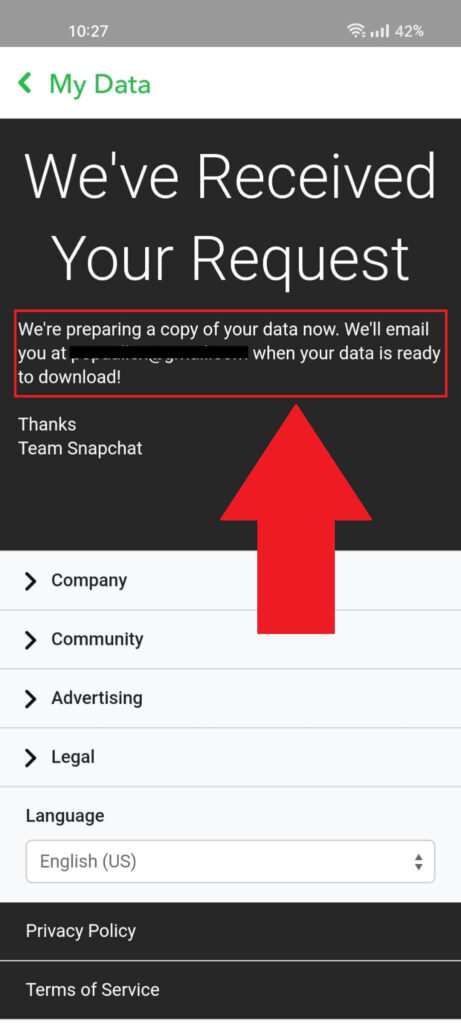
Snapchat has received your request and is preparing the data archive. Now, you’ll have to wait for a few hours or days.
This may take a few days, so if you’re in a hurry, guess what? Nothing. You can’t do anything but wait.
Once you get the archive, you’ll find all your messages inside, including the deleted ones.
Can I Save Messages on Snapchat?
To avoid waiting several days for Snapchat support to send you the data archive, you can save your messages before they get deleted.
Remember, you can only do this with messages that haven’t been deleted yet. If you know you may need them in the future, you can save them, and they’ll remain in the chat window permanently.
Here’s how to do that:
1. Hold-tap on the text message
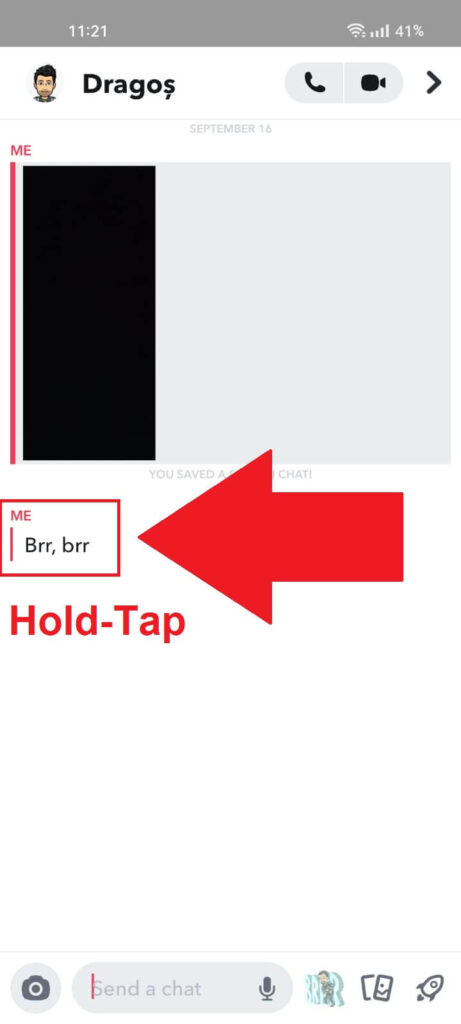
Open a chat with your friend and find a message you want to save. Then, hold tap on the message to open a settings window.
2. Select “Save in Chat“
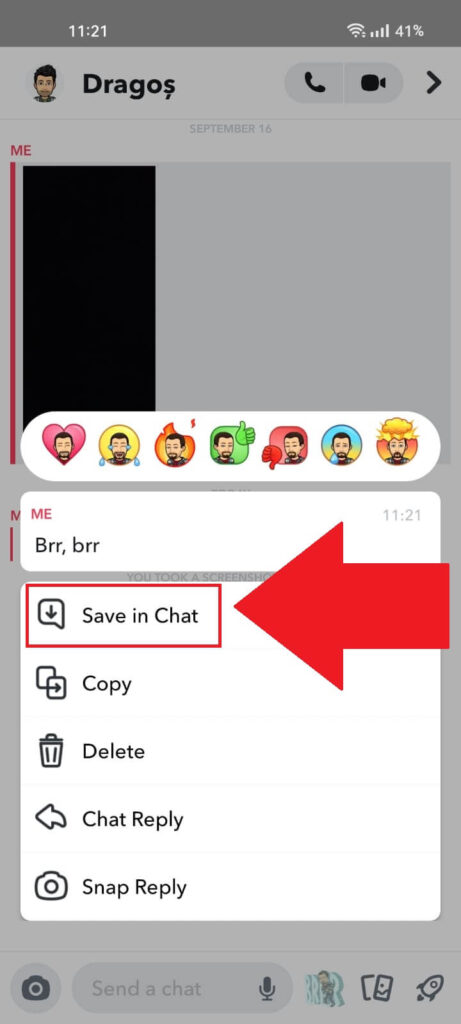
Once you hold-tap the message, a menu will pop up. Select the “Save in Chat” option, and you’re done. The message you saved will never disappear from the chat window.
This is quite the time-saver if you know you’ll need some messages in the future. You’re welcome!