Do you want to find specific messages in Facebook Messenger but don’t want to scroll to the top? Understandable.
Do these to see the first message on Facebook Messenger without scrolling:
- Search for specific keywords in the conversation
- Download your data and search for the messages
Below, you’ll find a detailed guide on how to apply each solution to find your first messages on Facebook Messenger without scrolling!
Summary: In this article, I present two methods to help you easily locate specific messages without the need to endlessly scroll: searching for keywords within the conversation and downloading your data from Facebook Messenger.

Follow the detailed steps provided to quickly discover and revisit your cherished messages!
Search for Specific Keywords in the Conversation
The easiest method of finding a message on Messenger is searching for keywords in the conversation.
Let me explain – Messenger has a feature that lets you search for a specific message using keywords that you or the other person may have used in the message.
For this to work, you must be fairly sure about a word you or the other person used in that conversation.
The word has to be pretty specific and somewhat “special” because if you search for the word “and“, you can probably imagine you’ll find countless results.
If the message was about bees, for instance, you might want to search for “bees” or “wings” or “pollen” to find that message.
Follow the steps below to see how you can do that:
1. Select a friend’s chat
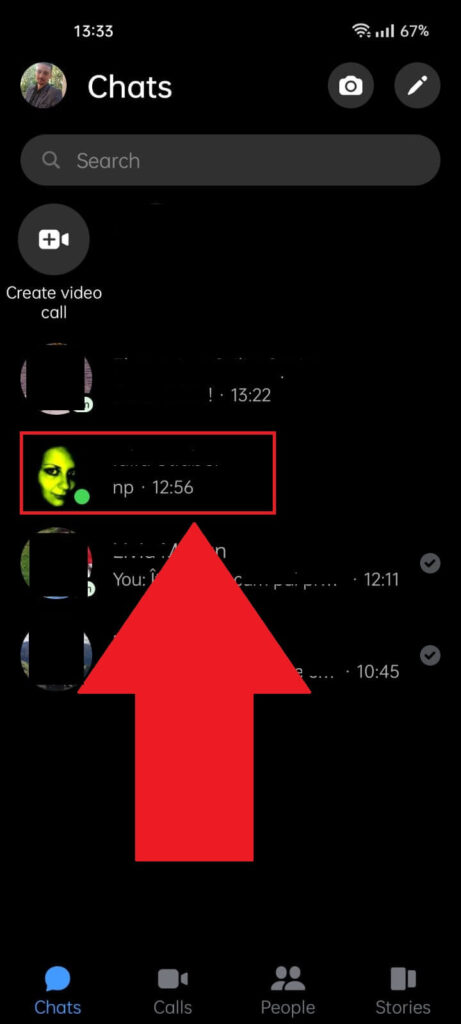
Open Facebook Messenger and select the conversation where you sent the message if you have too many conversations to scroll through, use the search bar at the top to find it easier.
Select it and proceed with the guide!
2. Tap on that person’s name
3. Select “Search in conversation“
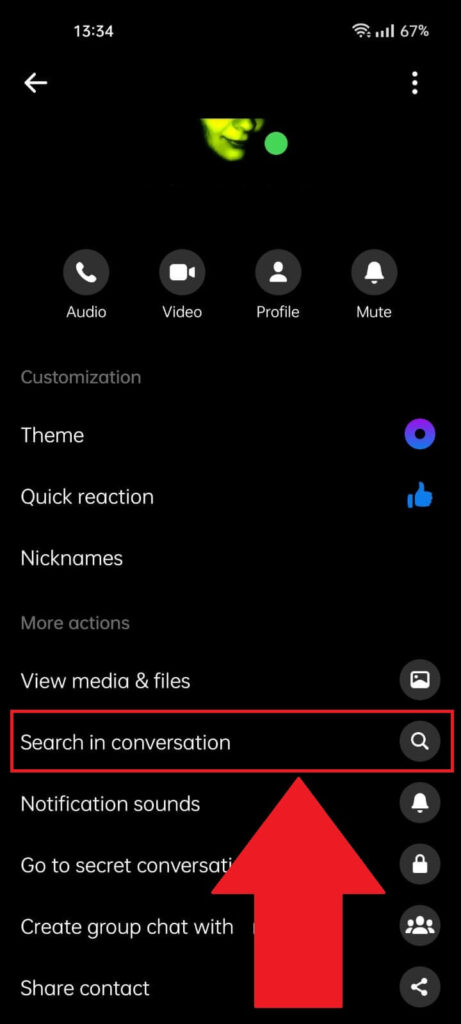
After you open your friend’s profile settings, scroll through the options until you find the “Search in conversation” option.
That’s what you’re looking for. Tap on it to continue!
4. Search for keywords
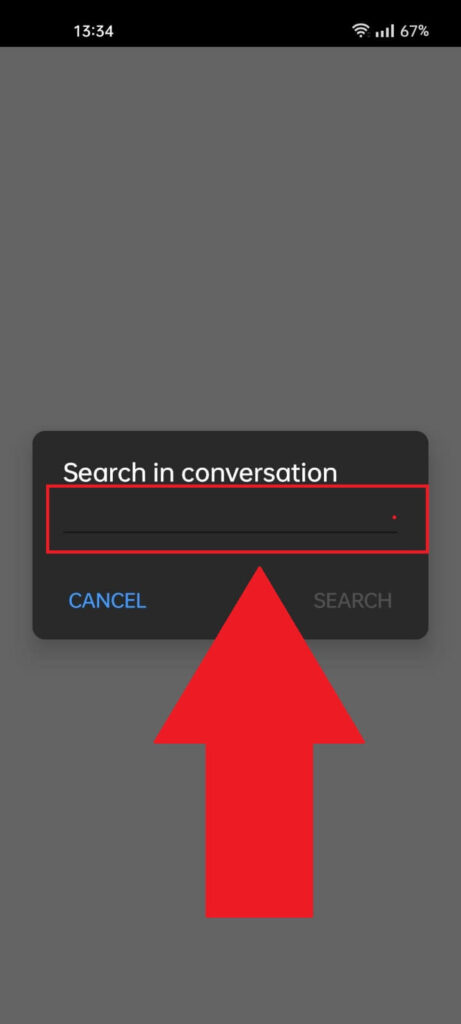
Type in a word that comes to mind that you think was included in the message you’re looking for. Then, hit “Search” to find all messages that include that word.

After you hit “Search“, you’ll be redirected to a page that shows you all the messages that contain the keyword you searched for.
Scroll through the messages to find the one you’re looking for. Remember, if the search term is too generic, you won’t find what you’re looking for.
Try searching for more unique words specific to the topic of the message you’re looking for.
If you can’t use this method or find the message you’re looking for, try the second method on this list. Keep reading!
Download Your Data from Facebook Messenger
The second method is to download your data from Facebook Messenger and find the first message from a chat through the downloaded file.
Here’s how to do that:
1. Select your profile in Messenger
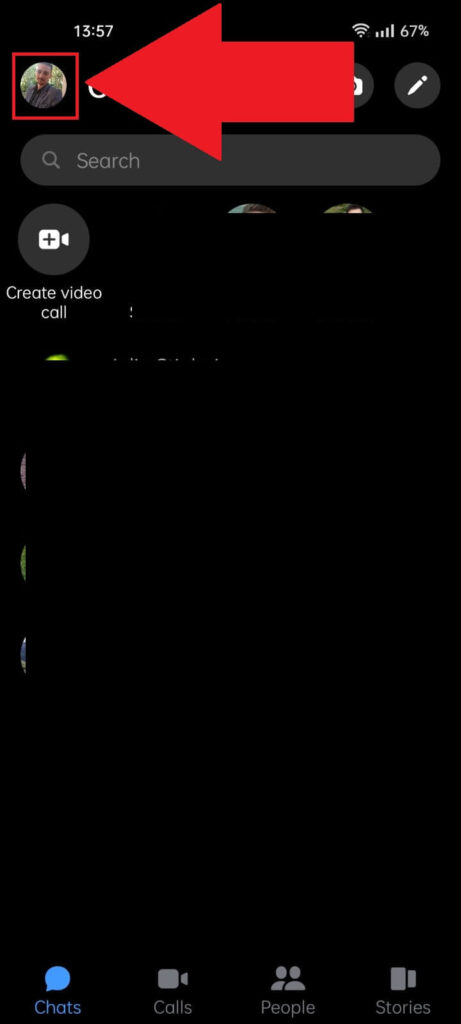
To download your data from Messenger, you’ll need to open your profile settings, and to do that; you have to select your profile picture in the top-left corner.
Move to the next step once you do that!
2. Go to “Account settings“
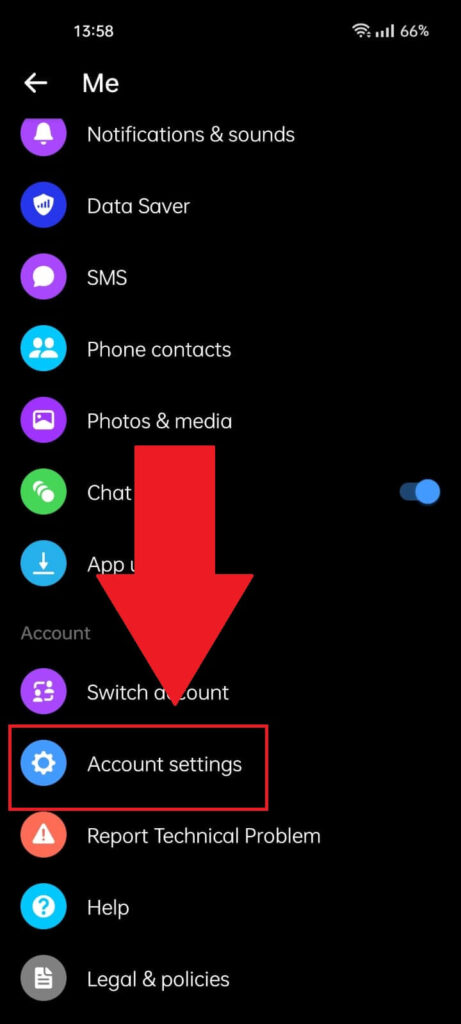
Once you open your profile settings on Messenger, you’ll be redirected to a page with multiple options. From this page, you can control your notifications, scroll the photos you sent, sync your phone contacts, and more.
To download your data, scroll down until you find the “Account settings” option. And then select it!
3. Select “Download profile information“
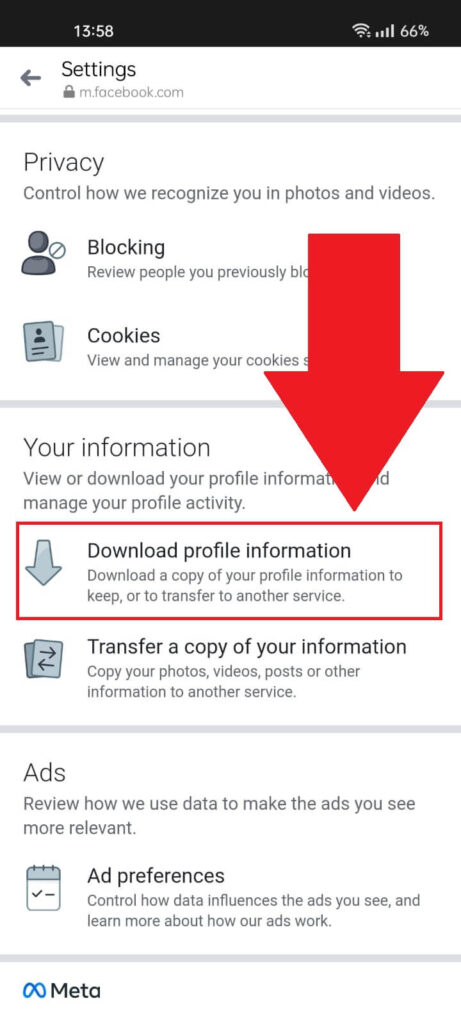
After you open your profile settings and go to the account settings on Facebook, you should see a page with various options like “Privacy“, “Ads“, “Account information“, and so on.
Scroll through the page and find the “Download profile information” option. Select it and proceed with the guide!
4. Select “Deselect all“
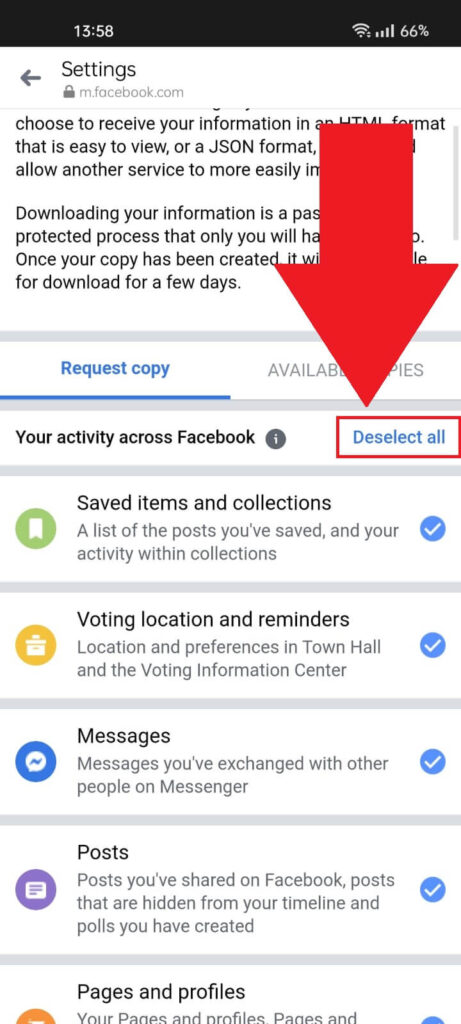
On this page, you’ll see a complete list of all your activities on Facebook, which you can download in an archive.
This information includes messages you’ve sent, votes, saved collections, profile information, pages, and so on.
If you only want your messages, I recommend tapping on “Deselect all” to avoid downloading irrelevant stuff.
5. Select your messages
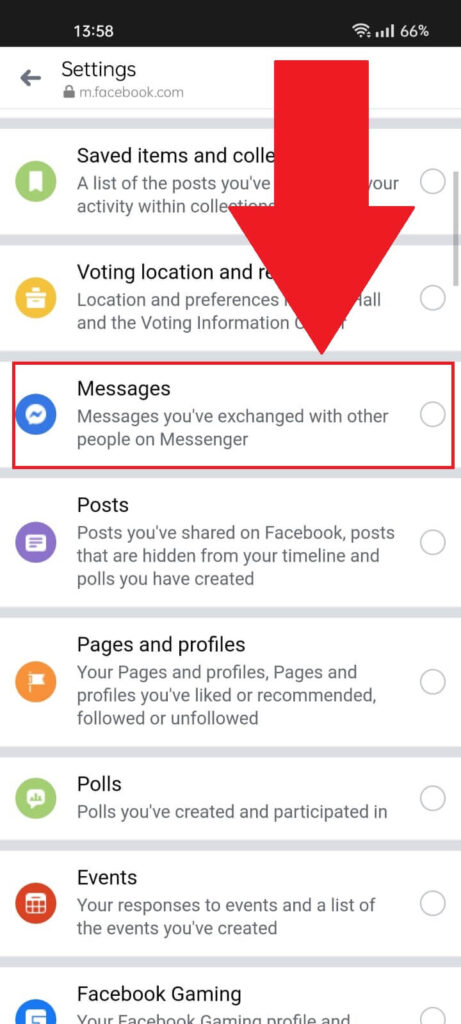
Once you deselect everything in the list, select the “Messages” option to ensure you only download your messages from Facebook Messenger.
After you check the “Messages” option, continue with the guide!
6. Select “Create File“
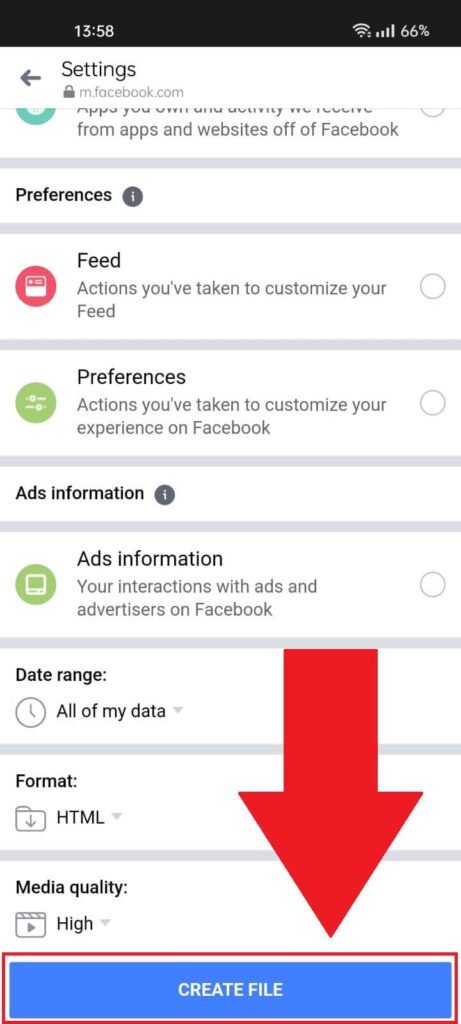
After you select “Messages“, you’re ready to download your data. Scroll down to the bottom of the page and tap on “Create File“.
Facebook has to first prepare your data to be downloaded, so you’ll have to wait a bit.
7. Download the data
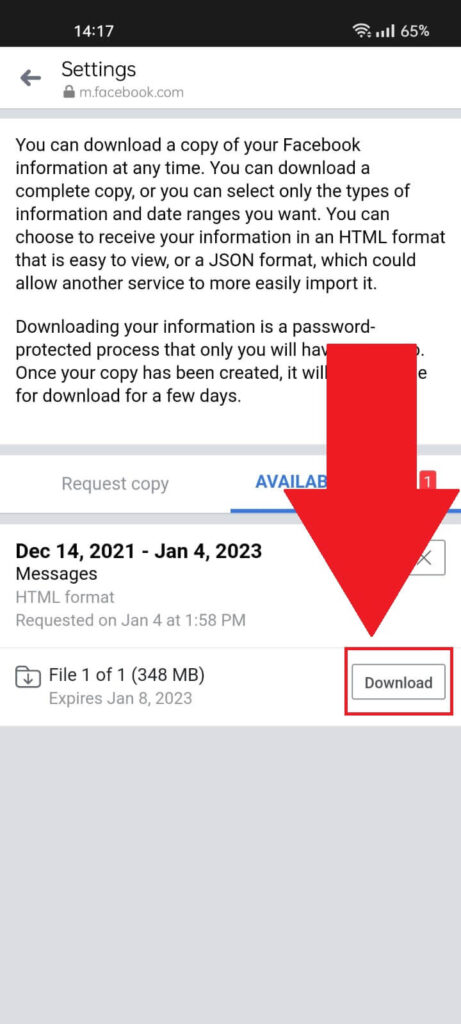
It shouldn’t take more than 10-15 minutes for Facebook to prepare the data for you. Refresh the page from time to time.
Once you can download the data, tap on “Download” and wait for it to finish downloading.
8. Open the archive
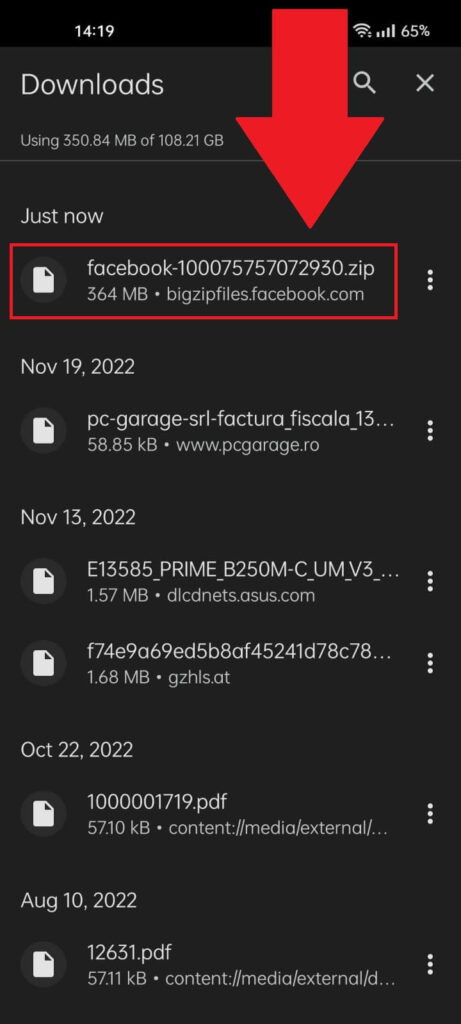
Once the archive finishes downloading, go to the “Downloads” folder and find the archive. Tap on it to open its settings.
9. Select “Extract files to…“
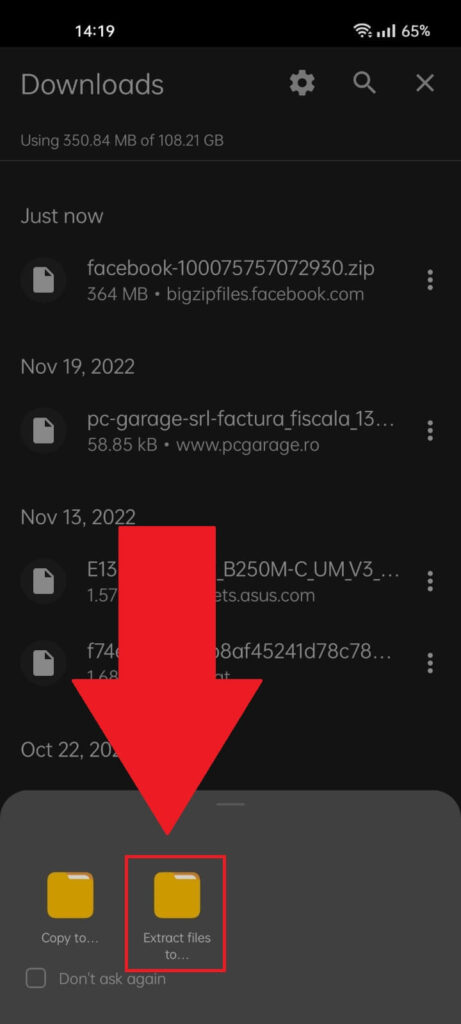
To open the archive, you’ll need to extract the files to a specific folder in your phone. Select “Extract files to…” and continue with the next steps!
10. Select a folder
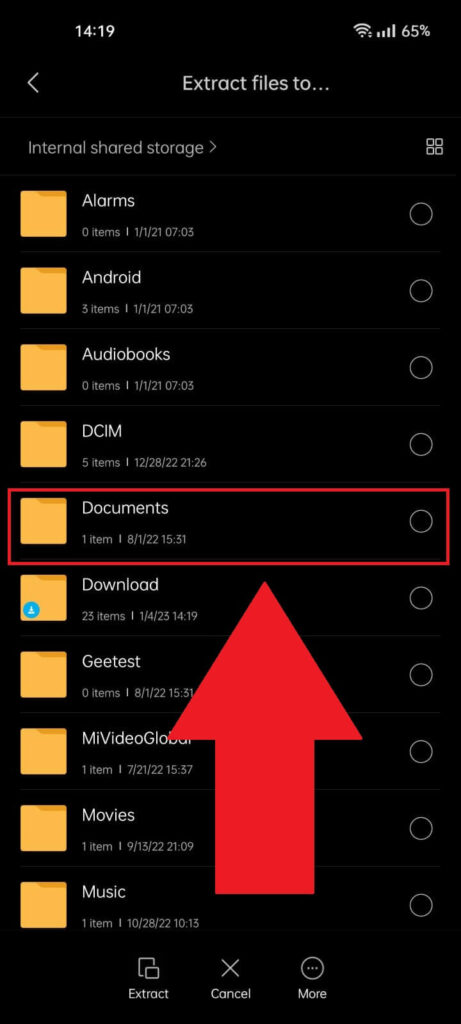
A new page will open up, showing you various folders in your internal storage to which you can extract the archive.
I recommend extracting it in the “Documents” folder or another similar folder you know how to find. Select the folder!
11. Select “Extract“
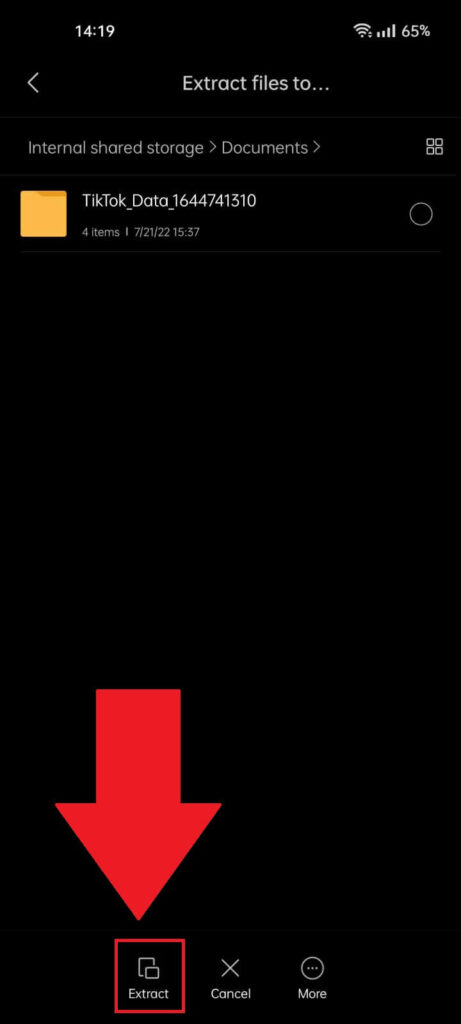
After choosing a folder, tap “Extract” at the bottom of the page to extract the archive, you’ll need to wait for a few seconds until the archive finishes extracting everything.
12. Open the folder
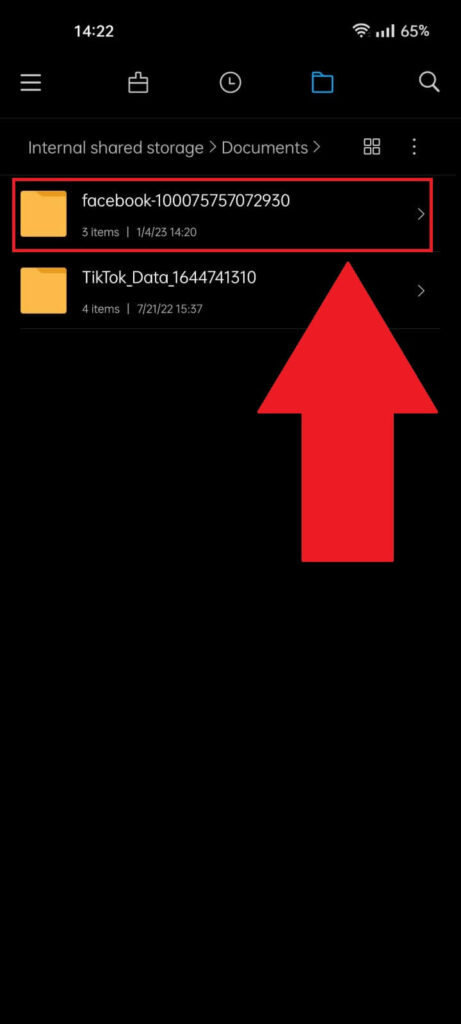
Once the archive finishes extracting, navigate to the folder where you extracted it, and find the “facebook” folder. Open it to find your messages.
13. Open the “messages” folder
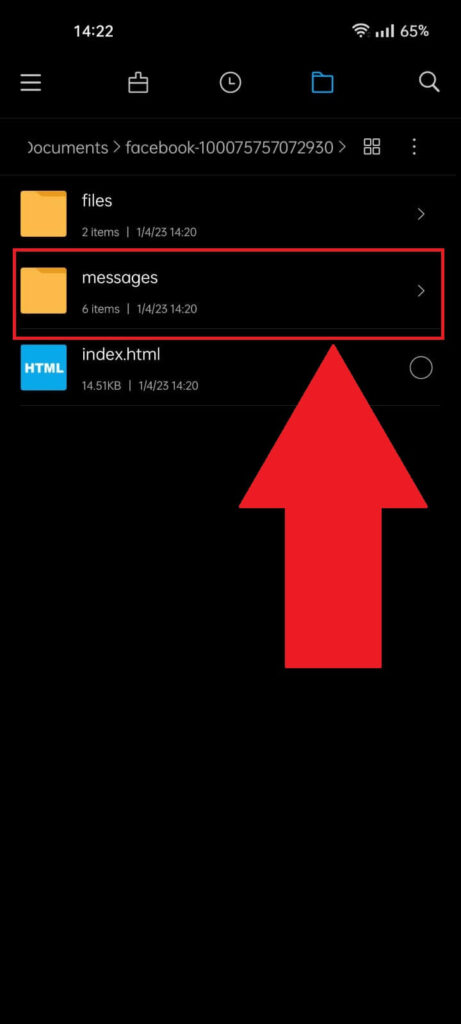
After opening the “facebook” folder, you should see the “messages” folder somewhere. Tap on it and follow the next steps!
14. Select “inbox“
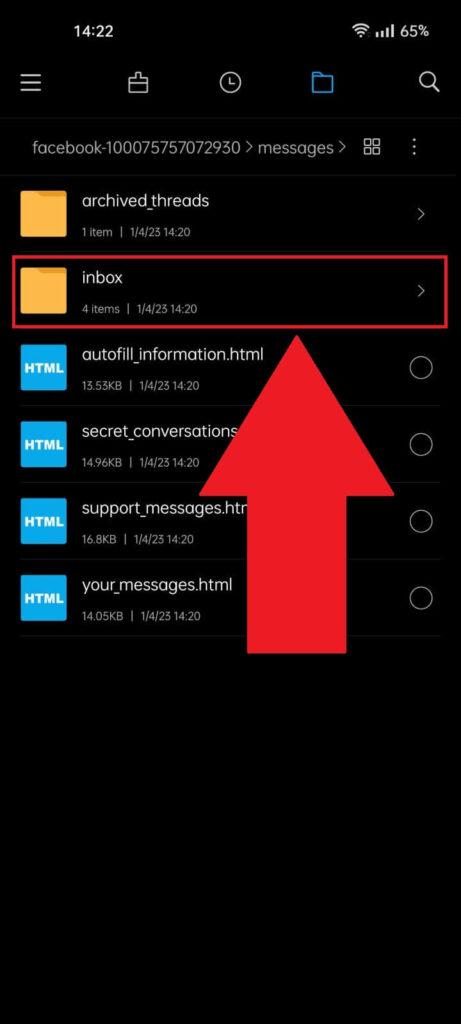
Once you open the “Messages” folder, find the “inbox” folder and open that. That’s where you’ll find your Messenger messages.
15. Select a friend’s folder
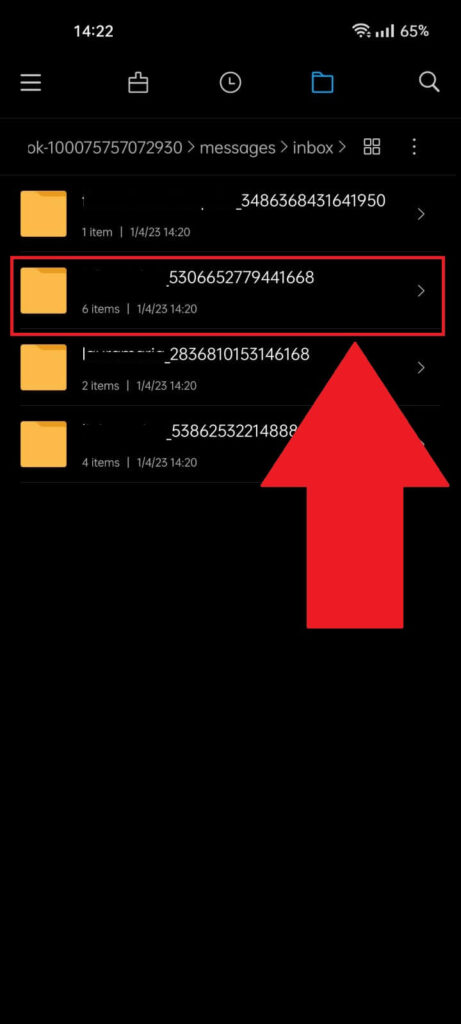
Once you open the “Inbox” folder, you should see multiple folders named after your friends. Open the folder corresponding to the person to whom you sent the message you want to find.
16. Open the HTML message files
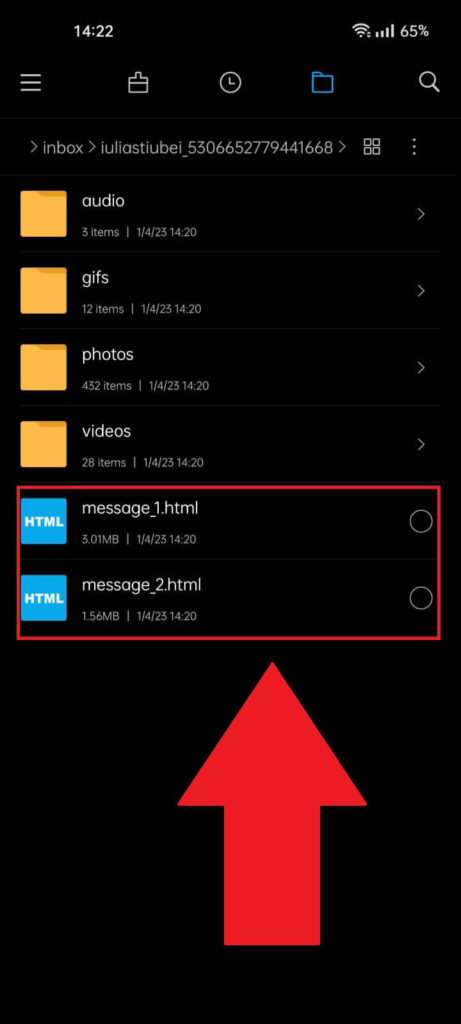
After opening your friend’s folder, you should see a couple of “message” files, starting with the number 1. They’re HTML files, so you’ll be taken to a webpage once you open one.
Depending on the length of your conversation with the other person, there may be 2-4-6 or upwards of 10 “message” files.
Open each of them individually and search for the message. You can use the CTRL+F function on each webpage to comb through the messages and search for keywords.
Leave a comment below if you have any questions or if you know other ways to search for messages on Messenger without scrolling!