Slow-motion is one of the coolest-looking effects you can achieve in CapCut, that much we can agree on. And even though pulling it off is tougher than it seems, it’s still doable with a bit of practice.
And that’s why I’m here, after all…
Follow my instructions to learn how to do it the right way:
- Select “New project“
- Select your video
- Tap on “Edit“
- Select “Speed“
- Select “Normal“
- Move the speed marker to the left
- Select the “Make it smoother” option
- Select “Better quality“
- Tap on the checkmark icon to finish
If all of the above seems confusing, no worries…
Below, I’ve attached a detailed guide with helpful screenshots to help you get this done faster.
Summary: In this article, I provide a step-by-step guide on how to achieve slow-motion effects in CapCut.

Step-by-Step Guide to Creating Slow-Motion Effects in CapCut:

1. Create a New Project:
   - Open CapCut and tap on "New project."
   - Select the video you want to edit and add it to your project.

2. Edit Your Video:
   - Tap on the video clip in the timeline to highlight it.
   - Tap on "Edit" from the toolbar.

3. Adjust the Speed:
   - Select the "Speed" option.
   - Choose "Normal" to adjust the overall speed of the video.

4. Set the Slow-Motion Speed:
   - Move the speed marker to the left to slow down the video. The further left you move it, the slower the video will become.

5. Enhance the Smoothness:
   - After adjusting the speed, select the "Make it smoother" option.
   - Choose "Better quality" to enhance the smoothness of the slow-motion effect.

6. Finish the Edit:
   - Tap on the checkmark icon to apply the changes.

Final Steps:

- Preview Your Edit: Watch the video to ensure the slow-motion effect is smooth and to your liking.
- Export the Video: Save and export your video in the desired resolution.

By following these steps, you can easily create high-quality slow-motion effects in CapCut, enhancing the impact and visual appeal of your videos.

1. Tap on “New Project“
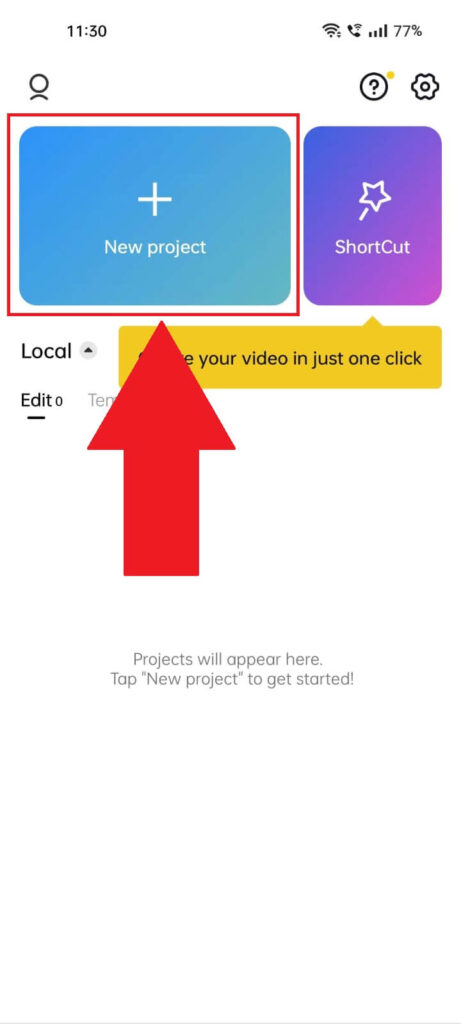
Begin by opening CapCut and selecting the “New project” button in the top-left corner. It’s big, it’s blue, and it’s very visible, so you should have no problems finding it.
Still, if it eludes you, try the screenshot above to find the little bugger!
2. Select a video and tap on “Add“
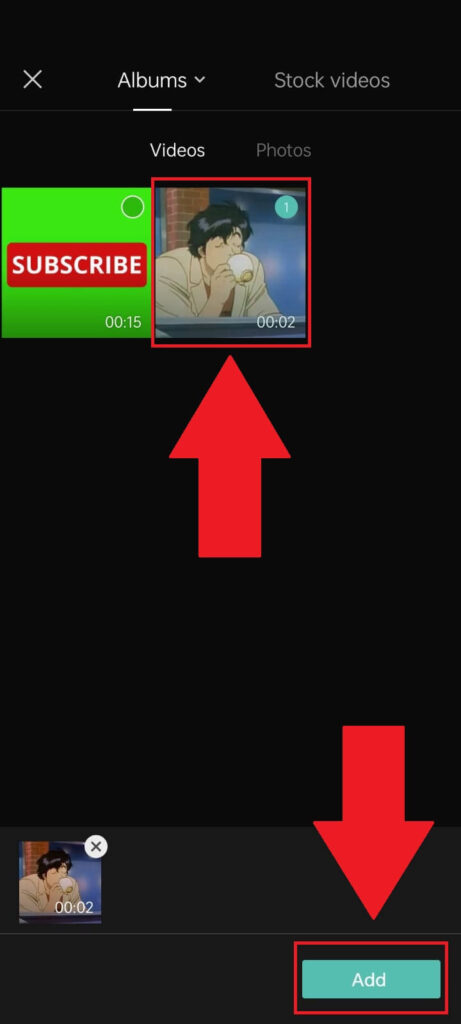
Selecting “New Project” will send you to the “Albums” page, where you should select a video to apply the slow-mo effect to.
Once the video is selected, tap the green “Add” button in the bottom-right corner and see the next steps below:
3. Select “Edit“
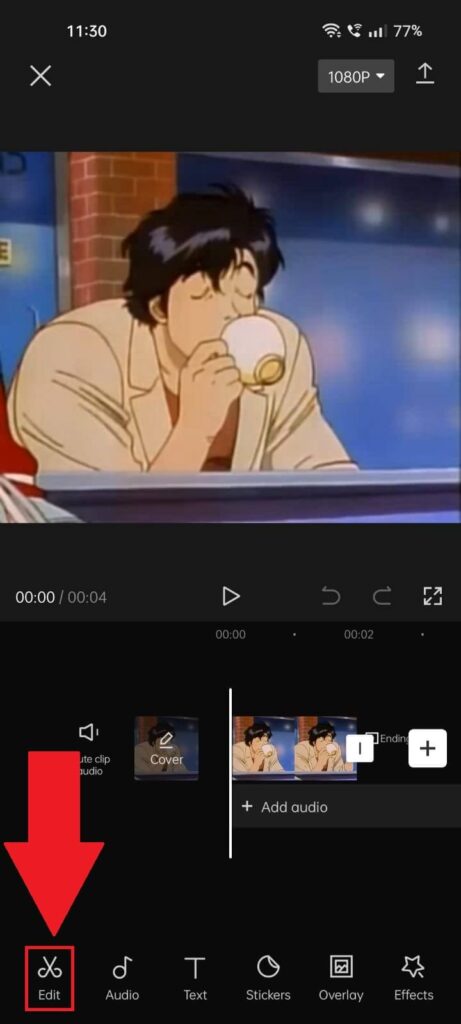
Once the video is selected, you’ll be redirected to the main editing screen. This is where you’ll be doing most of your creative work.
Putting that aside, locate the “Edit” button in the bottom-left corner – that’s where you’ll find the slow-mo effect!
4. Select “Speed“
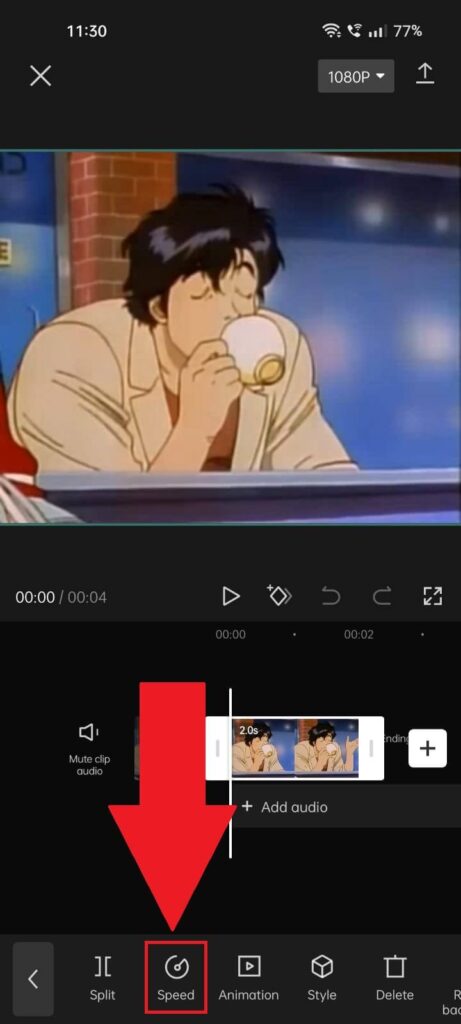
Tapping the “Edit” option will reveal several other settings on the bottom-side menu, including “Split“, “Speed“, “Style“, and so on.
The “Speed” option is what you want – that’s the slow-mo effect you’re looking for. Go select it and look below for further instructions:
5. Select “Normal“
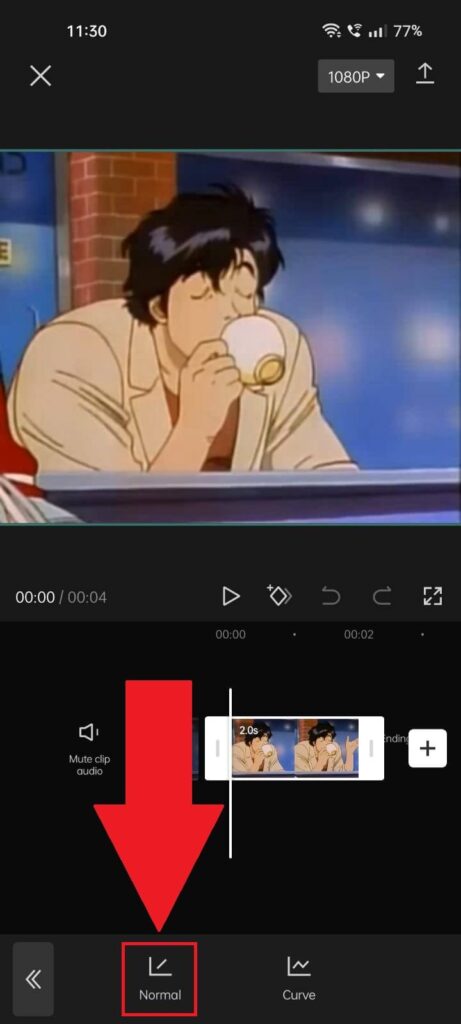
Once “Speed” is selected, you’ll see two more options appear – “Normal” and “Curve“. Without going into too many details, the Normal slow-mo effect is best used by beginners, while Curve is a kinda a bit more complicated.
Select “Normal” for now and jump to the next step:
6. Decrease the speed
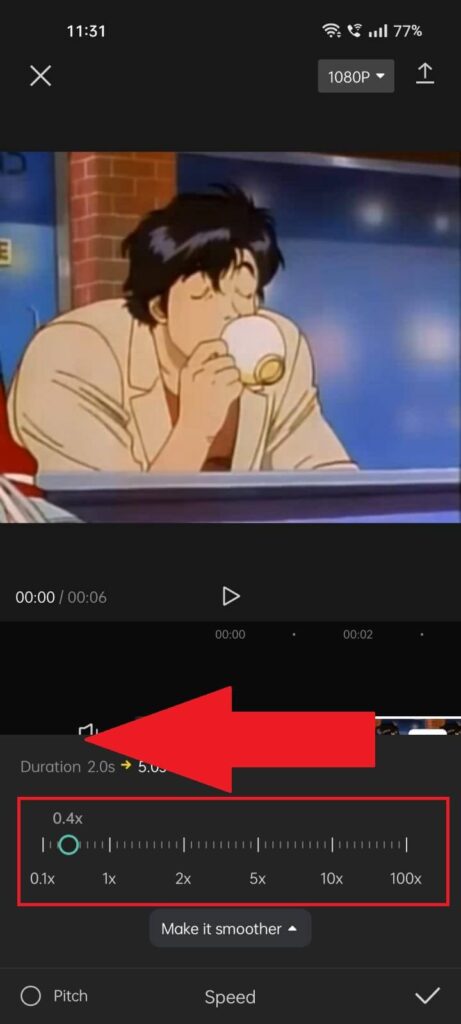
After selecting the “Normal” slow-mo effect, you’ll get to this page (see the screenshot above).
Here, you can adjust the slow-mo intensity, from 0.1x (10 times slower than the original version) to 100x (100 times faster).
Naturally, 1x is the original speed of the video.
You can play around with various numbers to see what speed setting you like the most, but I recommend somewhere around 0.4-0.5x to start things.
7. Tap on the “Make it smoother” option
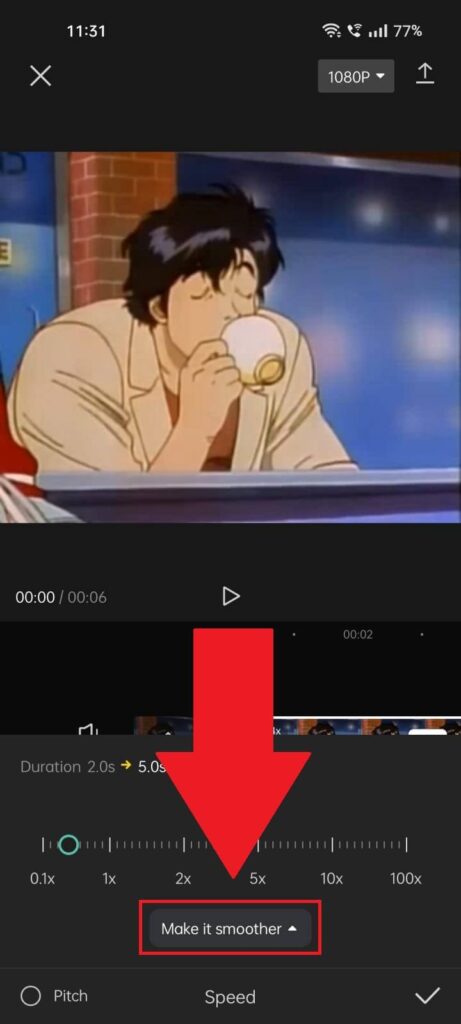
You might have noticed the “Make it smoother” option under the slow-motion bar. If you’ve been itching to see what it does, now’s the time for it.
Select it!
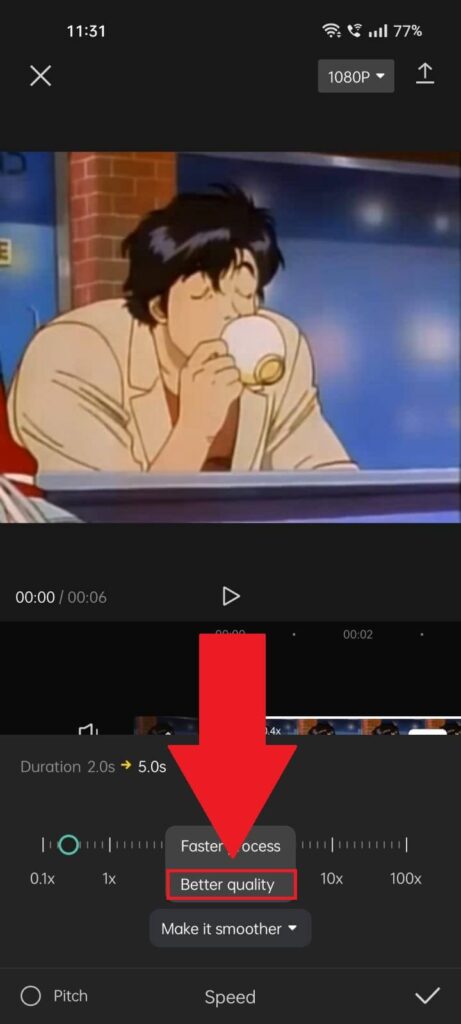
Once selected, it’ll reveal two options – “Faster process” and “Better quality“. Try choosing “Better quality” and see how it affects your video.
The smoothening effect should be quite noticeable as it basically removes frames and smoothens out rough visual elements.
The end result is a crisp and smooth slow-mo effect like in the movies (or close to that).
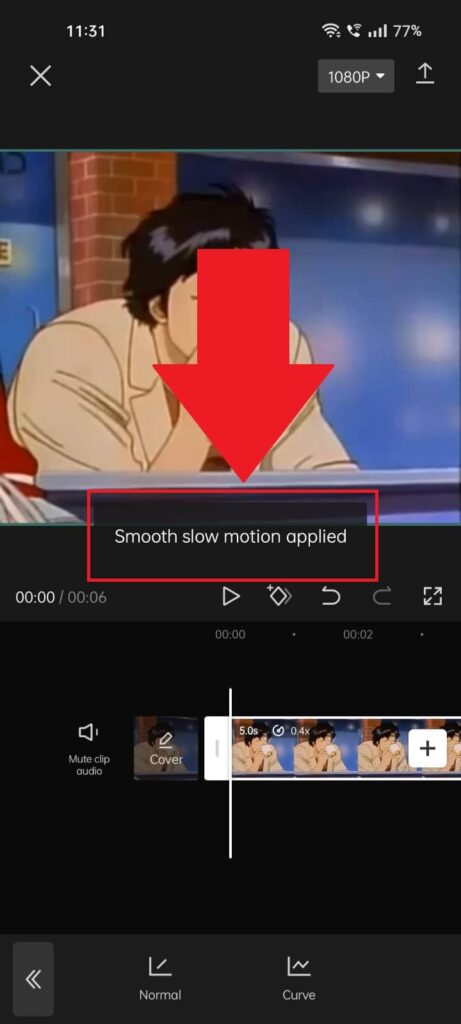
8. Tap on the checkmark icon
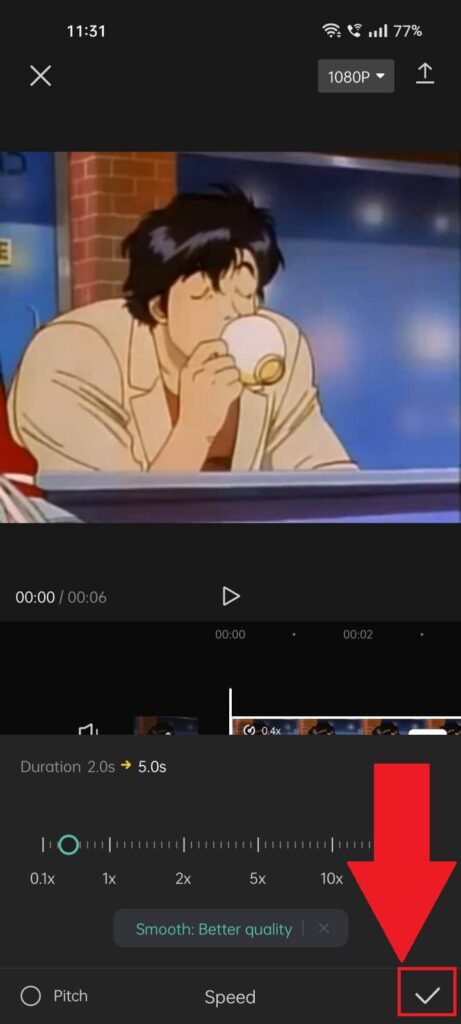
When you’re done playing around with the slow-mo effects, and you got what you wanted, tap the checkmark icon in the bottom-right corner to save your settings.
You wouldn’t want to lose all your chnages made just like that, I assume… Once the saving process is completed, you’ll receive a notification confirming this on the screen.
It looks like this:
Now that all this is done, you can export your video and post it on TikTok or any other Chinese (or USA-made) spyware social media app you like. See? That wasn’t so hard after all.
If there’s something amiss with the instructions above or you ran into a problem, feel free to contact me below, and I’ll troubleshoot your problem!