Does it annoy you too that Snapchat gives your filter away when you send snaps to your friends?
Yeah, me too, and many others are complaining about this. But there’s a good reason why Snapchat is doing this (yeah, really).
Other people may want to use your filter because they like it. Snapchat makes it visible so they can use it for themselves.
But what if you want to be selfish and not let people use your filter? Well, then I have just the solution for you:
- Take a picture on Snapchat
- Apply the filter to it
- Save the picture to your Camera Roll
- Make sure the photo you saved has the filter applied
- Discard the photo you took on Snapchat and delete it
- Use the filtered photo in your Camera Roll to send to your friends
This solution is actually very simple – by using the photo saved in the Camera Roll, your friends won’t be able to see what filter you’ve used.
Check out the guide below where I use screenshots and step-by-step instructions to show you how all this is done!
Summary: In this article, I share a simple trick that allows you to send Snapchat photos with filters applied without revealing which filter you used.

The process involves taking a picture on Snapchat, applying the filter, saving the filtered photo to your camera roll, and then sending the photo from your camera roll to your friends.

This method keeps the filter information hidden and adds a touch of mystery to your snaps.
1. Take a photo
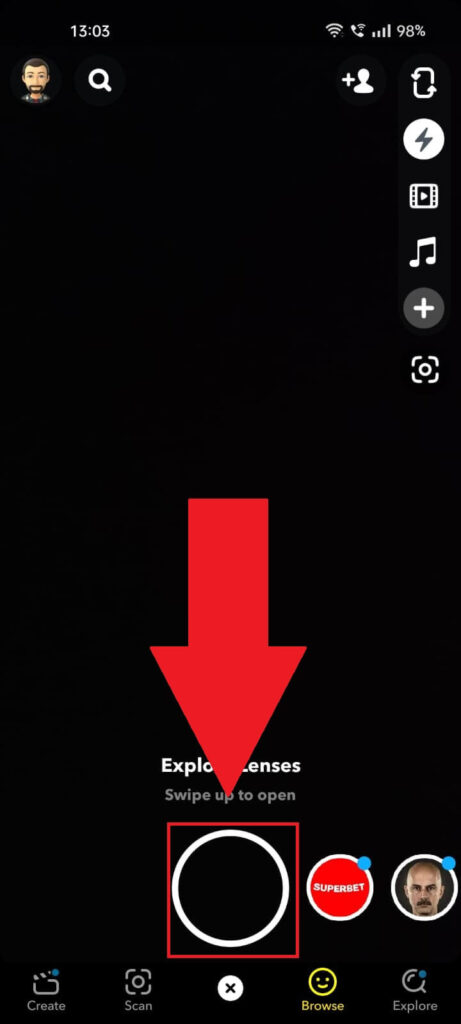
So, the first thing you should do is take a photo on Snapchat. Just tap the big circle when you’re ready to photograph something.
2. Tap the “Filters” icon
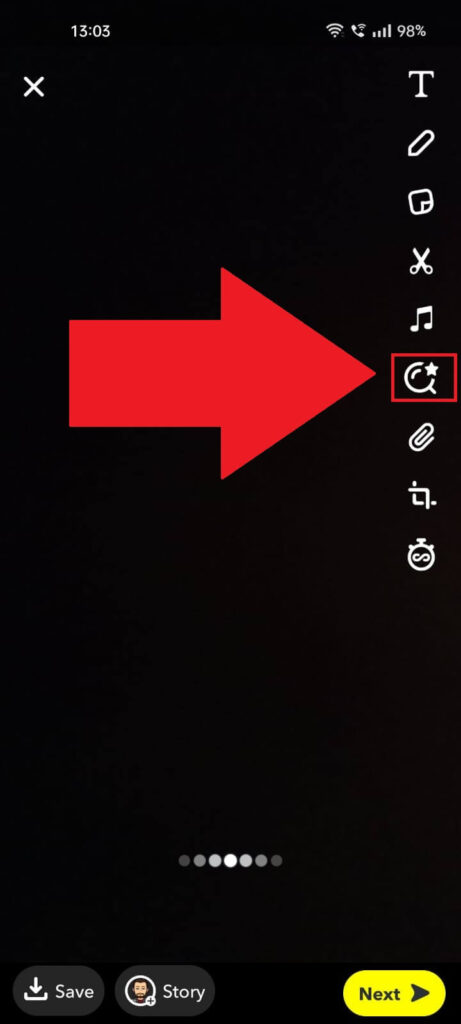
Once the photo is taken (hope it looks good), look on the right-hand menu bar for the “Filters” option (looks like a magnifying glass with a star).
Select it and just read my next instructions:
3. Select a filter
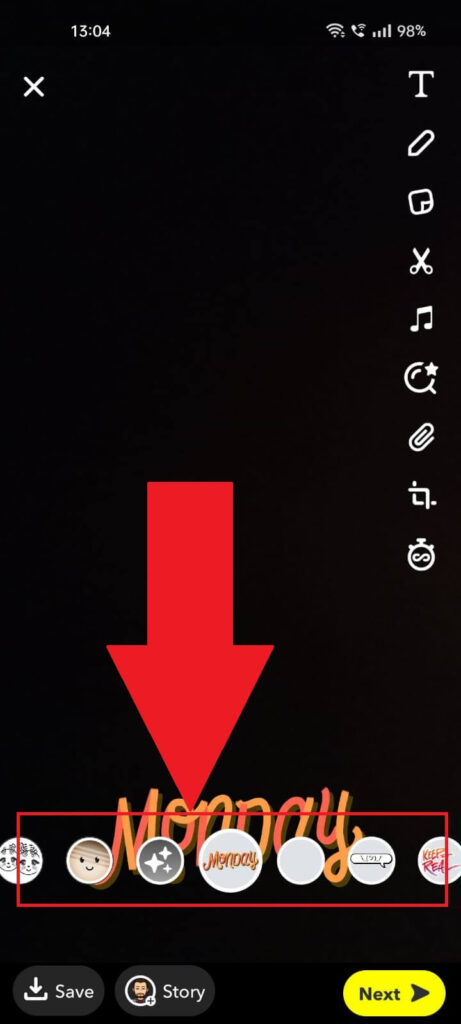
Next-up, a bar should have appeared at the bottom of the screen. That’s the Filter bar. It contains filters. Your job is to select and apply one.
Then, keep reading to continue with this wonderful guide 😀
4. Select “Save“
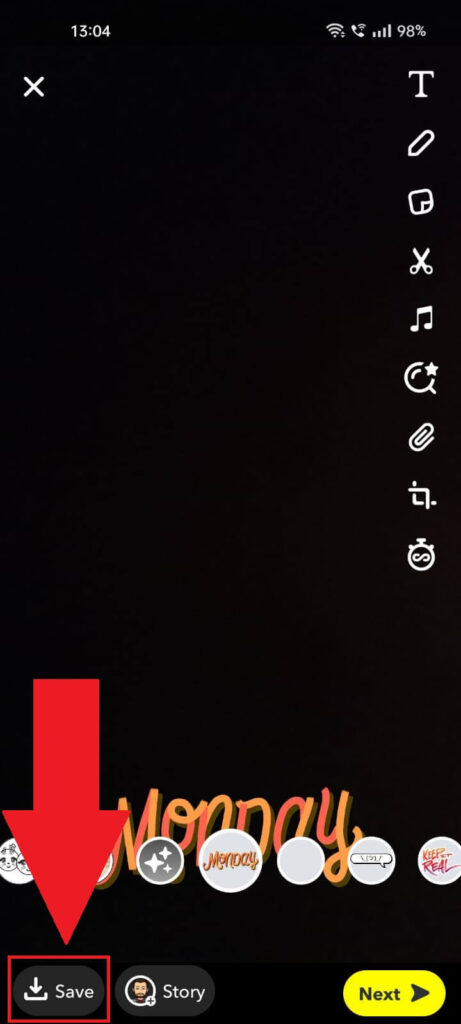
After applying the filter, DON’T select “Next“. You don’t want to send this picture to your friends – they’ll see the filter.
Instead, tap on “Save” in the bottom-left corner. That’ll let you download the photo to your gallery.
5. Discard the Snapchat photo
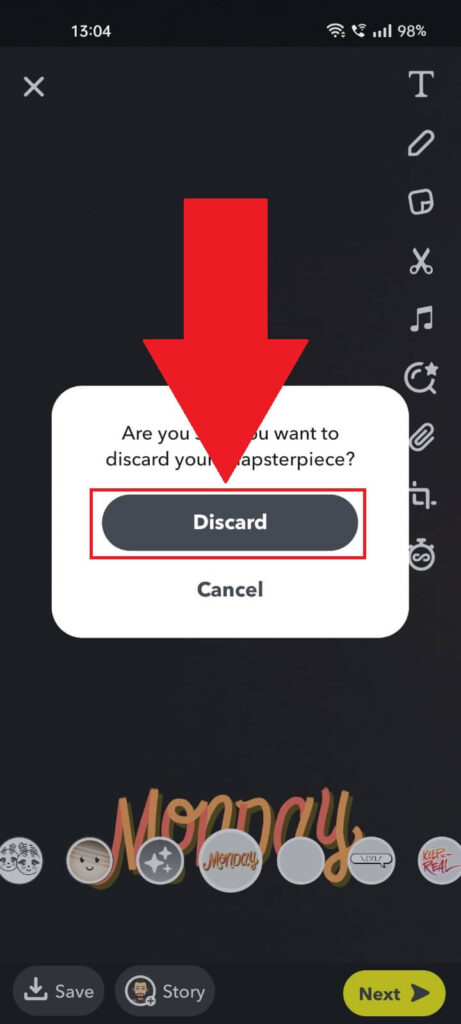
After saving the filtered photo to your phone, just go back to the previous screens and discard the snap in the meantime.
You’ll no longer need it. Select “Discard” and you’re done.
Next…
6. Go to your gallery
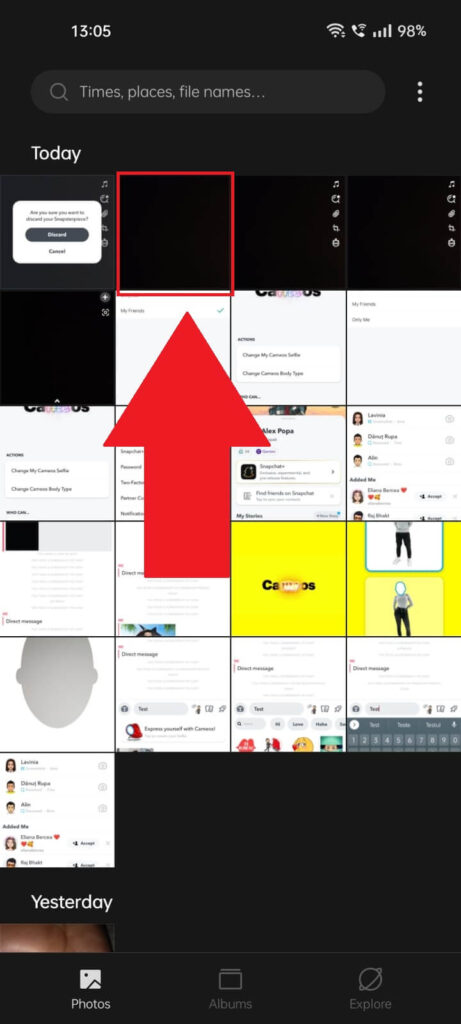
Now, open your phot gallery (camera roll) and find the photo you just saved. It should be at the top of the page where the most recent photos are located.
Once you find the photo, tap on it to open it and see it closer.
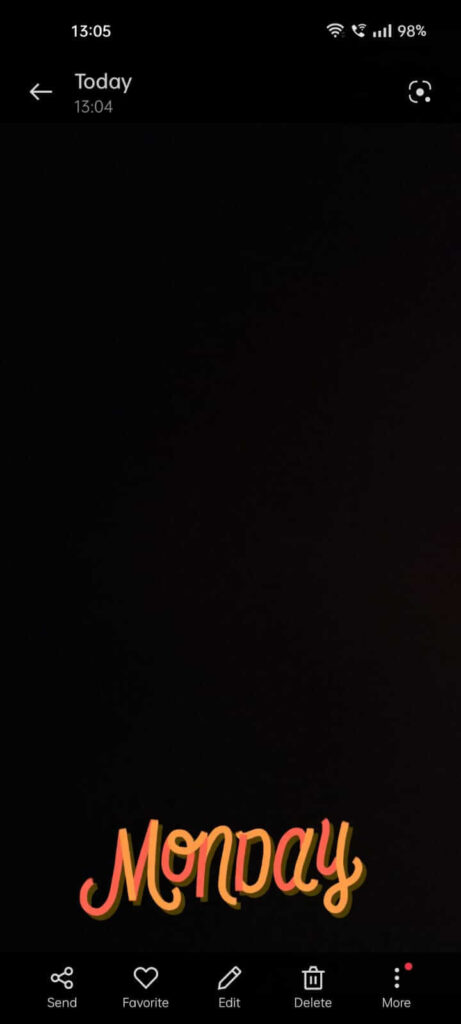
Once you zoom in on the image, you should know pretty fast if the filter is visible or not. Will people figure out what filter/lens you’re using? Probably not.
Now…
7. Open a chat with your friend
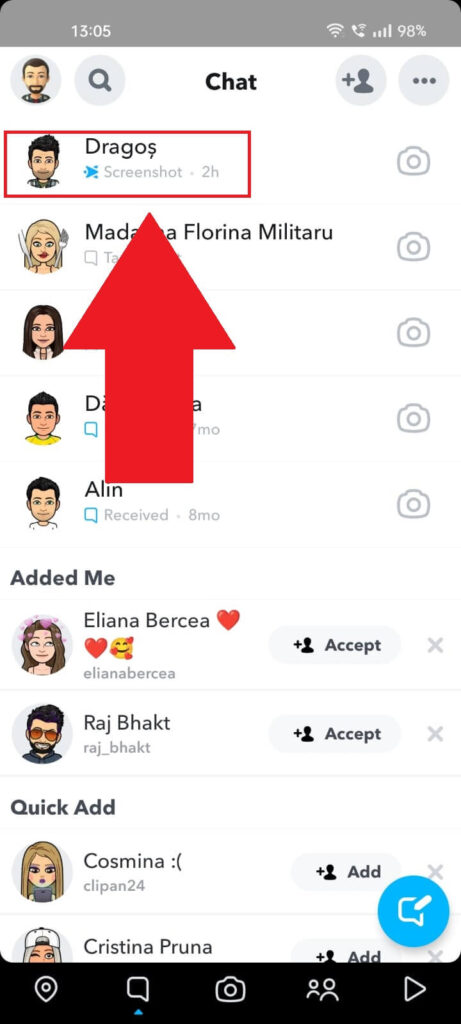
After you check the image for filter visibility, you’re ready to send it. Go to Snapchat, open the Chat window, and open a conversation with a friend to whom you want to send the photo.’
Spoiler – you’ll be sending the photo to that person 😀
8. Tap the “Image” icon
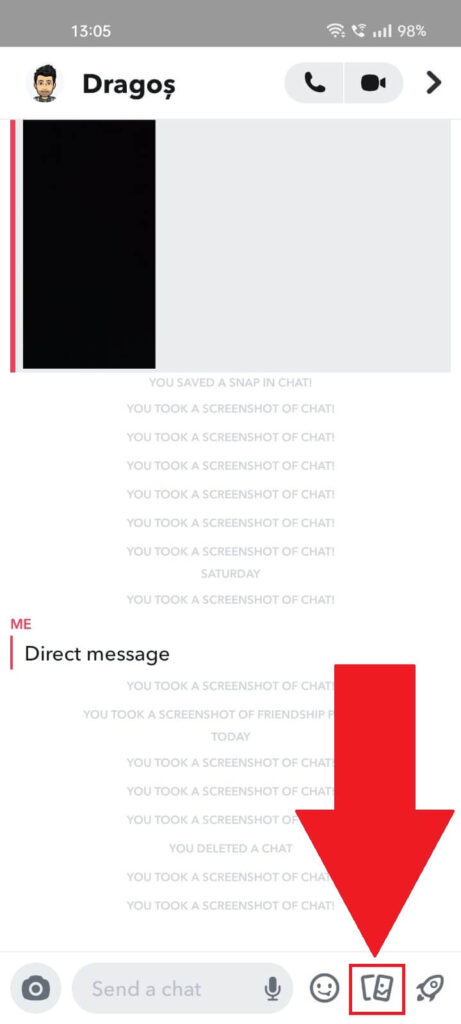
Once you open your friend’s chat, look for the “Image” icon in the lower right corner. Tap on it and see what I’ll be doing next:
9. Find the photo in your camera roll
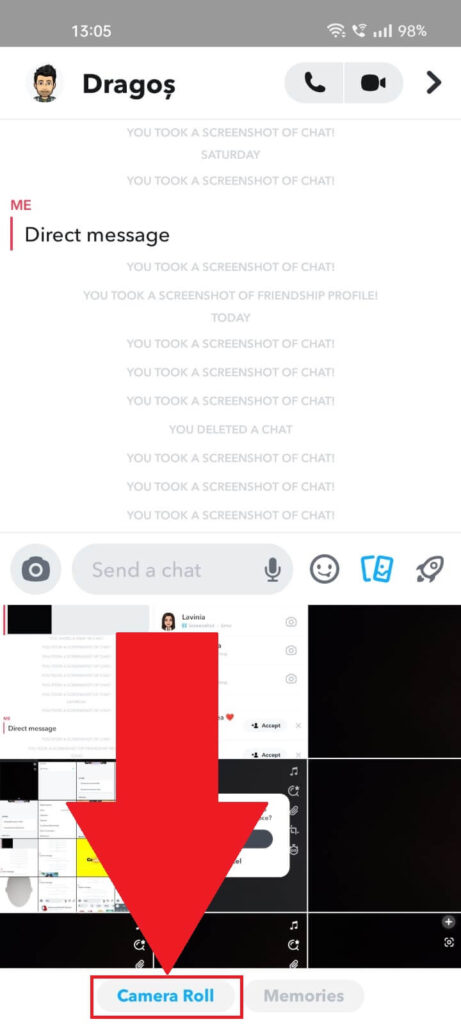
On this page, make sure you select the “Camera Roll” and find the photo you saved previously. Then, send it to your friend or post it on your story.
No one will know what filter you’re using, so problem solved!
Does it annoy you too that Snapchat gives your filter away when you send snaps to your friends?
Yeah, me too, and many others are complaining about this. But there’s a good reason why Snapchat is doing this (yeah, really).


