Metaverse is the last room of the Omega Corporation Escape Simulator, and it has left many players stumped (yours truly included).
However, I’ve figured it out since and I’m here to give you a full walkthrough, including a speed run and the location of all the 8 tokens.
So, keep reading for a step-by-step walkthrough of the Metaverse escape sim!
Summary: Are you trying to solve the Metaverse room in the Omega Corporation Escape Simulator? This article provides a step-by-step guide to help you out.

From opening the laptop and entering 3700 to solving the Binary Tree and completing the Tiles puzzle, we've got you covered.

Additionally, you'll find a speed run for quick solutions and a guide on locating all 8 tokens. Happy escaping!
Related guide: Escape Simulator the Office Walkthrough
Related guide: Escape Simulator Santa’s Workshop Walkthrough
Related guide: Dying Light 2 Stay Human System Requirements

Speed Run for Fast Solutions
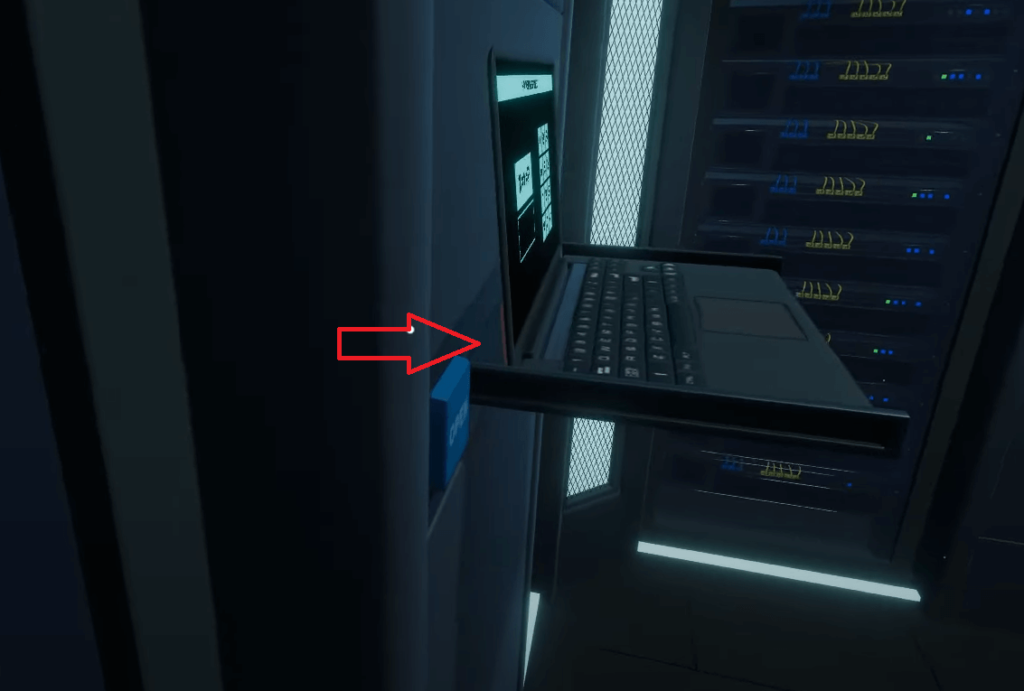
- Open the laptop and type in 3700, then grab the USB key
- Insert the FB8D disk on the top slot and the C353 disk on the bottom slot in the Disk Storage Unit
- Solve the Binary Tree as in the image below
- Under the Disk Storage Unit, type in ACFEDB and get the USB key
- Get the battery from the toolbox and put it inside the VR Headset
- Complete the Tiles puzzle by moving all the red tiles so the green tile can reach the end
- Align all the mirrors as in the picture below
- Find 4 X-es in a line (horizontal, vertical, diagonal) and beat the bot
That’s it!
Full Walkthrough
- XxY=?
This is the first puzzle of the Metaverse room.
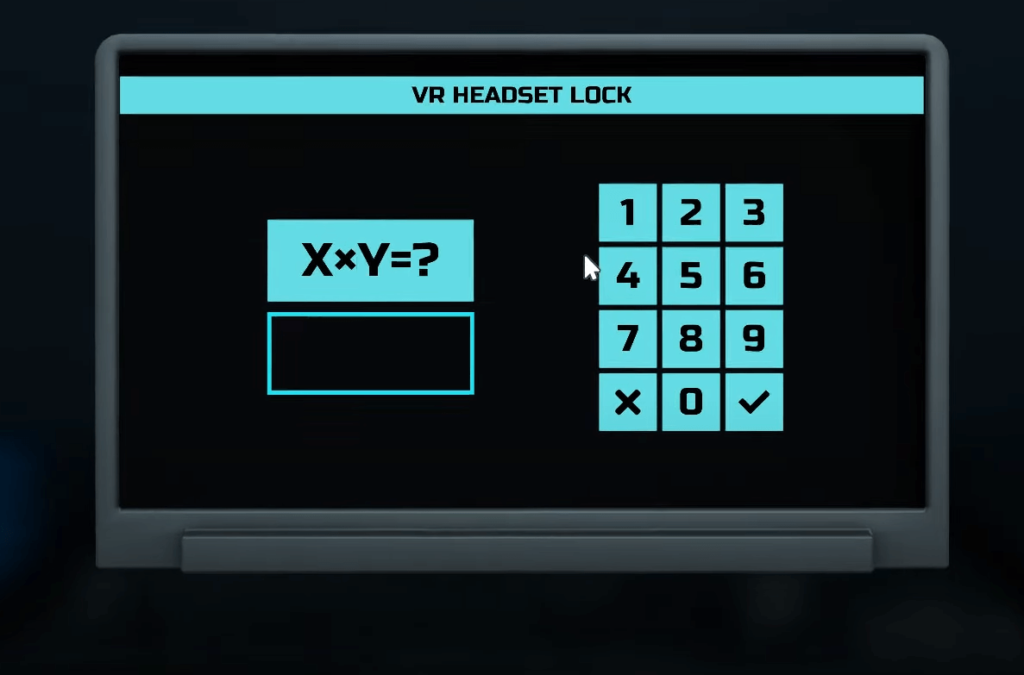
You need to solve a mathematical problem.
You’ll need the toolbox lying on the floor to find the solution. Please open it and take out the battery, electrical tape, and panel remover tool.
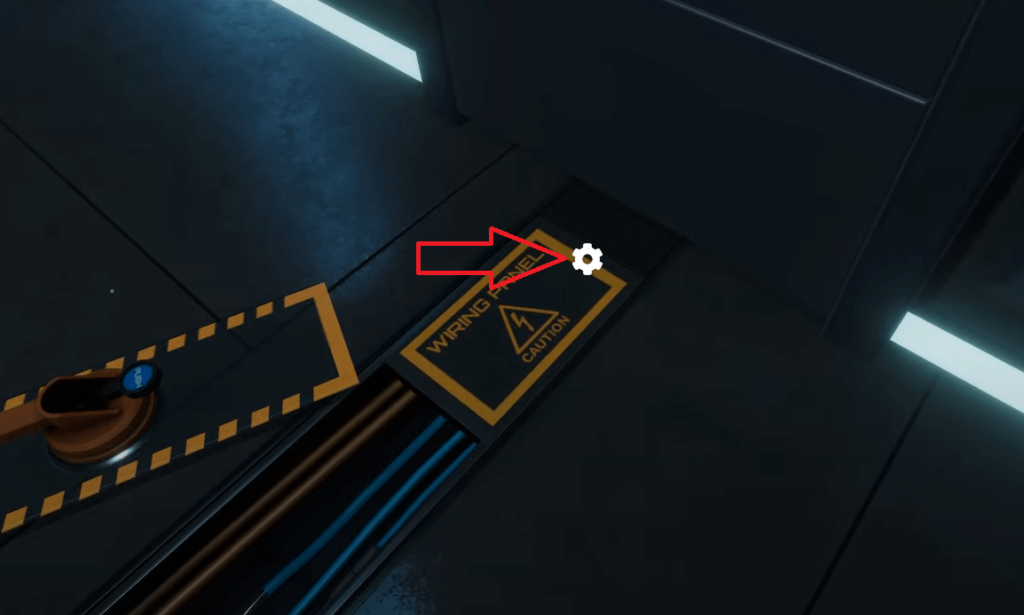
If you look on the floor, you’ll see a panel there.
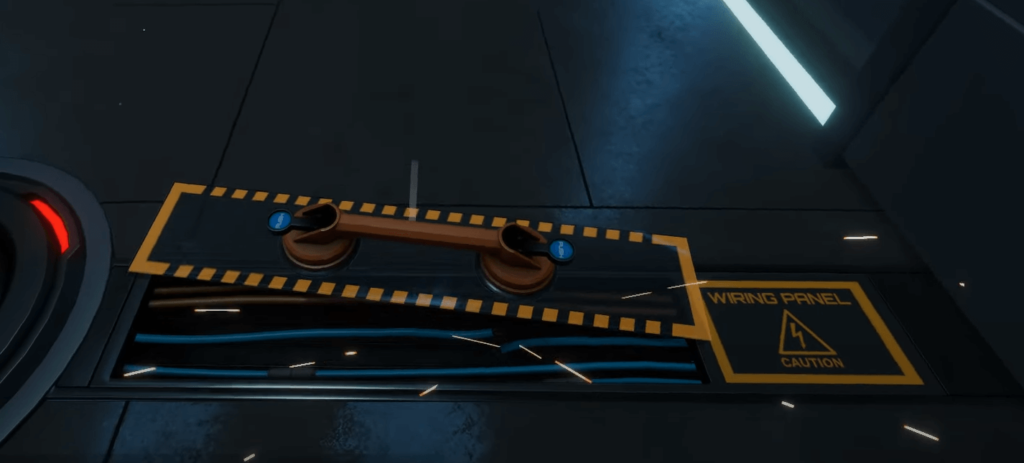
Use the panel remover tool to remove this panel. The tool has two blue levers at its ends. Use those levers to activate the remover tool and take away the panel.
After you do this, you’ll see a broken wire. Use the electrical tape in your inventory to fix the wire.
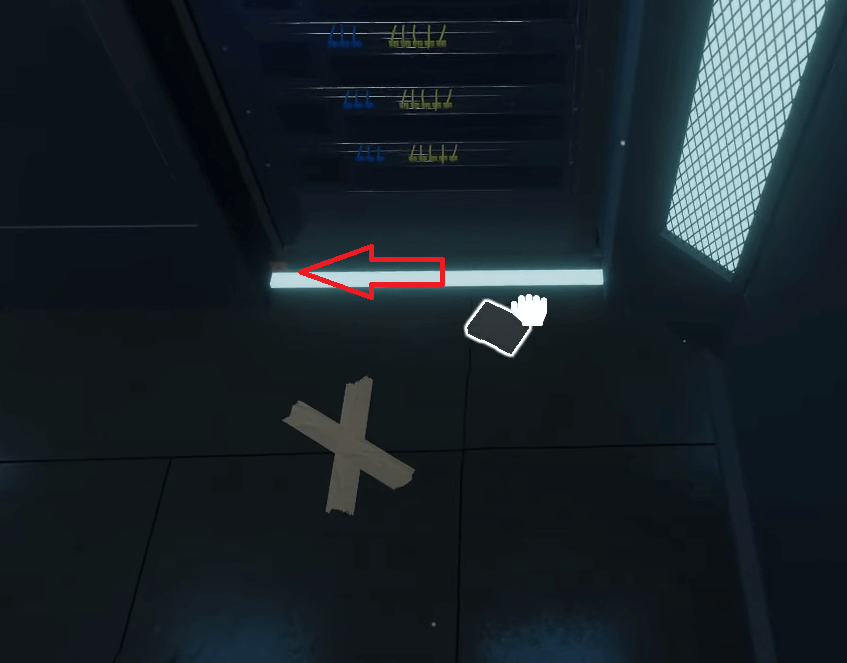
Once you do that, move to the corner of the room where there’s an “X” on the floor.
Then, look toward the center of the room at the hologram.
You’ll see that it forms a number. In this case, it’s the number 50 (image below)
Look for the “Y” marker on the floor and go there. Look toward the hologram, and you’ll see a different number – 74 (image below).

Now multiply X with Y. 50 times 74 is 3700. That’s your solution to the “XxY=?” problem.
Go to the interface with the problem and input this number (mage below).
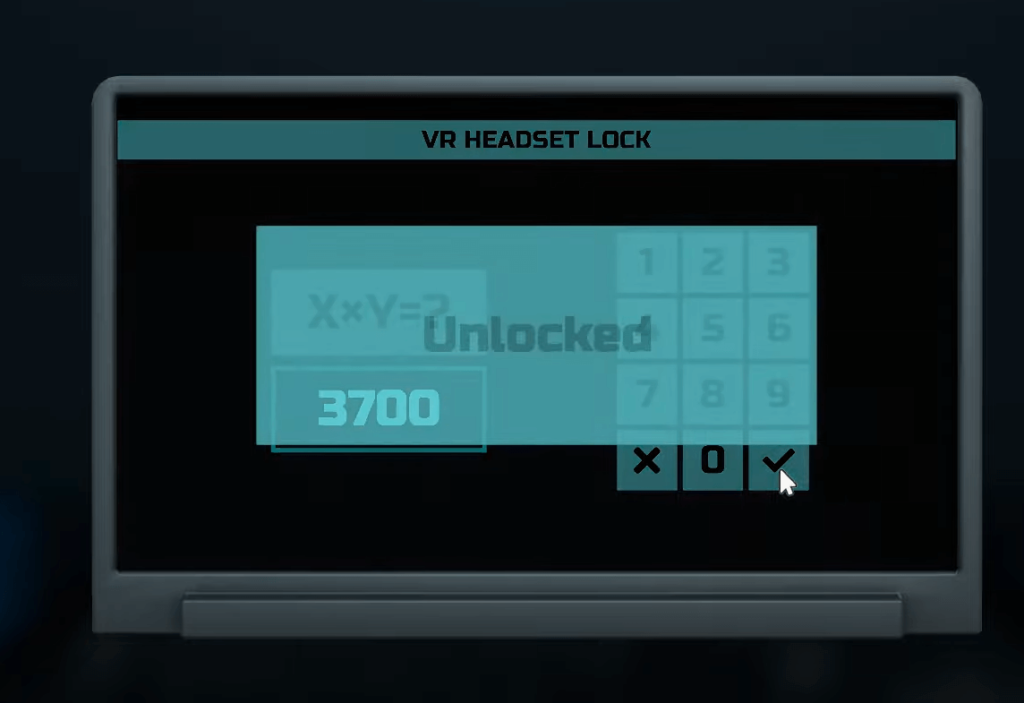
After you enter the correct solution, a slab in the wall will open up and reveal a hidden USB.
The slab is just above the laptop where you entered the correct number, a bit to the right.
That’s it for the first puzzle!
- Disk Storage Unit
This puzzle is a bit harder than the last one.
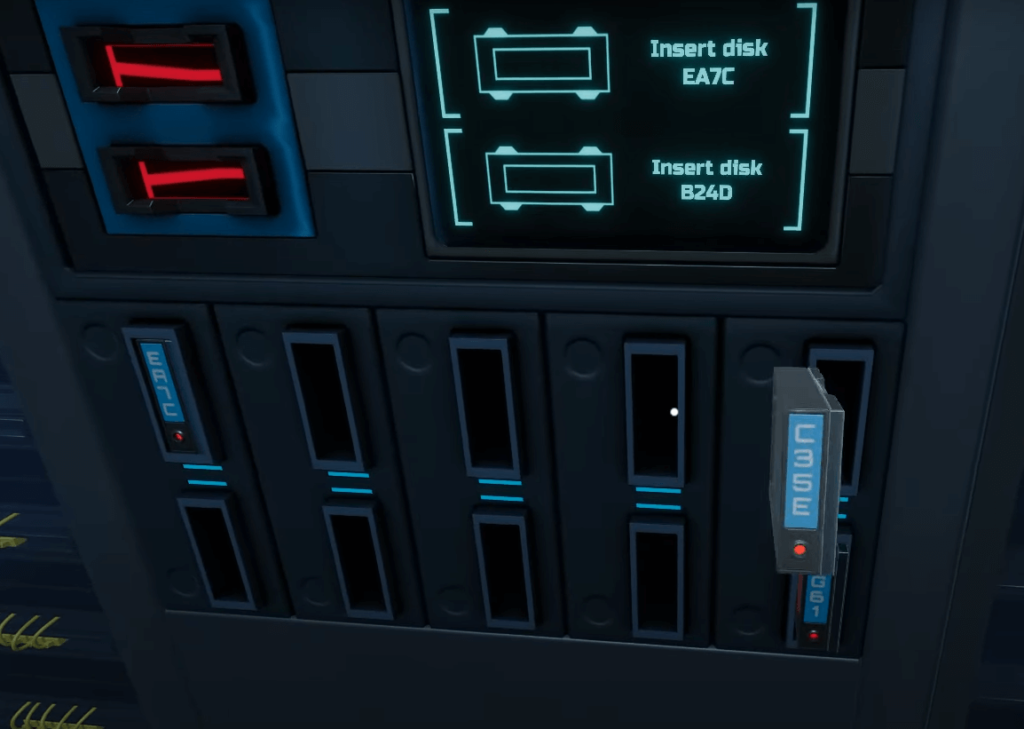
In the disk storage unit, you’ll need to enter disks EA7C and B24D.
First, collect all the disks in the slots and on the ground (spread throughout the room), and place them in your inventory.
Then, take the construction helmet and the clipboard hanging on the wall.
Look carefully throughout the room for any papers or disks. After you collect them all, you’ll need to insert the backup disks for disks EA7C and B24D.
EA7C is corrupted, and B24D is locked behind indestructible glass.
Consult the clipboard you just picked up for clues.
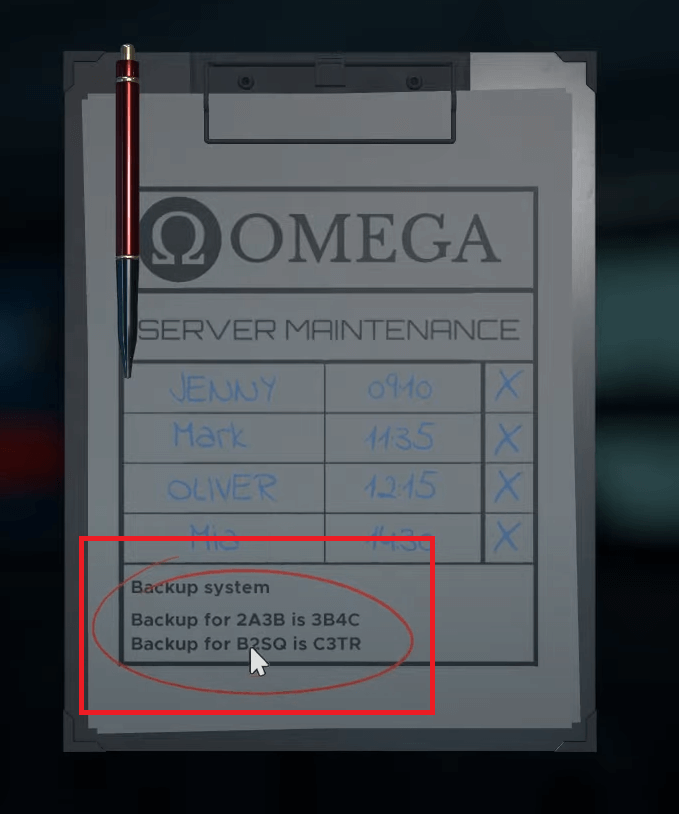
It says that the backup for 2A3B is 3B4C, and the backup for B2SQ is C3TR (see image above).
It might seem completely irrelevant to your problem but pay close attention.
Take 2A3B with its backup 3B4C. The letters and digits are moved from 2A3B to 3B4C.
The 2 is now 3, the A is now B, the 3 is now 4, and the B is now C. From 2A3B, you get the backup 3B4C.
Using the same logic, the backup for EA7C is FB8D, and the backup for B24D is C35E.
Look for these disks in your inventory because you must have picked them up from the room.
Insert both disks (FB8D and C35E) into their appropriate slots (image below).
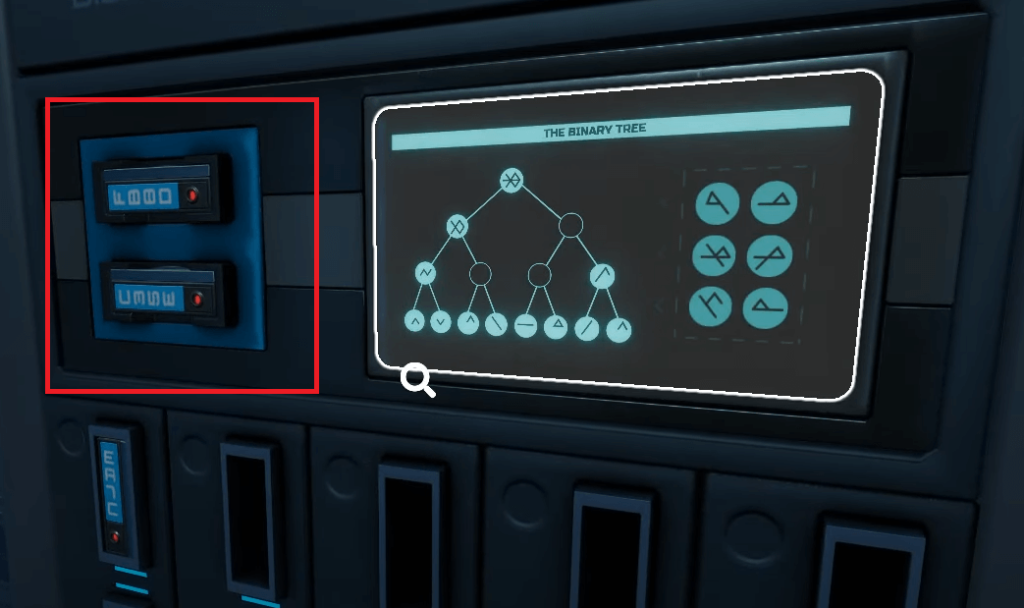
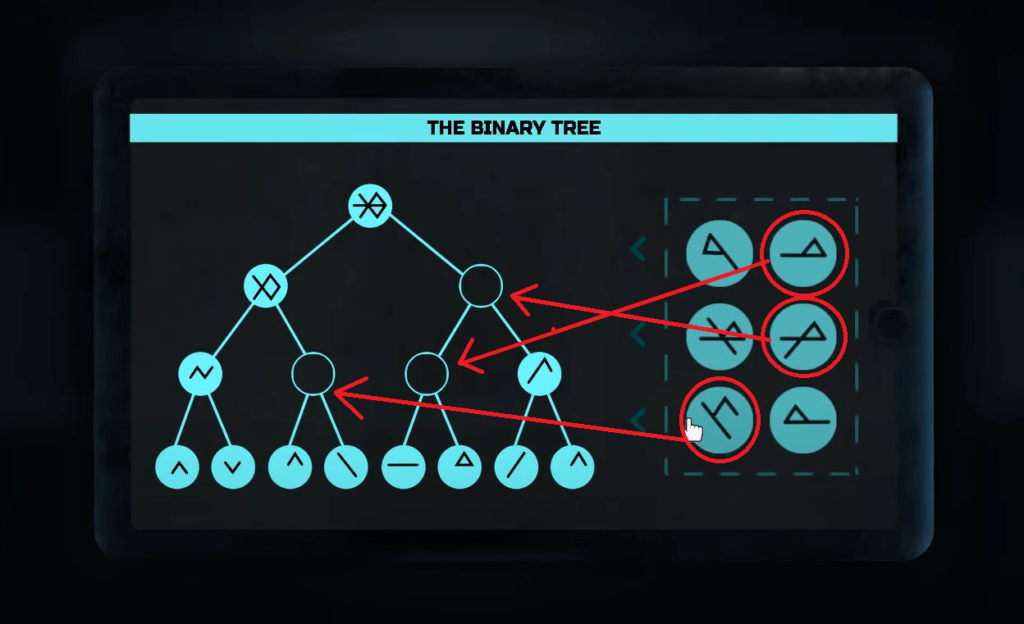
After introducing both disks correctly, you’ll notice that the main interface changes to a Binary Tree.
This requires a solution too. The parent patterns for each missing slot are in the picture below.
This is the solution to the Binary Tree, and this completes the second puzzle.
Don’t forget to collect the second USB key after completing this puzzle.
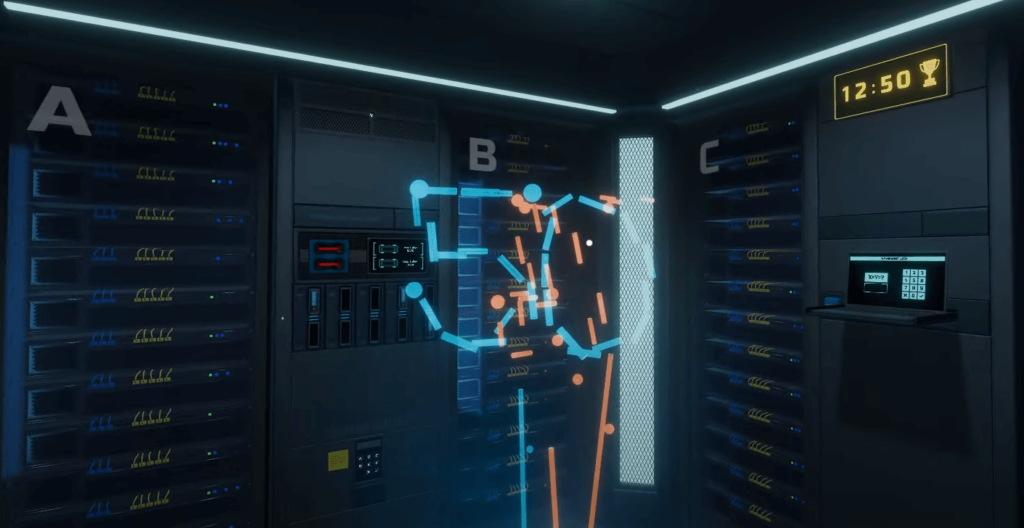
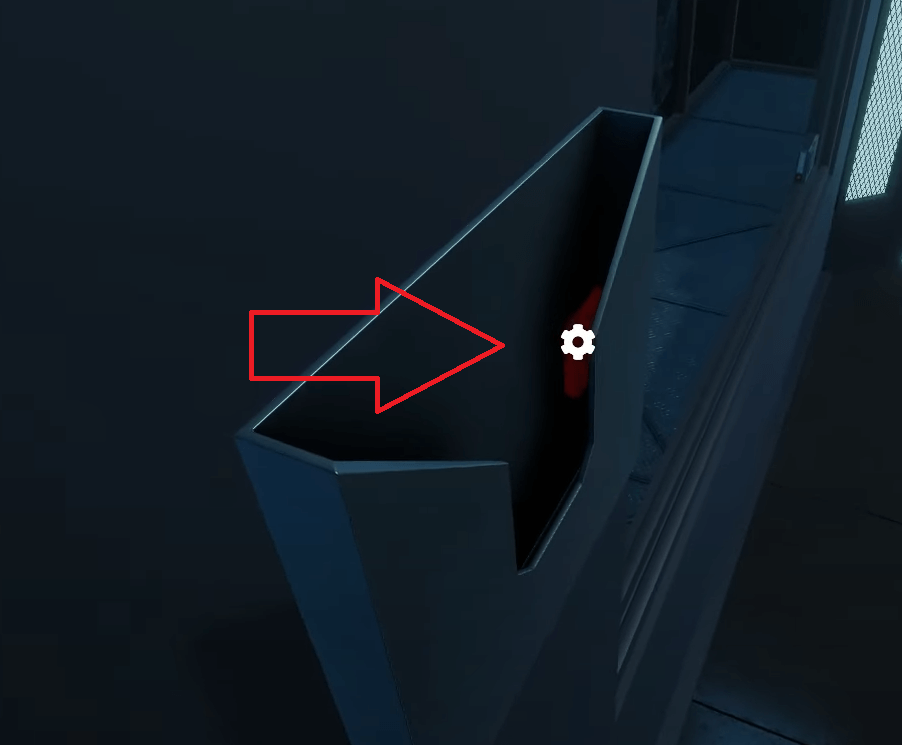
- Virus stuck in a loop
This next puzzle is right below the Data Storage Unit in the second puzzle (picture above).
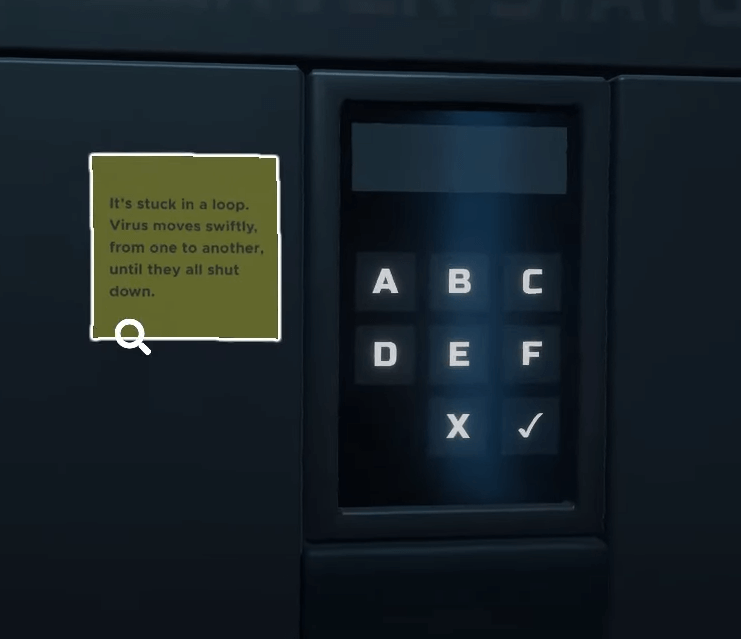
The note next to the keypad says that the virus is stuck in a loop and that all the terminals are shut down one after the other.
The solution to this puzzle is to pay close attention to the order in which the terminals shut down.
One after the other, the lights on each terminal will turn red. That means the terminal has been shut down.
Every terminal is marked with a letter.
All you need to do is remember that letter corresponding to every terminal that has shut down in its exact order.
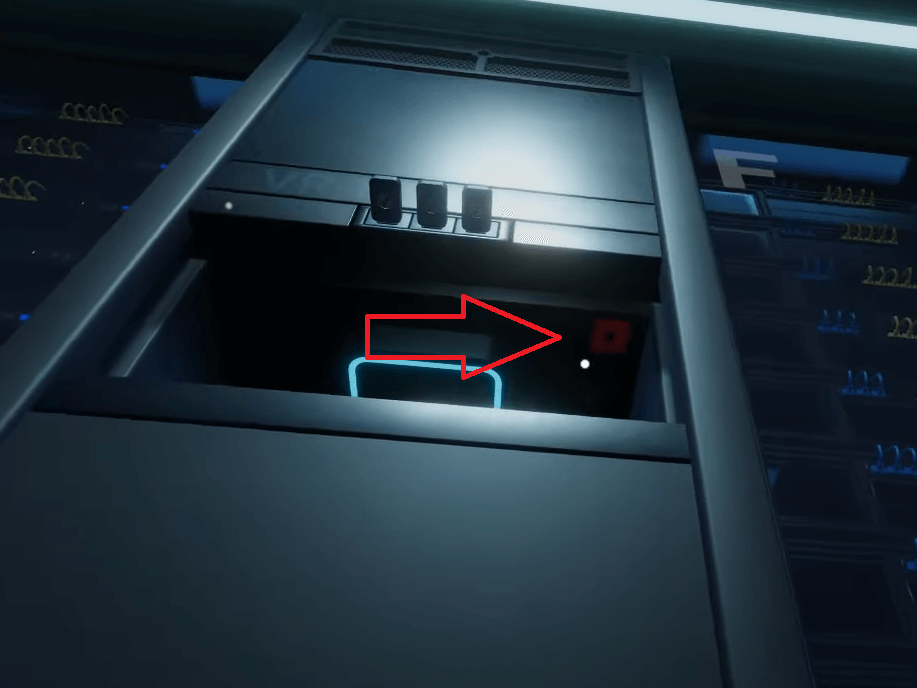
In the picture below, you’ll see an example of a terminal that has been shut down.
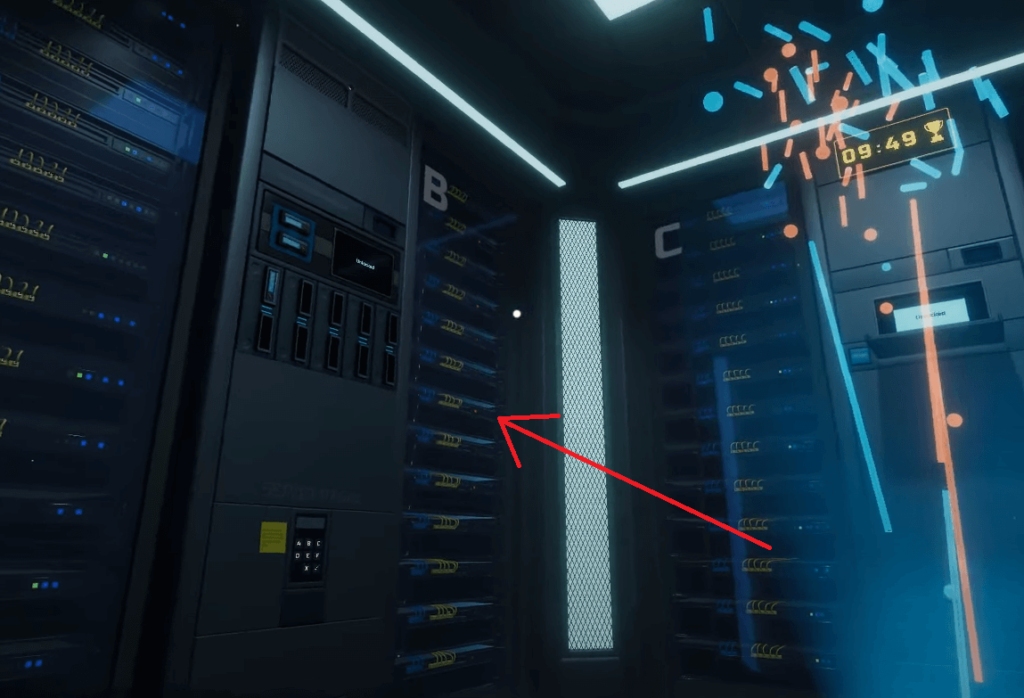
Unlike the others, this terminal has red lights flaring, which means it’s off. Now look throughout the room at all the terminals and see in which order they shut down.
The order is this:
- First is terminal A
- The second is terminal C
- Third is terminal F
- Fourth is terminal E
- Fifth is terminal D
- Sixth is terminal B
Now return to the keypad under the Disk Storage Unit and enter the following code – ACFEDB.
This will reveal another USB stick right under the keypad.
Place it in the slots on the wall where it says “VR HEADSET.” This is where you’ll place all the USB sticks you find.
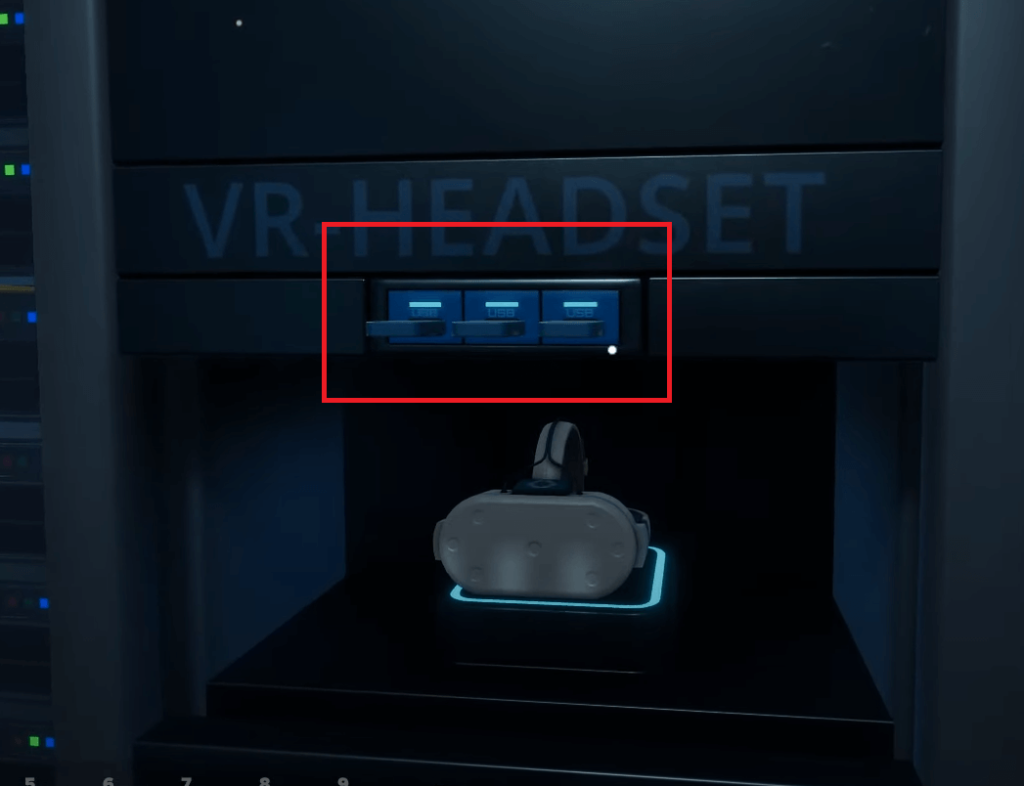
This marks the completion of the third puzzle.
- VR Headset – First Puzzle
After you complete the third puzzle and get the VR Headset, inspect it.
You’ll need to insert a battery into it to turn it on. You should have already picked up the battery from the floor.
With the VR Headset, you’ll enter the virtual world and will need to complete a series of puzzles.
The first puzzle requires you to move the green block to the end (image below)
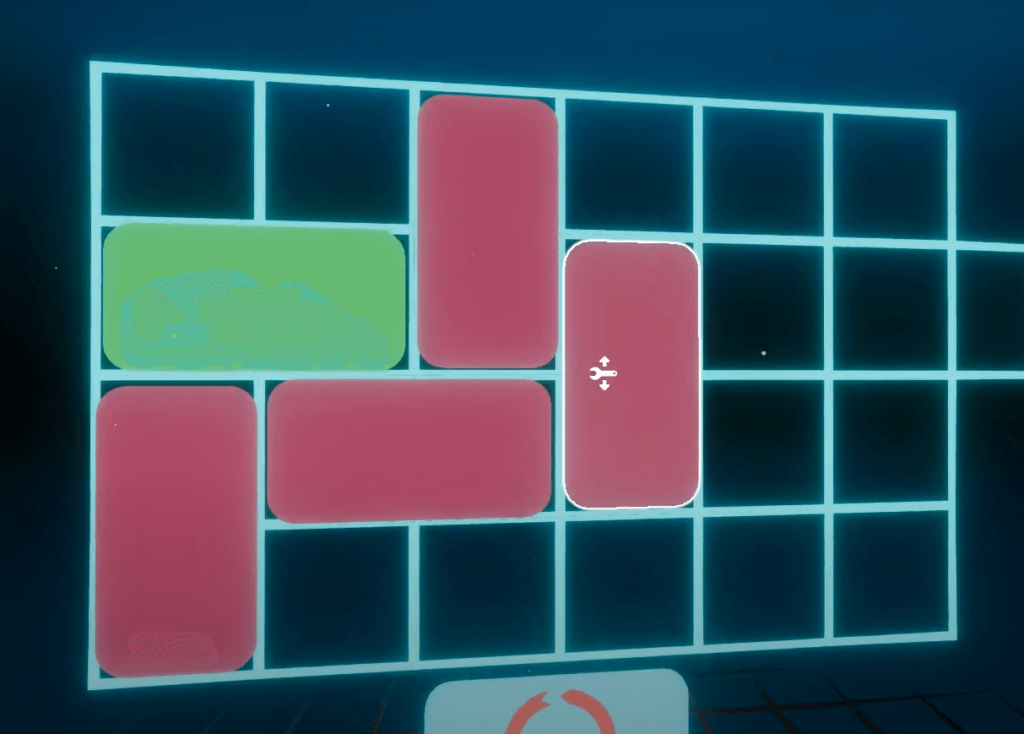
You’ll need to move the red blocks out of the way so the green block can move forward.
Please pay attention to this puzzle because it’s bigger than you think. Look around the room, and you’ll see what I mean by this!
This puzzle is not that difficult, so you should finish it quickly enough.
- VR Headset – Second Puzzle
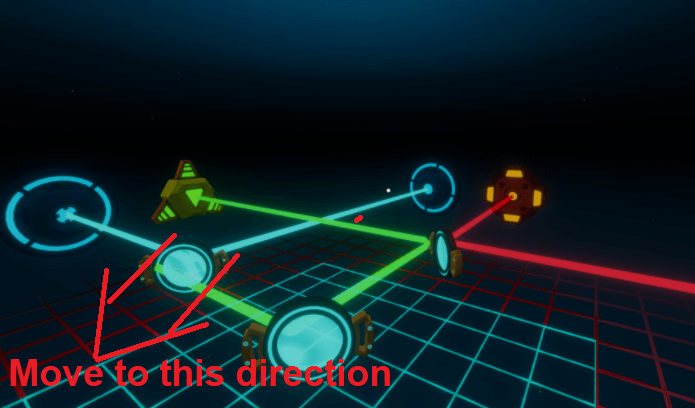
The second puzzle in the VR world requires you to align several mirrors to reflect the lasers on the appropriate targets.
The red lasers need to go into the red targets, the blue lasers into the blue target, and the green lasers into the green targets.
The picture Belowshows you how to align the mirrors so you can complete the puzzle.
The only mirror that isn’t aligned (if aligned, the puzzle ends immediately) is the mirror that doesn’t reflect the green laser.
Once you move it according to the instructions in the picture above, the puzzle will end.
- VR Headset – Third Puzzle and Final Puzzle
This last puzzle requires you to find 4 X-es in a line. It can be a horizontal, vertical, or diagonal line of X-es.
But the robot will try to stop buying by putting O-s in the boxes.
A secret you should know is that once you find 3 X-es in a line, the bot can’t stop you from putting the 4th one.
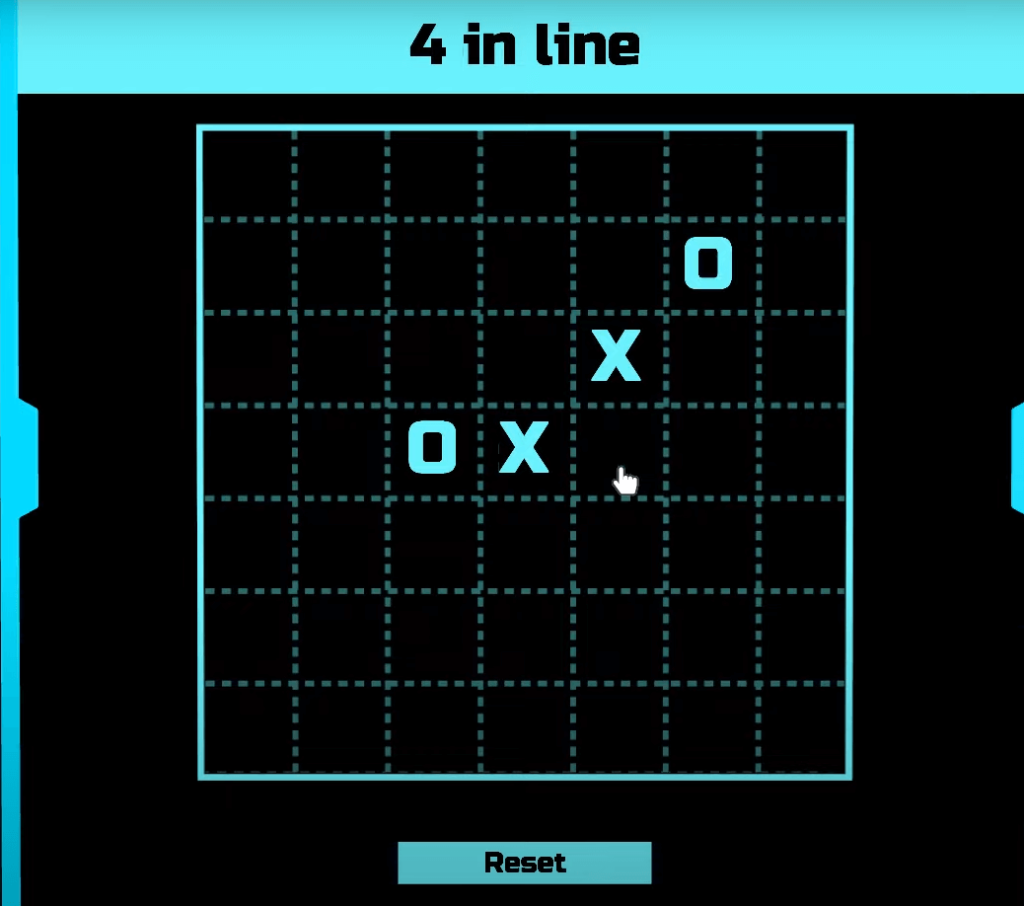
The catch is finding those 3 X-es in a line. Once you complete this puzzle, you’ll escape the Metaverse puzzle room in this Escape Simulator!
Where Are the 8 Tokens?
The Metaverse puzzle room also has 8 secret tokens that you can find.
Here are their locations, with pictures:
- On the ground, near the white X
- Under the construction helmet
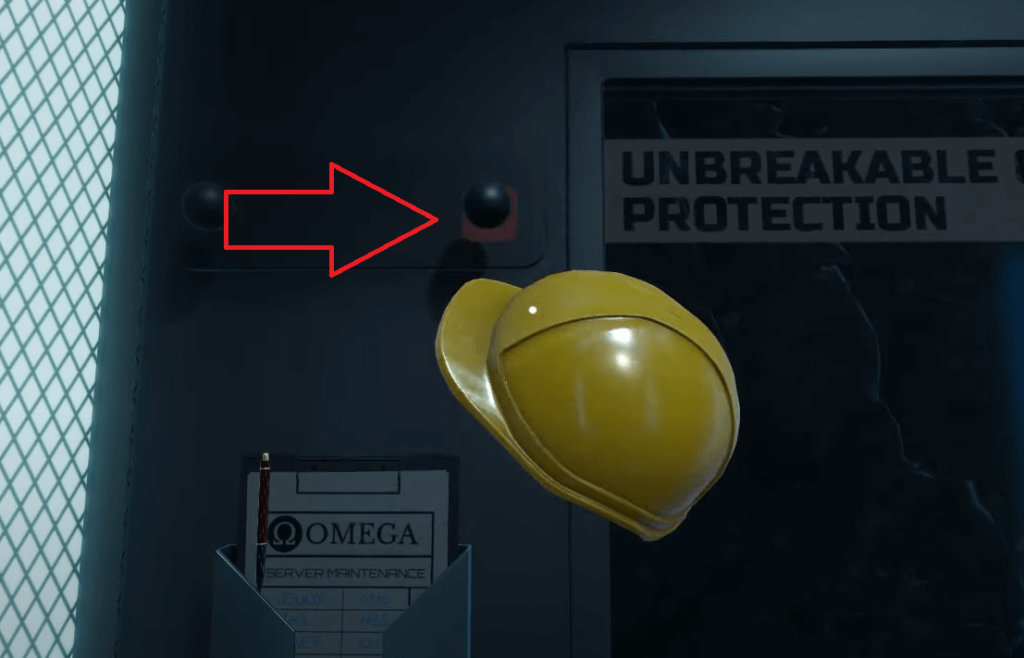
- In the slot where you pick the clipboard, next to the construction helmet
- On the wall, between the “D” and “E” white letters

- Behind the laptop
- By the Wiring Panel on the floor
- Inside the VR Headset booth