Escape Simulator Holiday has been rising in popularity a lot recently.
Santa’s Workshop is the first escape room in this highly-acclaimed escape simulator.
If you still haven’t figured out the solutions to this escape room, you’re in the right place.
This guide will tell you how to solve all the stages of the Simulator Santa’s Workshop.
After this walkthrough, you’ll know the answer to the sho0ting stars, the teddy bear, the rocking pony puzzles, and more.
Keep reading to find out more!
Summary: If you're stuck in the Santa's Workshop escape room, here's your quick guide to freedom!

This guide will teach you how to assemble the Steam Train Toy, solve the shooting stars puzzle, decode the URL, and repair the torn teddy bear.

We'll also help you build the rocking pony and create the golden key to make your escape. Let's dive in and crack these puzzles!
Related: Dying Light 2 Stay Human System Requirements
Related: Who Are The Top 30 Best Osu Players?
Related: How to Fix Minecraft Error 0x80131509

1. Steam Train Toy

The first of the puzzles is the Steam Train Toy you need to assemble.
You’ll find parts of the train throughout the room in various drawers, so search the room carefully.
The parts you need are:
- Locomotive (second from the bottom left)
- Coal wagon (right drawer under the train tracks)
- Person wagon with three windows (the red drawer under the presents)
- Logs wagon is already on the table
The order you should put them in is the locomotive first, then the wagon with its windows, the log wagon, and finally the coal wagon.
Then, collect the train toy box once it finishes assembling itself.
2. Sho0ting stars
Now you need to deliver the train toy box, but to do this, you’ll need to open the glass chamber for delivery.
The sho0ting stars puzzle locks the chamber.
The solution lies in the telescope. Adjust the telescope to see all four stars outside the window.
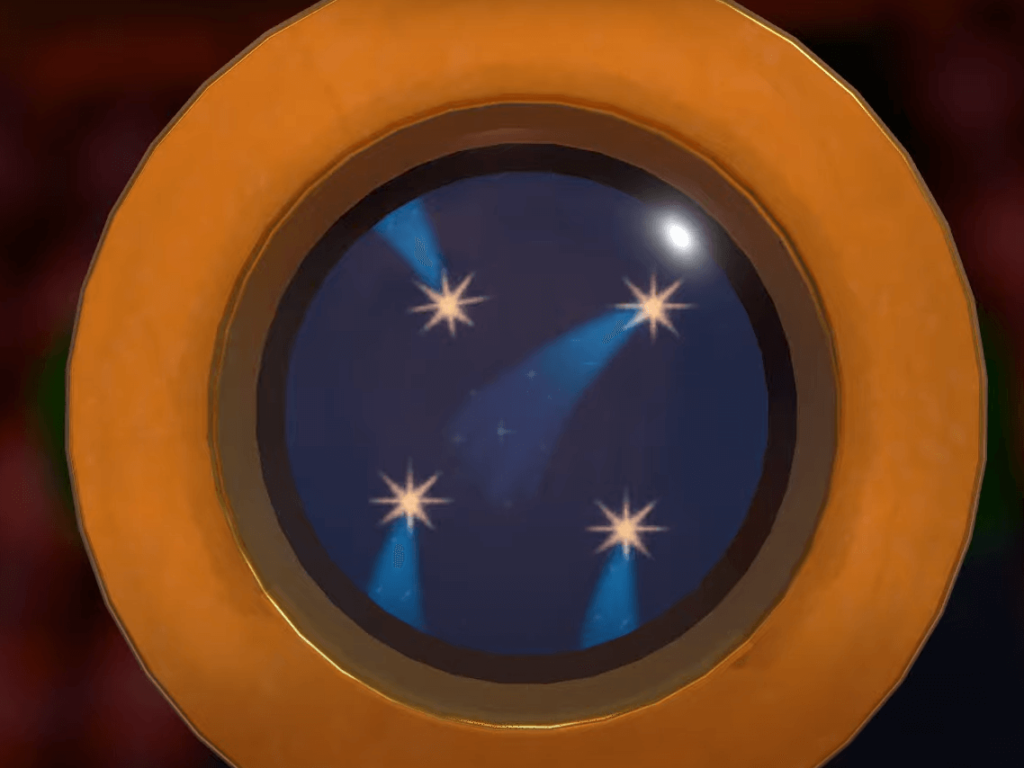
Remember the position of those stars and copy it on the panel in the glass chamber.
Once you move the stars on the panel to match the stars outside the window, the glass chamber will open.
Next, you can place the Steam Train Toy inside the chamber by selecting it from your inventory.
Click on the lever below the glass chamber to deliver the train toy box.
3. URL Decoder
Your next puzzle will require you to decode a web URL.
After clicking “Get Letter,” you’ll get this letter.
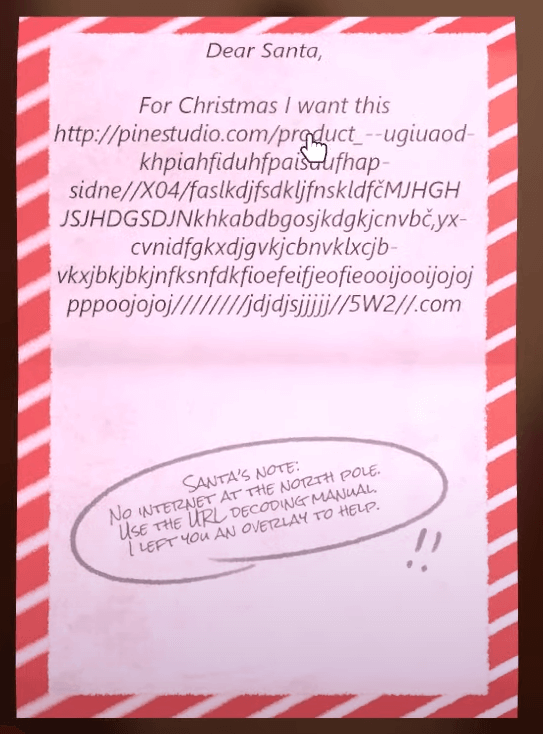
The letter says you’ll need to deliver a certain item in the internet URL.
But there’s no internet at the North Pole, so you’ll need to decode the URL.
Santa’s note at the bottom says the decoding manual is hidden somewhere nearby.
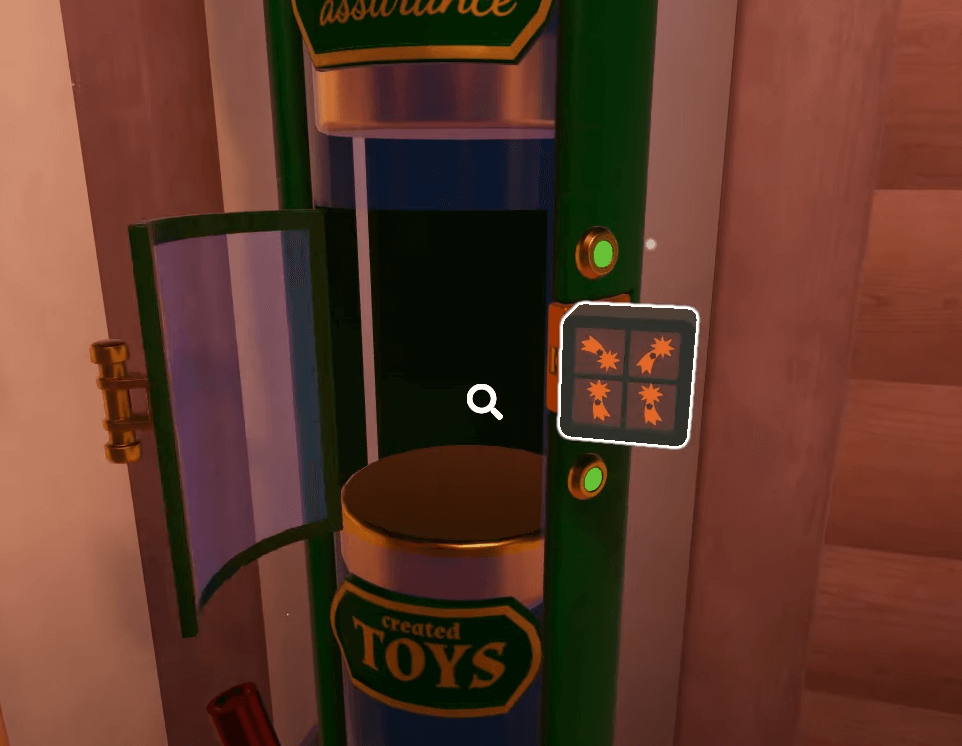
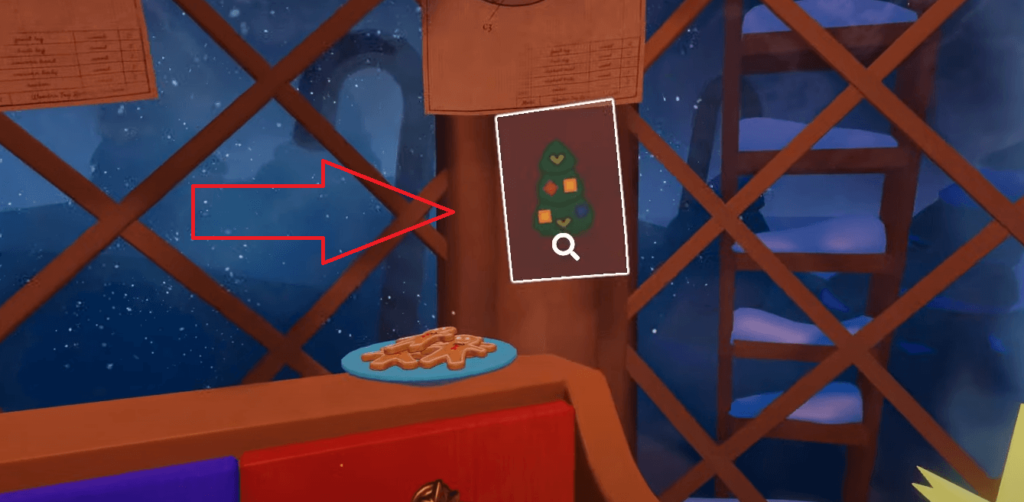
To do this, look at the table where you previously assembled the train. On the window, you’ll see a Christmas tree postcard to the left.
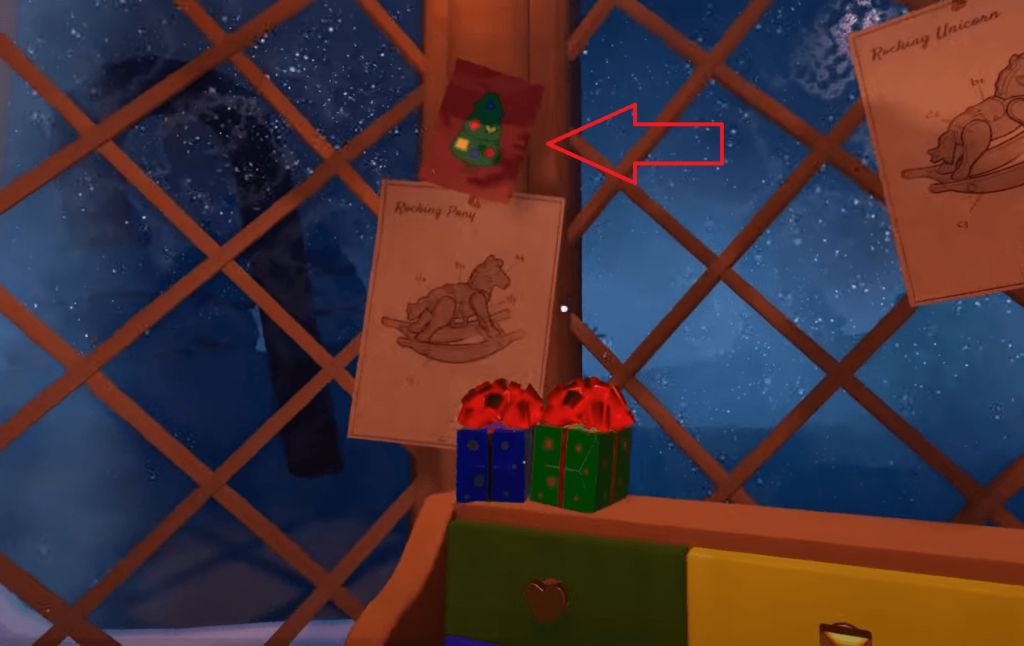
Click on it to enlarge it.
It’ll show different decorations in various colors. You need to open the drawers that have matching symbols with the symbols on the Christmas tree decorations.
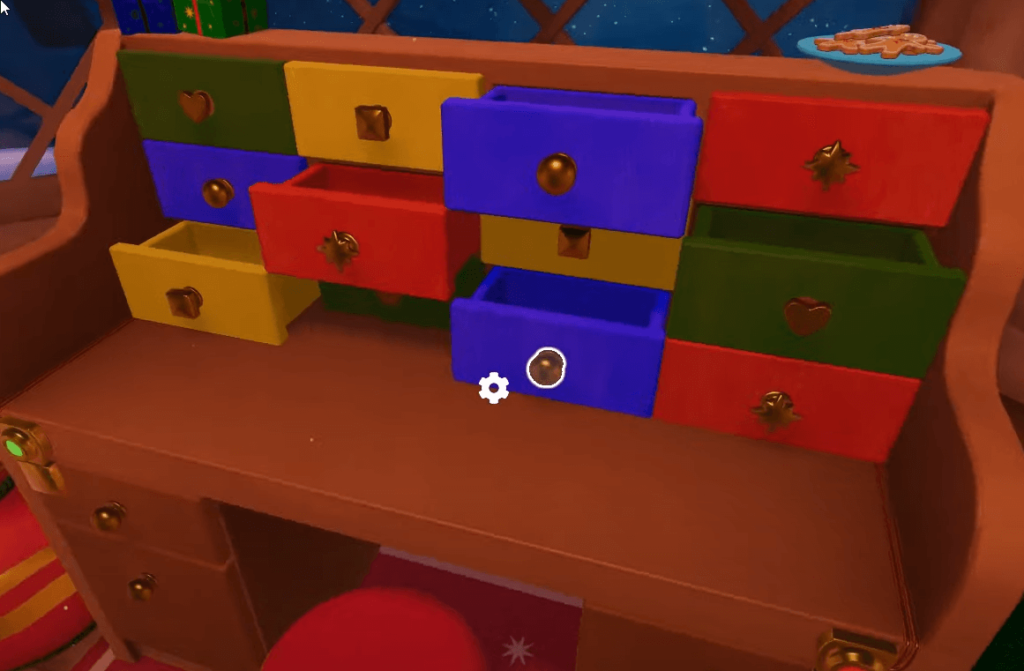
Follow the order on the Christmas tree like this:
- First is the blue drawer on the first row
- Second, is the red drawer on the second row
- The third is the green drawer on the second row
- Fourth is the yellow drawer on the last row
- Fifth is the blue drawer on the last row
- Sixth is the red drawer on the last row
After you do this, another drawer will open, giving you the URL decoder.
Now drag the URL decoder over the letter with the URL, and you’ll get the following results:
- Toy Material: X04
- Toy Type: 5W2
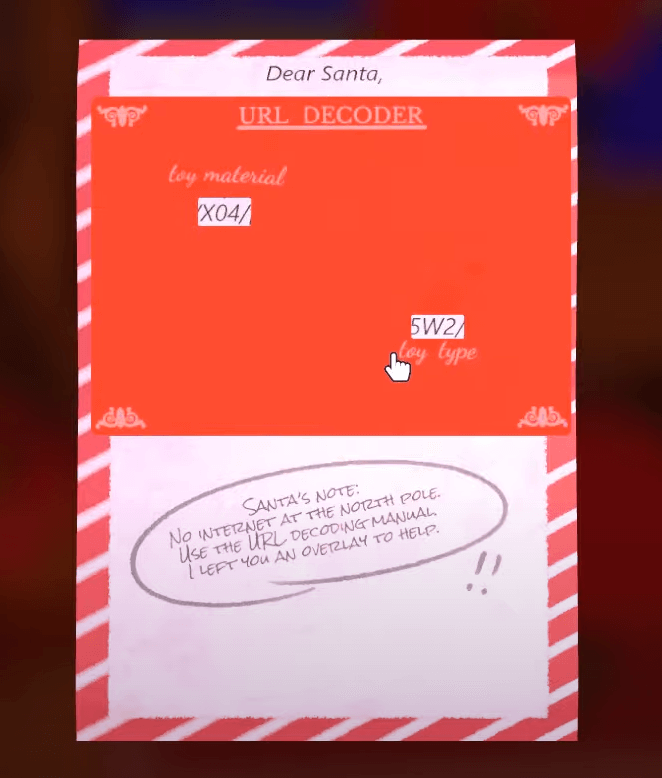
You can find this information on the paper note under the telescope. There, you’ll see the toy type and toy material codes.
X04 stands for plush, and 5W2 stands for Bear.
So, you’ll need a teddy bear. You’ll find one on the shelf to the right of the table.
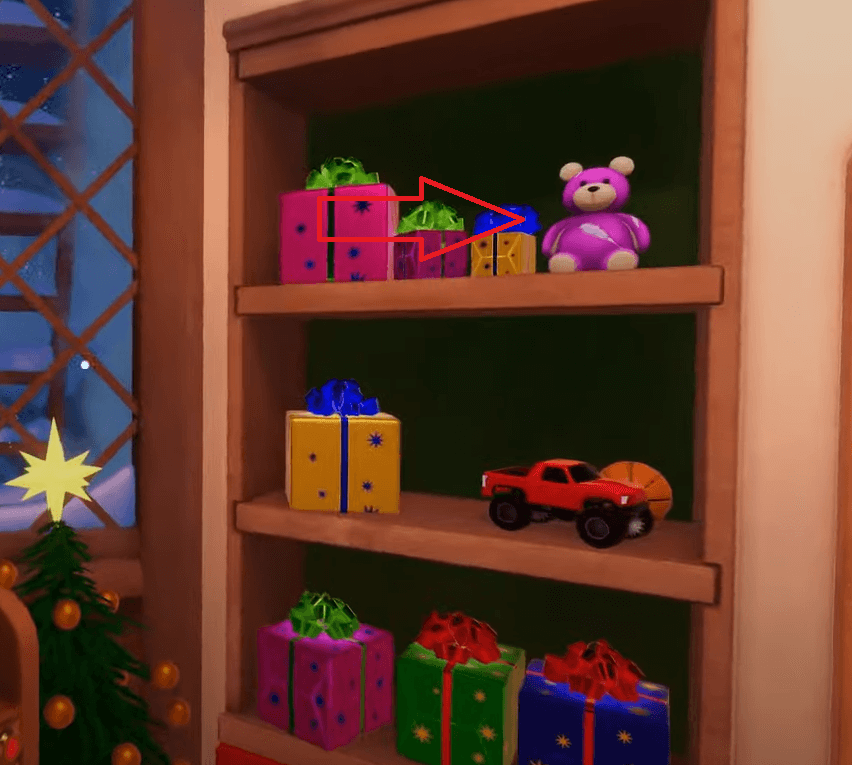
Once you collect it, you’ll notice that it’s torn apart. So, you’ll need to fix it.
To fix it, you’ll need a needle and thread.
4. Needle and thread
You’ll need a needle and thread to fix the torn teddy bear.
You’ll need to reopen the drawers in a different order to find one.
This time, you’ll need to consult another Christmas tree postcard. It’s to the right of the drawers, on the window.
This postcard will give you different symbols for your drawers. Open them in the order shown on the postcard.
The order is:
- First is the green drawer on the first row
- Second, is the red drawer on the second row
- Third is the yellow drawer on the second row
- Fourth is the yellow drawer on the last row
- Fifth is the green drawer on the last row
- Sixth is the blue drawer on the last row
This will open another drawer that will contain the needle and thread.
Now drag the needle and thread over the plush bear, and it’ll get fixed automatically.
Place the teddy bear into the glass chamber and deliver it to finish this puzzle!
5. Rocking Pony
The last letter talks about a pony, so you’ll need to deliver a pony for this puzzle.
First, look toward the table. On the window, you’ll see several schematics.
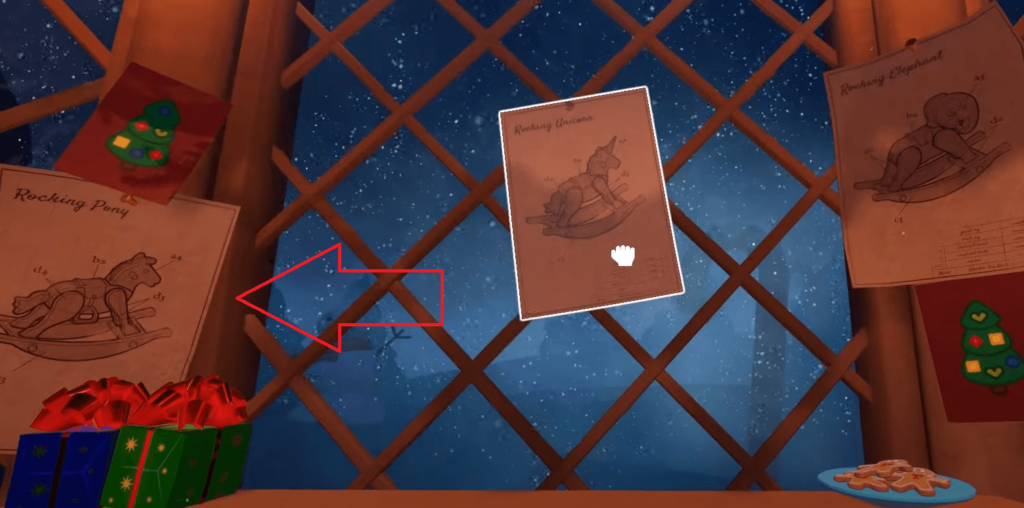
To build a pony, you’ll need the right schematic. Choose the one to the left. That’s the pony schematic.
If you zoom in on it, you’ll see different letters and numbers associated with other parts of the rocking pony.
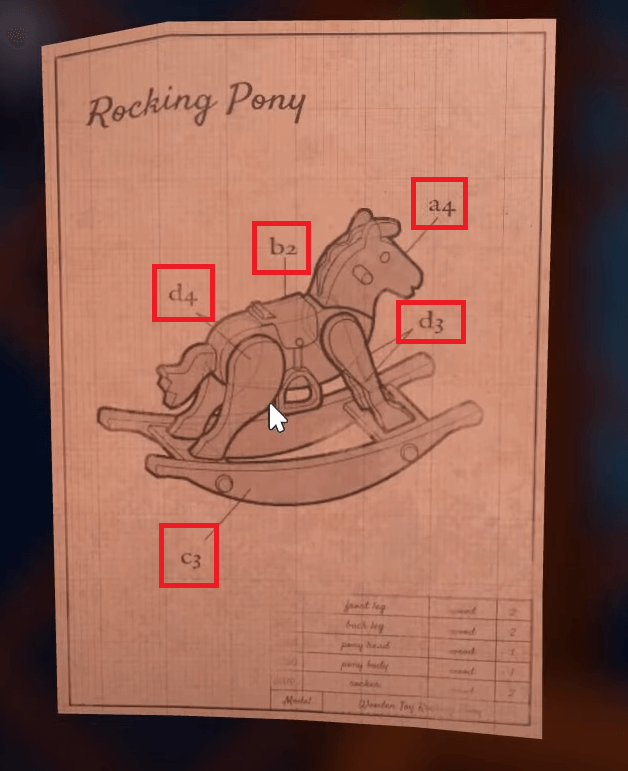
You’ll need these numbers and letters for the Toy Maker. It’s beside the glass chamber you use to deliver the toys.
On it, you’ll see a panel with digits at the top and letters on the side.

You’ll need to press the buttons corresponding to the correct digit-letter combination on the pony schematic.
For a4, click on the first button under 4. That’s the button on the “a” row and the “4” column.
Then, continue doing this for the other combinations.
Once you’re done, you’ll get the rocking pony toy, which you need to deliver via the glass chamber.
6. Golden Key
After the rocking pony is delivered, you’ll get a schematic for the golden key in the glass chamber.
This is the key you end to open the door and finish the escape room challenge.
Do the same as you did for the rocking pony.
On the Toy Maker, press the buttons corresponding to the digit-letter combinations on the key.

After you press the buttons, click on the lever to create the golden key.
Please pick it up, go to the door, and use the key to unlock the door.
That’s it; you just completed the escape room!