Despite all the controversies out there, I’m here to tell you that yes, you can put Snapchat filters on videos from the camera roll.
Here’s how I did it:
- Open Snapchat
- Tap on the “Rectangles” icon
- Select a picture
- Tap on the “Pen” icon
- Tap on the “Filters” icon
- Add a filter
- Send the picture to a friend
Seven simple steps for taking your Snapchat game to the next level. What’s not to like? Check my detailed guide below for additional help following these steps!
Summary: In this article, I provide a guide on how to add Snapchat filters to videos from the camera roll.

The process involves the following steps:

1. Open Snapchat.
2. Tap on the "Rectangles" icon.
3. Select a video from your camera roll.
4. Tap on the "Pen" icon.
5. Tap on the "Filters" icon.
6. Add a filter to your video.
7. Send the video to a friend.

Follow these steps to easily add filters to your videos and share them with your friends on Snapchat.

1. Tap on the “Rectangles” icon
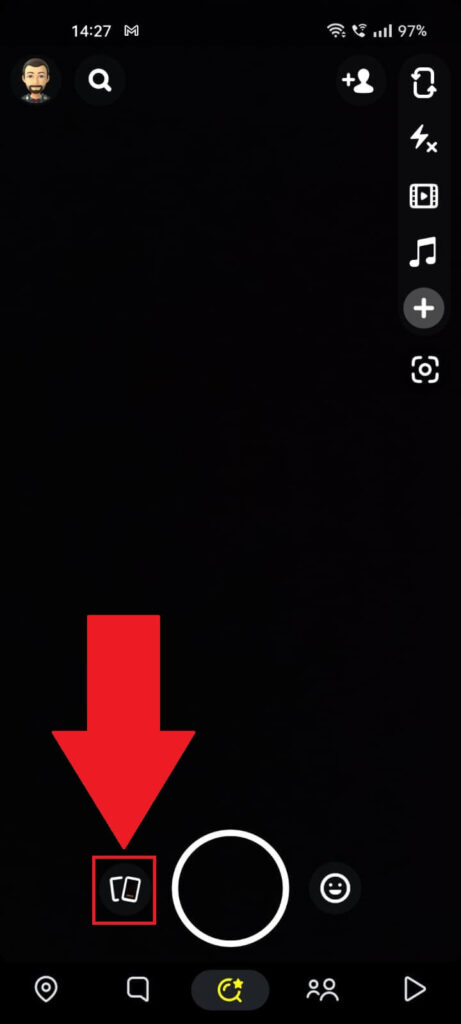
With Snapchat opened, you should be automatically sent to the camera feature. That’s fine – look for the “Gallery” icon (check the picture above to see how it looks) and select it.
2. Select a photo

Selecting the “Gallery” icon will take you to the camera roll, where you’ll see all your recent photos. Select the one you want to edit and proceed!
3. Tap on the “Pen” icon

After selecting the phot, DON’T send it to anyone just yet (the yellow button looks enticing, I know). Instead, tap the Pen icon in the bottom-left corner.
4. Tap on the “Filters” icon
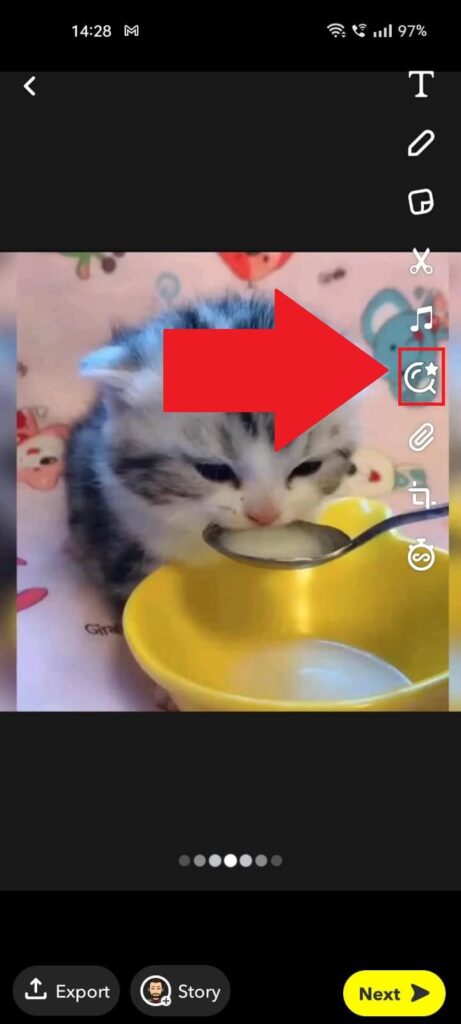
After tapping on the “Pen” icon, several options will appear on the right side of the app. Among them is the magnifying glass (with a star on top) icon – go select it.
5. Select a filter
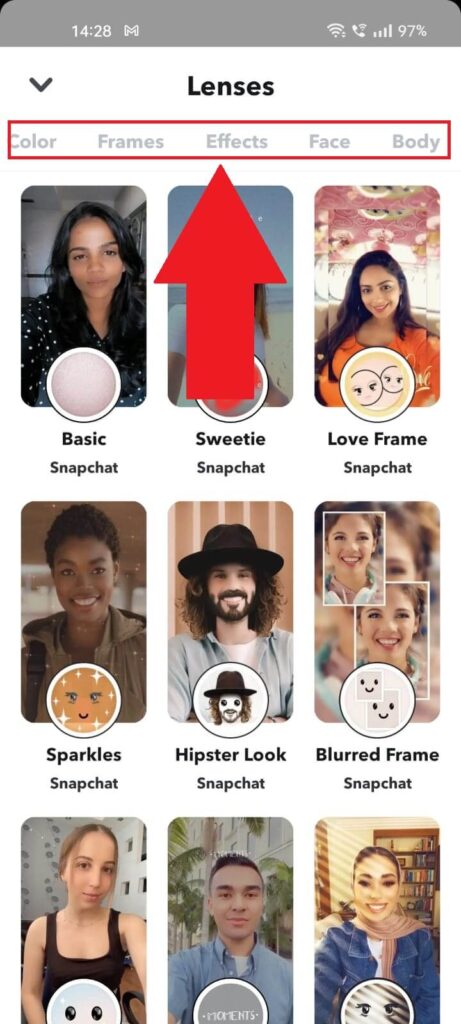
Welcome to the filter emporium – Snapchat’s finest effects, frames, filters, and so on. Select a category from the top and then select a filter. You’ll see it take effect almost immediately.
6. Post the photo
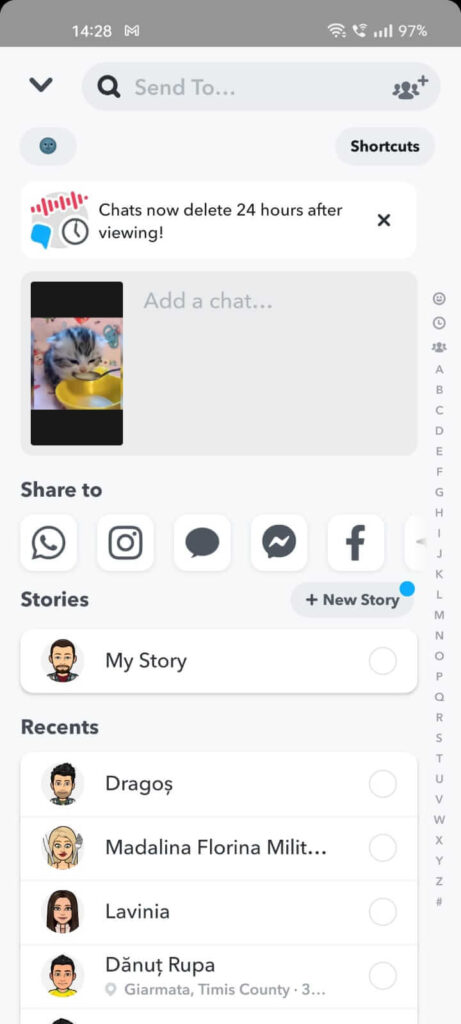
If you’re satisfied with the filter and want to send the photo to someone or post it as a story, then continue with the process.
And now you’re done – filter applied, and you learned a new method to edit pre-made Snapchat photos. Let me know in the comments below what you thought about this guide!