Creating an Instagram account without a phone number, you say? Well, take a look below:
You can choose between an email address and a phone number during the account creation process.
Open Instagram, go to the account creation screen, and you’ll see the “Mobile number or email” field.
If you don’t want to use your phone number, enter your Email, and you’ll receive all the instructions at your email address.
It’s pretty simple – just select your email address as the main login method, and that’s it. No phone number is needed!
Tip: You can find people on Instagram by phone number. Check out the linked guide to learn how.
But read through my guide below for more details 😀

1. Select “Sign Up“
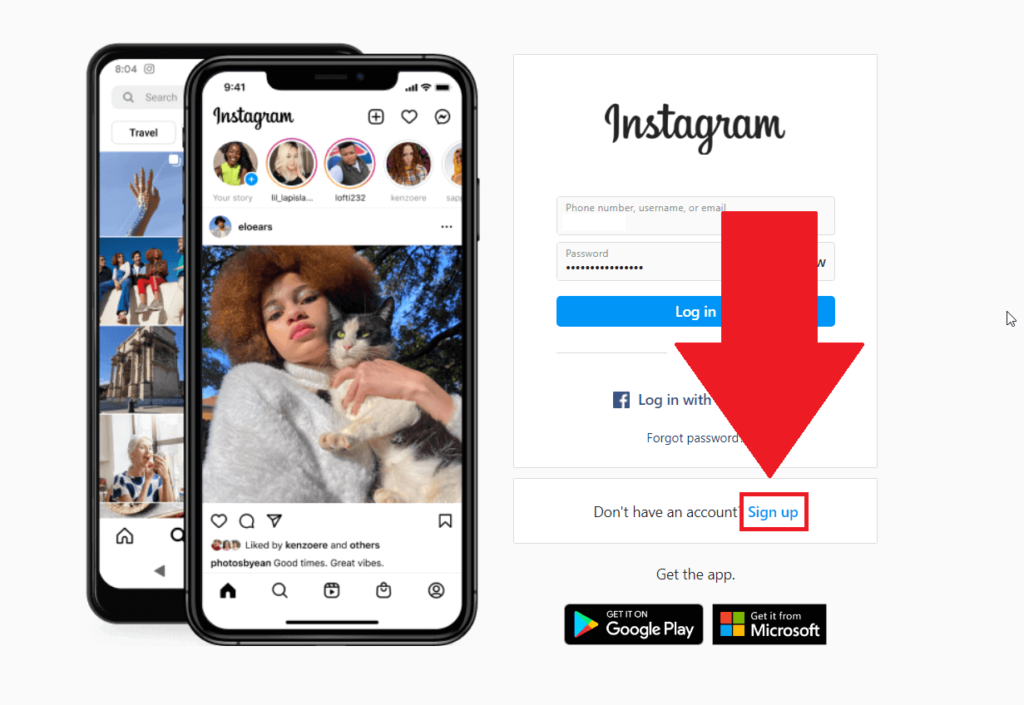
We’ll do this guide on a computer, so go to the official Instagram website (www.instagram.com), open it, and look for the “Sign up” button on the homepage.
It should be next to the “Don’t have an account?” question under the “Forgot password?” header (see the image above).
Click on it now!
2. Enter your email address
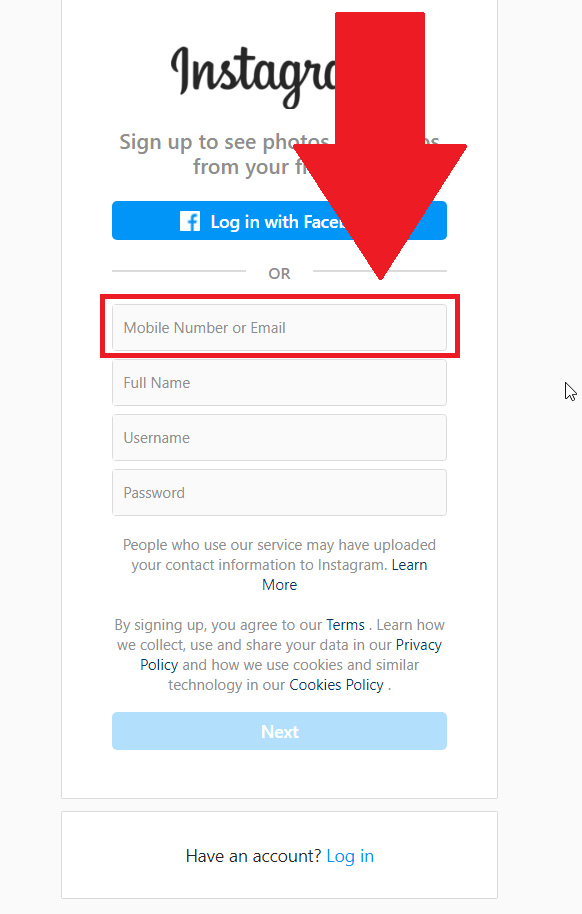
On this page, you’ll see the account creation fields:
- Mobile number or email
- Full name
- Username
- Password
The first field says you can use your email address or phone number (see the image above). So, the phone number is not necessary. Instead, enter your email address.
3. Complete the fields and select “Next“
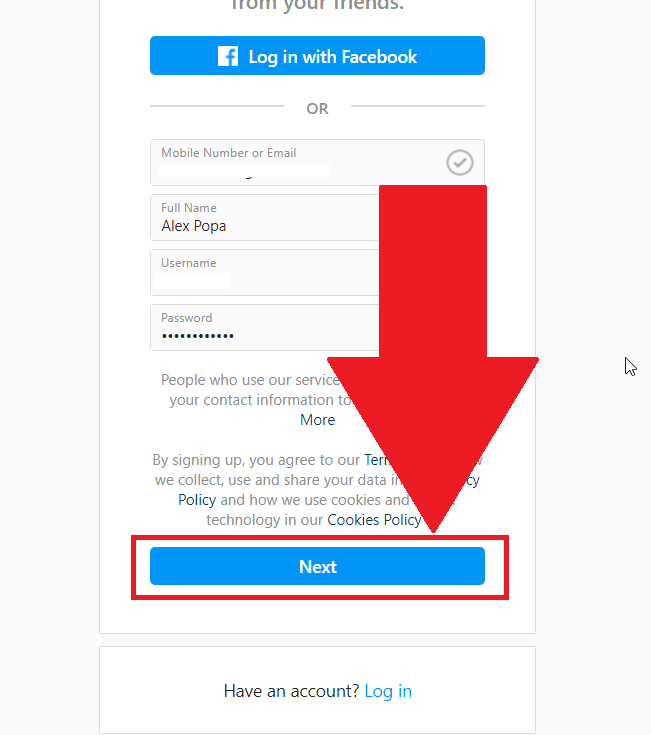
Enter your email address, full name, username, and password. Instagram will let you know if any of these are wrong by showing either a checkmark or an X marker next to the fields.
Once you’re done, select “Next” and continue with the next steps!
4. Enter your birthdate
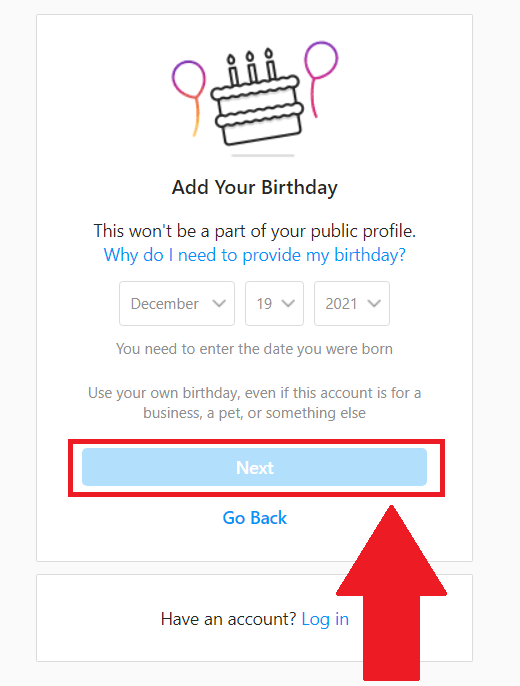
Once you complete the initial fields and select “Next“, you’ll be taken to the birthdate selection screen (which you can see in the image above). You don’t need to enter your REAL birthdate, though.
Instagram may encourage you to do this, but that’s only an encouragement. As long as you appear to be over 18, you’re fine!
Select “Next” once you select a birthdate and proceed.
5. Enter the confirmation code
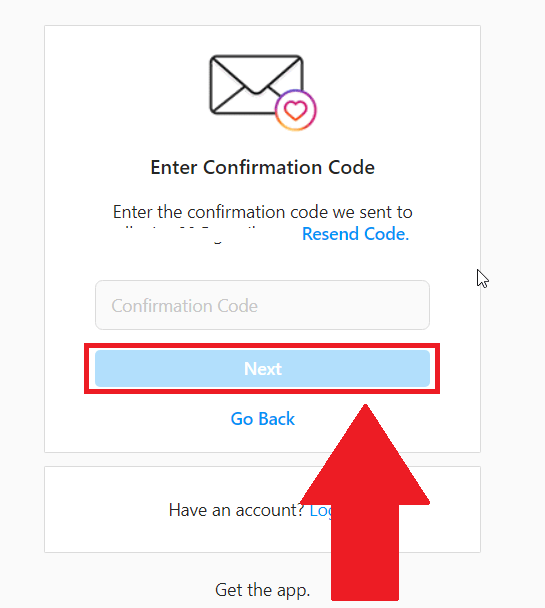
Once you enter your birthdate and go to the next page, you’ll be asked to confirm your email address with a confirmation code (see above).
Open your email provider (Google Mail for me), search for the Instagram email, copy the confirmation code, and paste it into the box here. Then, select “Next“.
That’s all. You’ve just created an Instagram account without a phone number. Instagram may ask you to enter your phone number after this, but it’s not necessary.
You can safely ignore it and use Instagram without a phone number!
Not sure who created an Instagram account? Check out my guide on finding out who created an Instagram account to learn more.
So, that’s all there is to it, really. If you have any more questions, leave them below, and I’ll be sure to reply soon 😀