Do you want to make a read-only channel on Discord, and you don’t know how?
Many servers have read-only channels where only the Discord server creator can post things.
Rule channels are almost always like this. But also, announcement channels can be read-only so that the announcements aren’t lost amidst player chat.
How to Make a Read-Only Channel on Discord?
- Open Discord and edit the channel
- Go to “Permissions”
- Click on “Advanced Permissions”
- Disable “Send messages”
This guide will teach you how to make a read-only channel on Discord on a PC and a mobile device.
Read below to find out more!
Summary: In this article, I provide a step-by-step guide on creating read-only channels on Discord, which are useful for rule and announcement channels.

To make a read-only channel, open Discord and edit the channel. Go to "Permissions," click on "Advanced Permissions," and disable "Send Messages."

The guide covers how to create a read-only channel on both PC and mobile devices. By following these steps, you can ensure that essential information remains visible and organized within your Discord server.
Related guide: 10 Best Discord Servers to Join
Related guide: How to Change Your Email Address on Discord
Related guide: How to Get an Animated Profile Picture on Discord
How Can You Make a Read-Only Channel on Discord?
It’s simple. It would be best to edit a channel by clicking on the respective icon.
Then, go to Permissions and disable “Send messages” for other users.
Lastly, save your changes.
A heads-up is that the “Send messages” option is enabled by default. So, any channel you make will allow users to send messages there.
Follow the steps below to make a read-only channel on Discord:
For PC
- Open Discord and edit the channel
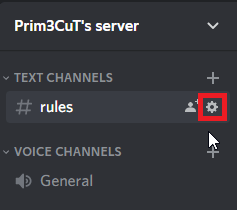
You’ll see multiple channels when you open Discord and go to your server.
Look for the one you want to make read-only and click on the gear icon next to it.
- Go to “Permissions”

You’ll land in the Overview panel when you open the channel settings.
On the left of the screen, you have multiple tabs – Overview, Permissions, Invites, Integrations, and Delete Channel.
To make your channel “read-only”, go to the “Permissions” tab.
- Click on “Advanced Permissions”
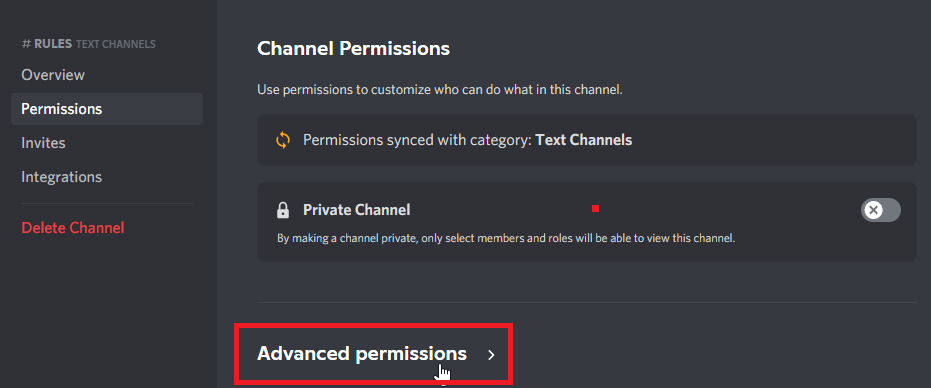
When you open the “Permissions” tab, you’ll see an overall description of the channel permissions.
The option you need isn’t here.
Down below, you’ll see an “Advanced permissions” option. Click on that to open the more advanced permission options.
That’s where the “read-only” option is.
- Disable “Send messages”
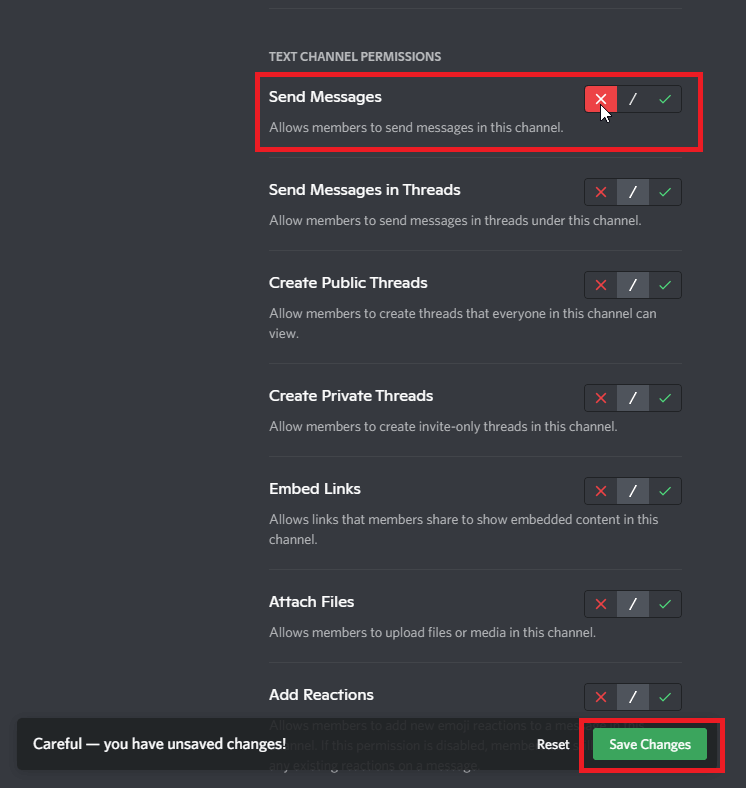
When you get to the Advanced Permissions, you’ll see an entire list of channel permissions.
These include “Attach Files”, “Create Public Threads”, “Add Reactions”, “Send Messages”, and more.
All of these are permissions to members of the group.
So, if you disable any permission here, members will not be able to do something.
For instance, if you disable the “Send Messages” permission, members of your Discord server won’t be able to send messages on a particular channel.
This is the “read-only” option. Disable “Send Messages” to make your channel read-only!
Lastly, click “Save Changes” at the bottom to save your changes and make the channel read-only!
That’s it!
For Mobile
- Tap on your channel’s name
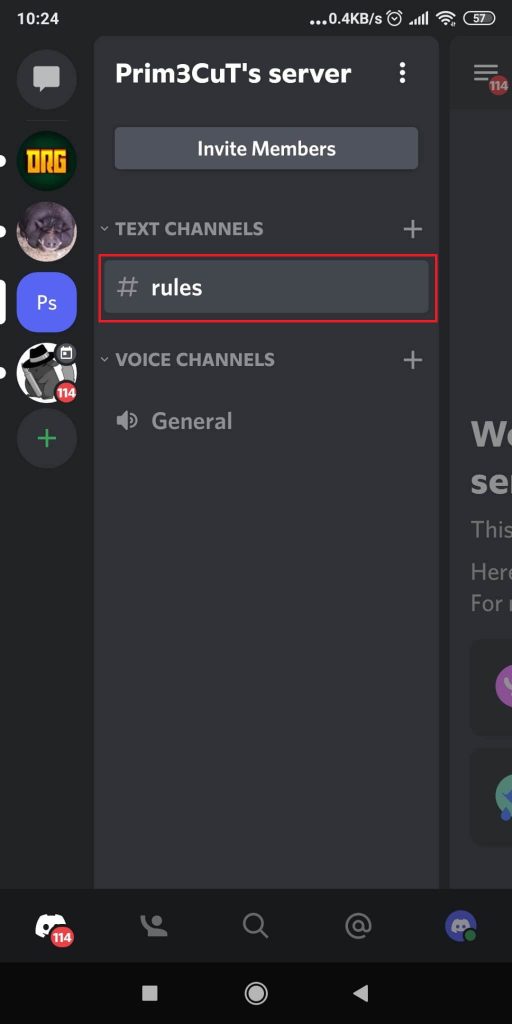
You’ll land on the main page when you open the Discord app on your phone.
On the right-hand side, you’ll see a list of servers. Select your Discord server and then look at the server’s channels.
Tap on the one you want to make read-only, in this case, the “Rules” channel.
- Tap on your channel’s name again

Once you enter the Discord channel, you’ll need to tap on its name again to open the menu.
Look at the top, and you’ll see the channel’s name.
Tap on it to go to open the channel’s menu.
- Tap on “Settings”
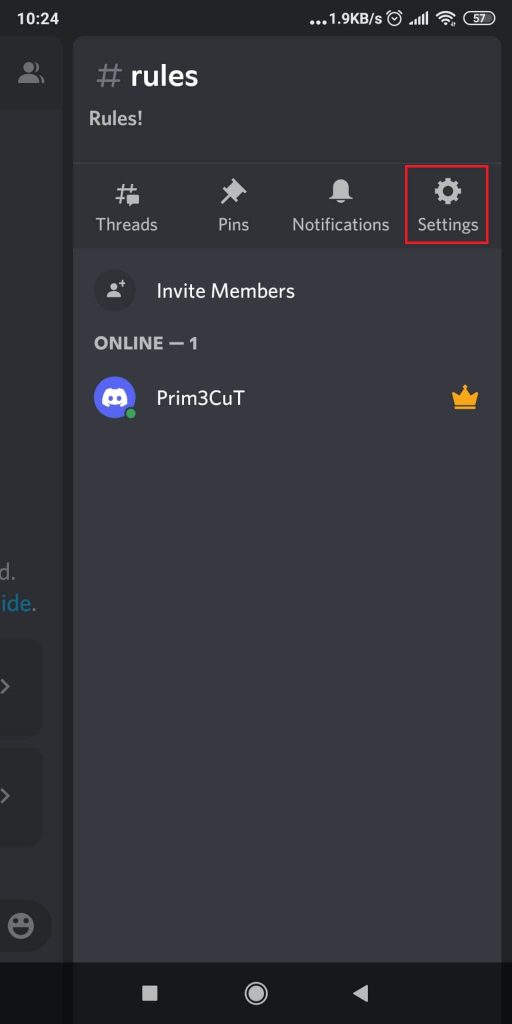
When you open the Discord channel menu, you’ll see several options – Threads, Pins, Notifications, Settings.
You can also invite members to this channel and see a list of all active members on this Discord channel.
Tap “Settings” at the top to open the channel’s settings.
- Tap on “Permissions”
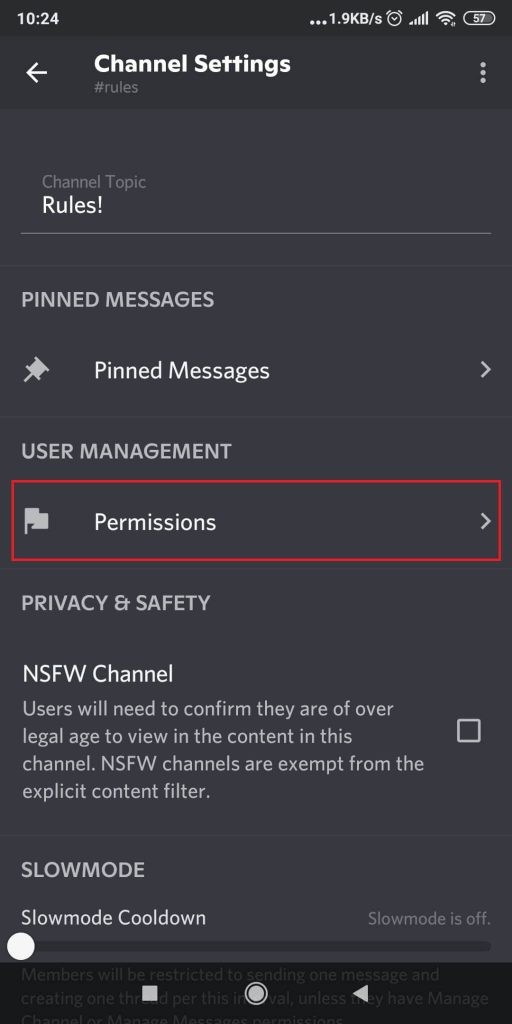
You’ll see several options in the channel settings, including an option to change the channel topic.
In the “Pinned Messages” section, you’ll be able to create pinned messages that members can jump to at any time.
In the “Permissions” tab, you can make the channel read-only.
Select Permissions to do it!
- Select “@everyone”
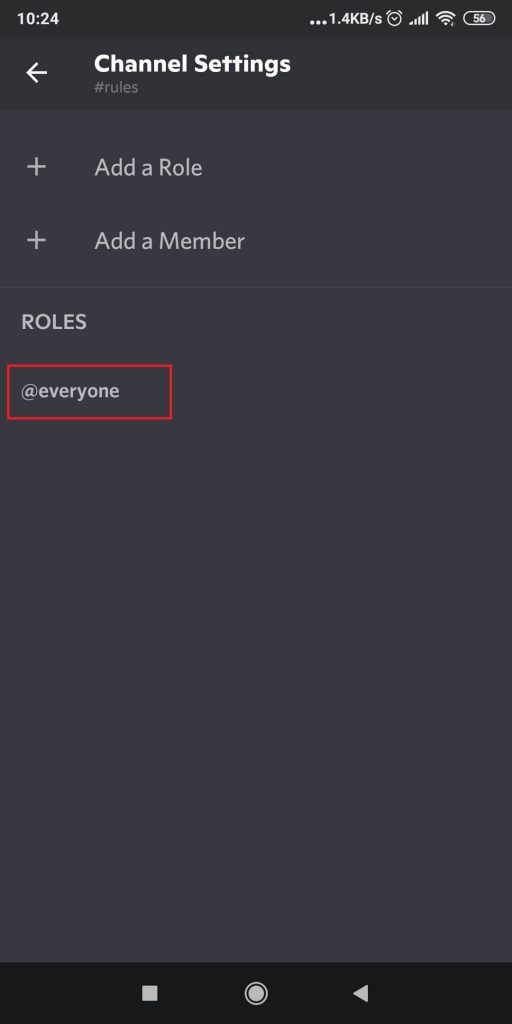
You’re not there yet. First, you need to select which permissions to edit.
Select “@everyone” to edit the permissions for everyone on the server except you.
This means you’ll make the channel read-only for all the members except you.
- Disable “Send Messages”
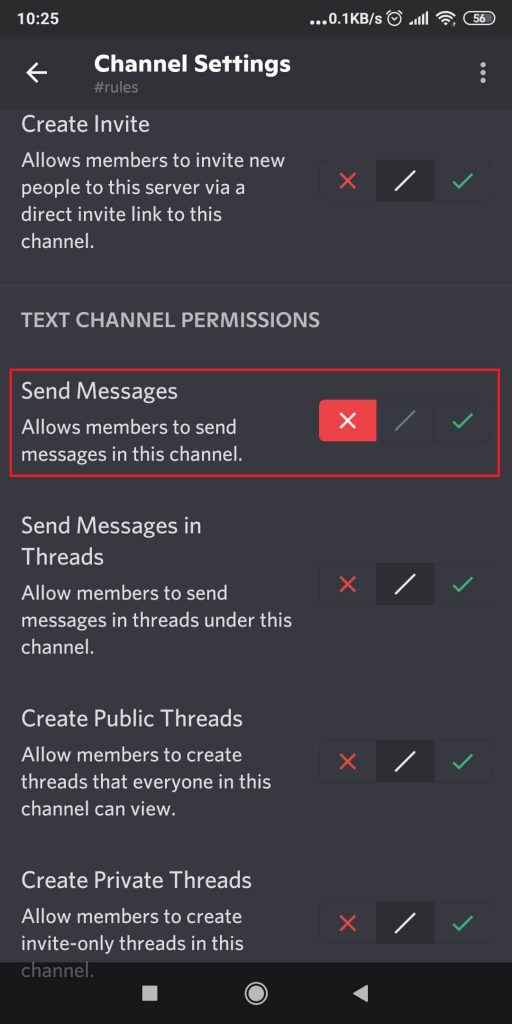
Lastly, go through the permissions until you find the “Send Messages” permission.
It should be the first option under “Text Channel Permissions”.
Disable it by selecting the Red X.
Then, go back to your channel, and that’s it. Now the channel is read-only, and only you can post messages on it.
Conclusion
Read-only channels are necessary on well-organized Discord servers.
There must be a “Rules” channel at the very least. That channel needs to be read-only, so the rules are always visible.
To make a channel read-only, go to the channel settings – permissions – disable send messages.
This is both for PC and mobile apps. While the process is more complicated on mobile devices, the idea remains the same.
FAQ
Can you edit permissions for any server role?
Yes, you can.
Discord servers have different roles based on how you design the server.
The “@everyone” role refers to all the group members, including those that don’t have a role.
Fresh people on the server will have this role, so permissions of “@everyone” will apply to them.
But you can edit the permissions of any role. So, for instance, if you establish the “General” role, you can allow them to chat on a channel.
On the other hand, the “@soldier” role is not allowed to chat on that channel, only to watch.
Superior roles can have more permissions than lower-rank roles.
This is the basis of a hierarchy, and Discord understands this perfectly.
But if you make it so that the “@everyone” role can’t chat on a channel, no one will be able to do that, not even superior roles.
Only the admin, the creator of the server, which is you, can bypass that permission.