Are you trying to complete “The Elevator” escape room in the Omega Corporation Escape Simulator?
This guide contains a speed run and a detailed walkthrough of all the puzzles in The Elevator.
You’ll find the answers to the Braille Keypad, Elevator Pattern, Space Between, Omega Corporation, Blue and Red Squares, They Went Missing, and Key Parts puzzles.
Keep reading for the walkthrough!
Puzzles and Solutions
- Braille Keypad: Find the correct sequence to unlock the keypad.
- Elevator Pattern: Decode the pattern to proceed to the next stage.
- Space Between: Solve the clues related to the space between the elements.
- Omega Corporation: Use hints related to the corporation to solve this puzzle.
- Blue and Red Squares: Arrange the squares in the correct order to unlock the next clue.
- They Went Missing: Discover the mystery behind the missing items to progress.
- Key Parts: Assemble the key parts correctly to unlock the final stage.
Also, check out my Escape Simulator Metaverse walkthrough as well, for more tips.
Speed Run for Fast Solutions
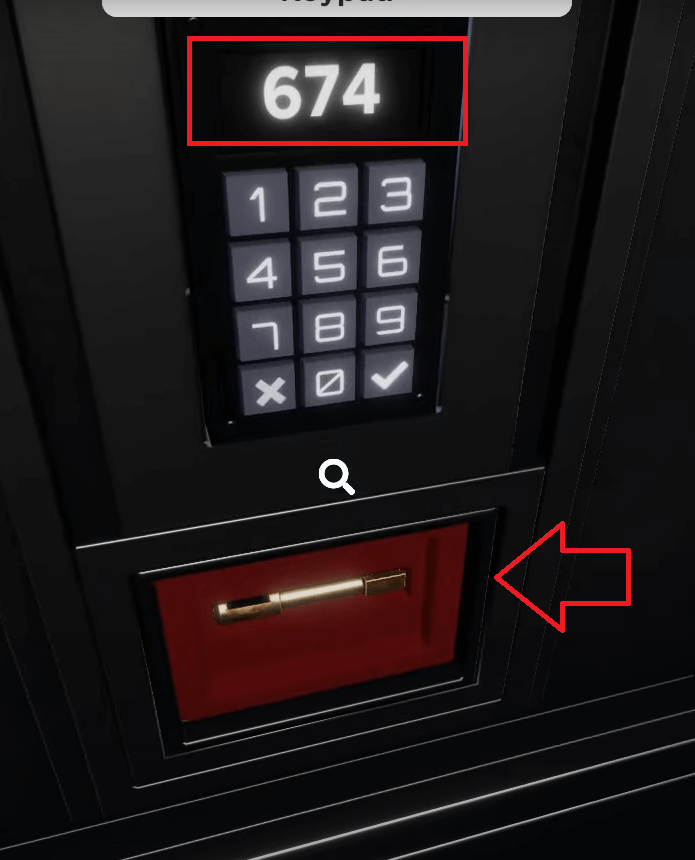
- Enter the 6-7-4 code on the 7th-floor keypad. Get the key part
- On the 6th floor, match the pattern on the door wheels to the pattern on the floor (after cleaning the water puddle). Grab the key part
- Enter the 2-6-8-0 code on the keypad on the 4th floor. Get the key part
- Get to the 2nd floor (use the instructions in the suitcase) and press on the squares as in the image below. Grab the key part
- Form the C-R-A-N-E word on the Omega Corporation logo on the wall. Insert the two keys and get the key part
- Assemble the key in your inventory and place it in the slot next to the -1 floor button. Then, get to the -1 floor
If you want the full walkthrough, read below!
Detailed Walkthrough
1. Braille Keypad
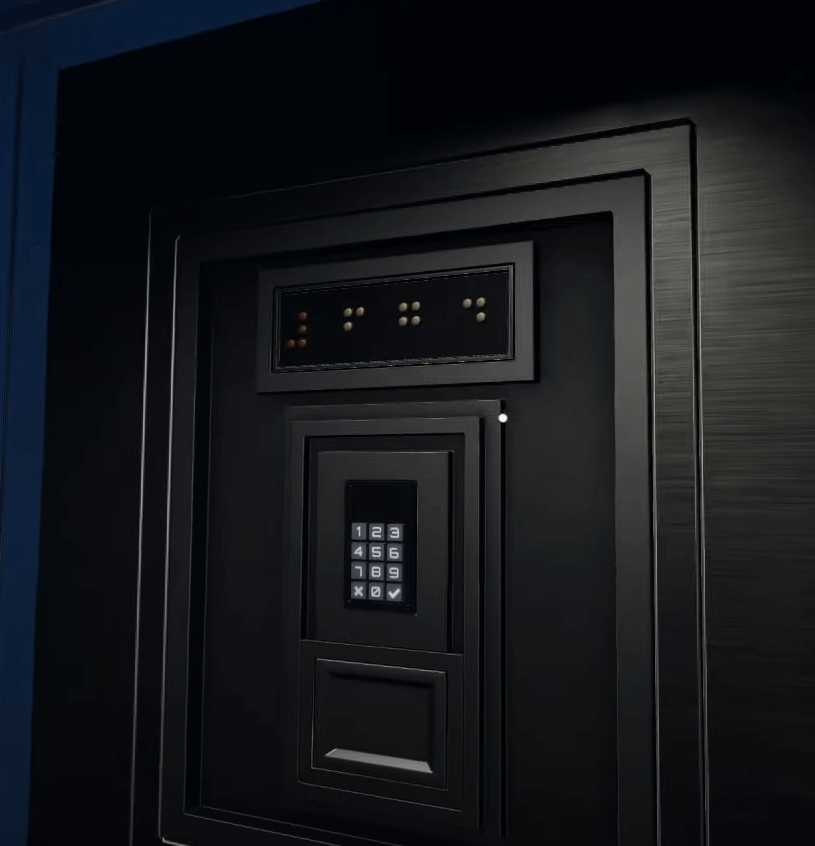
The first puzzle requires you to enter a code into the keypad on the door.
You’ll see instructions for the code above the keypad, but it’s in Braille.
The first Braille symbol is red, so you don’t have to use that. The other 3 symbols are what you need to decipher.
To solve this puzzle, look at the floor numbers to the right of the keypad.
You’ll notice that the floor numbers are also in Braille.
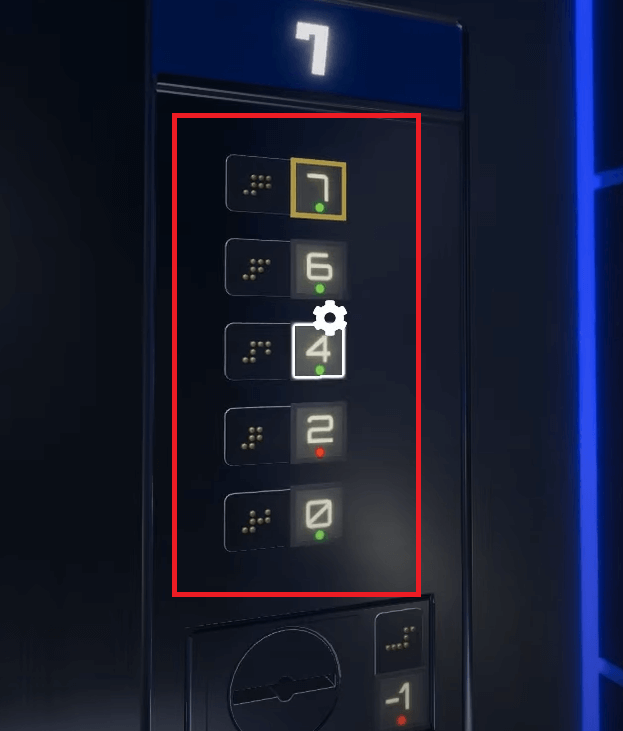
You need to figure out which of the Braille symbols above the keypad match the symbols next to the floor numbers.
If you look carefully, you’ll see that:
- The first yellow Braille symbol above the keypad matches the symbol of the 6h floor button
- The second yellow Braille symbol above the keypad matches the symbol of the 7th-floor button
- And the third yellow Braille symbol above the keypad matches the symbol of the 4th-floor button
So, the code for the keypad is 6-7-4. Once you enter the code, you’ll receive a key part.
Don’t forget to collect the key part after you type in the code!
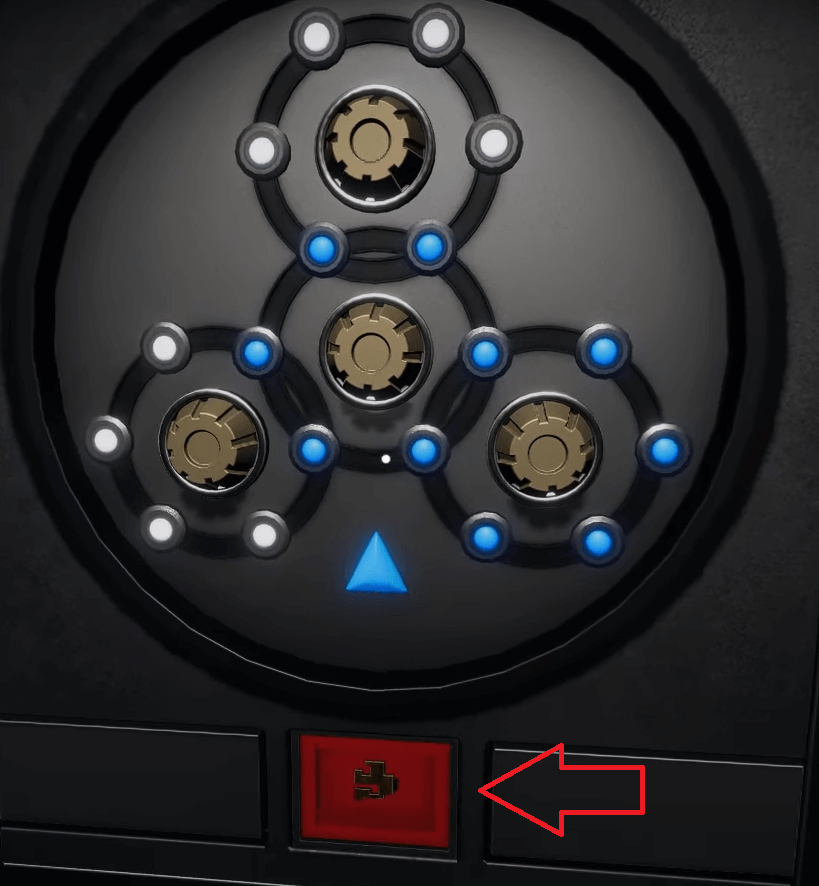
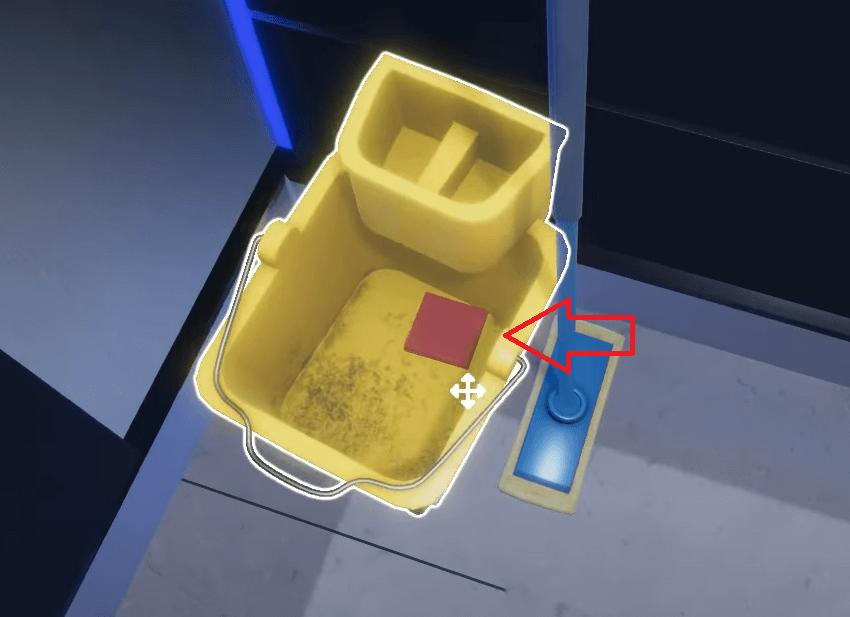
2. Elevator Pattern
This next puzzle will only appear after you go to the 6th floor.
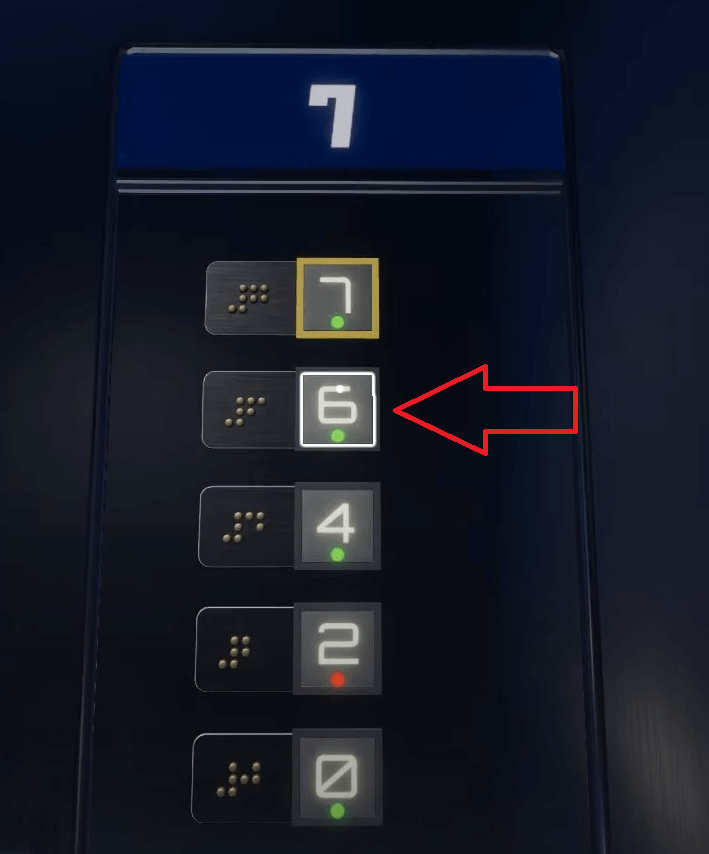
Once you get to the 6th floor, the door to the elevator will open and show you the next puzzle.
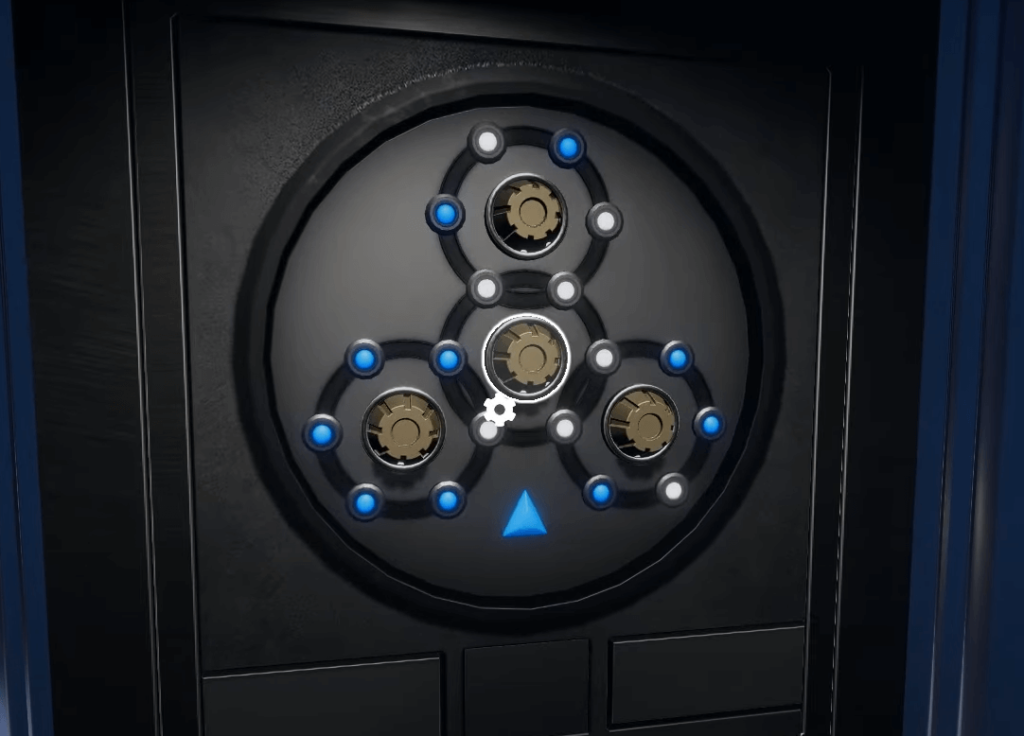
This puzzle needs you to complete the pattern.
To do this, you’ll need to match this pattern with the one on the floor.
There’s a similar pattern on the floor, but it’s covered with water.

To clean the water on the floor, you’ll need the mop.
You’ll find the mop in the elevator, next to the water puddle. But first, remove the warning sign from the puddle.
After that, grab the mop and clean the puddle to reveal the pattern.
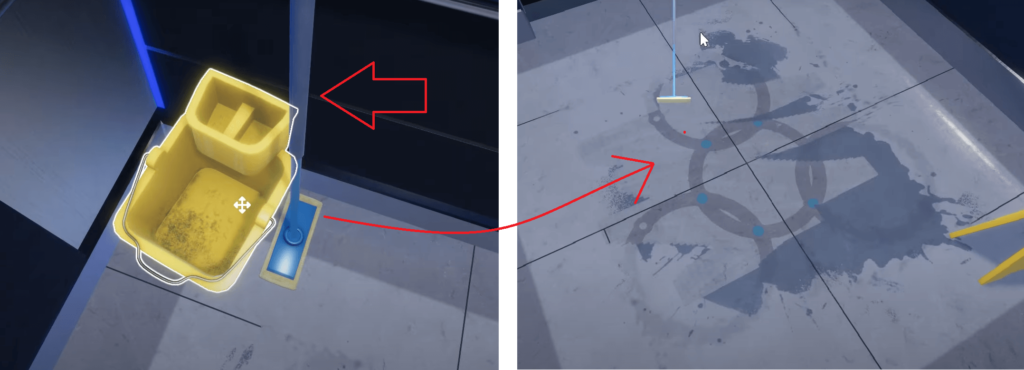
After you clean the water puddle, you’ll see the entire pattern.
And it looks very similar to the one on the door.
You’ll need to copy the pattern shown on the floor to the pattern on the door.
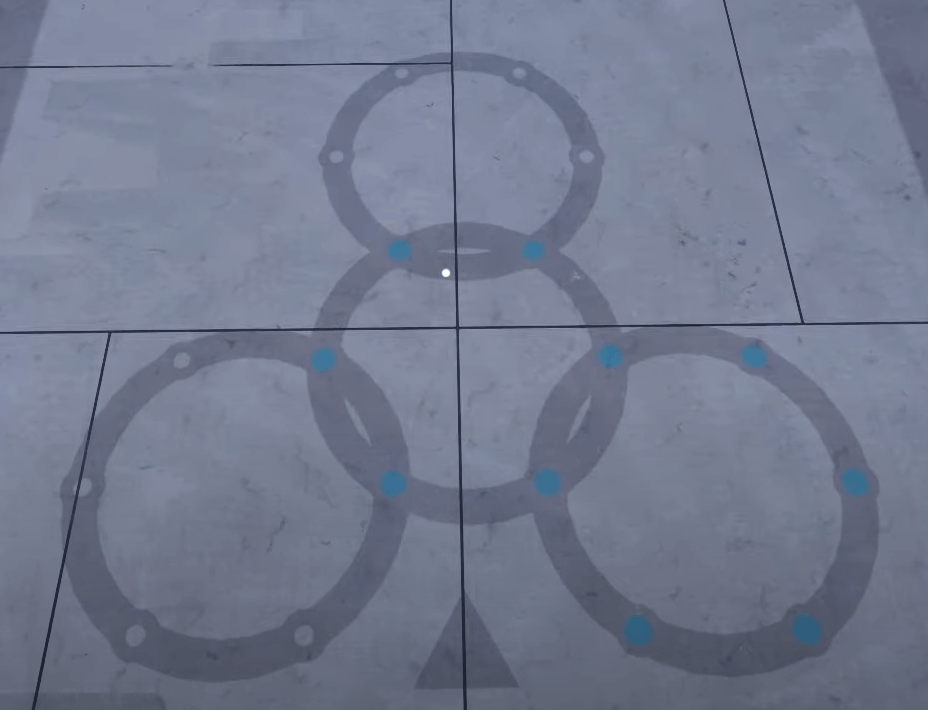
As you can see, all the dots inside the middle circle and the bottom-right one need to be blue.
To do this, go to the elevator pattern and use the buttons there to rotate the circles until you succeed.
An easy way to do this is first to make the bottom-right circle all-blue and have the bottom-left circle with 2 blue dots.
This means the center circle will have 4 blue dots.
Then, rotate between the center and bottom-left circle until the two dots from the bottom-left circle move to the center circle.
Don’t forget to collect the other key part under the elevator pattern!
3. The Space Between
This puzzle appears on the elevator door when you go to the 4th floor.
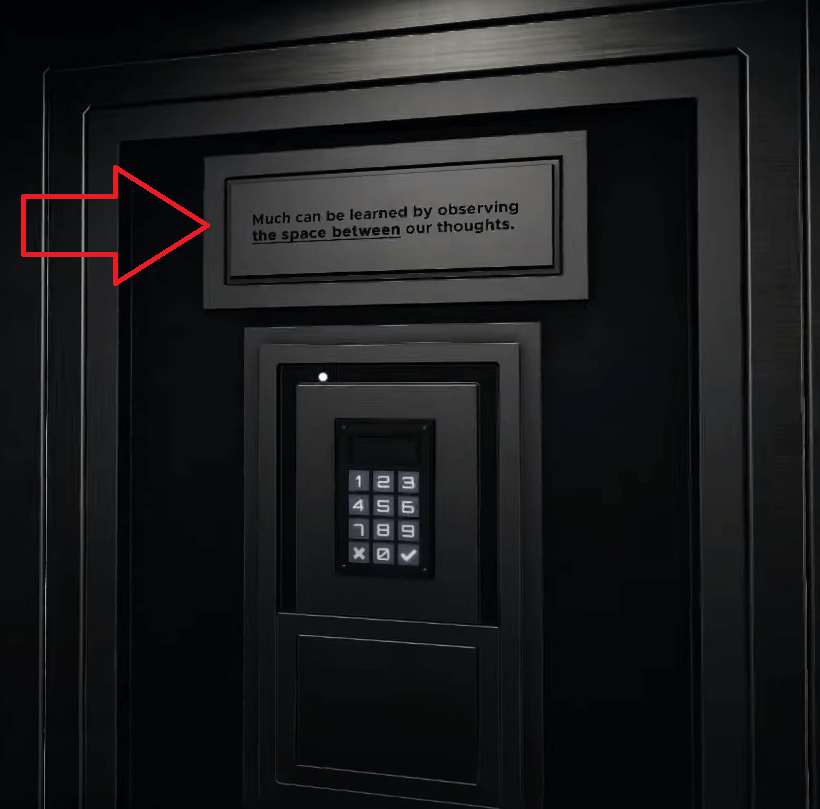
It says, “Much can be learned by observing the space between our thoughts.”
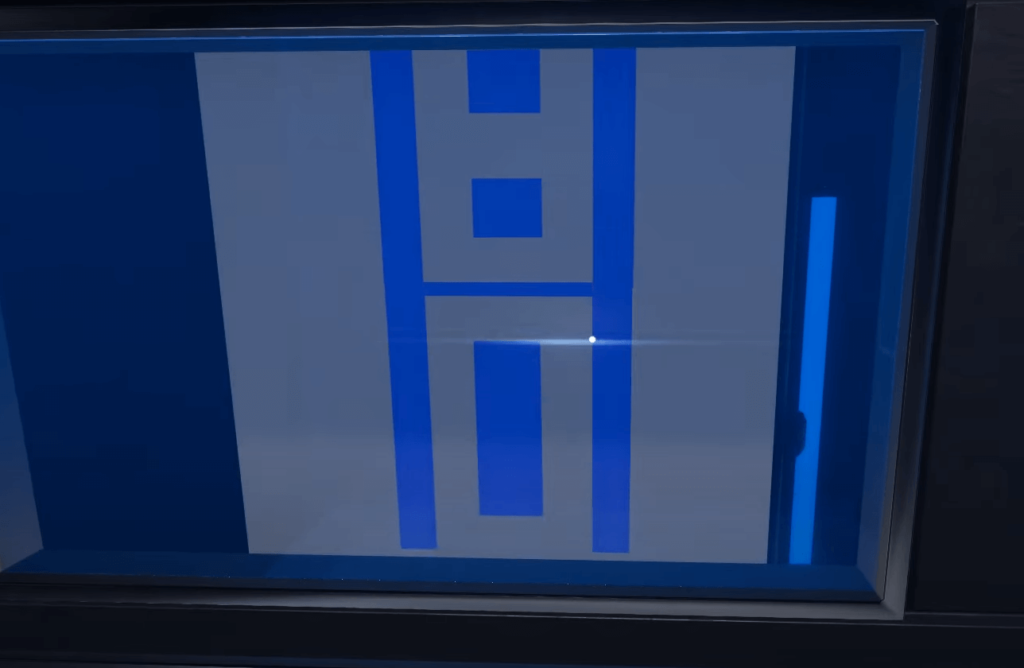
This refers to the outside of the elevator. You’ll see a number through the elevator’s window (blue glass).
But only when you’re going down to the 2nd floor.
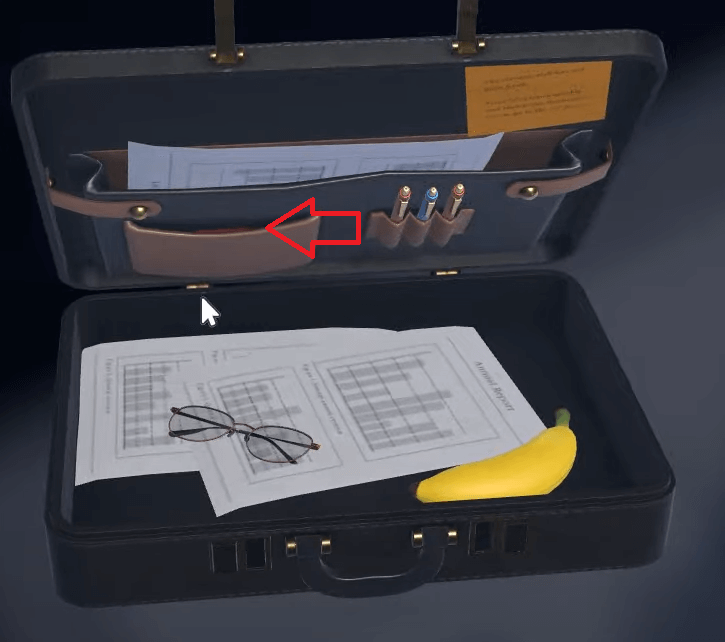
To go to the 2nd floor, you’ll need to open the briefcase and look inside.
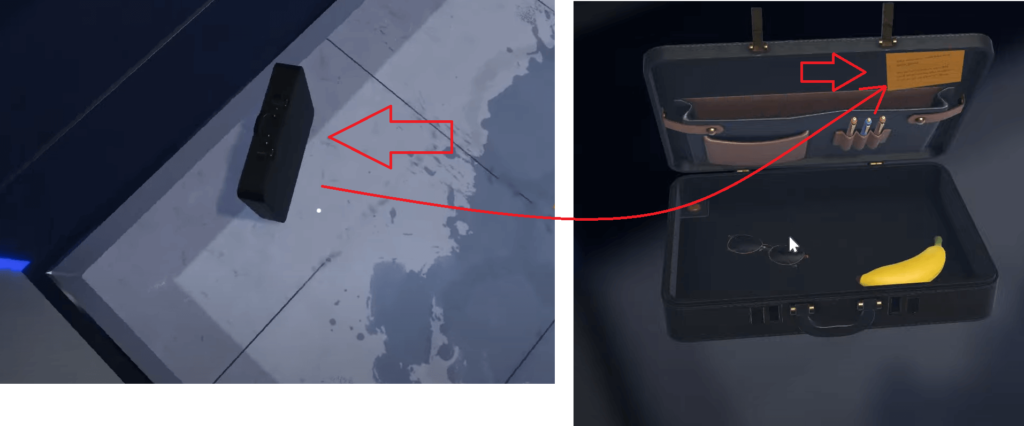
Take everything inside the briefcase, including the yellow note next to the pens.
That note contains instructions on how to get to the 2nd floor.
When you open the note, you’ll see the instructions.
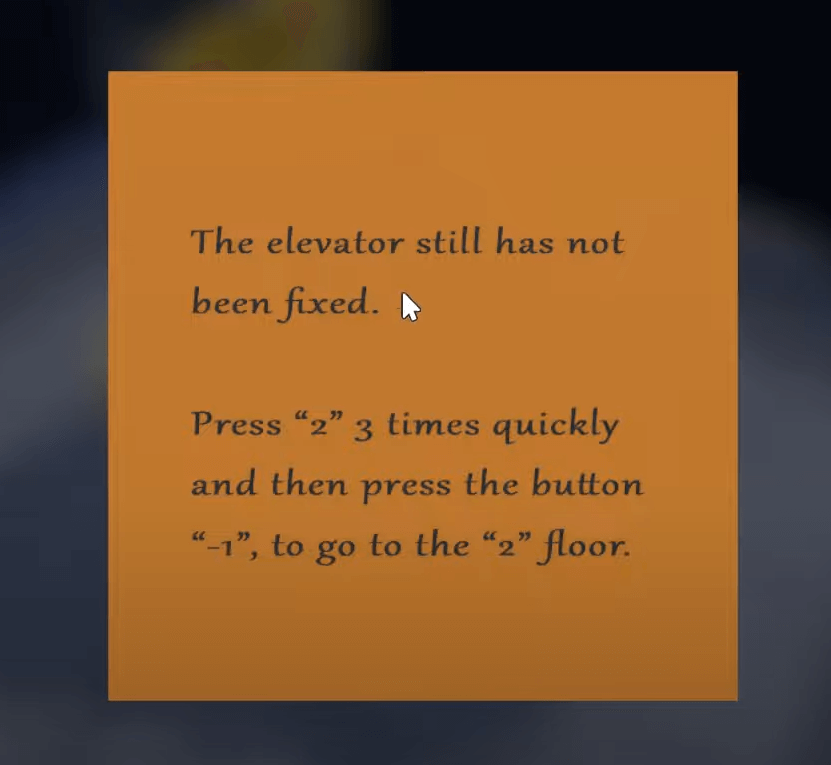
It says that to go to the 2nd floor, you’ll need to press “2” 3 times in quick succession and then press the “-1” button once.
This will send the elevator to the 2nd floor. After you do this, quickly go to the window and look outside.
Now, go back to the 4th floor and enter this code on the keypad. You’ll see the code is shown in white. It’s 2-6-8-0 if you look quickly.
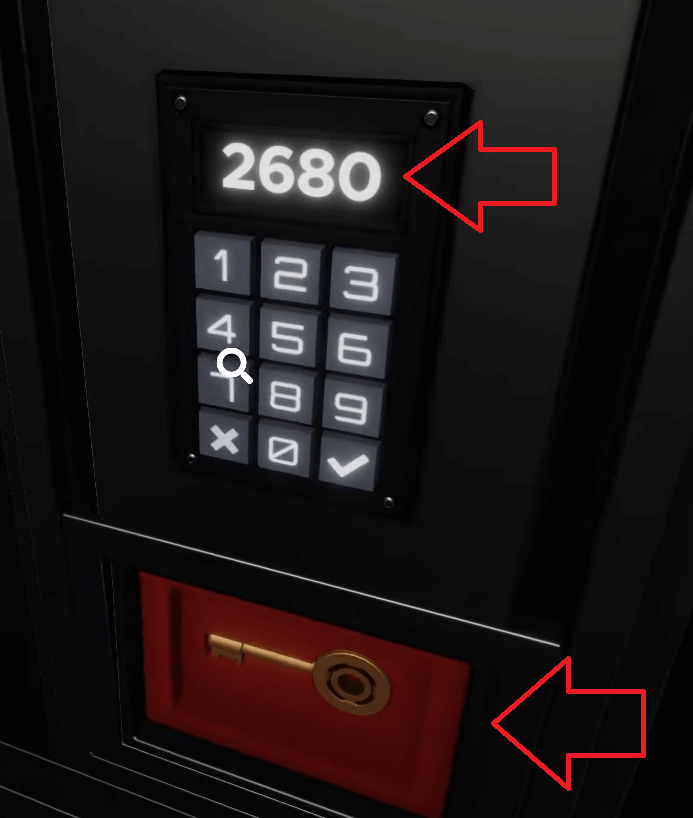
After you enter the correct code, you’ll also receive another part of the key.
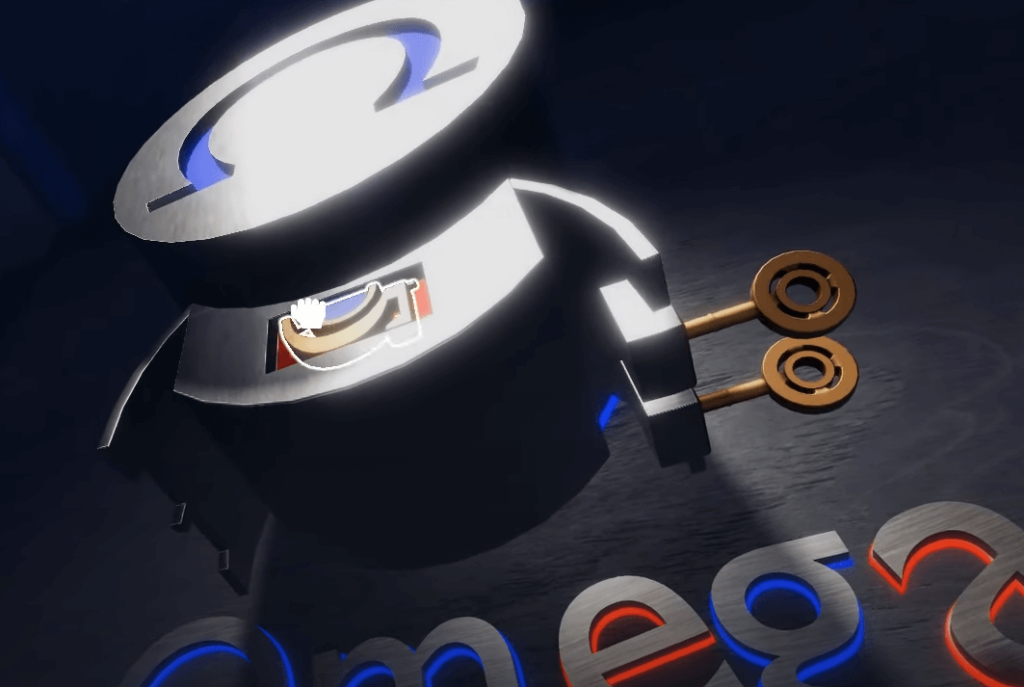
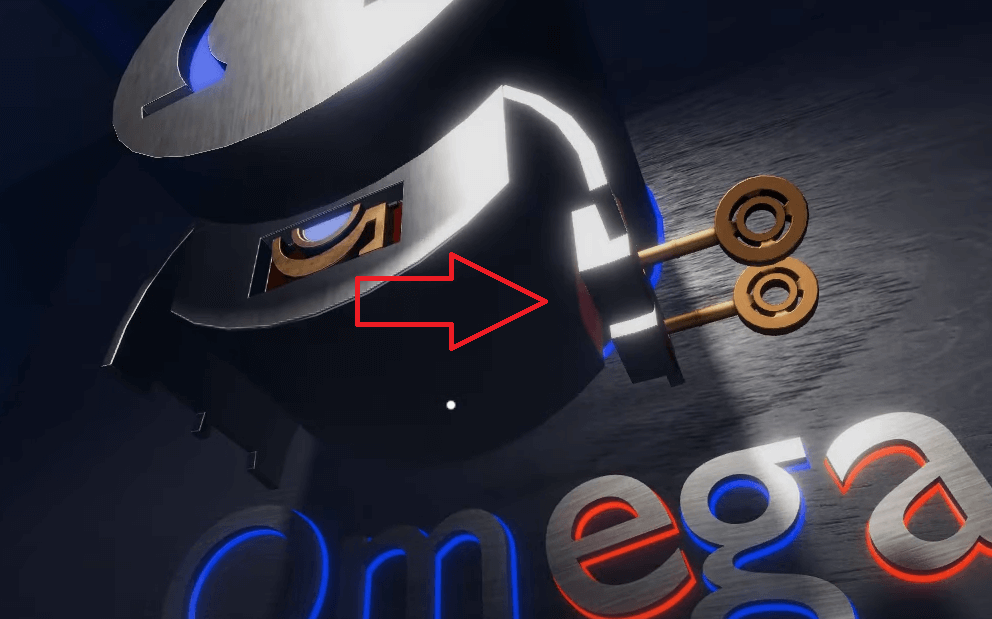
4. Omega Corporation Logo
Now that you have two keys, you can interact with the Omega Corporation Logo to get another key part.
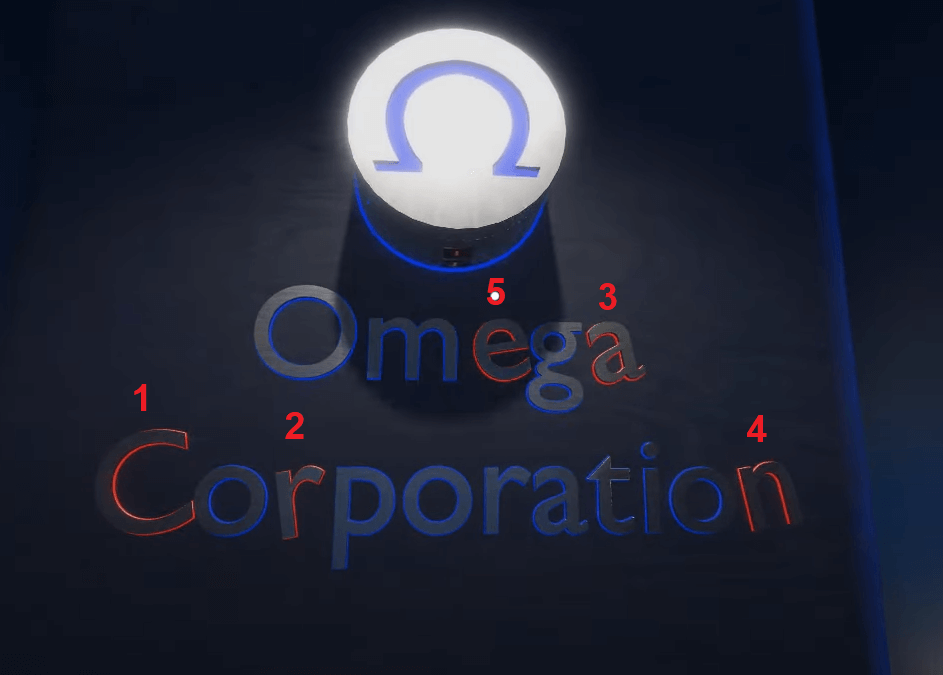
You need to tap on the C-R-A-N-E letters to form the word “Crane” with the Omega Corporation Logo.
If you look throughout the elevator, you’ll see the hint that can help you with this puzzle on the wall next to the logo.
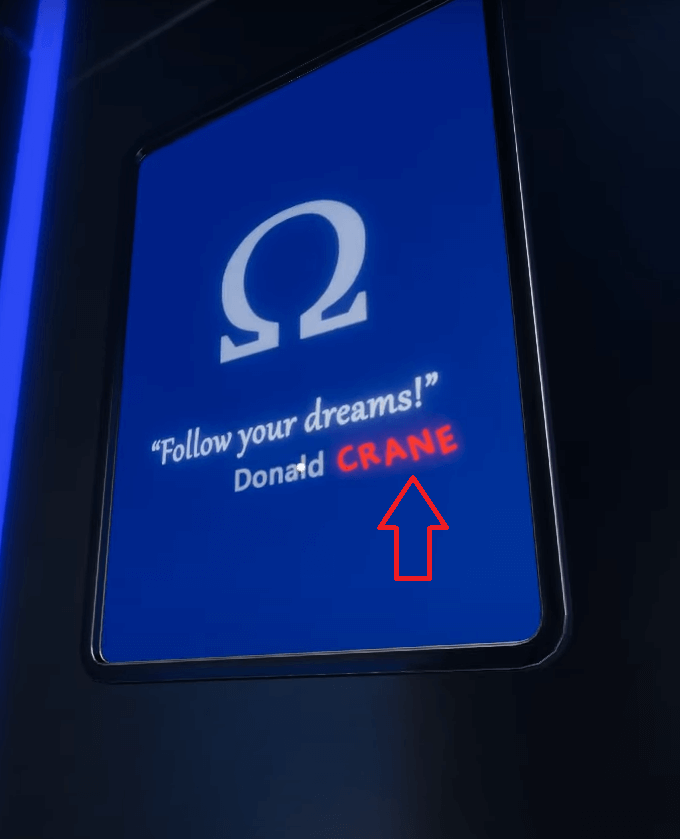
The panel says “Follow your dreams!” by “Donald CRANE”.
“Crane” is written in red, so it’s a hint for you.
After you complete the Omega Corporation logo puzzle, you’ll get another key part.
Now you’ve solved this puzzle too!
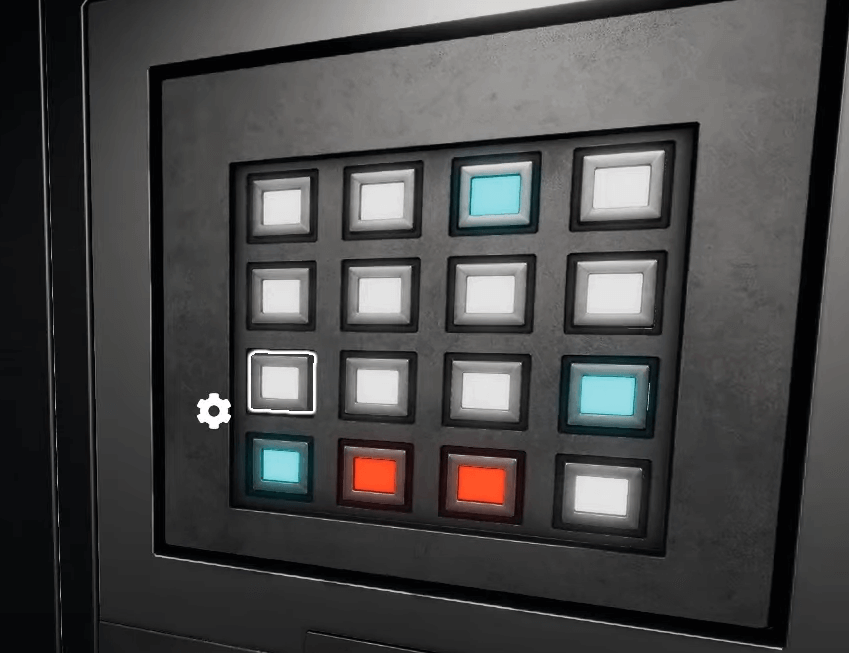
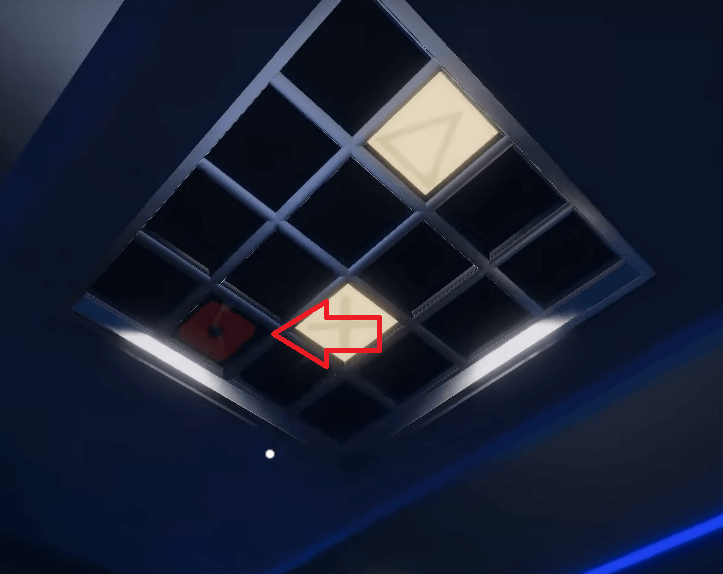
5. Blue and red squares
The next puzzle is on the 2nd floor after you press “2” 3 times and ”-1” once on the floor numbers.
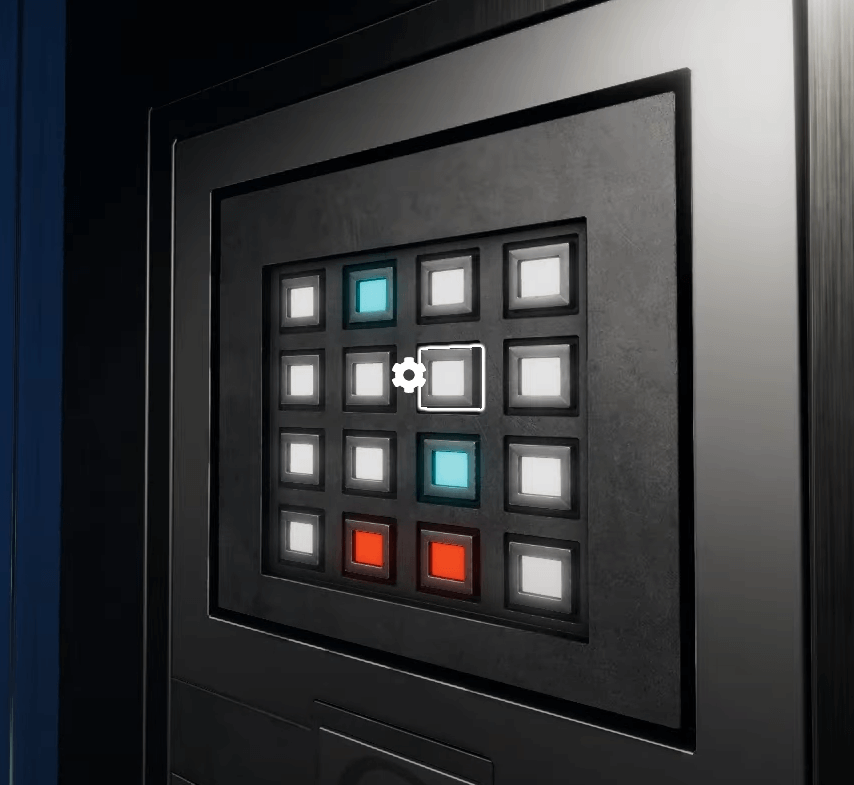
This puzzle requires you to enter the correct pattern into the interface.
The hint you need is on the ceiling. The ceiling lights, to be more specific.
If you look carefully, the lights on the ceiling are lit up in the same pattern as the pattern on the door.
If you switch the pattern on the door, the lights also change.
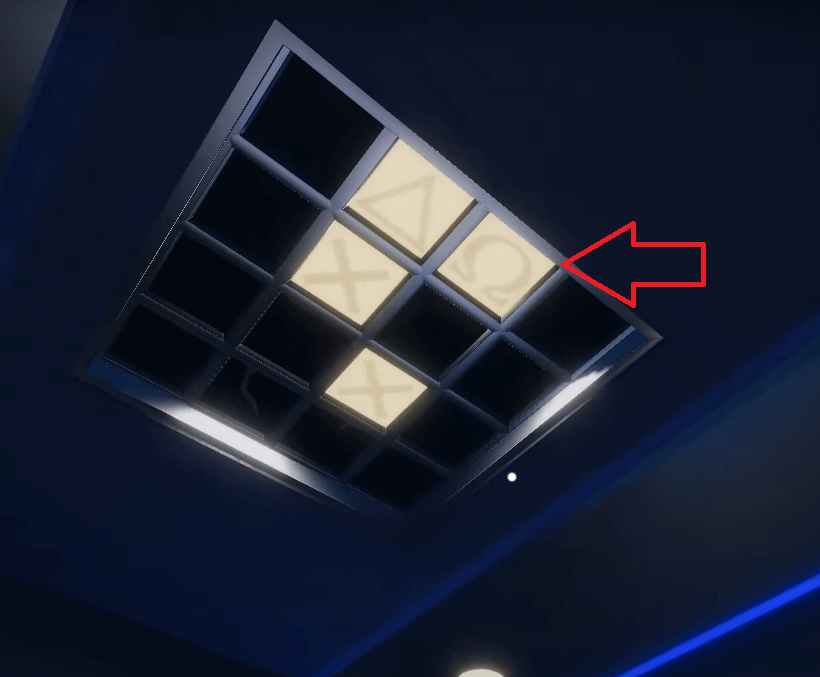
Moreover, the lights also have symbols underneath them. They always appear when the lights are lit.
So, to light up all the lights, make all the buttons on the door panel blue.
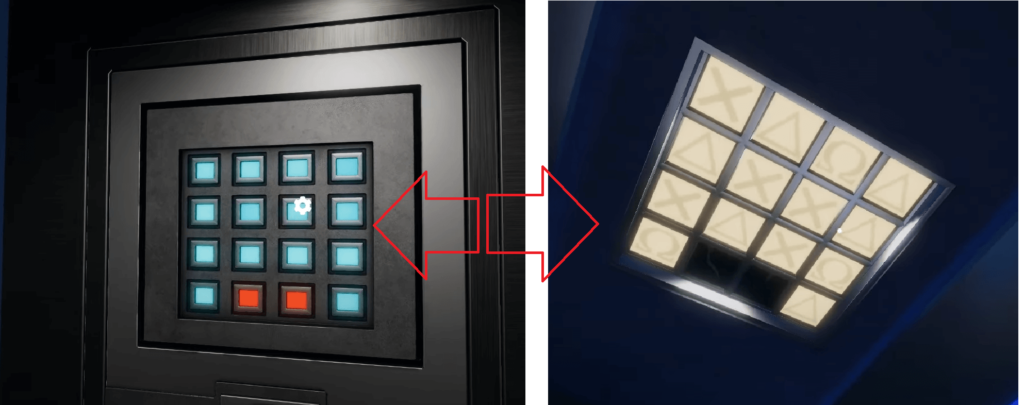
This will show you all the symbols under the ceiling lights.
Watch for the Omega (Ω) symbol. Remember where the Ω symbol is on the lights.
Now copy the pattern on the ceiling lights into the panel on the door.
Only the Ω buttons should be blue. The rest of the buttons should be turned off (white).
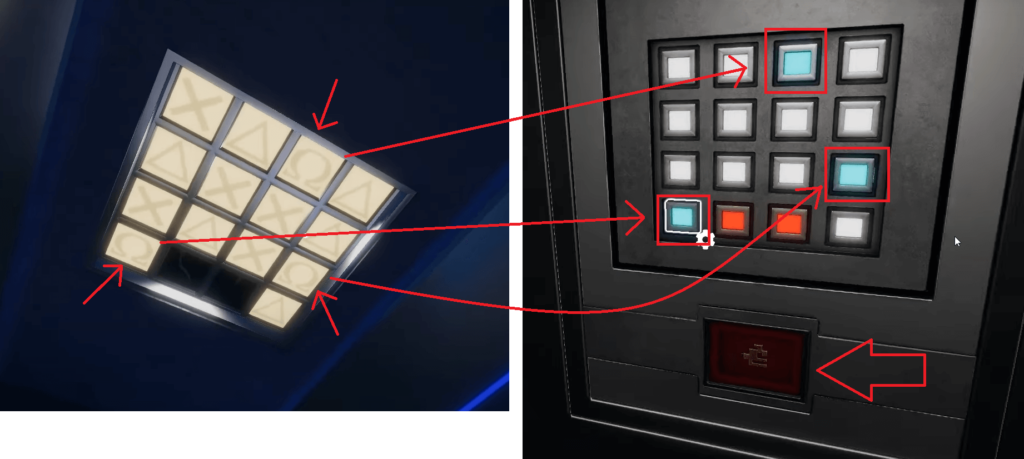
The correct solution to the puzzle is in the picture above. Only three buttons have to be blue on the door panel.
Don’t forget to get the key part after you complete this puzzle!
6. They Went Missing
This next puzzle takes you to Floor Zero. Press 0 on the floor numbers, and you’ll go to the next puzzle.
The elevator door will open, and you’ll see another keypad with a red note.
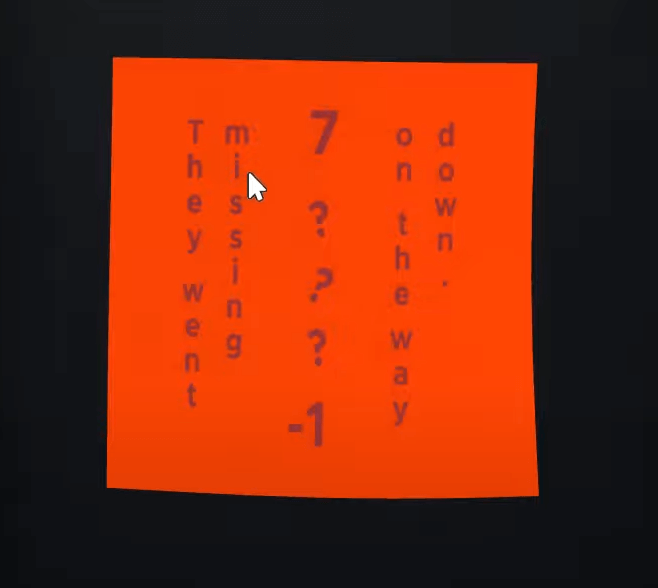
The note says, “They went missing – 7 ? ? ? -1 – on the way down.”
The “7 ? ? ? -1” sequence refers to the floor numbers.
This puzzle wants you to find the missing floor numbers between 7 and -1.
It’s easy to find the solution. The missing floor numbers represent the code you need to enter into the keypad.
Since the missing floor numbers are 5, 3, and 1, the keypad code will be the same.
Once you enter the code, you’ll receive the last key part.
7. Combine the Key and Go to Floor -1
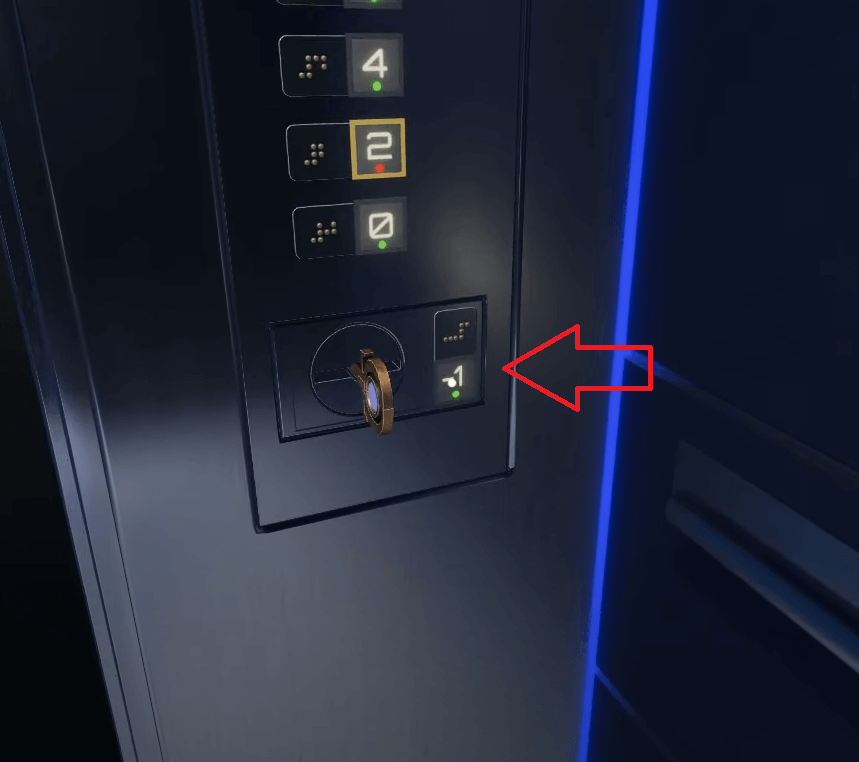
After completing the key, insert it into the slot next to Floor -1.
Then, click the “-1” button to go to Floor -1 and complete the game.
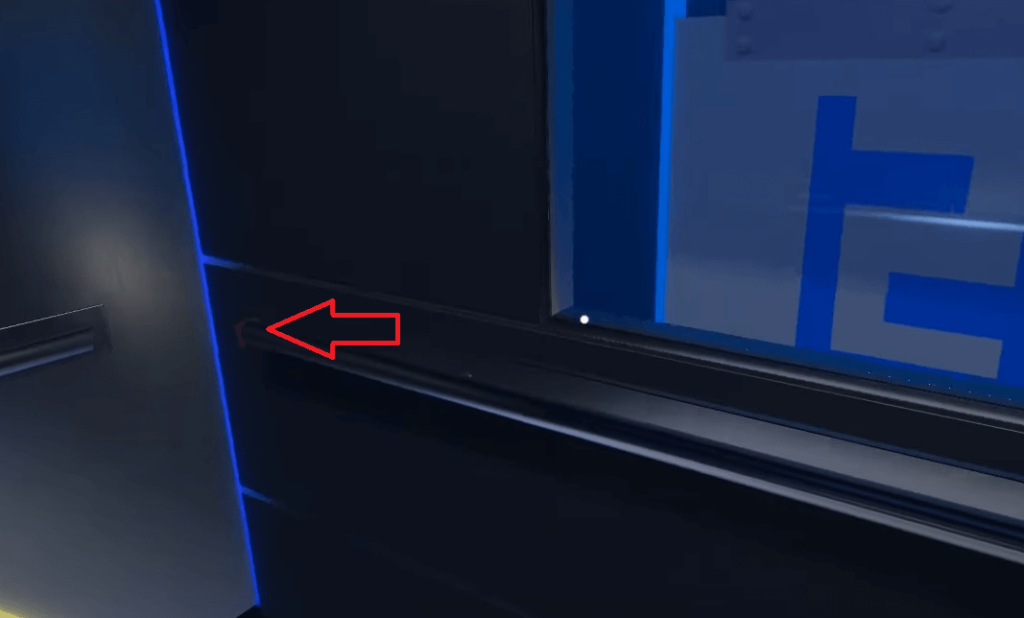
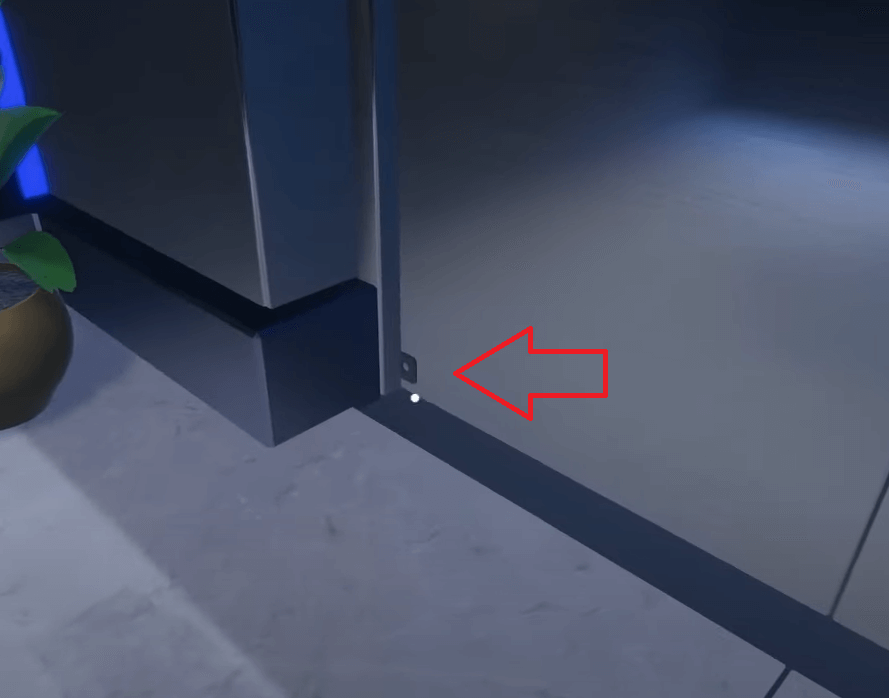
Where Are the 8 Tokens?
1. First Token – Ceiling Lights
2. Second Token – Inside the Suitcase
3. Third Token – Inside the Elevator Door on the 7th Floor
4. Fourth Token – Inside the Rag
5. Fifth Token – By One of the Lift Bars
6. Sixth Token – Inside the Omega Corporation Logo
7. Seventh Token – By the Elevator Door
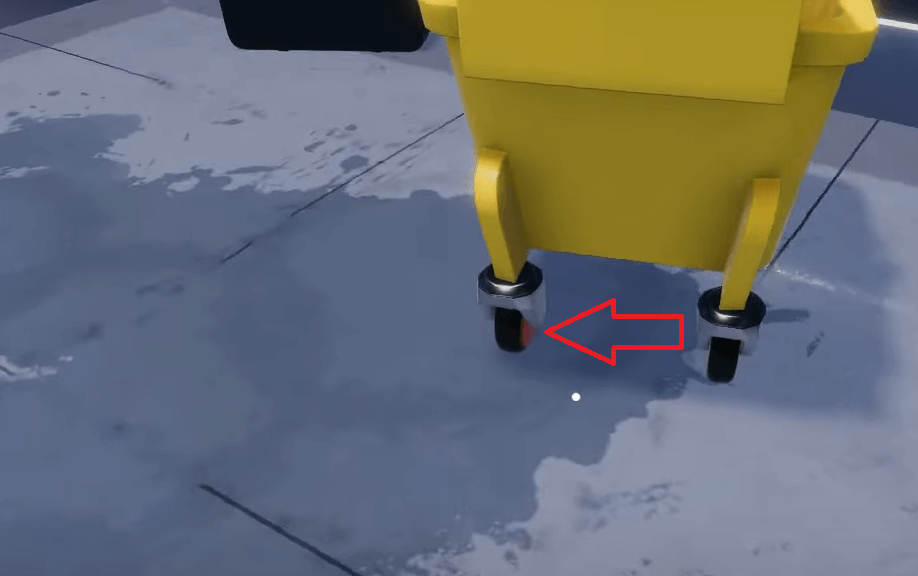
8. Eight Token – By the Wheel of the Cleaning Cart
Now that you’ve also found all 8 tokens of ”The Elevator” level, you’ve completed it perfectly!