The Edgewood Mansion is yet another chapter in the Escape Simulator, and The Lobby is the first escape room.
This guide contains a fully-detailed walkthrough of The Lobby, a speedrun guide, and a location of all the secret tokens (in that order, yeah).
You’ll learn how to solve all the puzzles in The Lobby, including the Fruit Password, Symbol Keypad, The Briefcase, and more.
So, let’s begin, shall we?
Summary: In this article, I share my experiences and tips on how to successfully escape The Lobby, the first room in the Edgewood Mansion chapter of Escape Simulator.

I provide a detailed walkthrough, a speedrun guide, and the locations of all secret tokens. You'll learn how to solve puzzles like the Fruit Password, Symbol Keypad, The Briefcase, and more.

Through my firsthand account, I offer insights into the various steps, hints, and tricks needed to conquer this escape room adventure.
Related: Escape Simulator Metaverse Walkthrough
Related: Escape Simulator the Office Walkthrough
Related: Escape Simulator Santa’s Workshop Walkthrough

Speedrun Guide
- Get to the safe and click on KING-QUEEN-BISHOP. Get the briefcase
- On the briefcase, put 6-1-9 on the left and 9-1-6 on the right locks. Get the keycard
- On the monitor, enter the 3-0-5-3-9-8 code
- In the “Security Clearance” menu, click on the “No Smoking,” “No Shopping,” and “No Weapons” symbols
- When asked for an ID number, press 0-4-2 and switch up the Security Clearance to 5
- Place the keycard on the door and enter APPLE-BANANA-CHERRIES
Step-By-Step Walkthrough
1. Evacuation Keypad
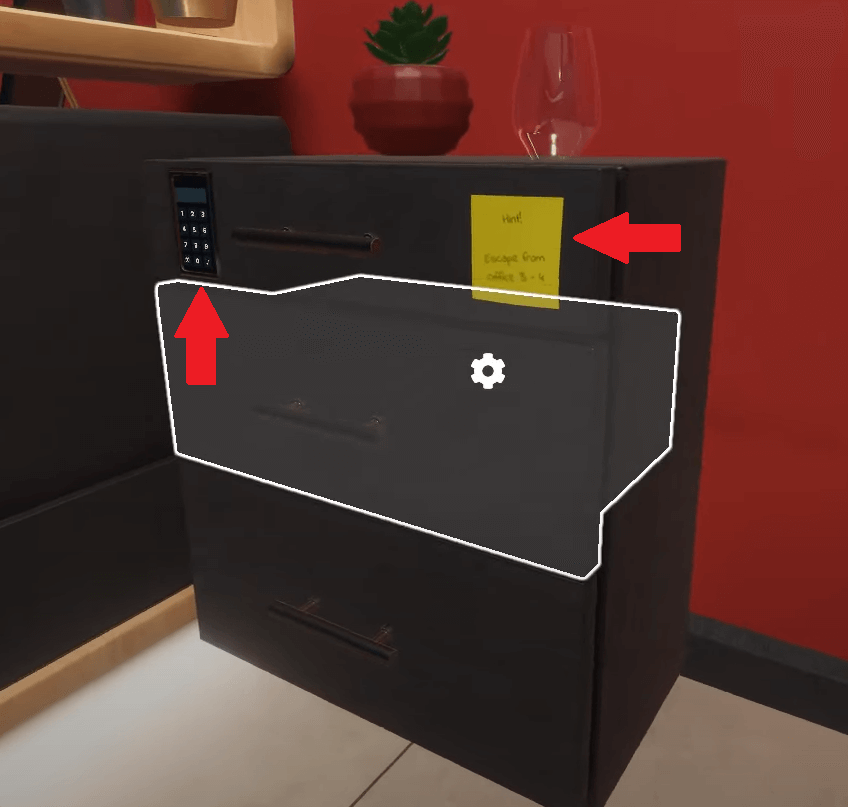
The first puzzle you should solve is the Evacuation Keypad. You’ll see it on one of the drawers in the room (check the image above).
Next to the keypad, you’ll see a yellow sticky note. Pick it up and see what it says.
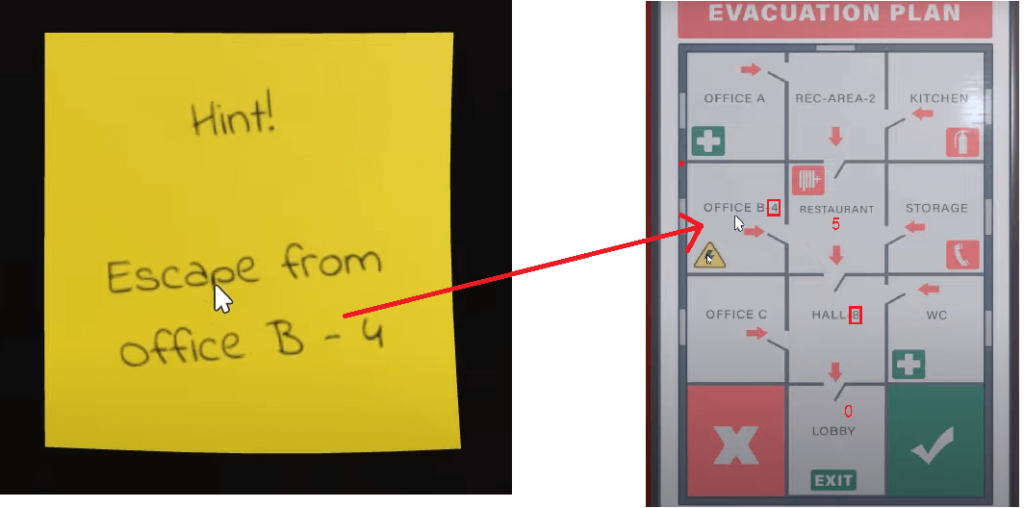
The sticky note says, “Hint! Escape from office B-4”.
This hints at the Evacuation Plan that is directly above the keypad. Click on it to zoom in (see it above).
And then retrace the steps from OFFICE B (where the arrow points to the picture) to the LOBBY at the bottom.
You’ll see that OFFICE B is numbered 4, and the HALL, just before the LOBBY, is numbered 8.
Think of the Evacuation Plan as a smartphone digit keyboard, with 1 in the top-left corner, followed by 2, and so on.
Office B is 4, Restaurant is 5, Hall is 8, and Lobby is 0, just like a smartphone digit keyboard.
So, the code to the keypad is 4-5-8-0.
Enter it into the keypad to get the metal detector.
2. Touchscreen Computer
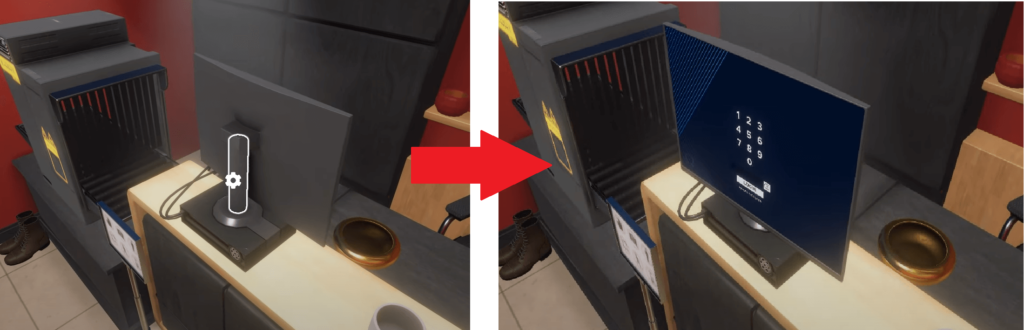
The monitor will initially be turned away from you but click on the monitor stand to turn it toward you (like in the picture above).
This will reveal a touchscreen keypad on the monitor, which you’ll need to solve.
Click on the monitor to zoom in and click “Forgot Password” to get a hint.
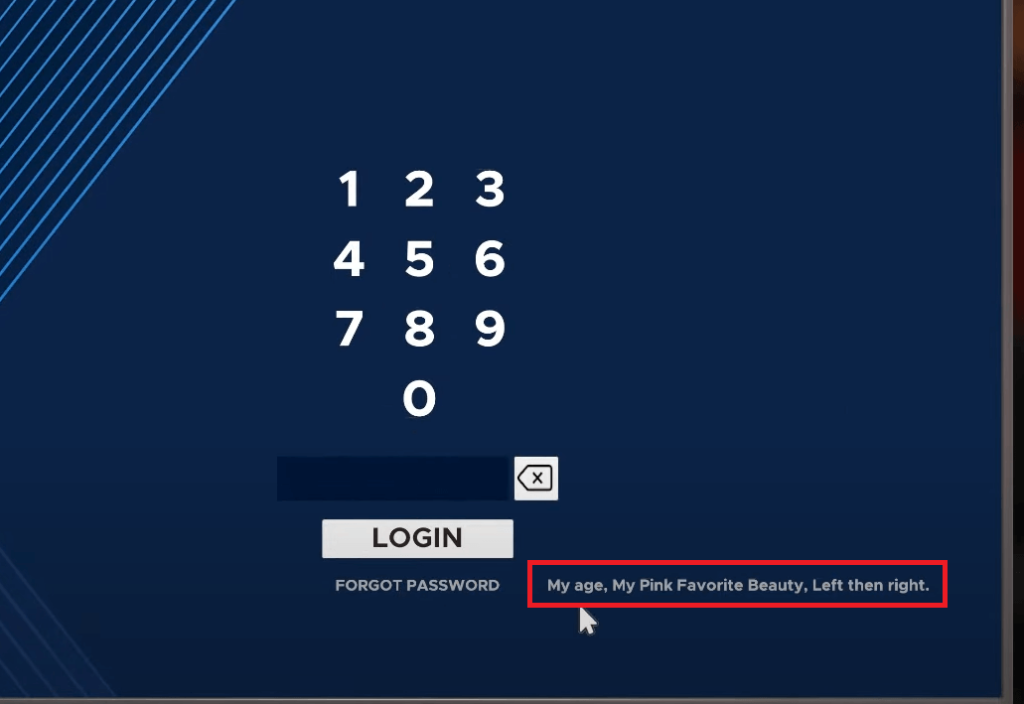
It says, “My age, My Pink Favorite Beauty, Left then right.” This is the hint you need to find the password.
But first, you’ll need to collect some items.
The “Age” hint refers to a birthday cake postcard in the second drawer.
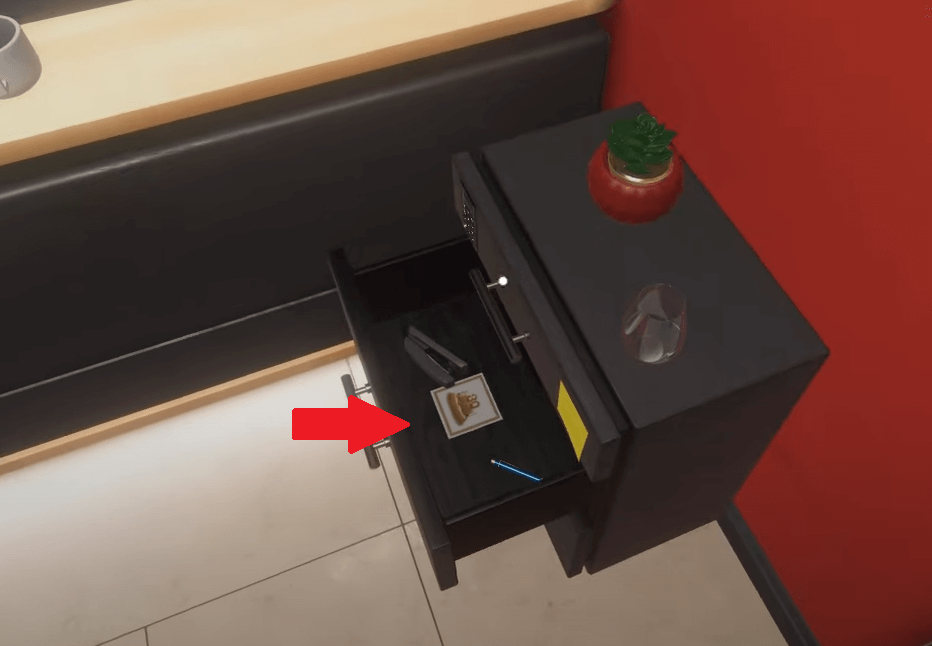
Pick that up because it contains a valuable clue for the password on the monitor.
Next, pick up the picture frame on the desk.
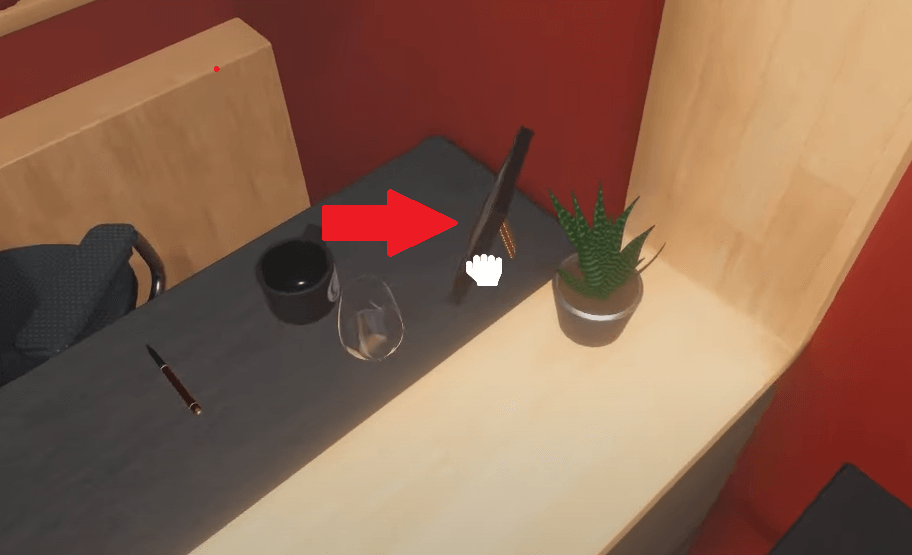
The picture in the frame also contains a clue for the monitor password.
Now you need one other item (technically two) – the boots on the floor.
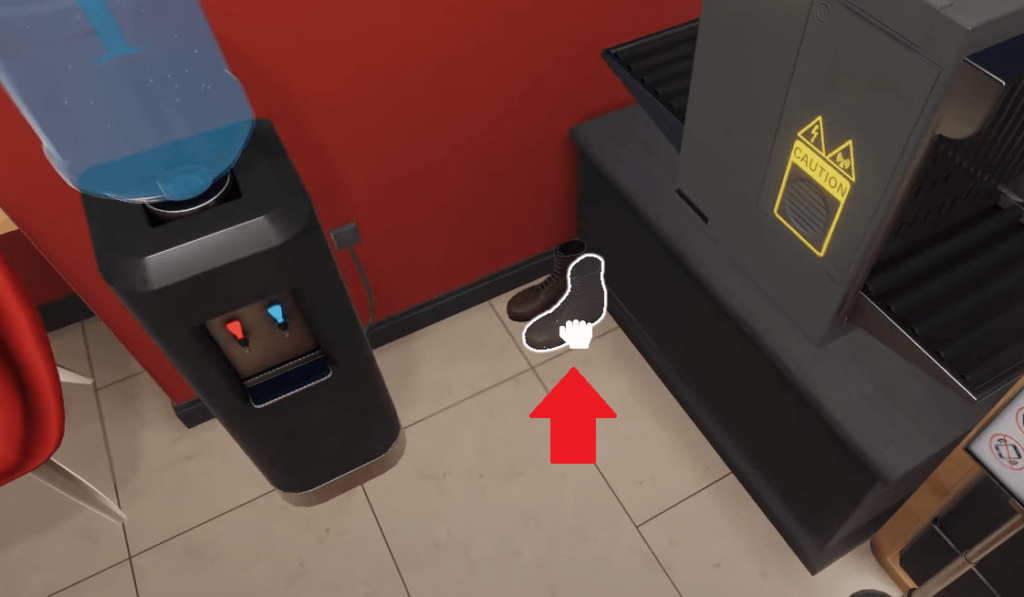
The boots are also a clue to deciphering the monitor password.
Remember the hint? It was “My age, My Pink Favorite Beauty, Left then right.”
The “age” refers to the birthday cake, the ”pink favorite beauty” refers to the framed photo, and the “left and right” refers to the left and right boots.
The birthday cake postcard and the framed photo each have numbers on them.

The postcard shows 30, and the photo shows a car with the plate number 53.
The first sequence of the password is 3-0-5-3, then.
Next, the two boots. Check the left one first, and then the right one.
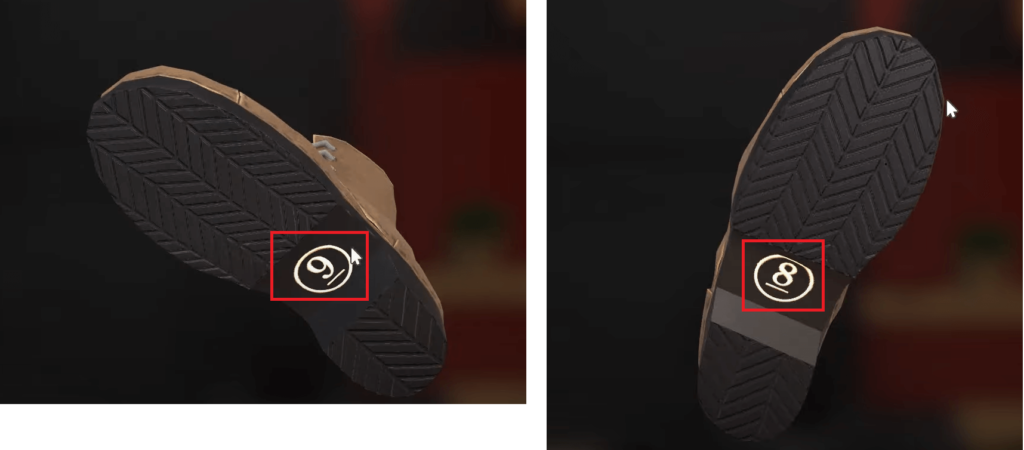
The numbers on them are 9 and then 8.
So, the final sequence is 9-8. The complete password for the monitor is 3-0-5-3-9-8.
After you enter the password on the computer, it’ll unlock and reveal several options.
3. Security Clearance – Part 1
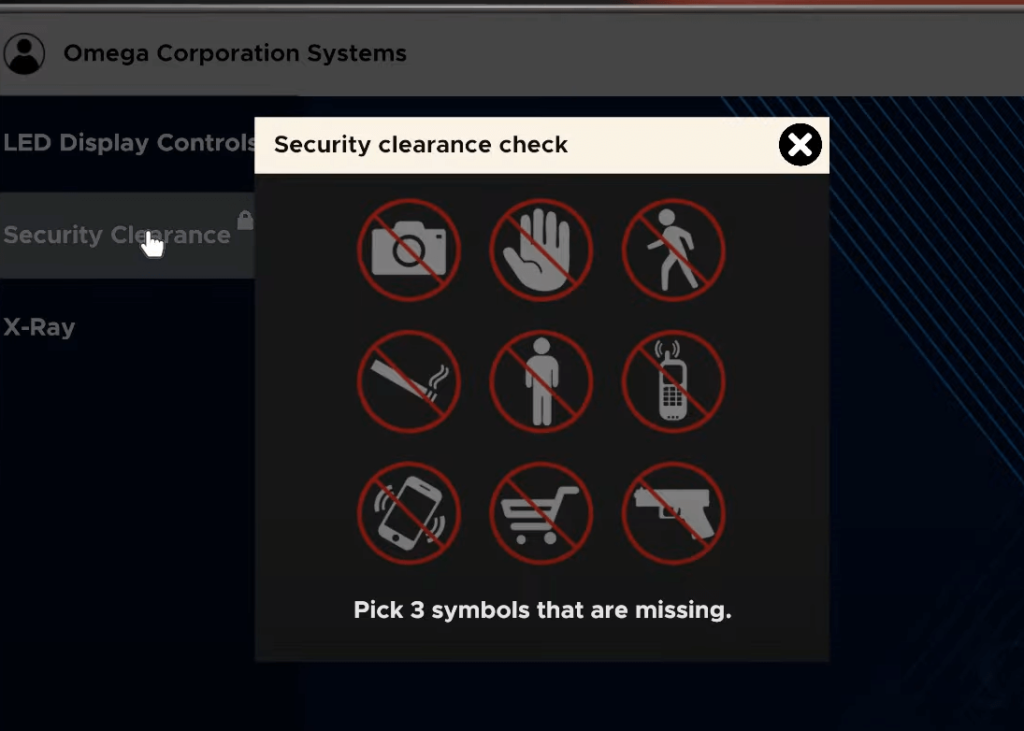
You’ll see the “Security Clearance” option on the computer you just unlocked. Click on it to open the app.
It’ll show a “Security clearance check” where you need to pick the 3 symbols that are missing from a list of symbols.
The solution is just beside the monitor, on the floor.
You’ll see a sign on the floor in front of the monitor with multiple symbols like the one on the monitor.
This is where you can see what symbols are missing.
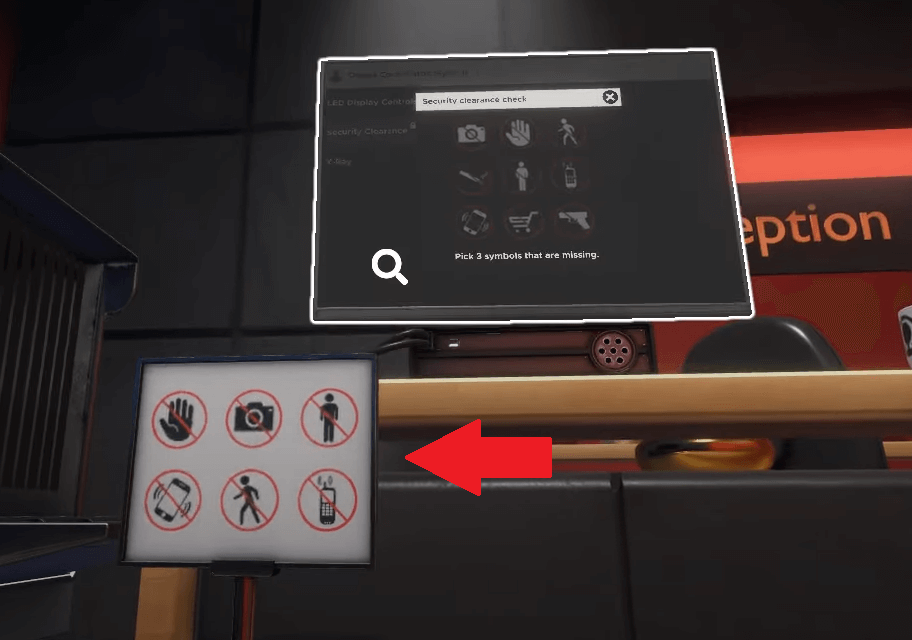
Compared to the symbols on the monitor, the ones on the sign are missing 3.
The 3 missing symbols are Smoking, No Shopping, and No Weapons.
Go back to the monitor and click on these symbols to complete this puzzle.
After you enter the symbols, you’ll receive another puzzle in the “Security Clearance” menu of the computer.
You’ll solve this later because you need an item locked behind another puzzle.
4. Symbol Keypad
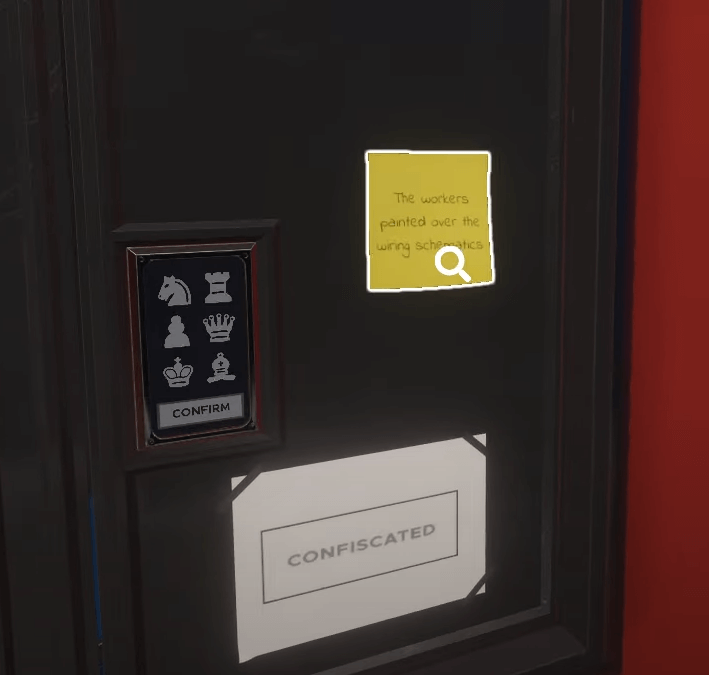
The next puzzle is a keypad with symbols. If you read the yellow sticky note near the keypad, it says, “The workers painted over the wiring schematics.”
You’ll need to figure out what the symbols are. The clue to this is simple – the wall next to the keypad is covered in these symbols.
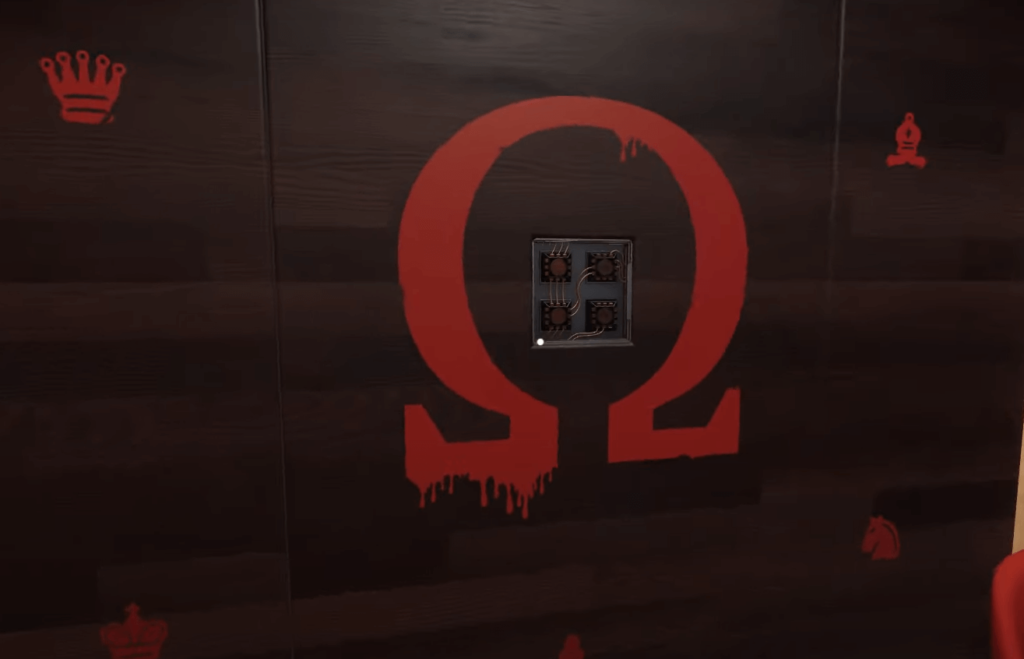
You can also see the wiring mechanisms inside the Omega letter. In the four corners of the Omega letter, there are 4 symbols, with a fifth one at the bottom.
To figure out which symbols you need to press on the keypad, you need the Metal Detector.
You already have the metal detector in your inventory (surprise), so use it to scan all the symbols on the wall.
Remember where the metal detector makes a noise and turns green. Those are the symbols you need to enter into the keypad.
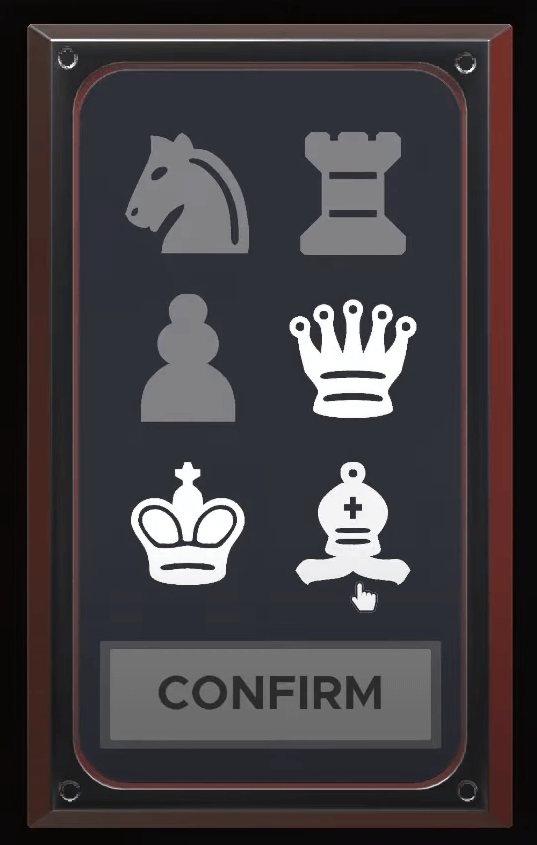
These are the 3 symbols you should enter into the keypad (see above).
Click on “Confirm” and collect the briefcase (you’ll need it later).
5. The Briefcase
The Briefcase is the next puzzle. You need to open it.
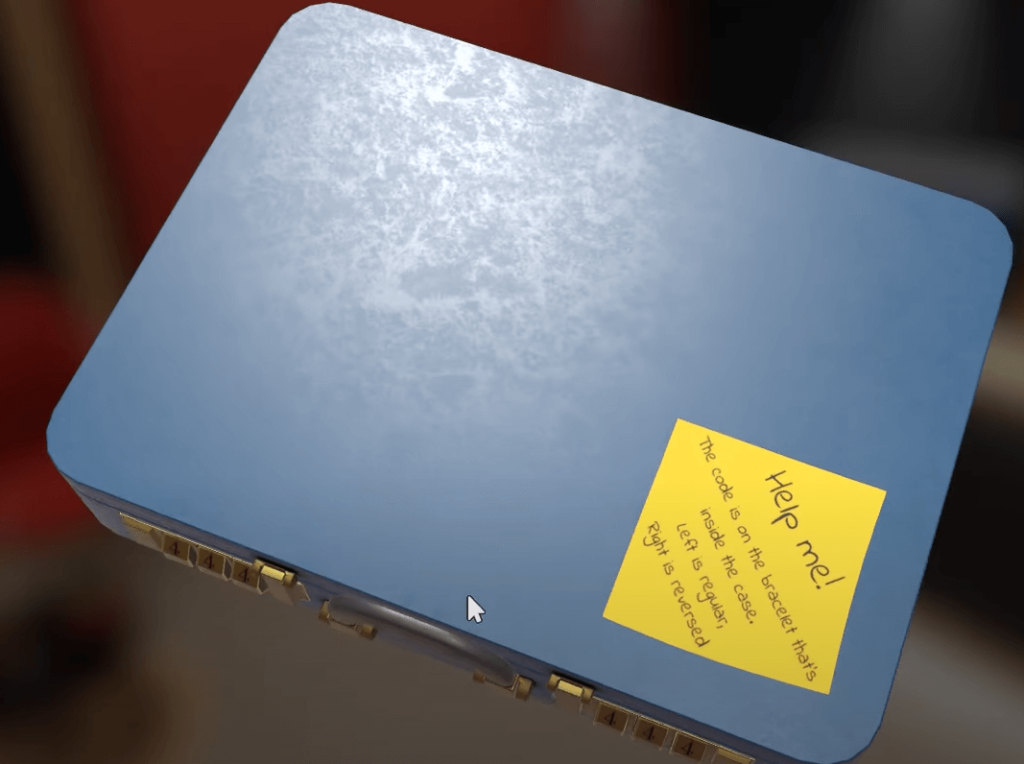
The hint is on the briefcase yellow note: “The code is on the bracelet inside the case. Left is regular, Right is reversed.”
So, the code is written on the bracelet that’s inside the briefcase.
Put it into the X-ray machine to see what’s inside the briefcase without opening it.
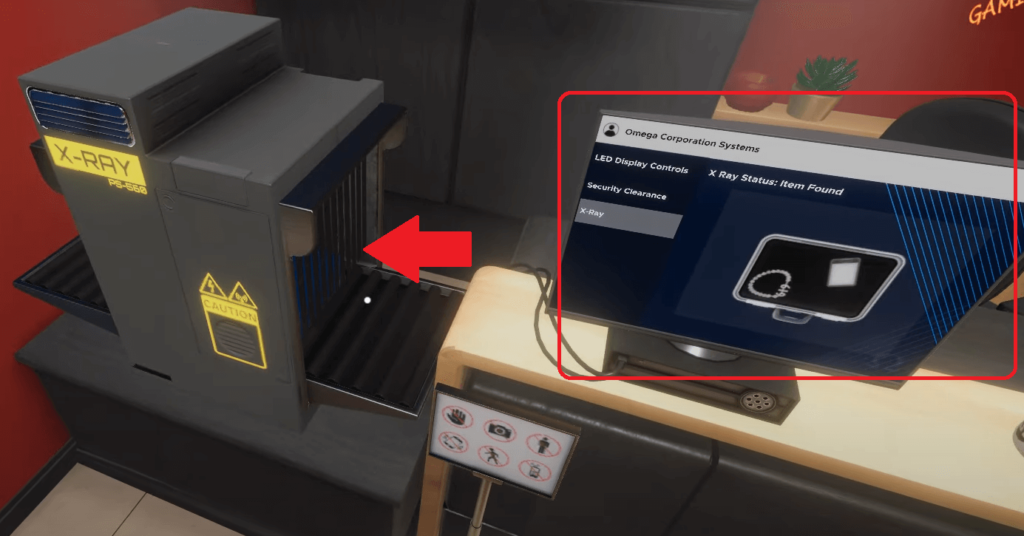
The X-ray machine is right next to the monitor. Once you put the briefcase inside, you’ll see what’s inside it on the monitor, under the “X-Ray” menu.
Click on the monitor to zoom in and look at the bracelet.
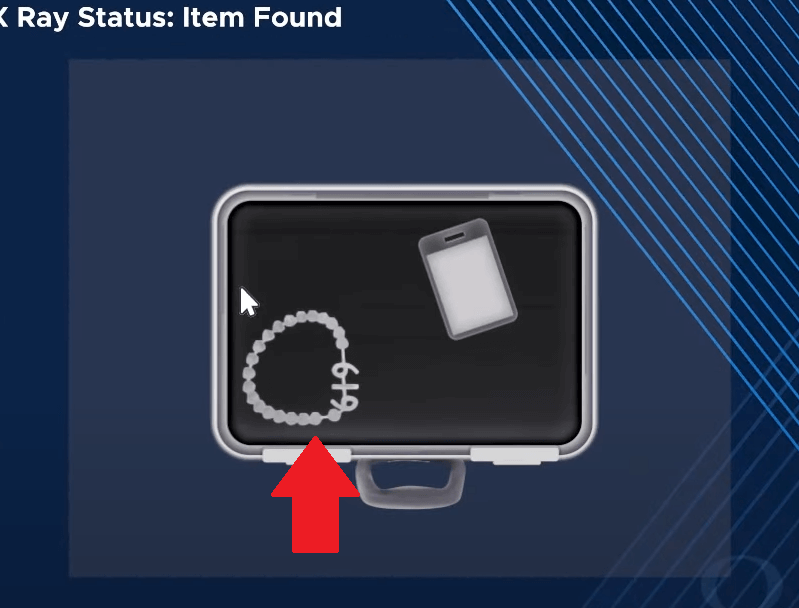
You can read the number 6-1-9 on the metal bracelet inside the briefcase.
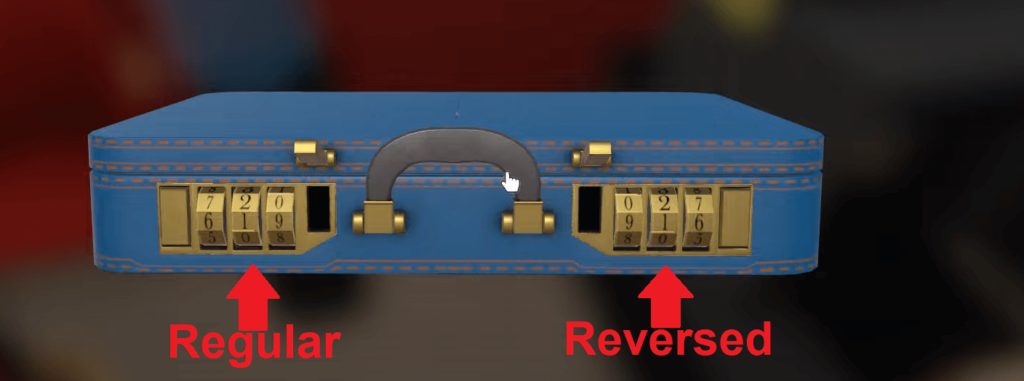
Remember the sticky briefcase note: “Left is regular, Right is reversed”.
It means that, on the left side of the briefcase, you’ll enter the code 6-1-9, and on the right side of the briefcase, you’ll enter the reversed number 9-1-6.
Once you open the briefcase, collect the keycard inside and move to the next puzzle.
6. Security Clearance – Part 2
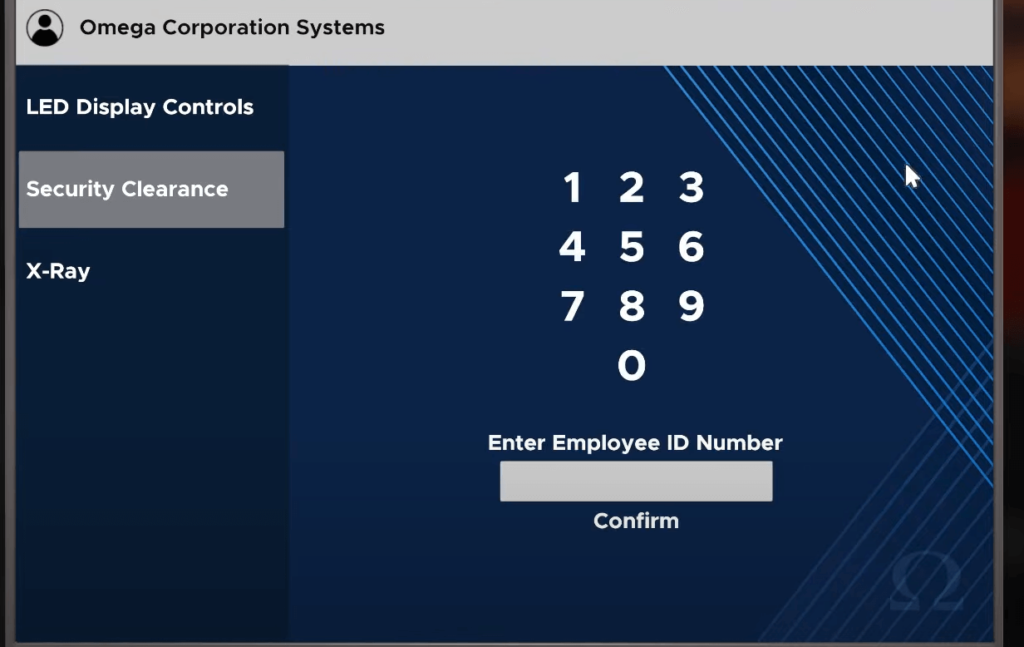
You must enter an Employee Id Number to change the security clearance.
The Employee ID Number can be found on the Keycard you picked up from the briefcase earlier.
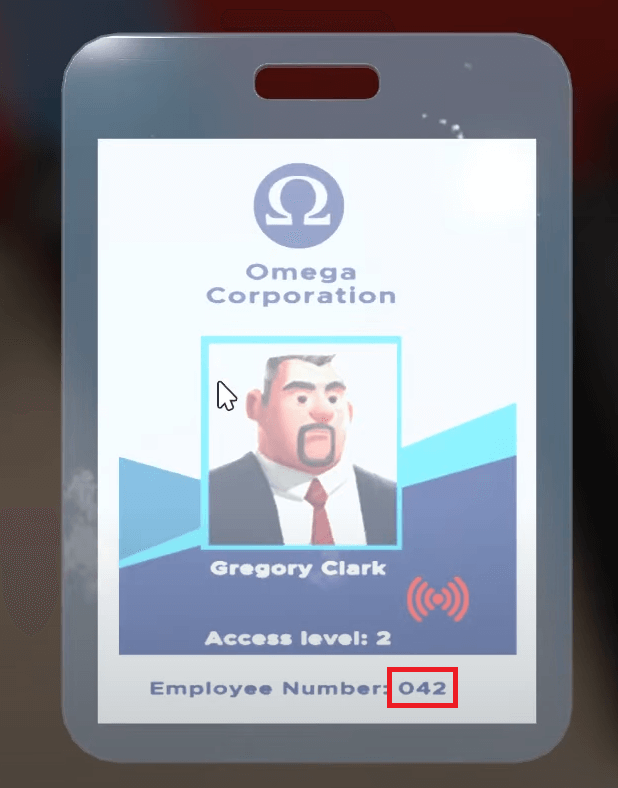
The employee number is 0-4-2. Enter this code into the “Security Clearance” menu on the computer.
Once you enter it, you’ll see that you have Security Clearance 2. To complete the next puzzle, you’ll need Security Clearance 5.
So, increase your Security Level to 5 (if only it was this easy in the real world…)
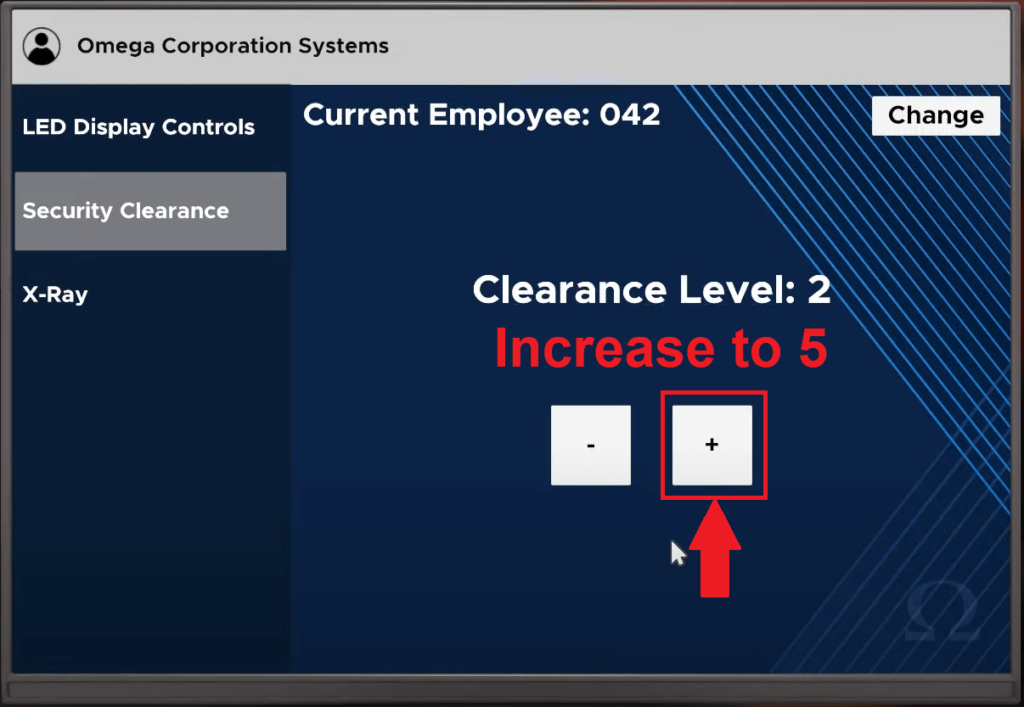
Then, exit the “Security Clearance” menu once you increase it to 5.
7. Fruit Password
On the computer, click “LED Display Controls” and select “Important”. This will change the display message above the water dispenser.
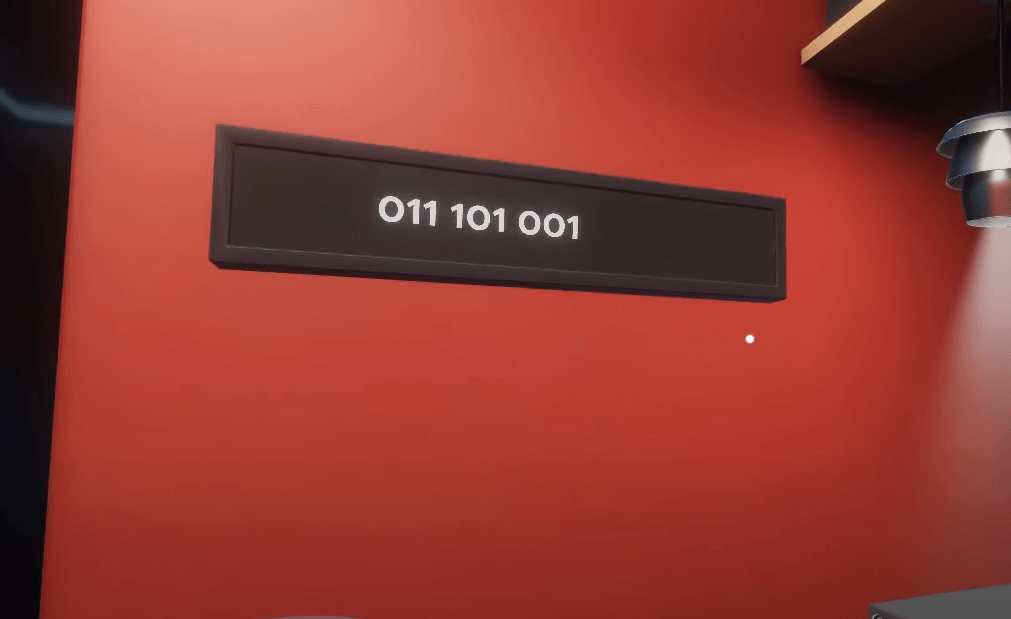
It’ll show a string of digits – 011 101 001.
This is the final puzzle of the Lobby escape room.
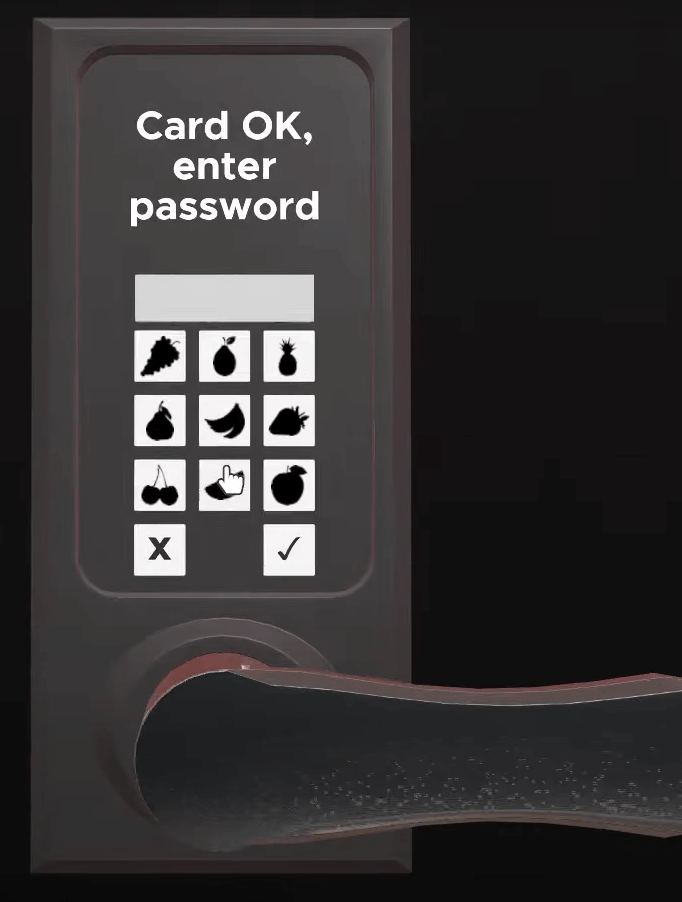
If you place the keycard on the card reader on the door, you’ll see that it lights up, and you can enter a password.
But the password is formed by fruits.
To find the password, you need the digit code on display above the water dispenser, which is formed by 0s and 1s.
To decipher it, grab the tree figurine on the table.
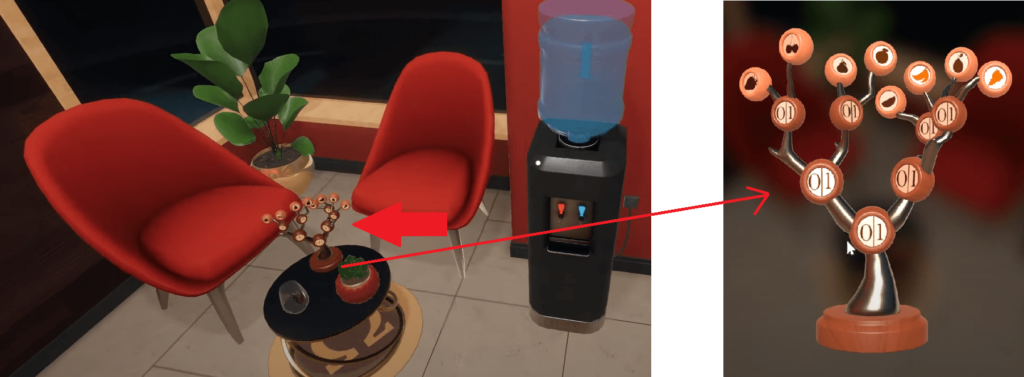
The tree branches contain 0s and 1s, which all lead to fruits.
Remember the code on display above the water dispenser? It’s 011 / 101 / 001.
On the tree, 0 means left, and 1 means right.
For the first sequence, 011, follow the left branch, then two rights, and you’ll get to the apple fruit.
For the first sequence, 101, take the right branch, then the left branch, and then the right branch to get to the banana.
For the third sequence, 001, take the left branch, then another left, and then right to get to the cherries.
Enter apple, banana, and cherries into the fruit keypad, and that’s it. This will let you escape from the Lobby room!
Where Are the Secret Tokens?
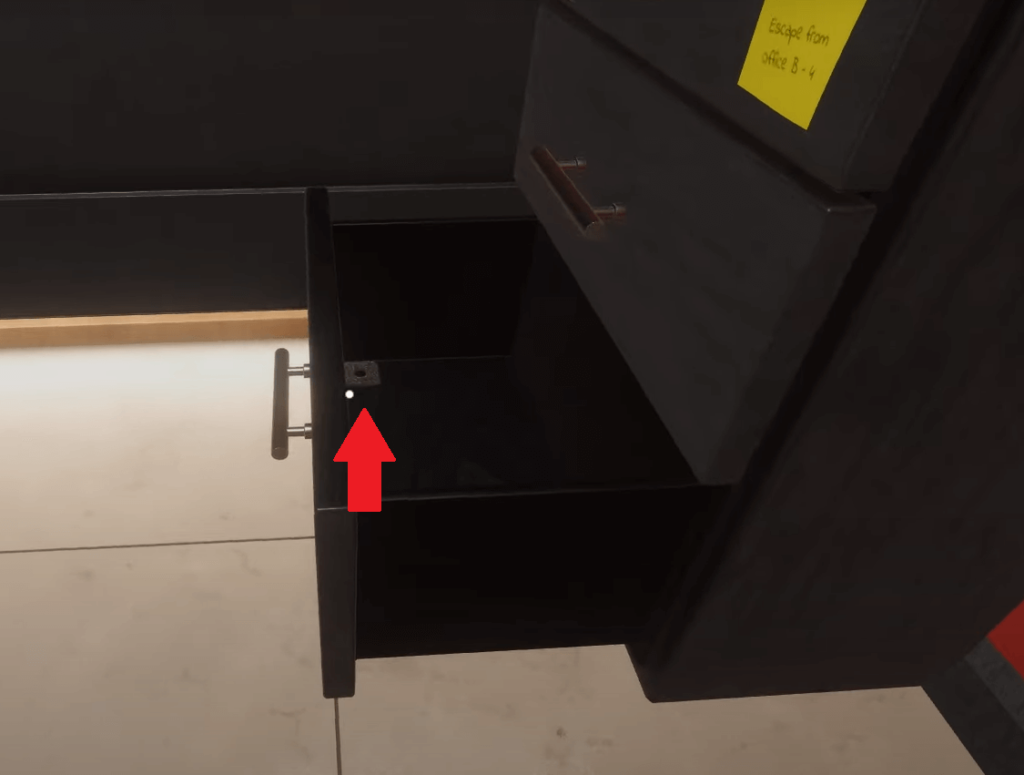
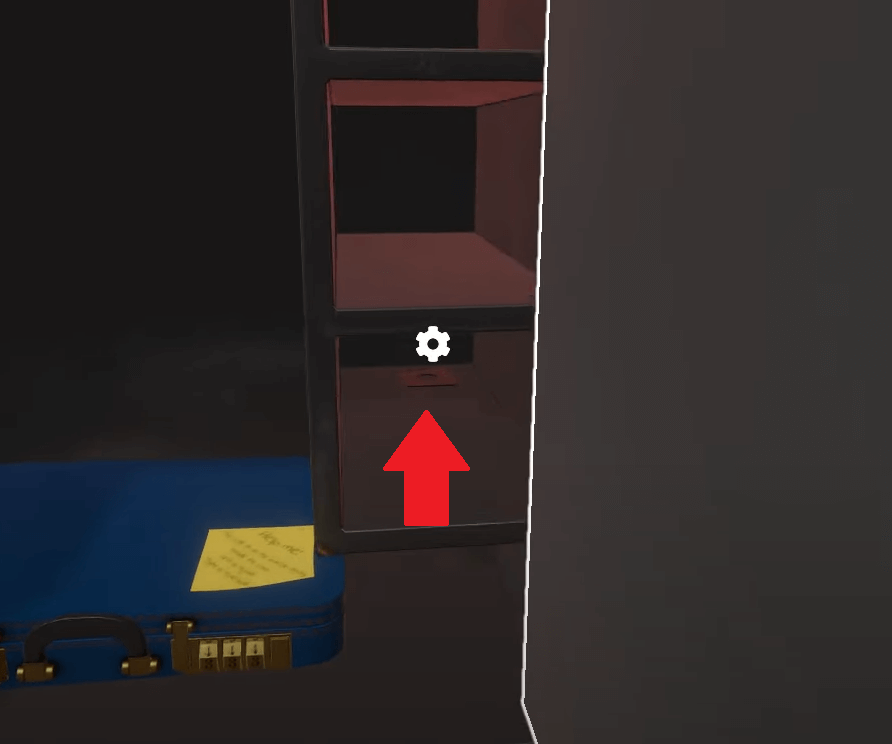
- Inside the bottom drawer
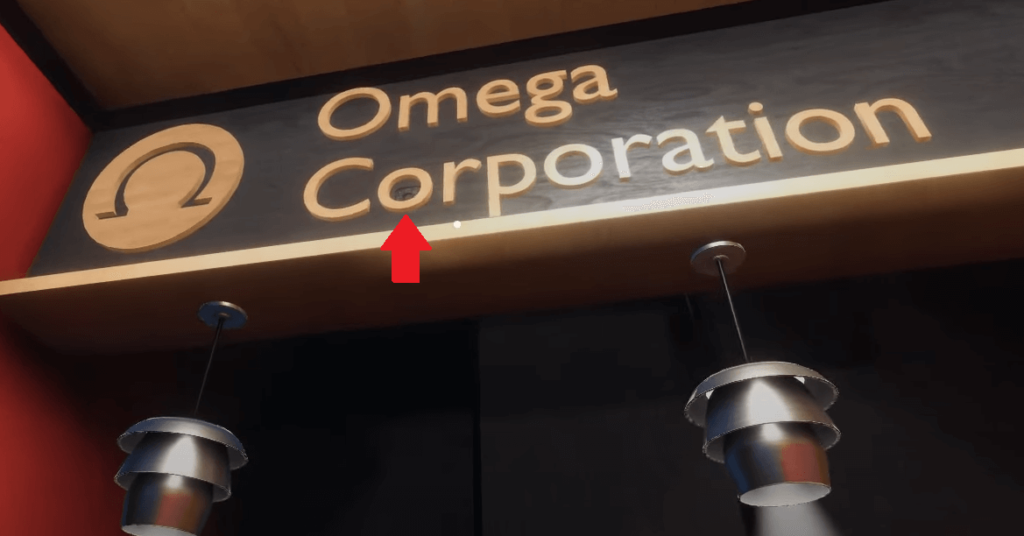
- In the first “O” letter of the “Corporation” on the wall above the computer
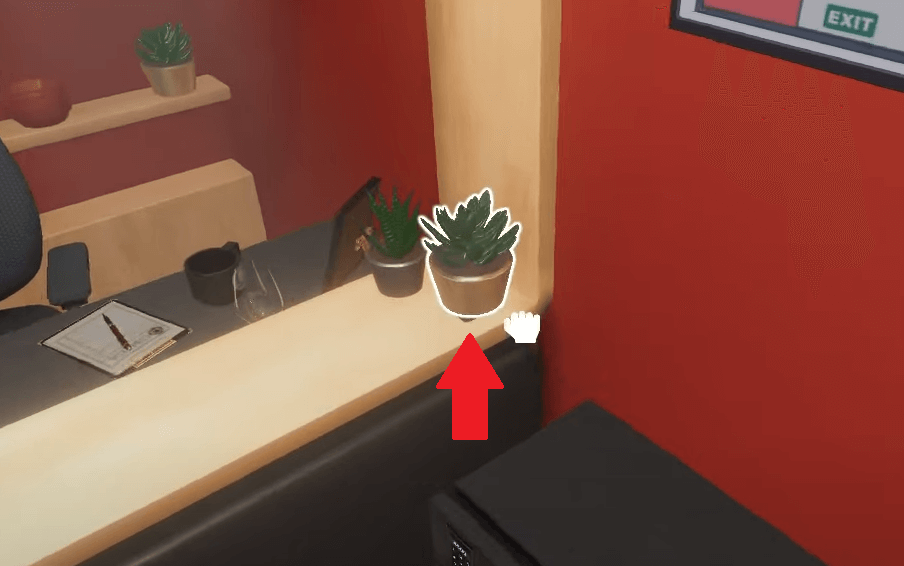
- Under the flower pot on the desk
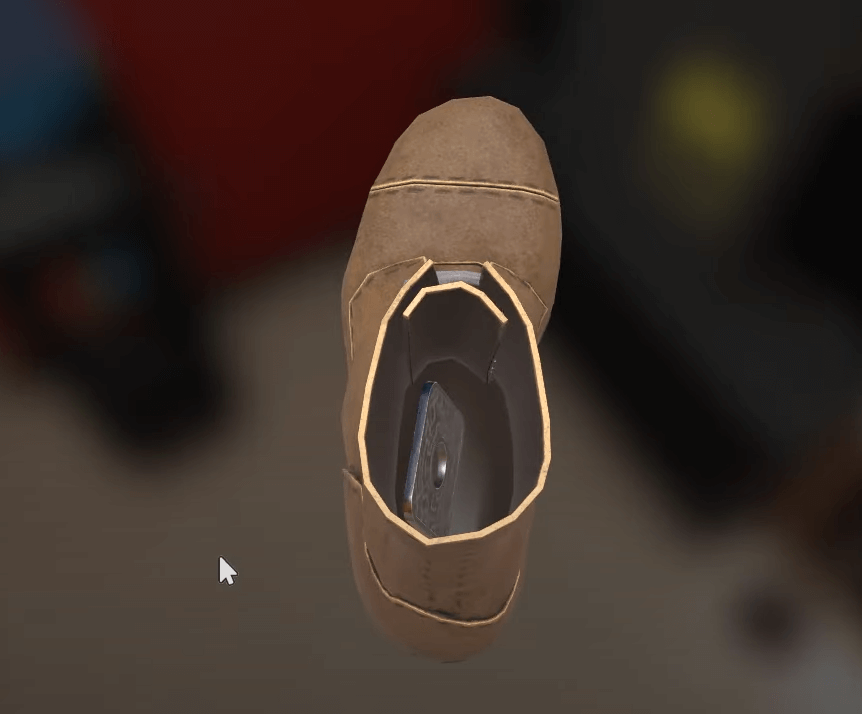
- Inside the left boot
- Inside the chess safe on the wall
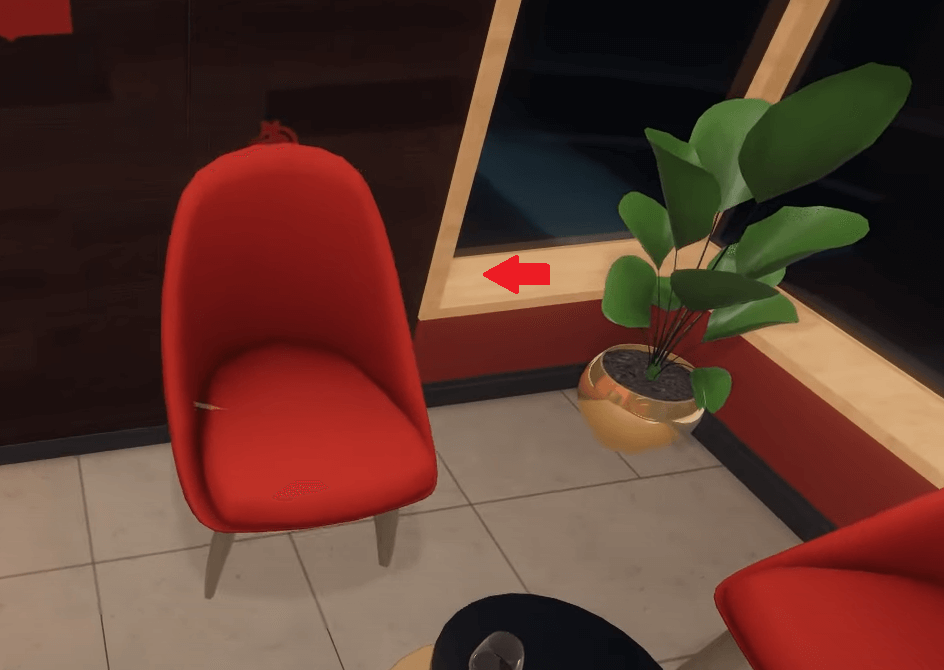
- By the window, next to the big flower pot
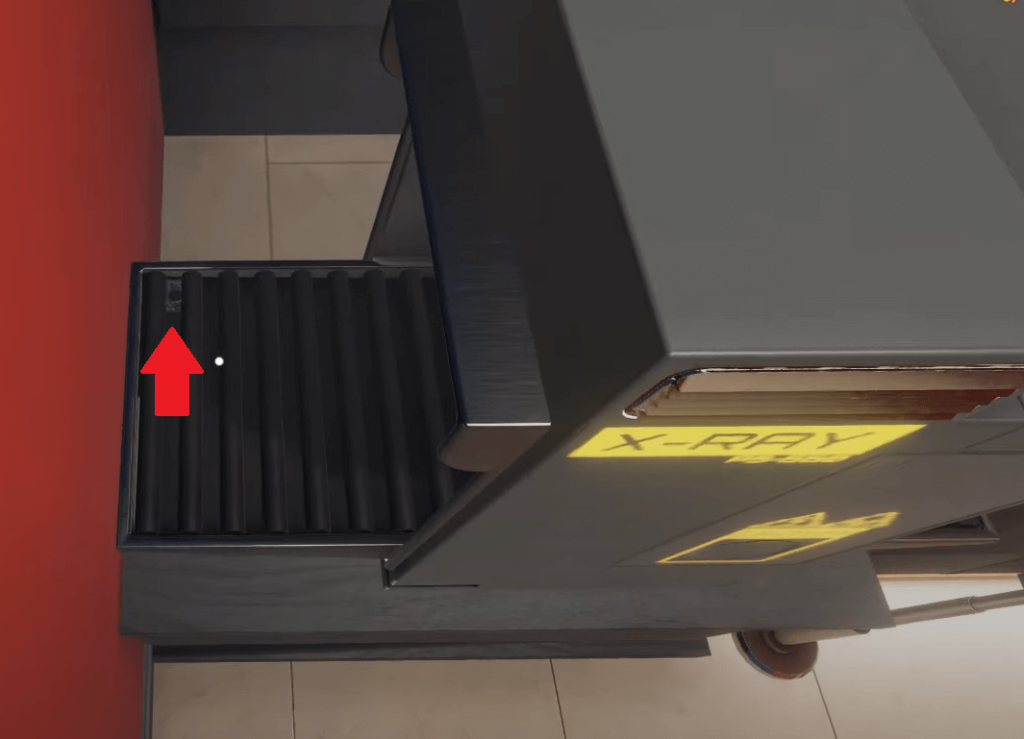
- Behind the X-Ray machine
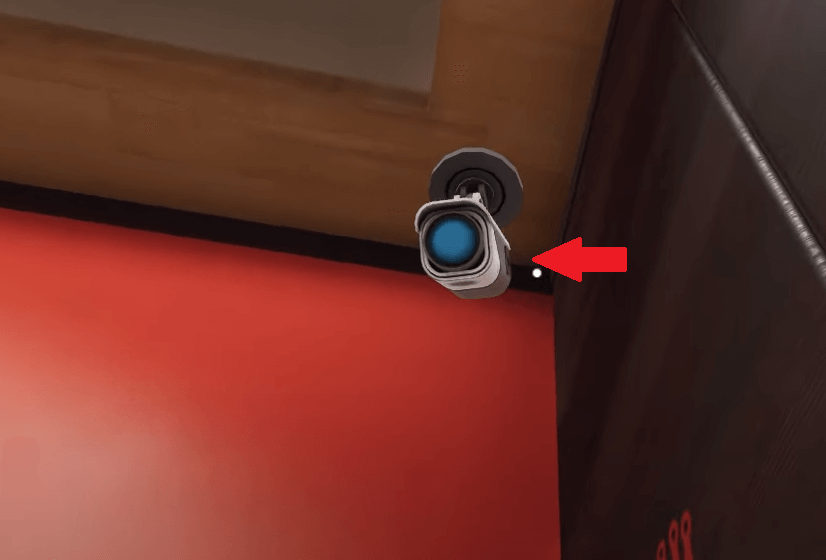
- On the side of the security camera
These are all the 8 secret tokens that mark the end of The Lobby escape room!