The Underground Lab is the last escape room in the Edgewood Mansion Escape Simulator, and also my personal favorite. Can’t explain why…
It contains puzzles such as the Zebra Lock, Animals, the Lock, and more.
Well, in this guide, I’ll take you through a complete walkthrough of all the puzzles and also include a speedrun and the location of all 8 tokens.
Let’s start!
Summary: Are you tackling the Underground Lab in the Edgewood Mansion Escape Simulator? In this article, I'll guide you step-by-step through the entire process.

I'll walk you through arranging the animal wheels, entering 5-4-1-3 in the zebra lock, aligning all the mirrors, and moving the clock hands.

I've also included a speedrun for quick solutions and a detailed guide on where to find all 8 tokens. Happy escaping!
Related: Escape Simulator The Lobby Walkthrough
Related: Escape Simulator Metaverse Walkthrough
Related: Escape Simulator the Office Walkthrough
Speedrun Guide
- Arrange the animal wheels in this order: Zebra 3, Elephant 6, Deer 4, and Lion 6. Get the key
- Enter 5-4-1-3 in the zebra lock and get the lockbox and tile
- Arrange the tiles in this order: ROSE-FLY-FROG-SNAKE-EAGLE. Get the key
- Touch the eyes as in the image below and get the key
- Move the hands of the clock as in the image below and get the key
- Zoom on the lockbox and enter 8-6-3. Get the key
- Put all the keys in the life capsule
Step-By-Step Guide
1. Staring Eyes
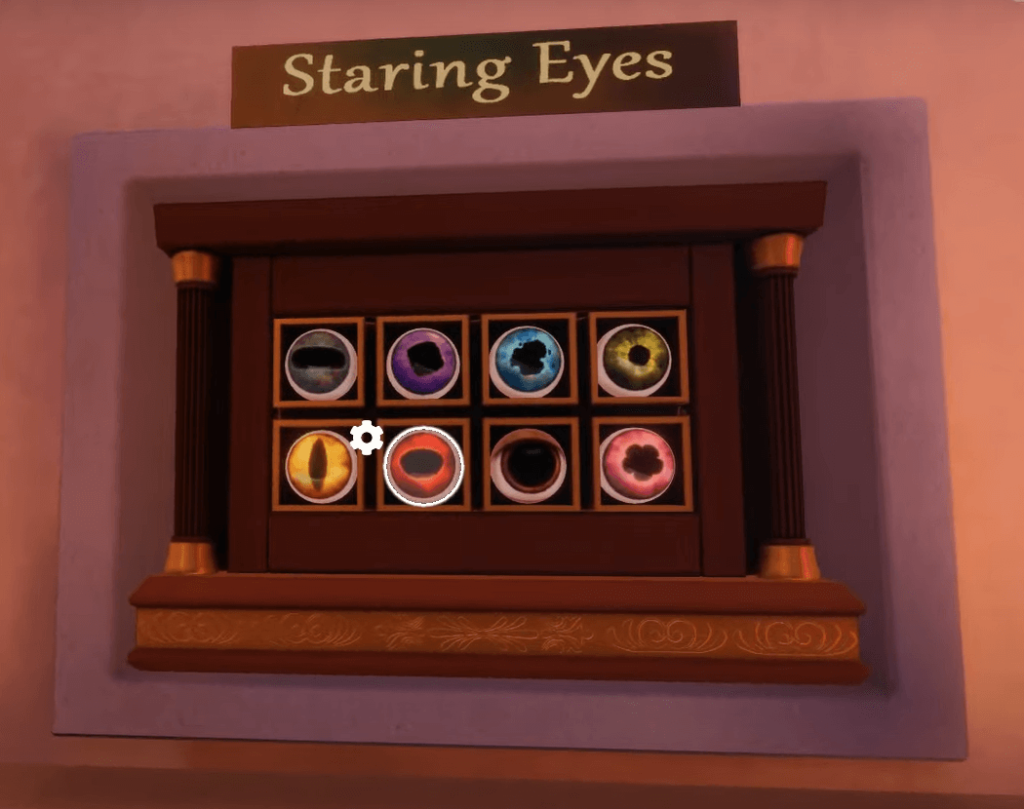
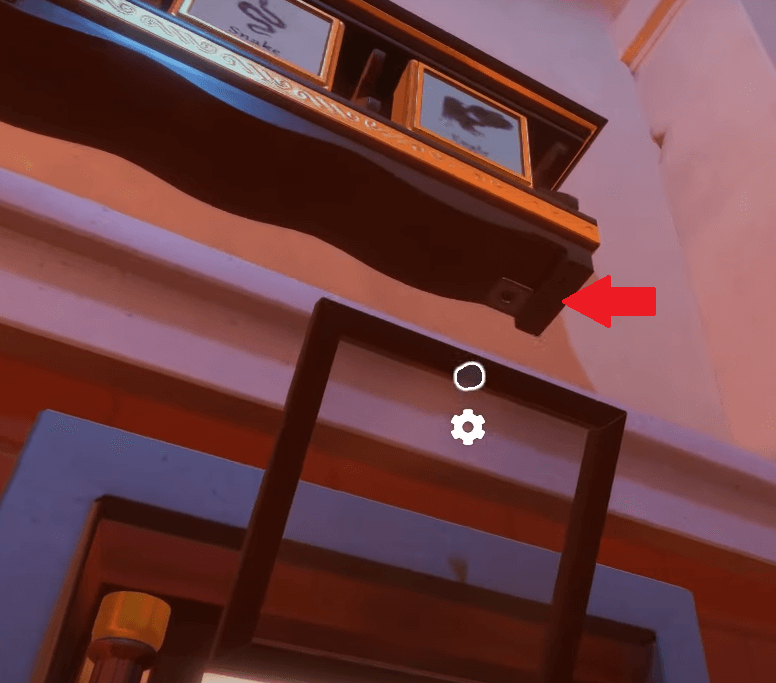
This is the first puzzle of this room. You’ll need to pick up the book on the stand below the Staring Eyes puzzle to complete it.
It’s just to the left of the puzzle (see the image below).
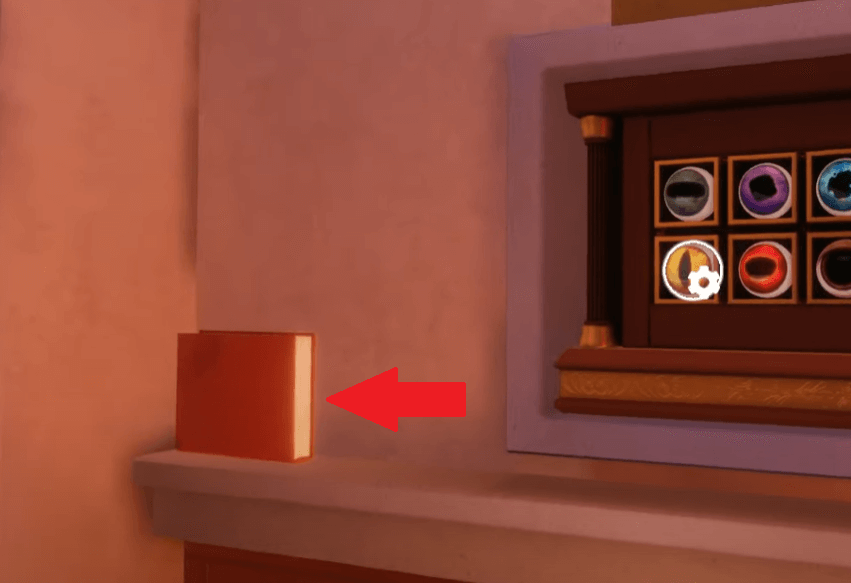
Open the book and read through it. You’ll find the instructions to complete the Staring Eyes there.
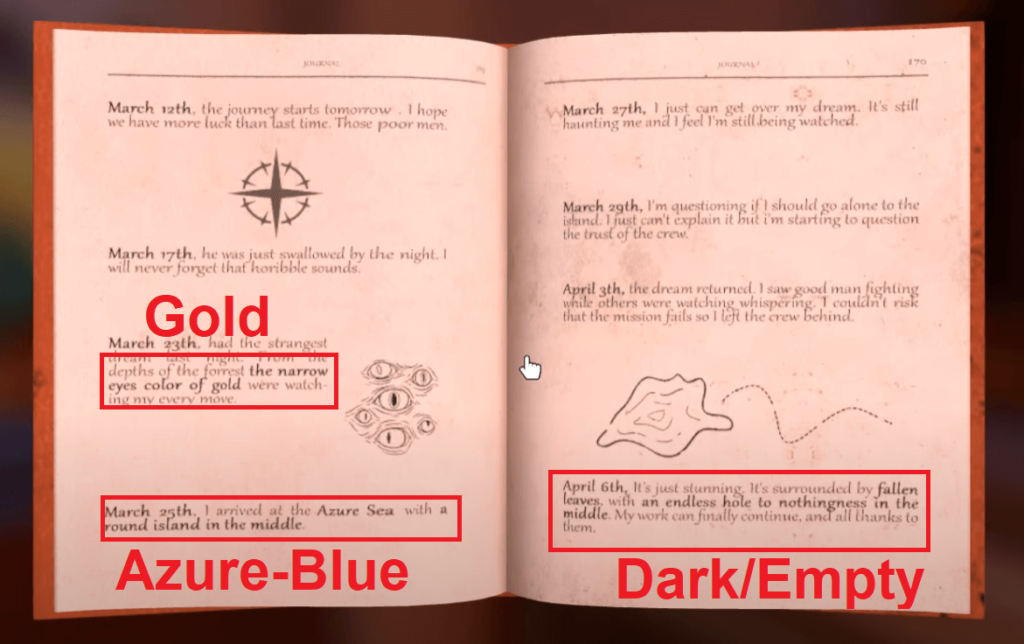
Read the “March 23rd”, “March 25th”, and “April 6th” entries (highlighted in the image above).
The first mention golden eyes, the second mention Azure (blue) eyes, and the third mentions empty/dark eyes.
That’s the answer to this puzzle 😀
Return to the Staring Eyes on the wall and click on the eyes in the photo below.
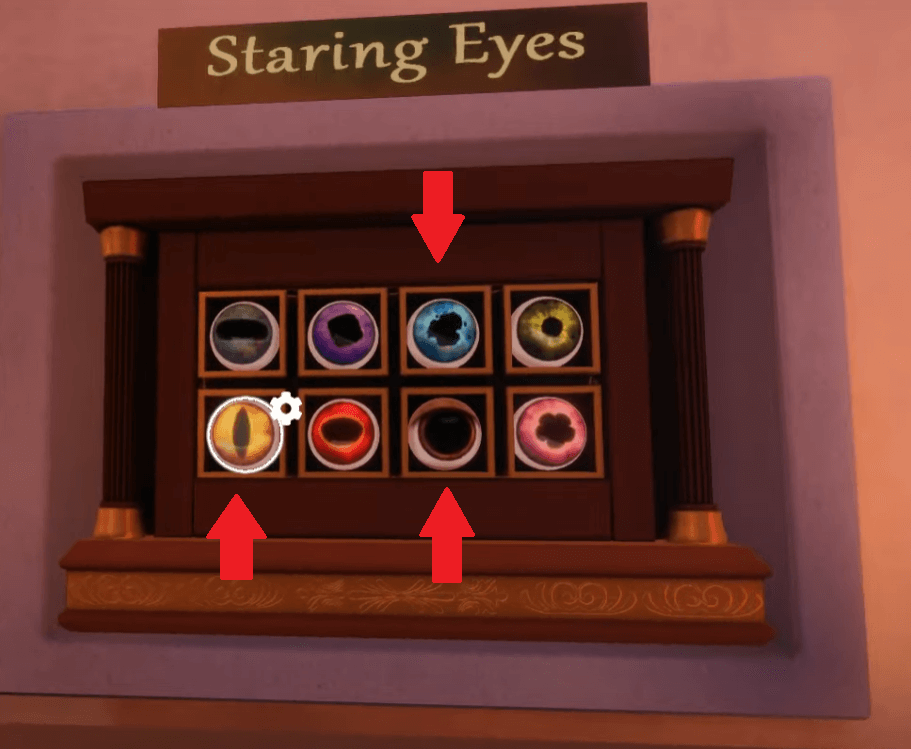
Once you enter the correct combination (in the right order), you’ll get a key. Collect it and move to the next puzzle.
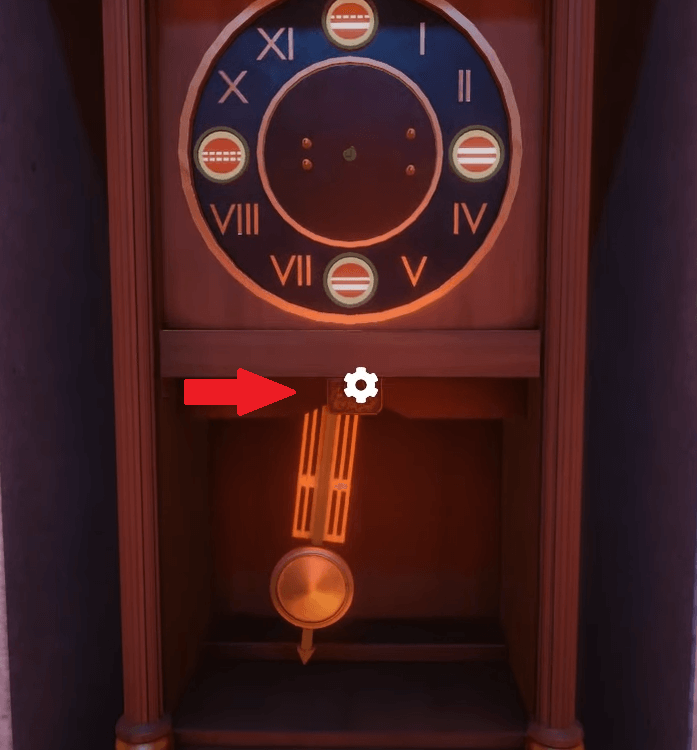
2. The Clock
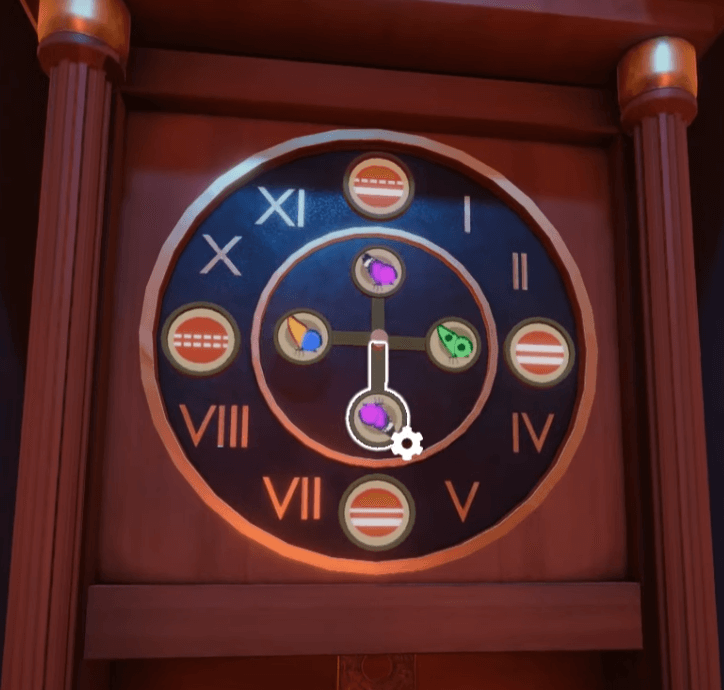
This next puzzle requires you to match the hands of the clock with the correct patterns. The key here is remembering that every hand has a different insect, and the patterns refer to the markings on the plant pots near the clock.
Refer to the image below to understand.
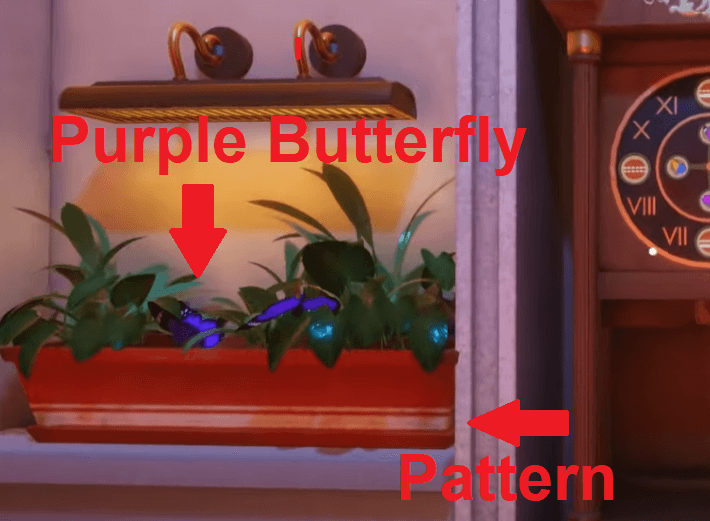
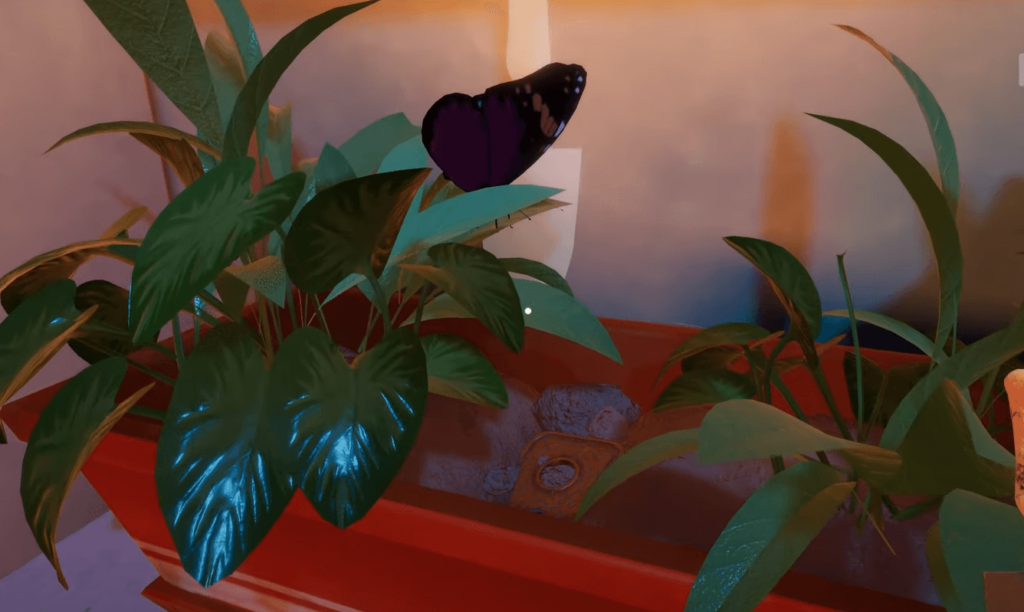
The plant pot has a certain pattern on it, which is among the patterns on the clock. On this plant pot (above), you can see purple butterflies.
The other plant point near the clock has another pattern, and purple butterflies will also go there.
Check throughout the room for other plant pots (on the ceiling) to see what kind of butterflies land on them.
The answer is this:
- Purple butterflies land on the double-lined patterns
- Green butterflies land on the double-stripped patterns
- Blue and yellow butterflies land on a pattern with a stripped and a full line
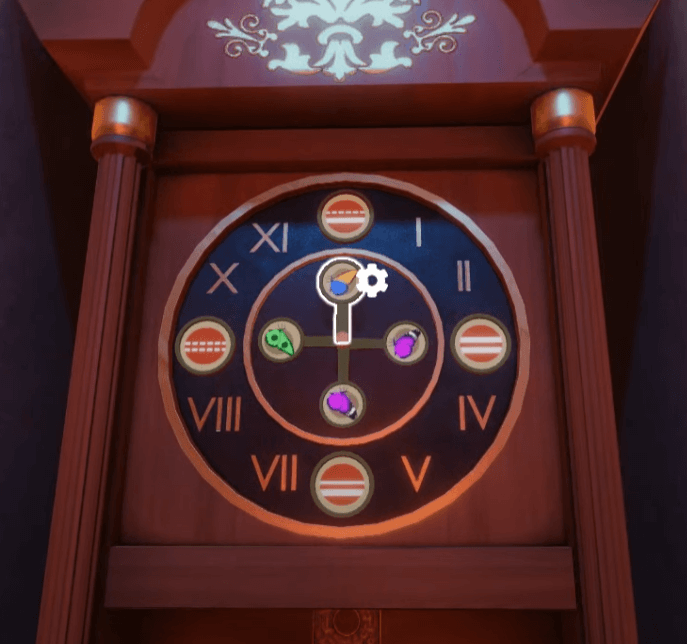
This is how you should match the clock hands with the patterns on the clock quadrant.
After this, collect the key and move to the next puzzle.
3. Animals Puzzle
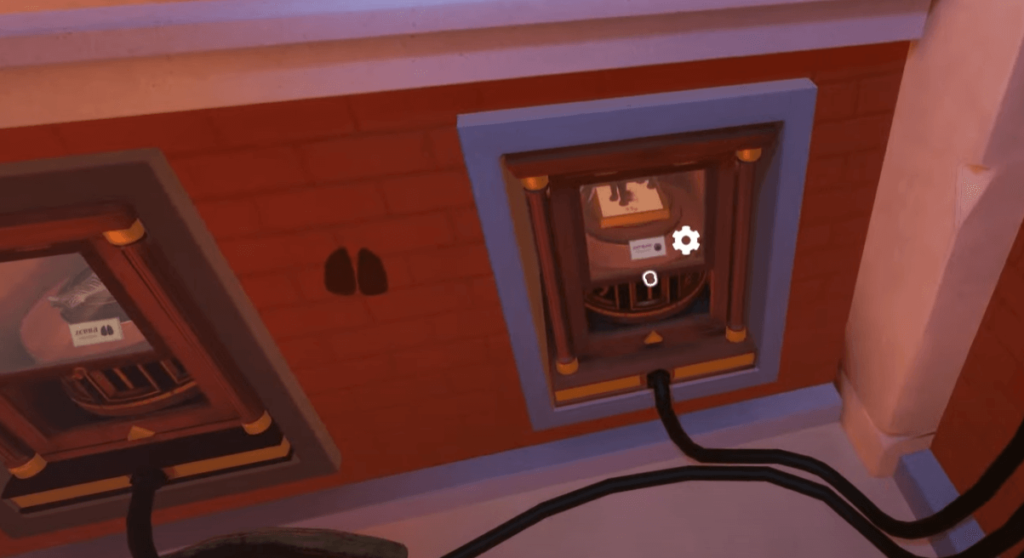
In this puzzle, you must press on a level after matching the animal wheels (inside the wall containers) with the right numbers.
Every wall container contains a different animal with a specific footprint. Remember every animal’s footprint and look through the room to find them.
Count every set of footprints and match this with the number wheel on the animal wheel.
The solution is:
- Elephant – 6
- Zebra – 3
- Deer – 4
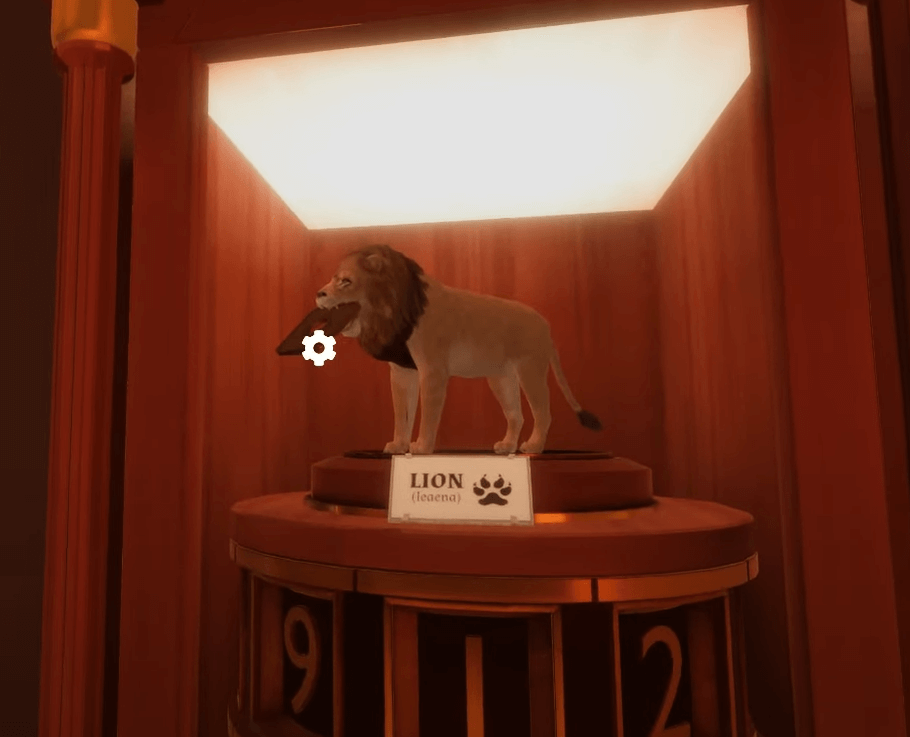
- Lion – 6
Then, pull the level down and grab the key.
After you grab the key, move to the next puzzle in the room.
4. Zebra Lock
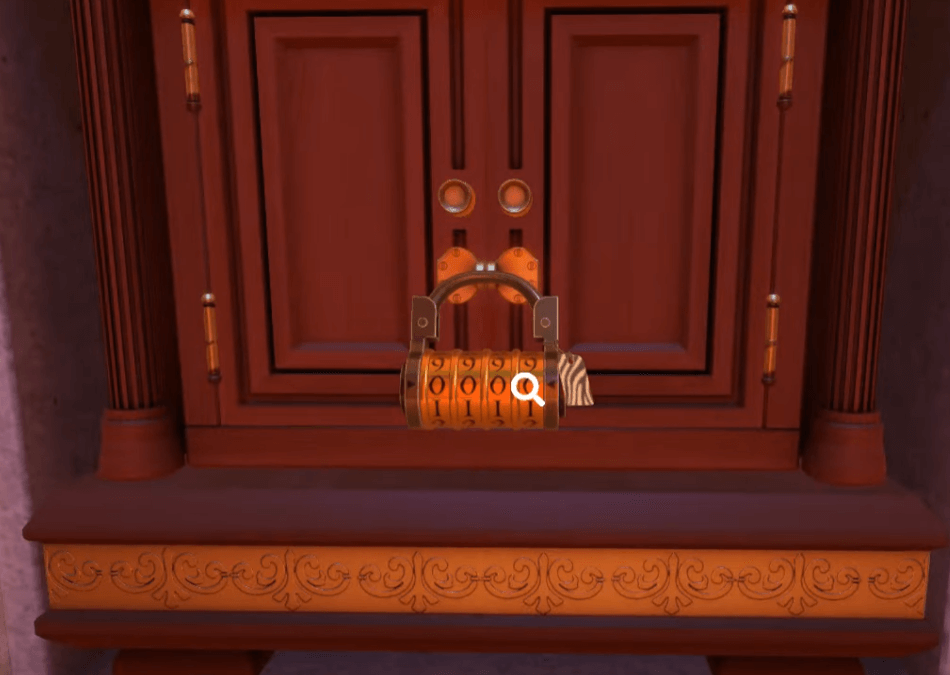
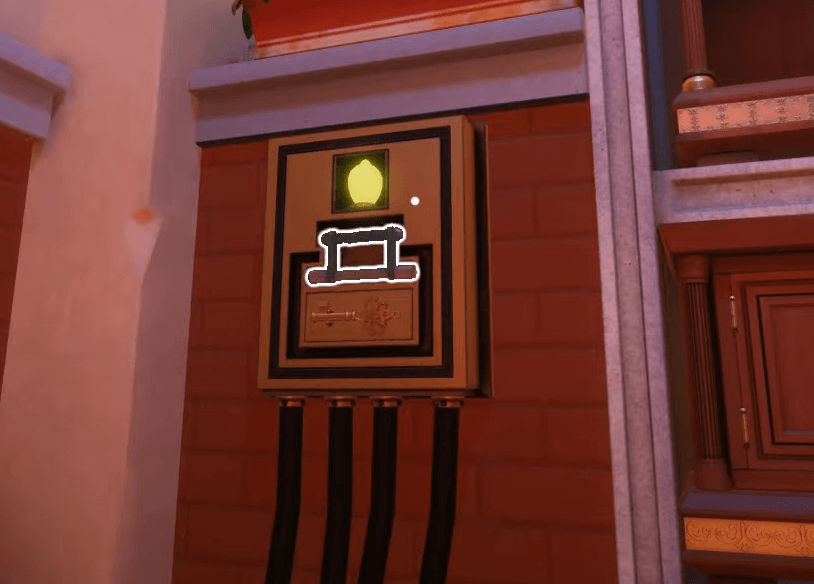
The next puzzle is a lock with a 4-digit solution. You should notice that there’s a zebra-patterned sticker on the lock.
You should pick the zebra figurine from its wall container and observe it. The solution is the number of green stripes on each zebra’s feet.
Each foot is numbered from 1-4, according to the order of the lock digits.
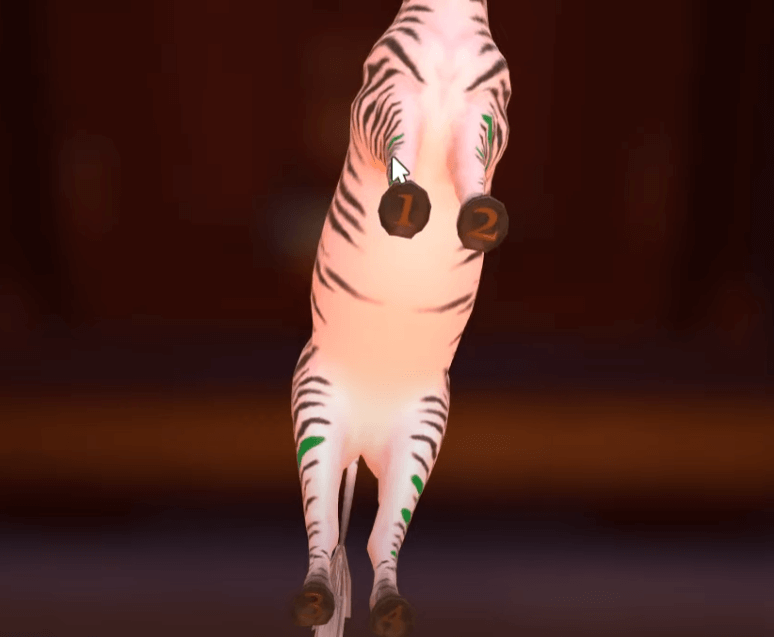
Foot 1 has 5 stripes, foot 2 has 4 stripes, foot 3 has 1 stripe, and foot 4 has 3 stripes.
So, the code for the padlock is 5-4-1-3. Enter it into the padlock to unlock it.
Then, grab the note, tile, and lockbox inside.
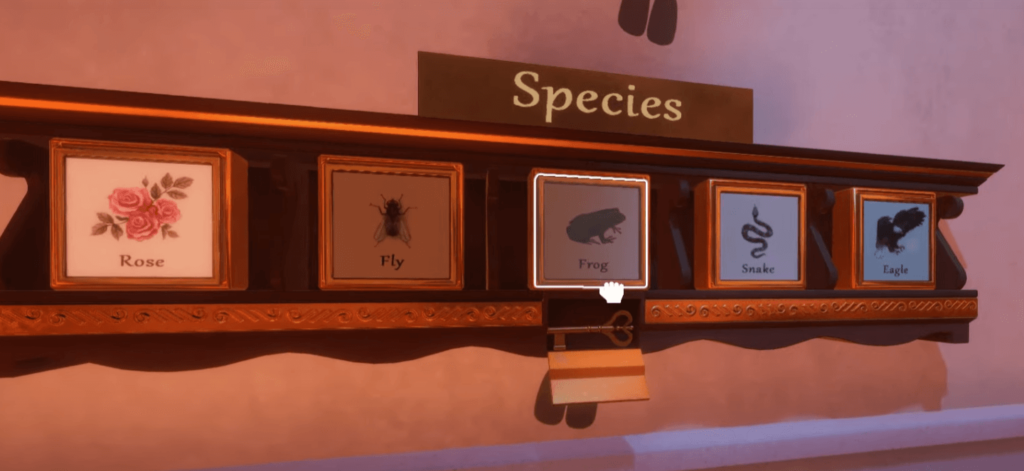
5. Animal Species

This puzzle requires you to place the anima tiles you find through the room in the correct order. For this, you’ll need the animal tiles first.
The Frog tile is inside the clock, and you’ll find the Fly tile inside the Elephant display.
The Rose tile is on the ground, while the Snake tile is on the ledge to the right of the Staring Eyes.
Finally, the Eagle tile is in the compartment with the zebra padlock. Quite the hidden location for it…
Next, you’ll need The Origin of Species book on the ledge near one of the plant pots with the purple butterflies.
Open the book and look through it.
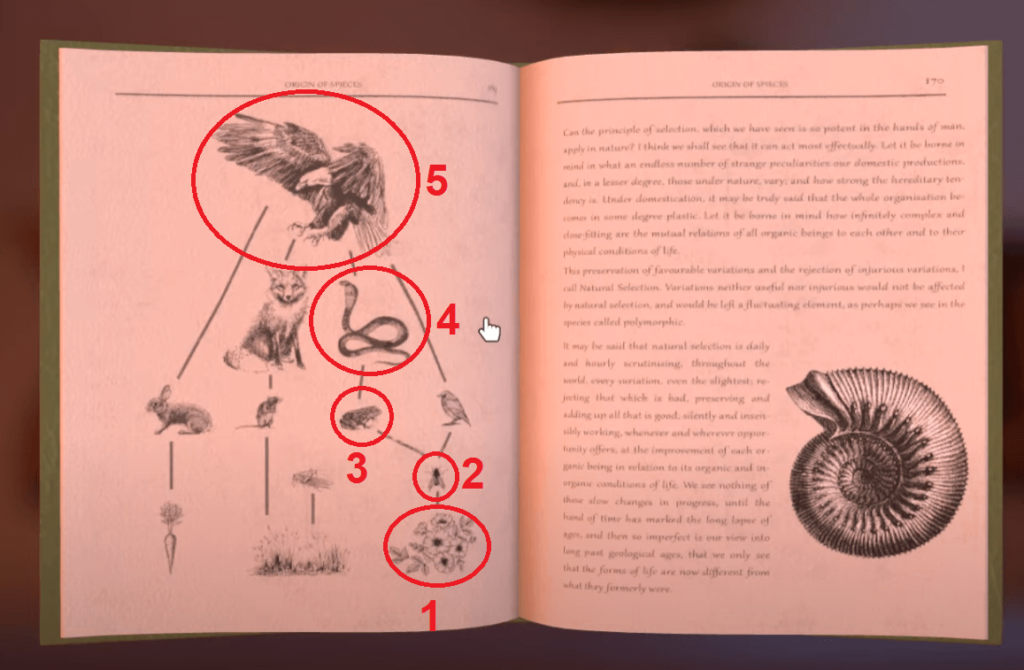
You’ll notice that the Eagle is at the top of the food chain. Under it are several strings of animals, each in the role of prey and predator.
The string you should be looking at is the one you have tiles for – Rose, Fly, Frog, Snake, Eagle.
Place the tiles in this order on the “Species” tileset and grab the key (see the image below).
Once you grab the key, move to the next puzzle.
6. Lock Box
The lockbox you picked up from the container with the Zebra Padlock is a puzzle by itself.
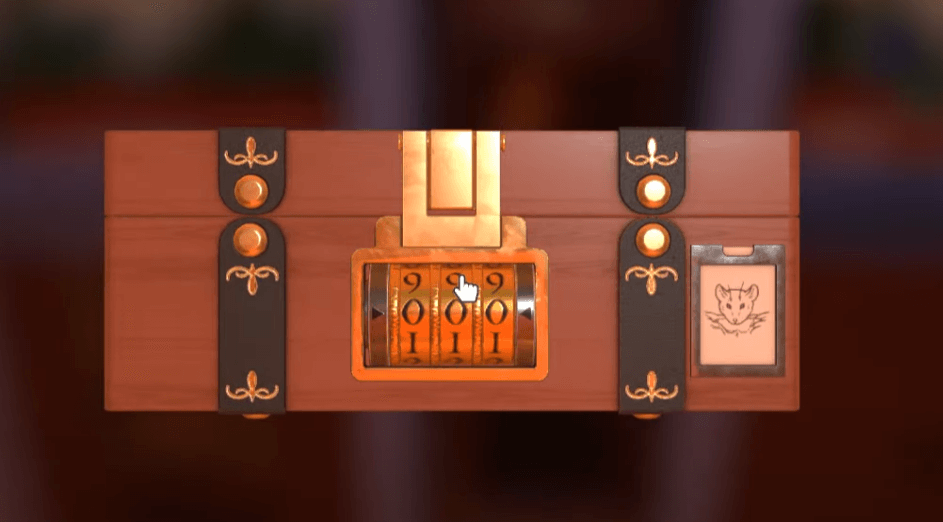
Look at the small picture in the bottom-right of the lockbox. It’s the image of a mouse.
This is a hint to the mouse drawing split into multiple pieces throughout the room:
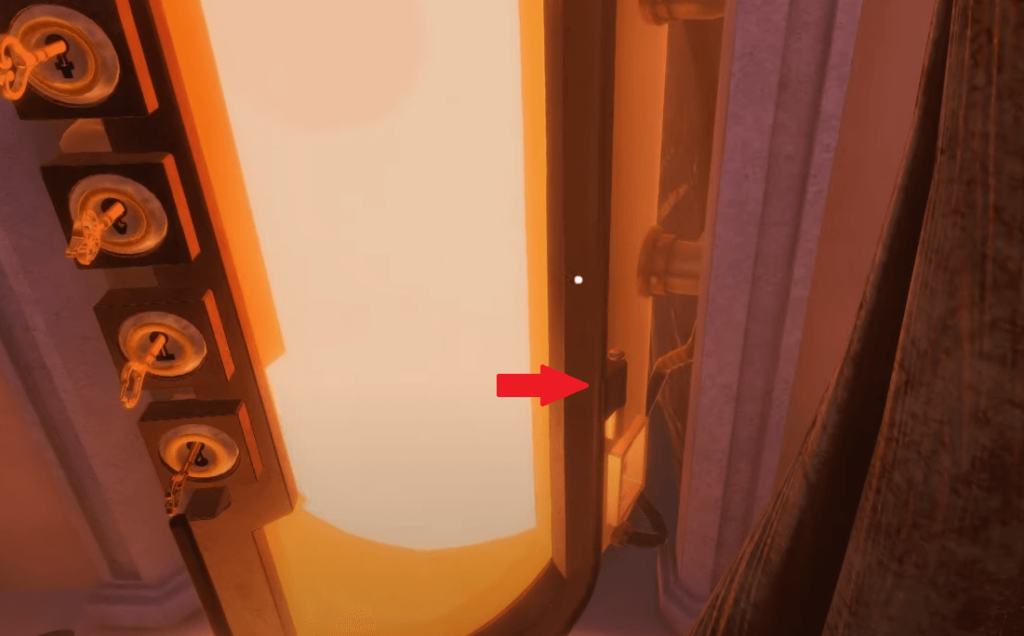
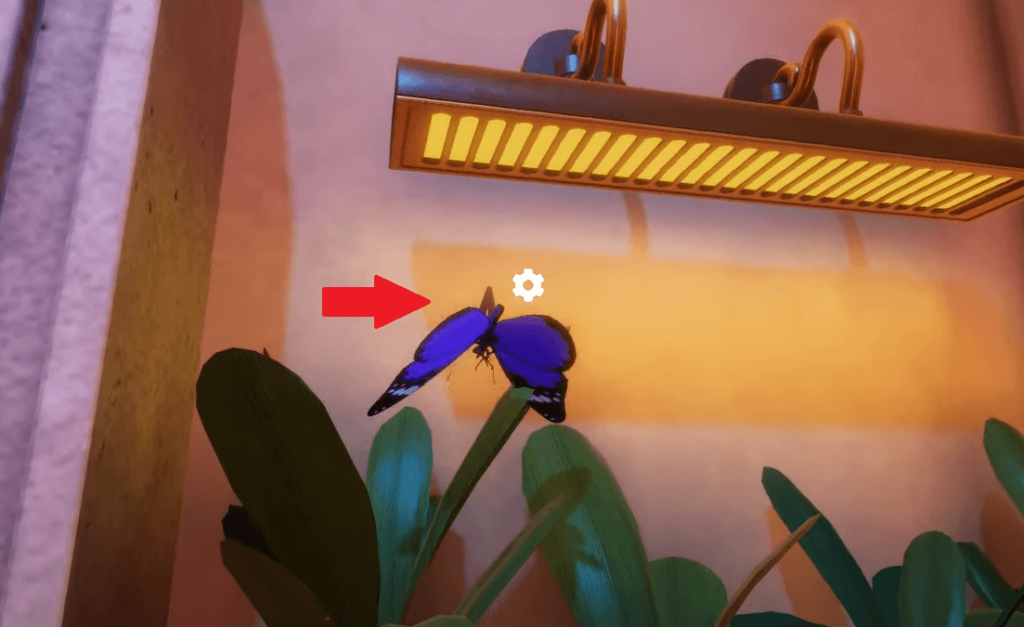
- The first piece is under the power switch
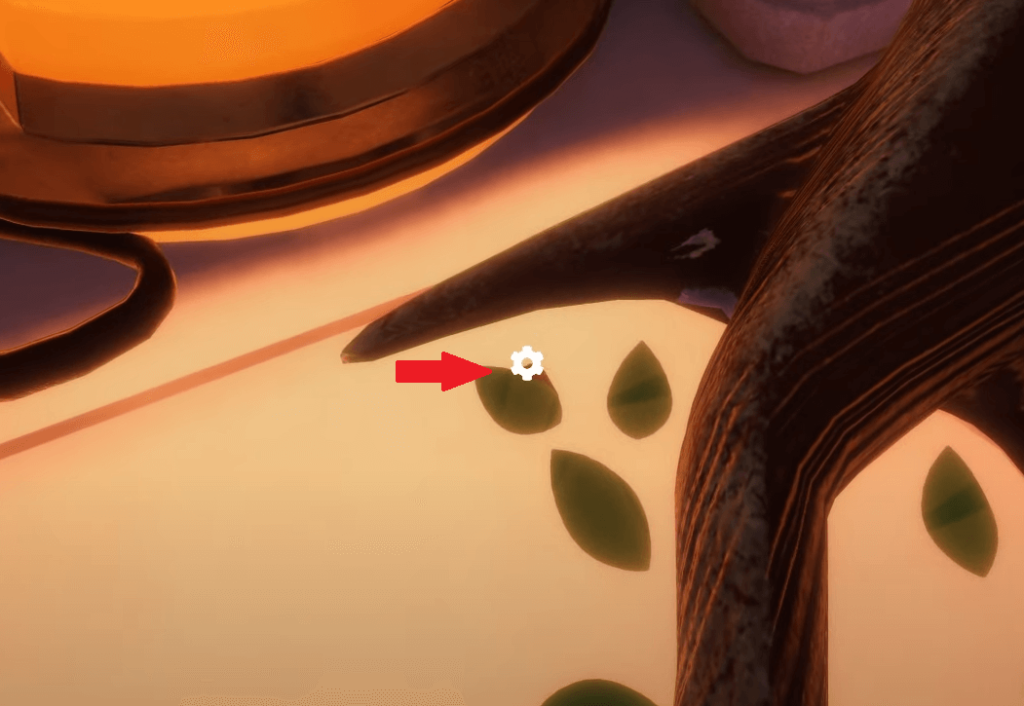
- The second piece is under a leaf on the ground, at the base of the tree
- The third piece is in the Zebra Padlock container, where you find the lock box and the Eagle tile piece
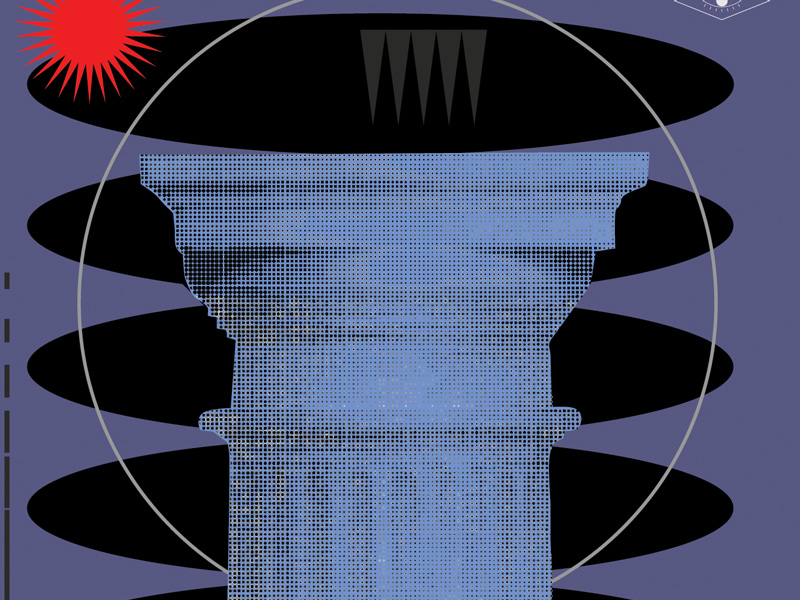
Combine all three pieces to form the complete mouse drawing and zoom in on it.
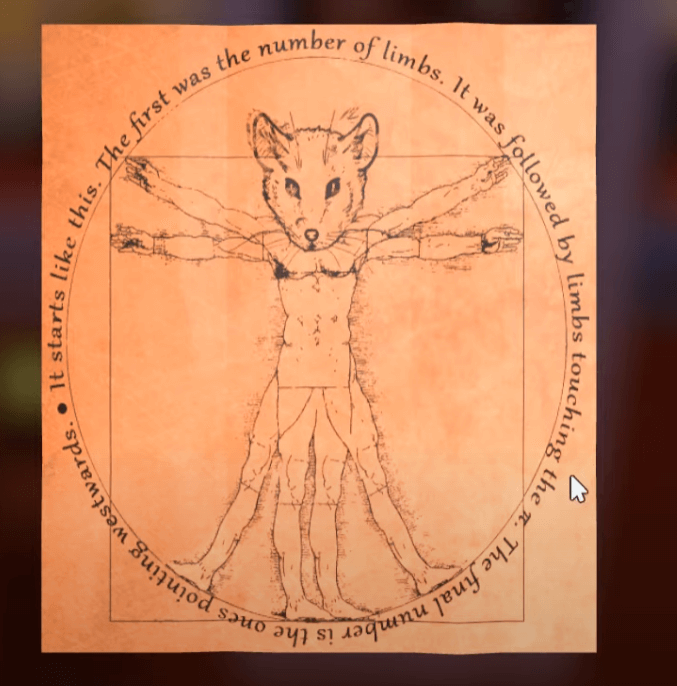
The writing on the side reads: “The first was the number of limbs. It was followed by limbs touching the pi. The final number is the ones pointing westwards.”
With these instructions, you get the following:
- Number of limbs – 8
- Limbs touching the pi (circle) – 6
- Limbs pointing towards west – 3
The code for the lockbox is 8-6-3, then. Grab the key from the lockbox.
7. Insert the keys into the door
Now you have all the keys you need to escape the Underground Lab.
Insert all the keys into their appropriate key sockets on the door.
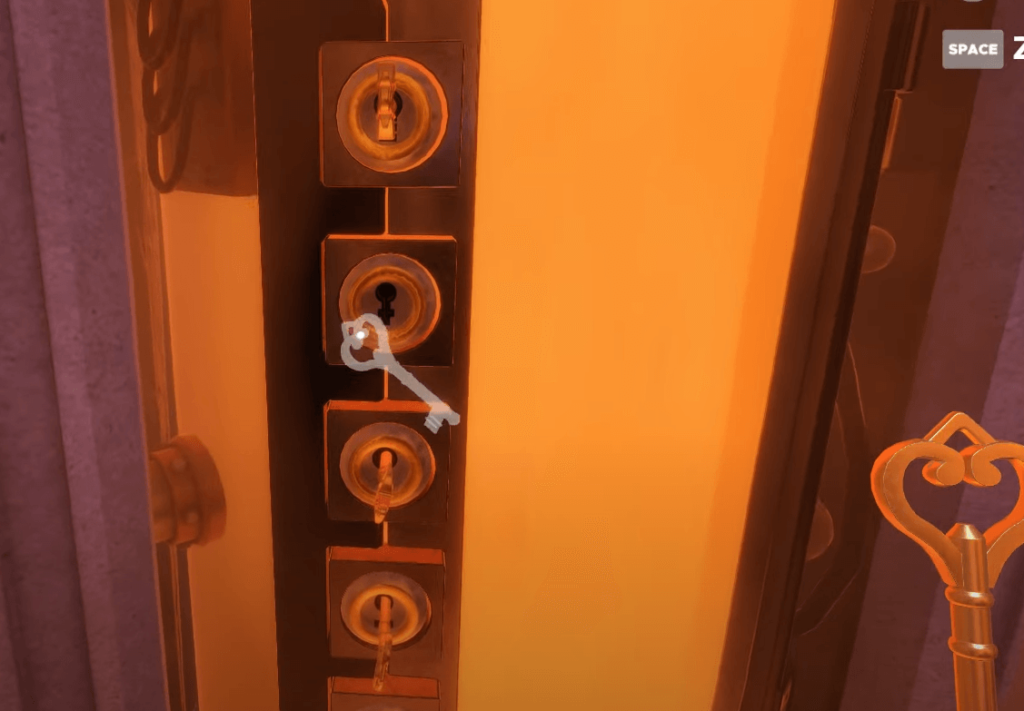
Every key will fit a specific socket, so try them one by one until you find the right keys for the right sockets.
Once you open the door, you’ll escape the room and end the game!
Where Are the Secret Tokens?
1. On a purple butterfly
2. Inside a plant pot (dig the soil with the Garden Trowel)
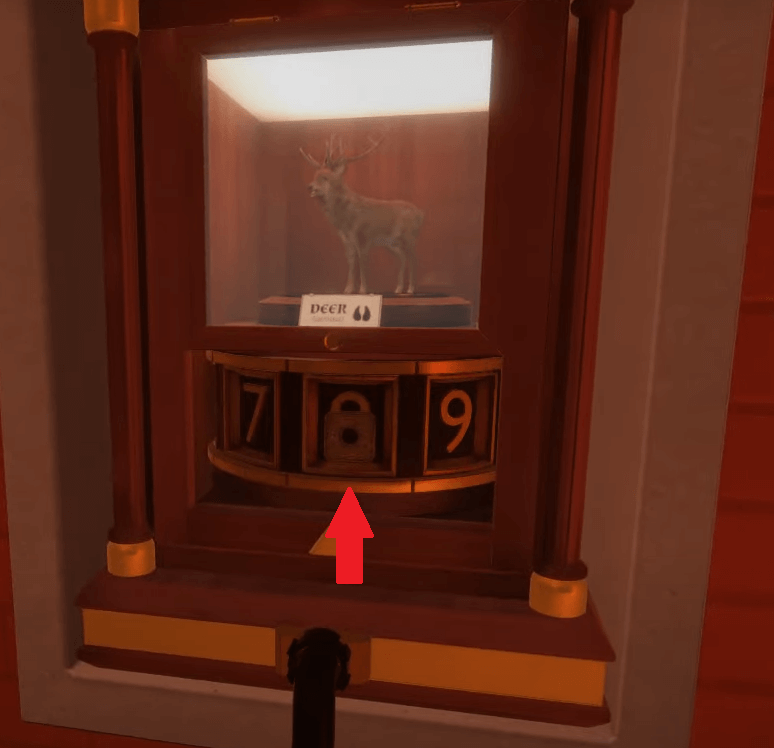
3. Inside the Deer display, on the digit 8
4. In the lion’s mouth in the lion display
5. Under a leaf, on the ground, near the exit door
6. Under the Eagle tileset, on the “Species” puzzle ledge
7. Inside the clock
8. On the bottom-right hinge of the exit door