Are you trying to add blur to your videos on CapCut and you have no freaking idea how to do that?
Well, you’re in the right place, my friend, because this is exactly what I will be teaching you here today.
Here’s how you can blur a video on CapCut:
- Open CapCut
- Select “New project“
- Select the video you want to edit
- Select “Effects“
- Select “Video effects“
- Go to the “Basic” category
- Select “Blur“
- Adjust the blur effect intensity
Important: this technique allows you to blur the entire video. But if you want to blur a specific part or an object in the video, here’s what to do:
- Add the video to CapCut
- Add the same video as an Overlay
- Adjust the blur intensity
- Select “Object” on the bottom menu bar
- Select the “Overlay” option
- Go to “Overlay” – “Mask“
- Select a mask shape that best fits the object you want to blur
- Adjust the blur size and intensity and save the changes
With these techniques in hand, you’ll be able to blur your videos seamlessly in a few minutes (even seconds, really…). They may not make you a professional editor, but you’ll be pretty damn close to one, I promise!
Below you’ll find a more detailed description of these steps. There are some helpful screenshots as well, you can just tag along and replicate those steps exactly as in the images (which is why I added them, hehe).
Scenario 1: Bluring the Entire Video
This part of the guide only deals with blurring the “entire” video, not specific parts of it. If you need to blur a specific video part, skip to “Scenario 2” further below.
Now, let’s get started:
1. Select “New project“

Open CapCut from your app list and then select “New project” in the top-left corner of the screen. This will take you to your albums, where you can select a video to edit. Simple stuff, so far.
2. Tap on your video
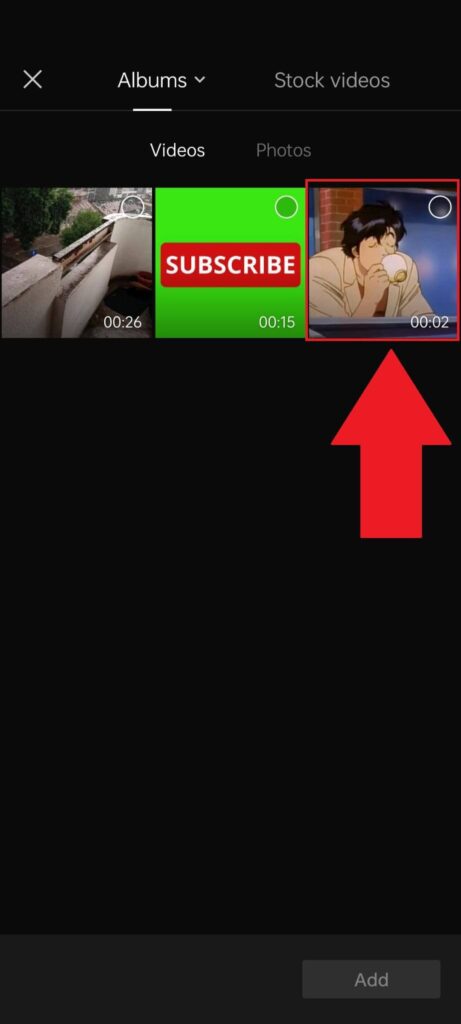
Select the video you want to edit with a simple tap. Now follow the next step to add the video to the editing screen:
3. Tap on “Add” in the bottom-right corner
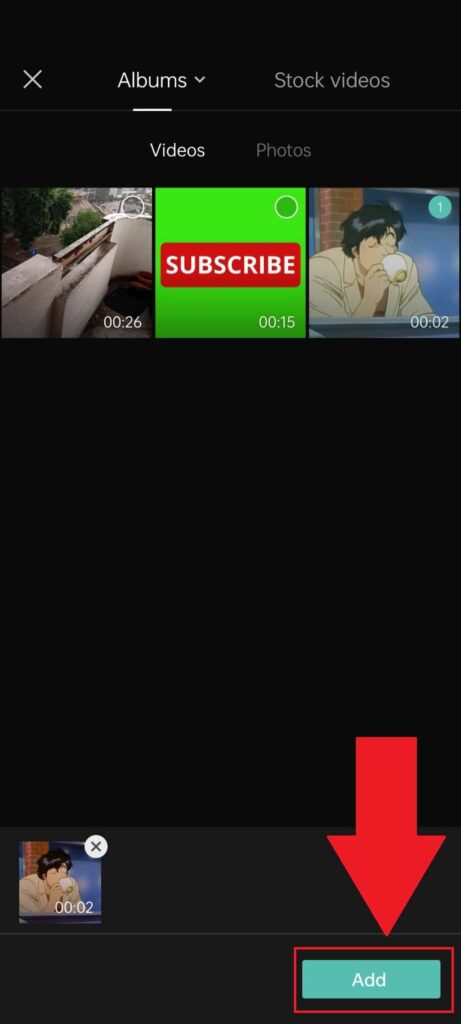
Once you select your video, you’ll see the “Add” button light up in the bottom-right corner. Tap on it to upload the video to CapCut and to be able to begin editing… which is the bread and butter of the app.
4. Select “Effects“
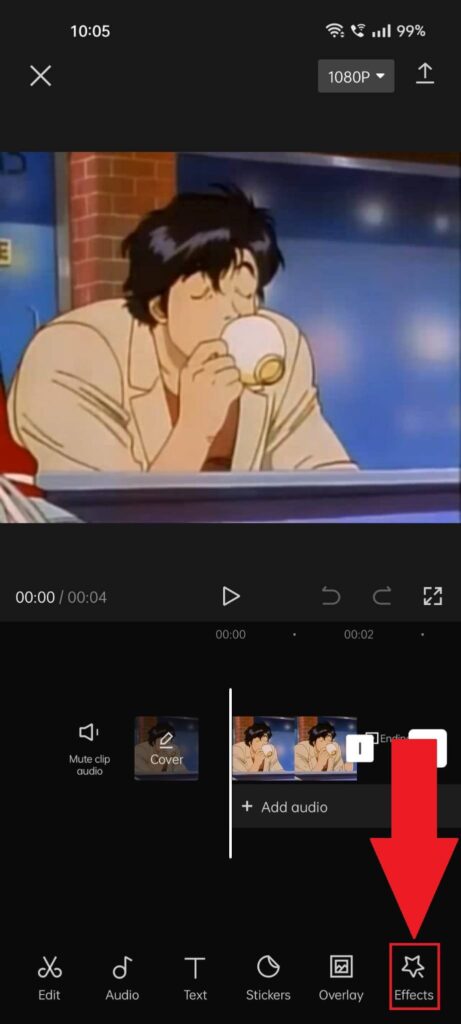
Once the video has been added to the editing screen, look at the bottom menu bar for the “Effects” option and then select it. That’s where you’ll find the “blur” settings.
5. Select “Video effects“
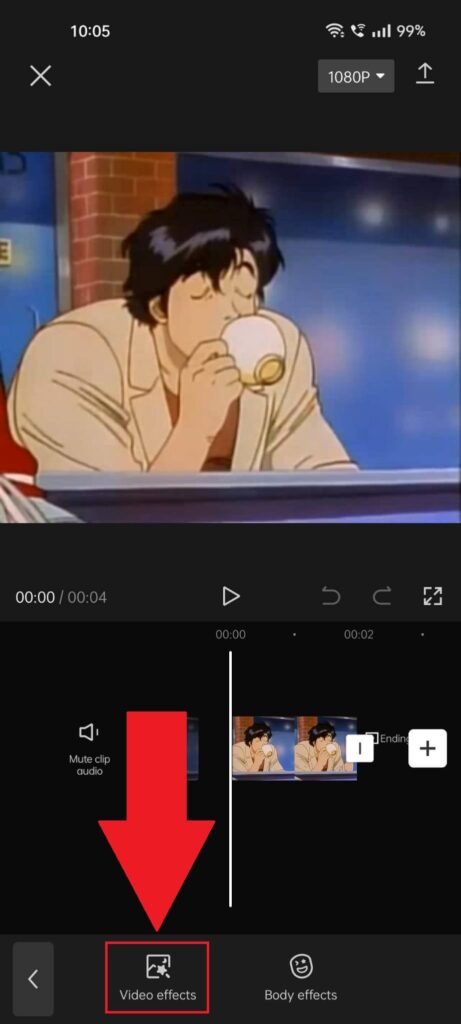
After you select “Effects“, you’ll see two options show up: Video and Body effects; each with its own sub-options. Select the “Video effects” option and proceed with the next step:
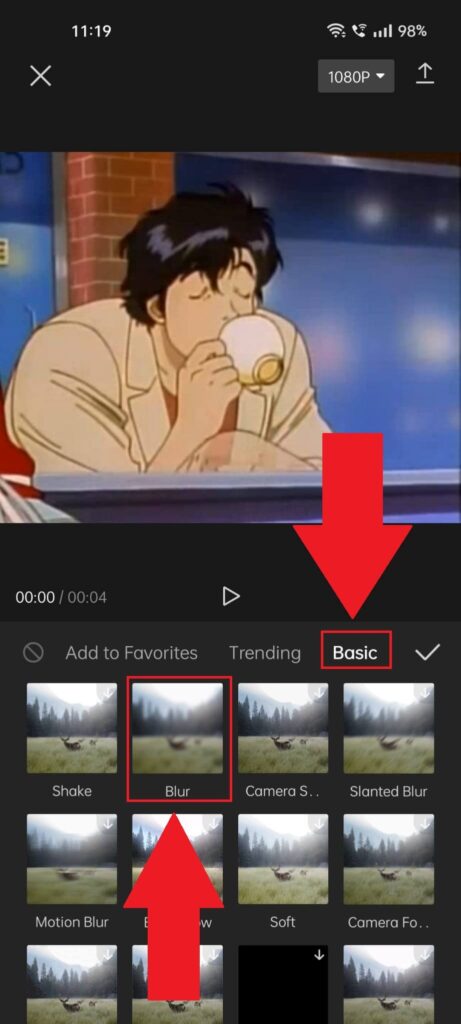
6. Select the “Basic” category
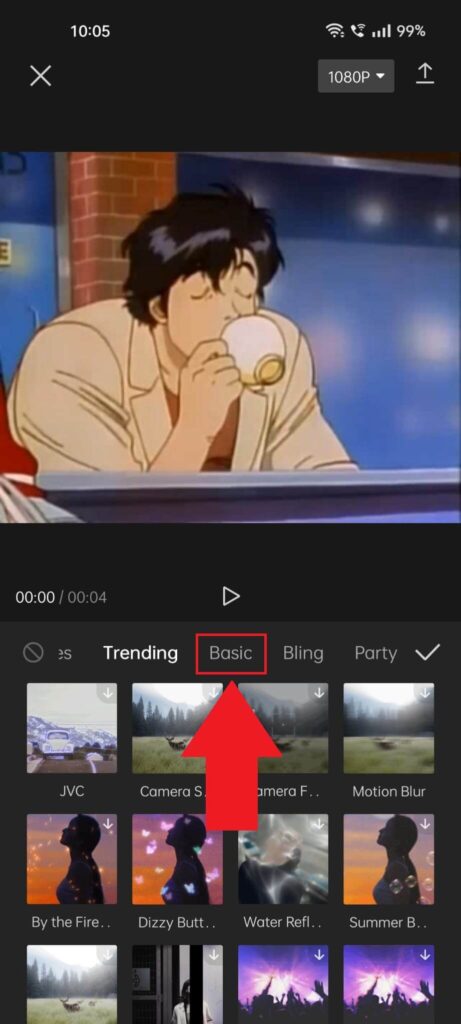
After you select “Video effects“, the bottom half of the editing screen will change to show various effects and menus. The categories at the top of the screen (Basic, Bling, Party, etc…) that’s what you need.
Find the “Basic” option and select it. And now you’re almost there…
7. Select “Blur“
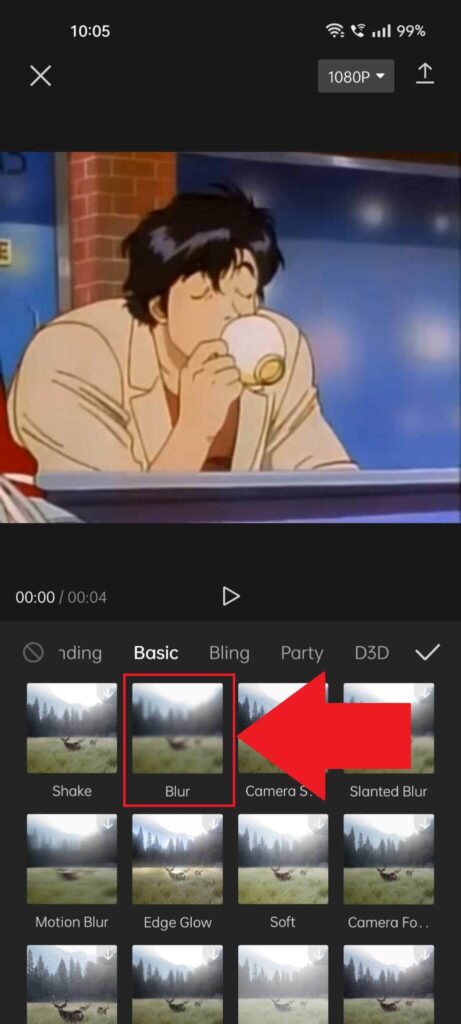
The “Blur” option is the second under the “Basic” category. Select it, and you’ll see the icon change, and a new option will appear: “Adjust“. (yeah, I know right? way too many settings…)
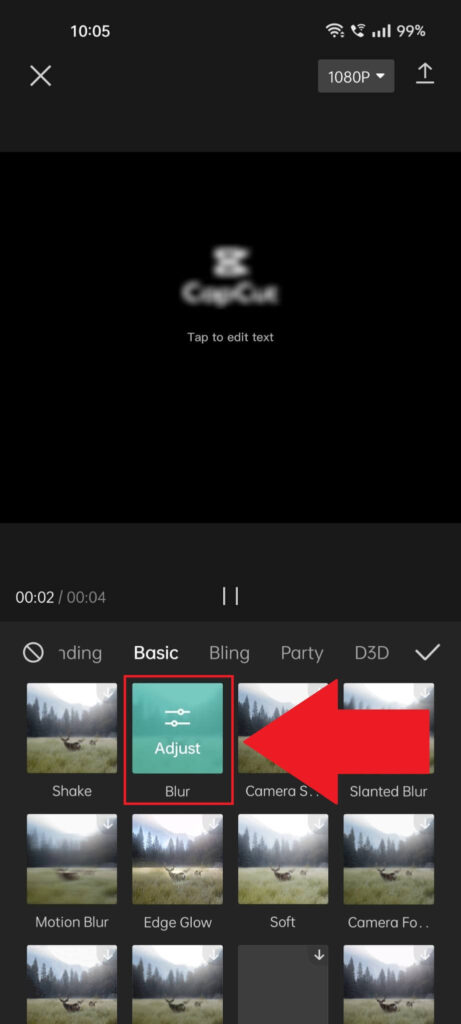
Select “Adjust” if you need to change the intensity of the blur effect. Below I will explain how you can do that:
8. Adjust the “Blur” intensity
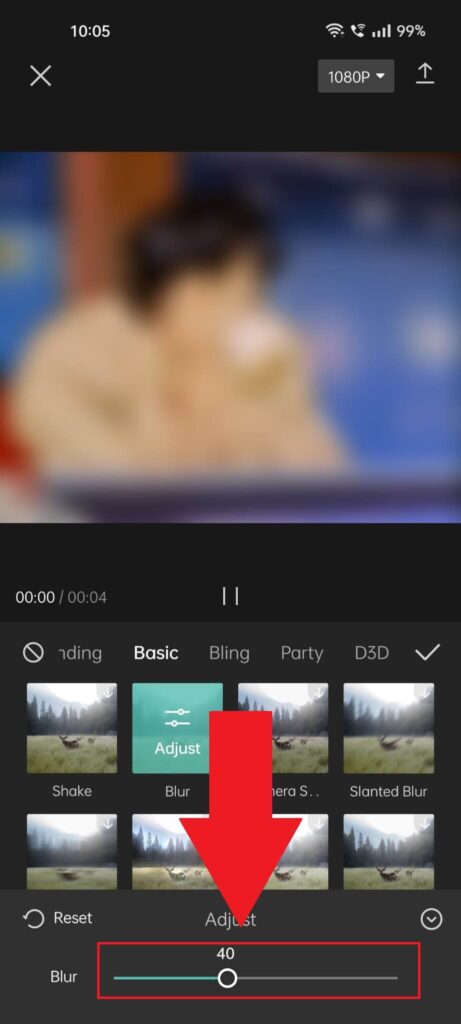
Yay… we’re finally reaching the end of this long string of settings and options galore (about time…)
Once you select “Adjust“, a bar will appear at the bottom of the screen. This is the “Blur” bar, which lets you adjust the intensity of the blur effect added onto the video.
9. Adjust the blur timeline
You can then apply various settings here.
For instance, if the video has 10 seconds, you can blur 5 seconds of it by having the Blur Timeline stop at the video’s half-point. Experiment with it to see what results you get!
The blur applies to the entire video, as shown in the picture above. Below you can check out how you can apply a blur setting ONLY to a specific part of the video:
Blur a Specific Part of the Video
If you want to blur an object, face, or person in the video, you’ll have to approach the situation a bit differently. See below how to do that:
1. Select “Overlay“
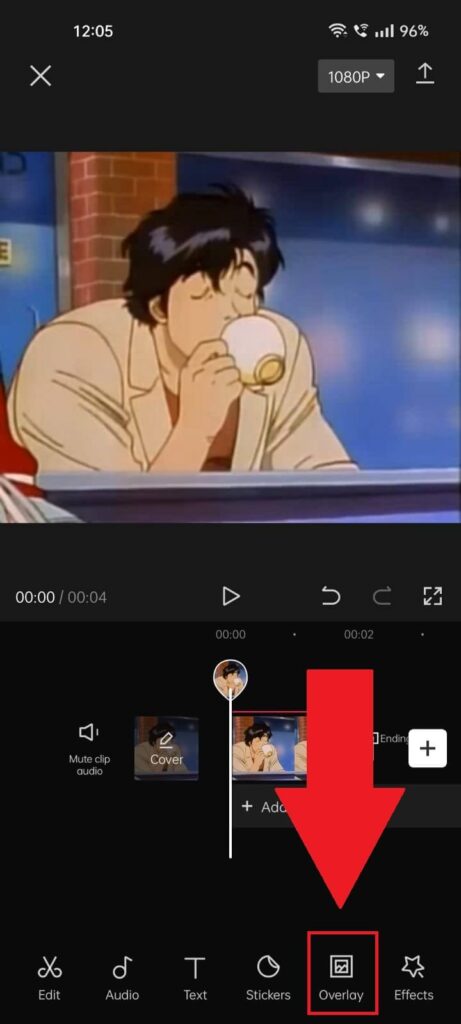
Assuming you already have the video uploaded and ready for editing, find the “Overlay” option on the bottom menu bar and give it a tap.
Check out my guide on adding overlays on CapCut for more info.
2. Tap on “Add overlay“
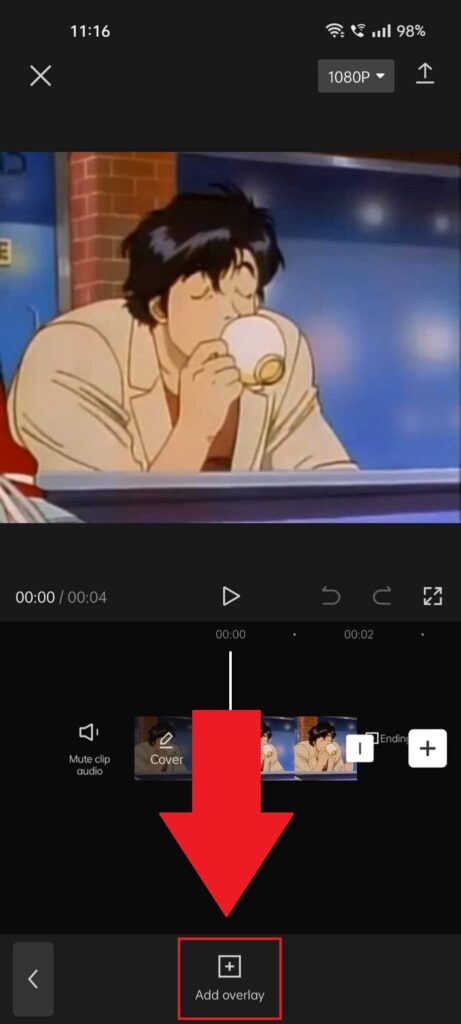
After you select “Overlay“, a new option will appear at the bottom. It’s the only option there, so you can’t miss it. Tap on “Add overlay” and keep reading!
3. Add the same video as an overlay
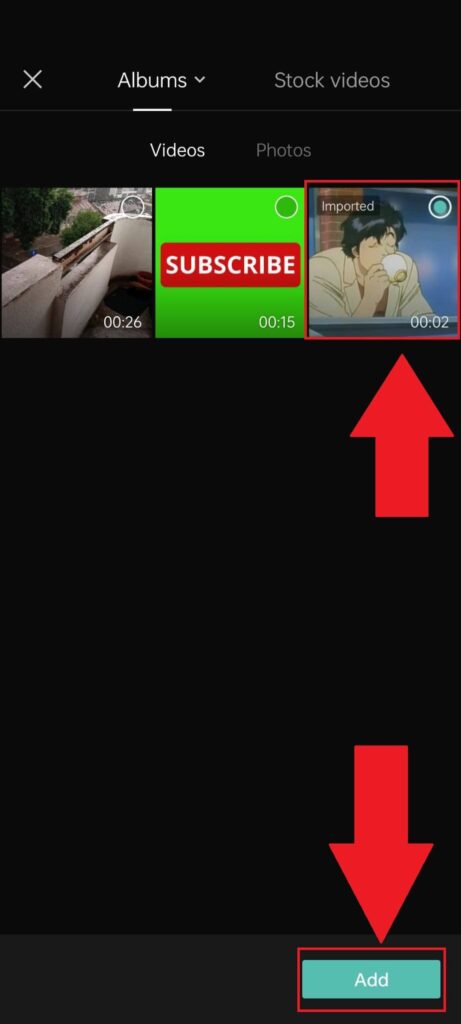
This is very important. The overlay you add through the “Add Overlay” option should be the “same video“ as the main one you’re using. Find it, select it, and tap on “Add“.
I’ll explain the logic behind this in the next steps, so keep reading!
4. Extend the overlay on the entire screen
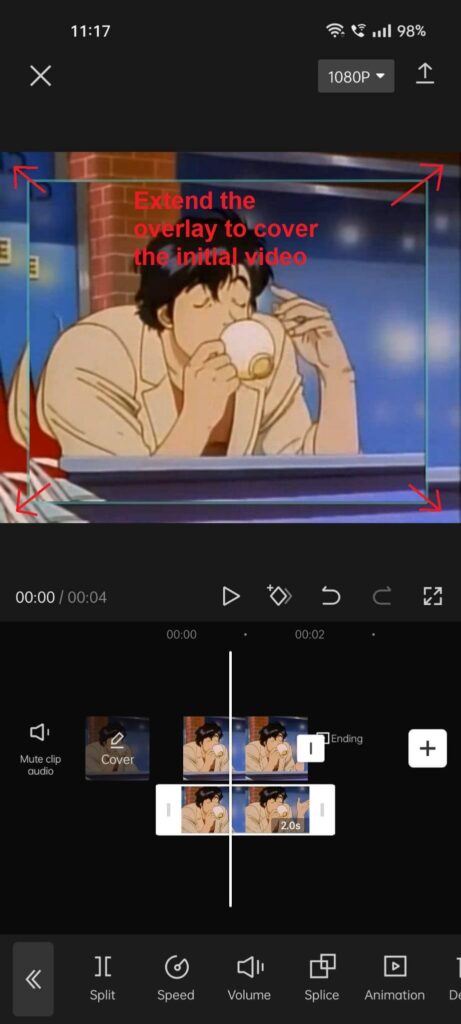
This step is also very essential.
You’ll notice that the overlay video you added will appear minimized on the main editing screen. To know how large it is, look for the margins and compare it to the background video.
The video will appear square-shaped on the main video (yeah, so, this doesn’t make any sense if you just read it like this, so check the screenshot above).
Make sure you extend it to cover the entire original video by dragging each corner to the edge of the screen. See the image above to understand, this stuff is really confusing if you just read it; you need to see it to fully get it.
5. Select “Effects“
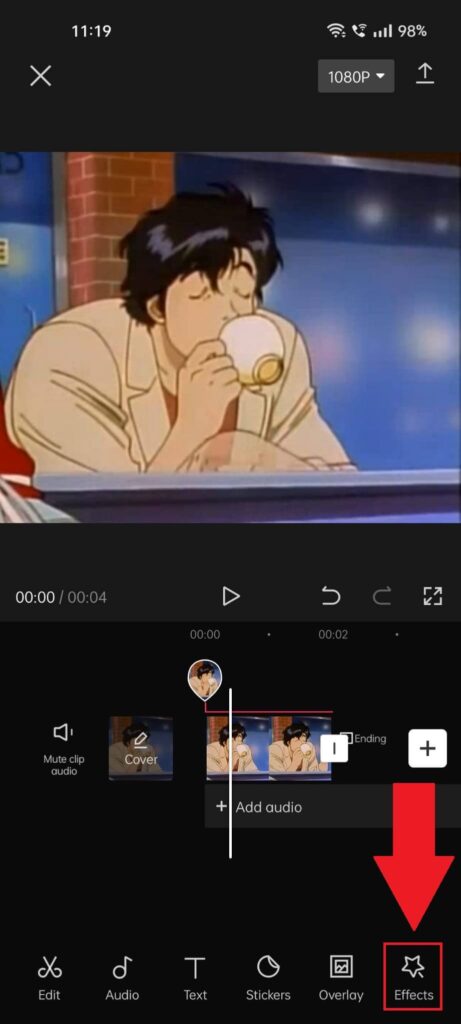
After you make the overlay video fit the entire screen, go back to the main editing menu and tap on “Effects“. This is where you’ll find the blurring option.
And now you’re finally over the complicated part…
Next comes:
6. Select “Video effects“
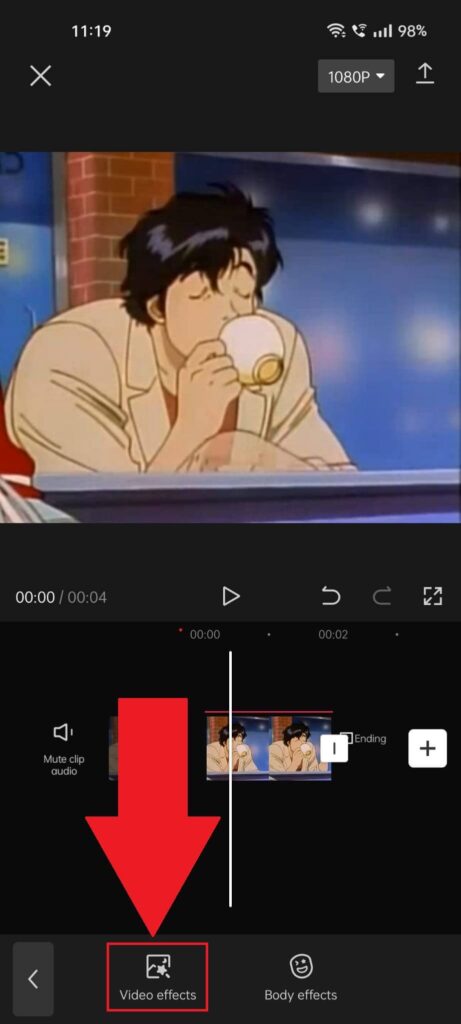
Next, select “Video effects” from the menu at the bottom. You should know this by now… we already did this a couple of times already.
The Blur option is in the same place as before, in the previous steps. But the above image is there as a quick reminder for you (…see how thoughtful a person I am?).
7. Go to “Basic” and select “Blur“
Here, once you select the “Video effects” option, you’ll need to choose the “Basic” category and then tap on “Blur“. This will let you apply blur to the video.
(again, check the screenshot, as this really looks weird explaining in writing)
8. Select “Object“
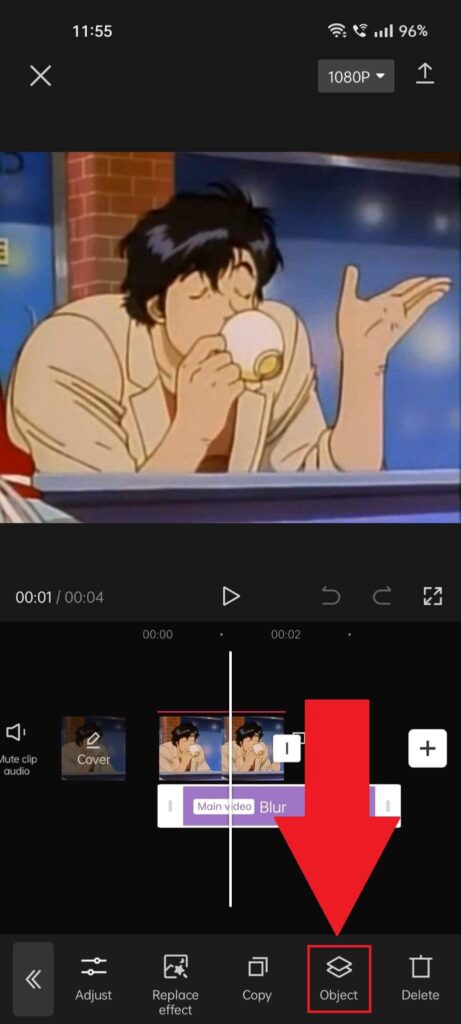
This is where it gets different. Before, you added the blur to the entire video. Now, however, you’ll only apply it to a portion of it.
Once you apply the blur and customize the intensity (like last time – go back if you’ve forgotten), close the menu, and you’ll see a couple of options on the menu at the bottom of the screen.
Select “Object” and keep reading!
9. Tap on “Overlay“
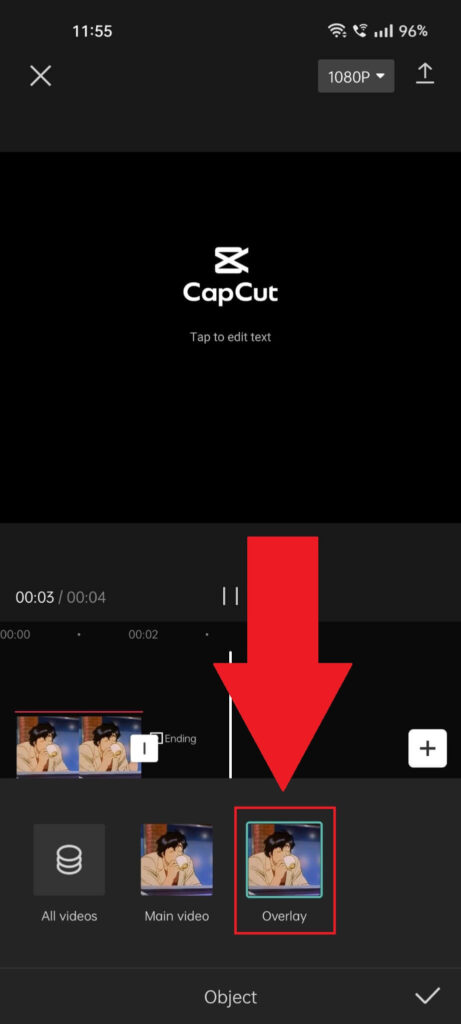
You want to apply the object blur to the “Overlay” and not the “Main video” – VERY important.
So, select the “Overlay” option, and NOT the “Main Video” option.
10. Go to “Overlay“
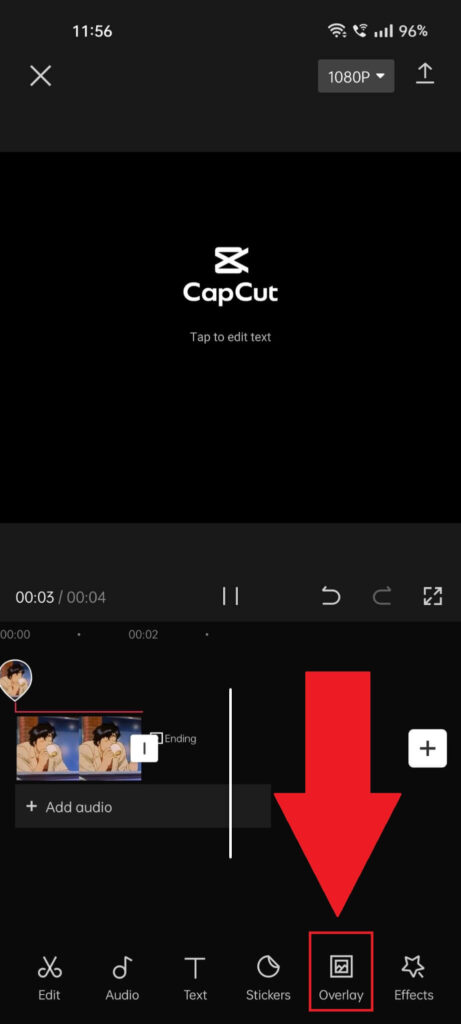
I know it looks complicated, but it’s really not (I’m just trying to encourage you… it kinda is complicated).
Go back to the main editing options and select “Overlay“. You’ll need to find a specific option for the overlay feature, which is shown below:
11. Select “Mask“
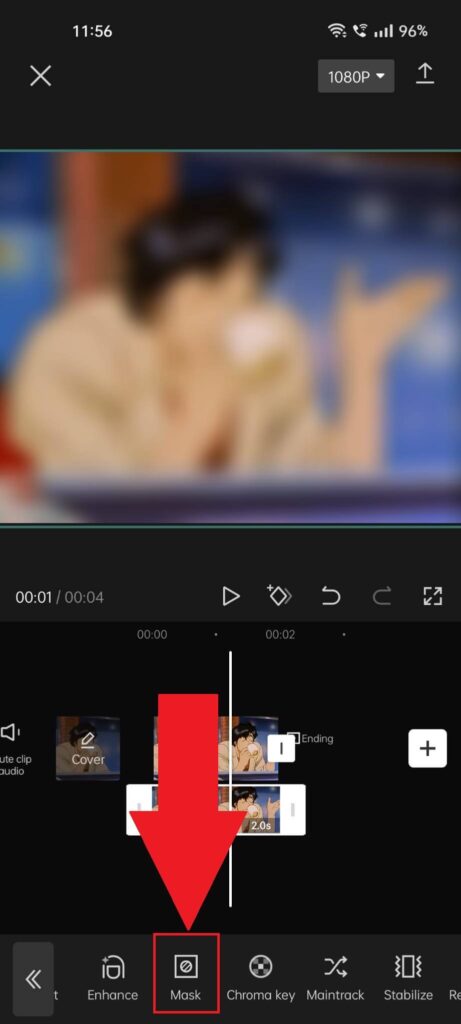
Once you’re in the “Overlay” menu, scroll through the options until you find the “Mask” option. Select it and follow the next steps!
12. Select a mask shape
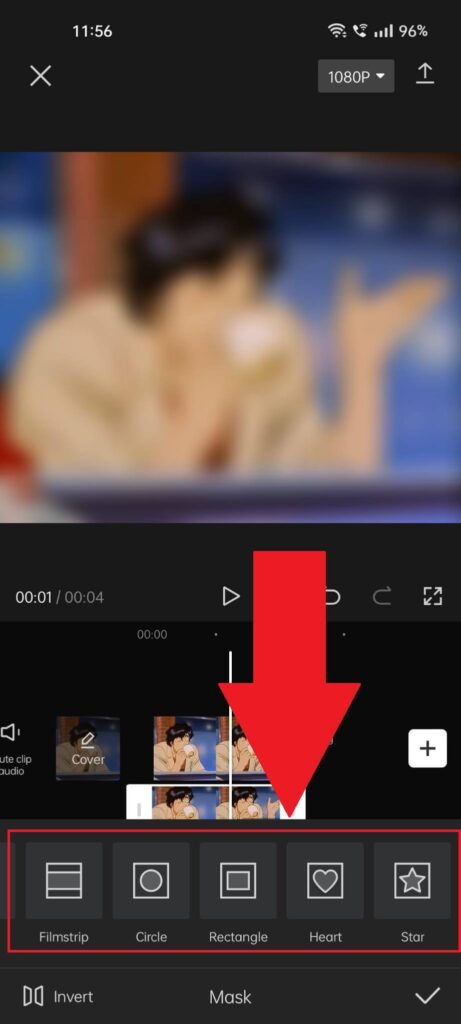
Next, you need to select a shape for the blur overlay on the video. Choose a shape that best fits your needs and make it so it covers the object you want to blur in the video.
The bigger the object you want to blur, the bigger the shape you should select… Circles and rectangles work best for most objects imo.
13. Extend the blurred shape over the object and save the changes
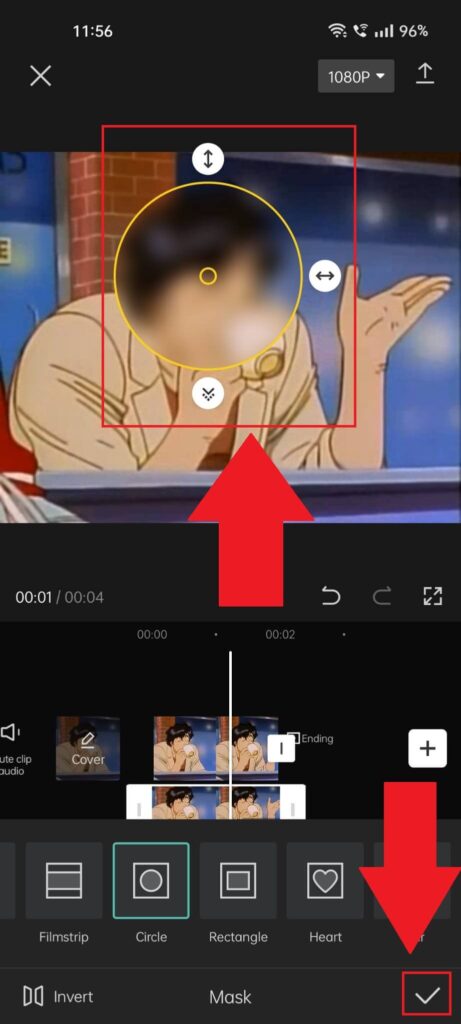
Once you select the shape, you’ll need to extend it over the object you want to blur. Make sure you cover the entirety of the object or person’s face with a blurry shape.
Then, lastly (about time!!!), tap the checkmark button in the bottom-right corner to save the changes.
Now, you can replay the video and see if the blur effect works as intended.
If not, get back to editing and play around with some of the settings.
AND THAT’S IT! – ahhhh… see, this is why I create screenshots every time!! There’s just no way to get all of this without the screenshots.
I’ll probably do a video as well at one point, as this is one of the more complicated guides.
Anyway…
To summarize all of this:
Blurring a video on CapCut can either conceal specific parts of the video or blur the entire video, depending on the technique you choose.
The first method allows you to blur the entire video, while the second method lets you blur a specific face or object within the video.
Both methods are straightforward to implement. If you have any questions, feel free to comment below!
Also, check out this guide on adding text to a CapCut video.
I’m always around to reply to questions.