Ready to go out in style or hear the clinking of swords and the surging of mana? Yeah, I’m talking about connecting Battle.net to Discord, what else?
Follow my instructions to quickly connect Battle.net to Discord:
- Go to the “User Settings” (gear icon at the bottom of the Discord window)
- Select “Connections“
- Tap on the Battle.net icon
- Connect to your Battle.net account
To finish this quicker, I recommend going over my guide below. It has screenshots that will help you go through it easier, so keep reading!
Summary: Connecting Battle.net to Discord is a straightforward process that lets you showcase your achievements and enhance your gaming experience with friends. Follow these steps:

### How to Connect Battle.net to Discord

1. **Open Discord and Go to User Settings**:
   - Click on the gear icon next to your username to open User Settings.

2. **Navigate to Connections**:
   - In the User Settings menu, click on "Connections" in the left sidebar.

3. **Select the Battle.net Icon**:
   - Tap the Battle.net icon from the list of available connections.

4. **Log In to Your Battle.net Account**:
   - Enter your Battle.net credentials to connect your account to Discord.

For a more detailed guide with step-by-step instructions and screenshots, continue reading below.

---

### Detailed Step-by-Step Guide with Screenshots

**Step 1: Open User Settings**
- In Discord, click on the gear icon next to your username.

**Step 2: Go to Connections**
- In the User Settings menu, find and click on "Connections."

**Step 3: Select Battle.net**
- Click on the Battle.net icon among the available connections.

**Step 4: Log In to Battle.net**
- Enter your Battle.net account details to complete the connection.

**Step 5: Showcase Your Achievements**
- Once connected, you can showcase your Battle.net achievements and game activity on Discord.

By following these steps, you can easily connect your Battle.net account to Discord and enhance your gaming experience. If you have any questions, feel free to ask in the comments below!
Related: How to Move Discord Channels on Mobile
Related: What Does the Hourglass Mean on Discord?
Related: How to Lock a Discord Channel?
How Can You Connect Battle.net to Discord?
Connecting Battle.net to Discord is actually pretty easy but, just in case, here’s a step-by-step guide on how to do it:
1. Go to the Discord User Settings (gear icon)
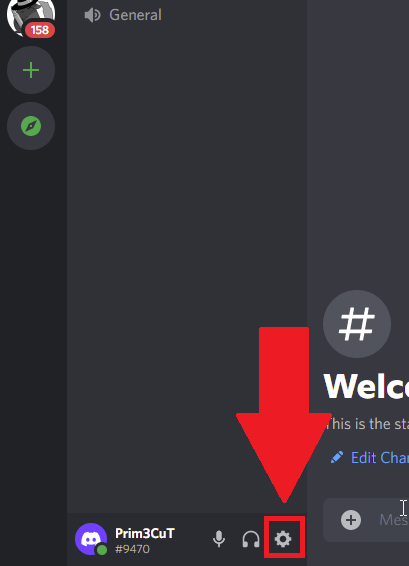
Begin by opening the Discord app (on your desktop PC) and scanning it to find the “Gear” icon (it should be near the headphones icon, in the bottom-left corner).
Give it a tap and continue reading:
2. Select “Connections“
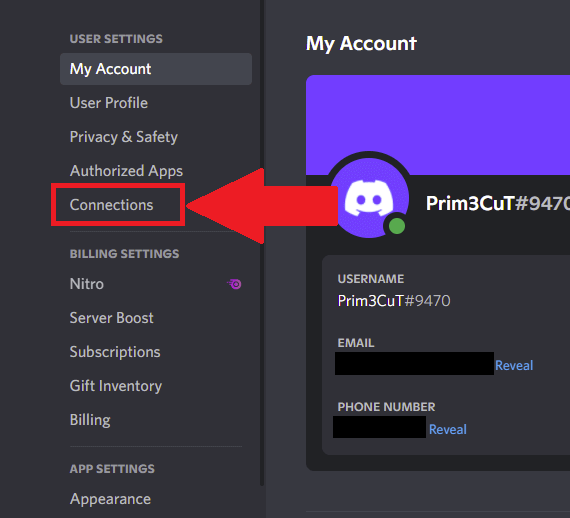
The Gear icon will teleport you to the Discord settings, at which point you’ll have to locate the “Connections” option on the right-hand side and shake its hand (by that, I mean tap it).
3. Select the Battle.net Icon
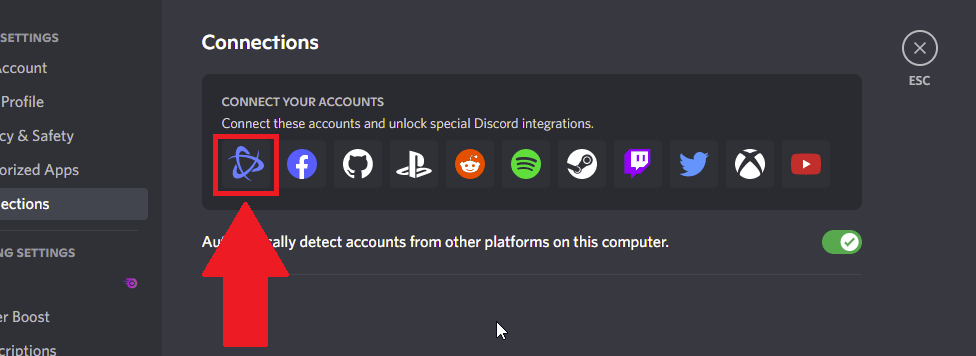
This will take you to yet another page on this wonderful journey of ours. The “Connections” tab will show you all manner of apps that you can connect to Discord.
The Battle.net icon can be seen in the picture above. If you’re unsure, search for “Battle.net” on Google and see what icon they have (it’s… well, three curved lines mingling with each other).
4. Login to Battle.net
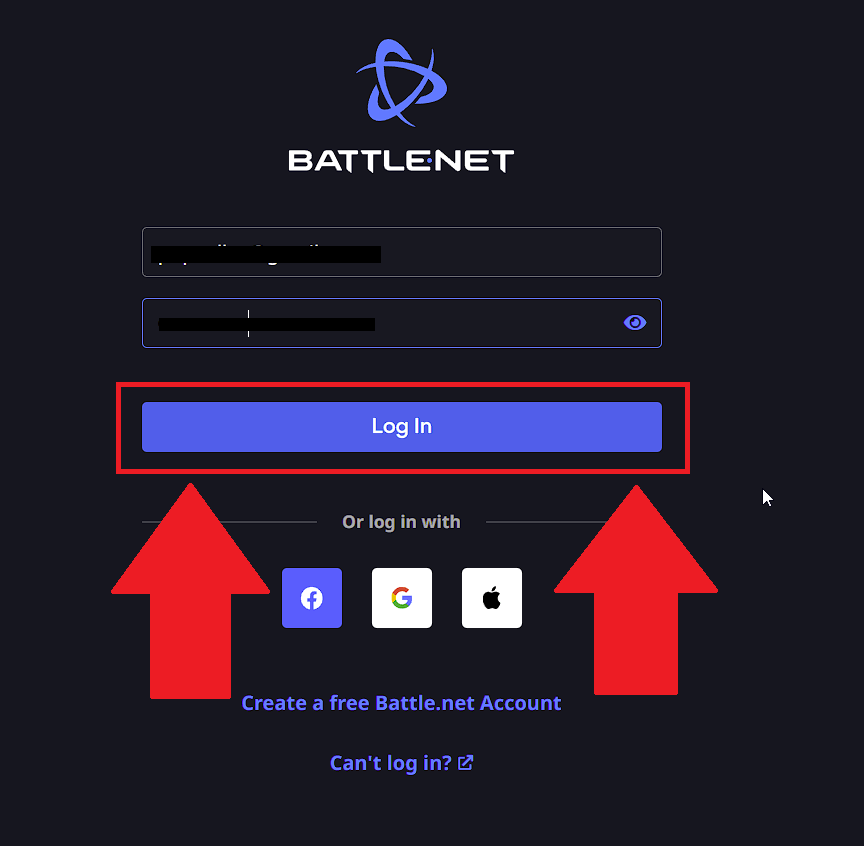
You’ll be asked to enter your Battle.net credentials, so do that. If you’re like me and you forgot your password, quickly reset it and log in.
5. Use the Authenticator or Another Method to Prove It’s You
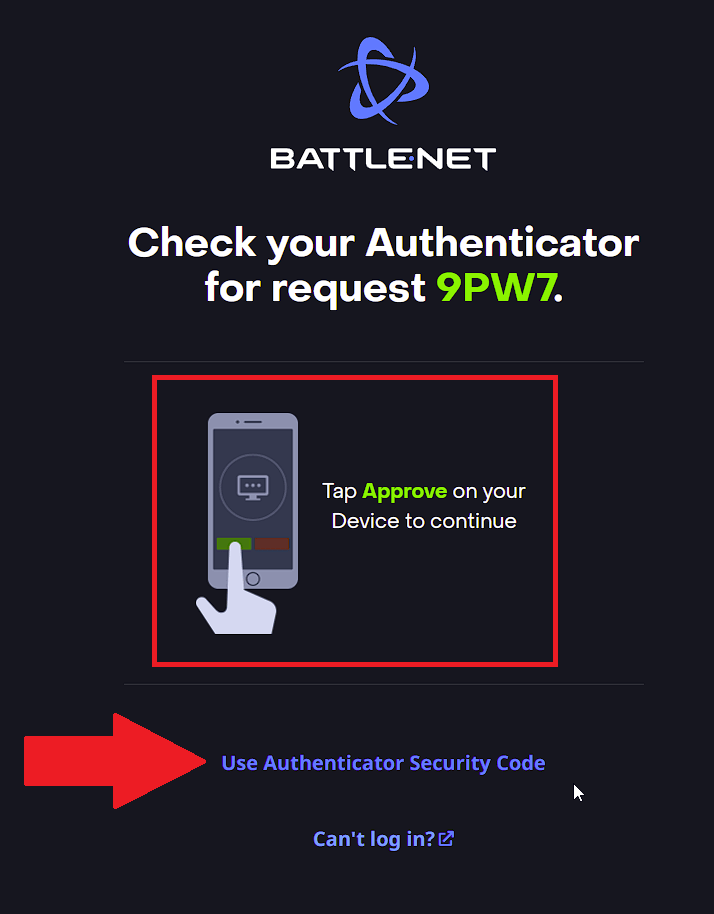
Here’s the tricky part – you’ll have to download the Battle.net Authenticator from Google Play (on your phone) to confirm the login attempt on your computer (connecting to the NASA servers again).
6. Select Another Method
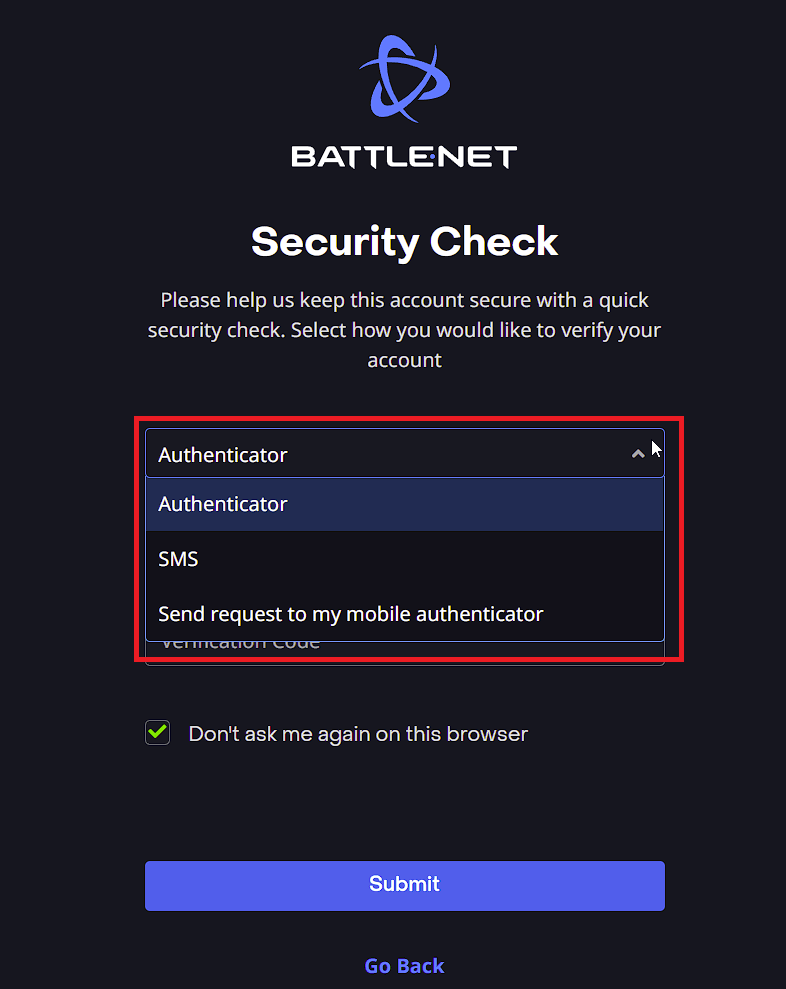
Once you confirm through the Authenticator, you’ll be taken to a security check, because Battle.net wouldn’t be the true NASA without even MORE security measures.
In the “Security Check” window, you can select another method to confirm your identity. Click on the “Identity” option, and a dropdown menu will appear with several options.
I’ve selected the “SMS” option for this article. This means you’ll receive an SMS code to your mobile phone (only if the phone number is registered with Battle.net).
7. Allow All Permissions
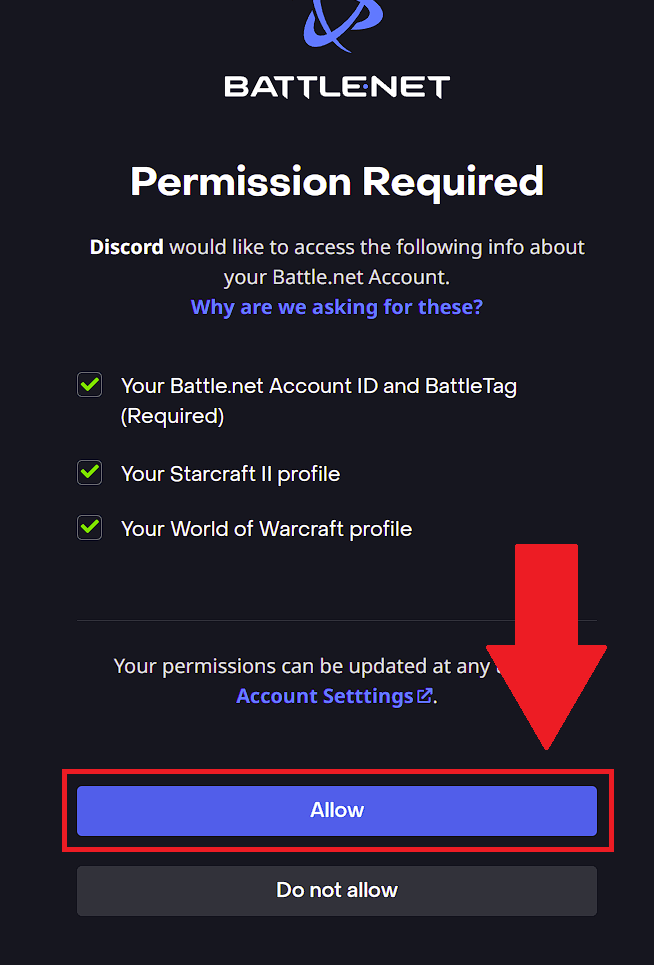
The last step is to allow all the permissions for Battle.net to sync with your Discord account. This includes all your Battle.net game profiles, Account ID, and the BattleTag.
Check whatever options you want (doesn’t really matter), and click “Allow” to finish the process.
You can verify whether Discord has synced with Battle.net by going to Discord User Settings – Connections.
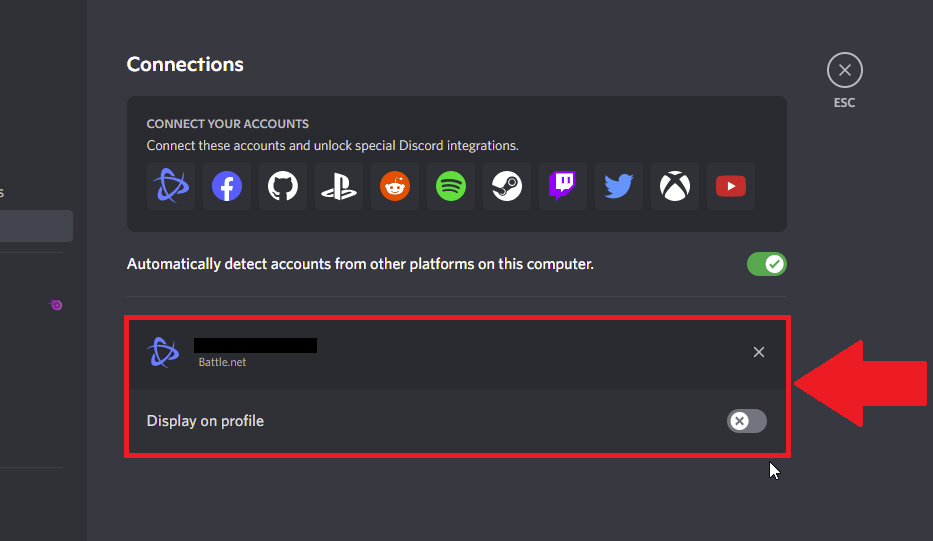
Under the “Connections” tab, you’ll find your Battle.net connection, and you can choose whether the Battle.net information appears on your Discord profile.
Check or uncheck the “Display on profile” option depending on what you want.
The One Conclusion to Rule Them All…
To summarize, you can connect your Battle.net account to Discord by going to User Settings – Connections – Battle.net.
Go through the synching process, log in to Battle.net, allow all permissions, and you’re done. You can go to the “Connections” menu in Discord to see if the connection was successful.
Connecting your Battle.net account to Discord allows you to showcase your achievements from Battle.net to Discord.
It also improves your gaming experience with your friends on Battle.net.
Let me know in the comments below if you found this guide helpful or if you have other issues with Discord. I’ll be glad to help!
What if I can’t find the Battle.net icon on the “Connections” page on Discord?
This is more common than you think. Many users can’t connect their Battle.net accounts to Discord for three reasons:
– Either their Discord or Battle.net accounts are using different email addresses
– They can’t find the Battle.net icon on the “Connections” page on Discord
– They’ve changed their Battle.net usernames recently
There was even an official thread on Twitter where Discord officially stated that there was a problem syncing Battle.net to Discord and that they were working on it.
This took place between 2017 and 2018, and now, users can connect to their Battle.net accounts correctly.
However, if you can’t do that, you should restart Discord, clear the cache (on mobile), or reinstall it.
Do the same for Battle.net, to be sure. Afterward, try to sync your Battle.net and Discord accounts together.
How can you de-sync your Battle.net account from Discord?
If you want to de-synch your Battle.net account from Discord after syncing them, you should go to User Settings – Connections on Discord.
There, you’ll find the “Battle.net” entry, with your username next to it.
If you look carefully, you’ll see an X icon in the top-right corner of the “Battle.net” panel. Click on it to de-sync your Battle.net account from Discord.
You’ll be asked to confirm this by clicking on “Disconnect” or “Cancel.”
Doing this may also remove you from all the servers you’ve joined with the Battle.net account on Discord.
Please think carefully before you do anything because it may have serious repercussions on your Discord server and profile.
Fortunately, you can synch the Battle.net account back to Discord at any time. But this won’t make you rejoin all those servers, though.

