Filters, the bread, and butter of Instagram… If you’re thinking about using a few of them on your Reels, I can help you do it in a few easy steps. Just see below:
- Tap on the Plus icon at the top of the Instagram app
- Select “Reels” from the bottom menu
- Scroll through the filters to select one
- Finish your Reel and post it
Four steps to apply a filter to a Reel doesn’t sound too difficult, right? Keep reading to see the actual steps, with screenshots too!
But before doing anything you should check if your Instagram reels are not working in the first place.

1. Tap on the “+” icon
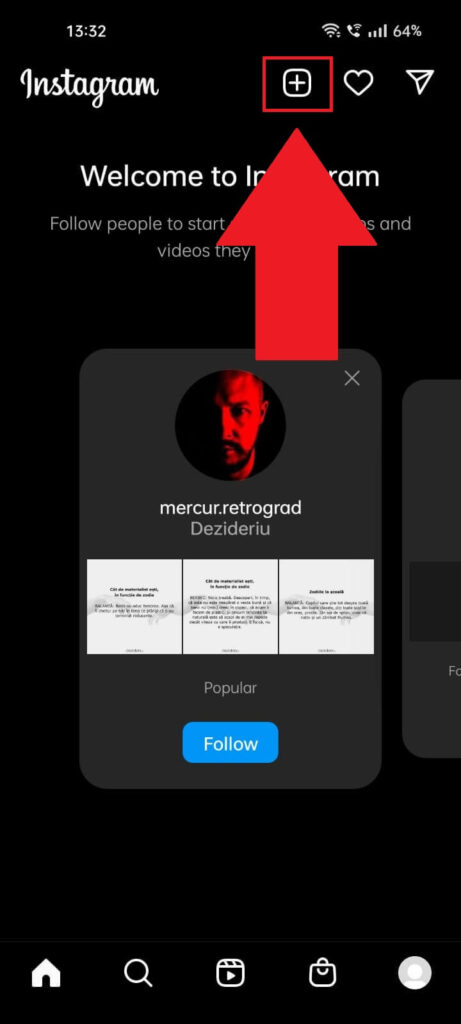
Start by opening Instagram and tapping on the + icon in the top-right corner (see the screenshot above for visual aid).
Then, look below for more info:
2. Select “Reel” from the bottom menu
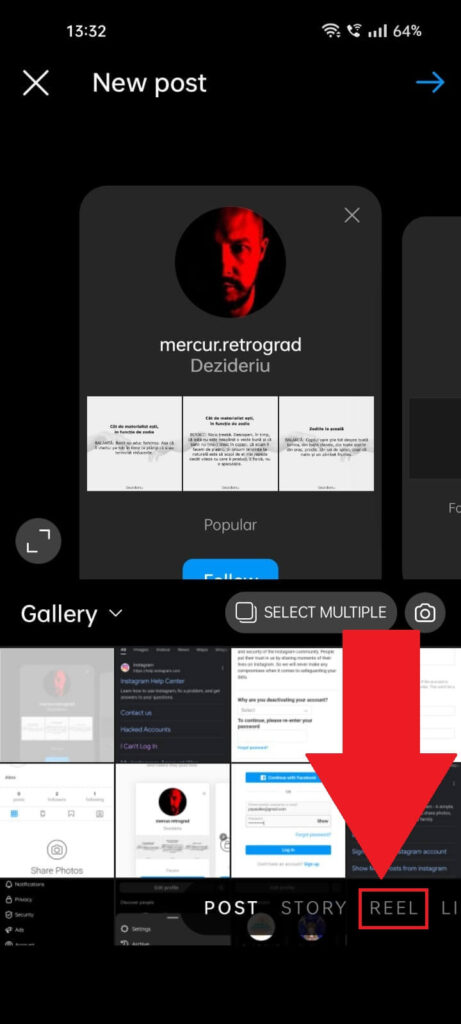
Next, you’ll arrive at the content selection page, where you can select a piece of content to post. Instead, look for the “REEL” option on the bottom menu bar and select it.
Then, follow my instructions below:
3. Make a reel with or without initial filters
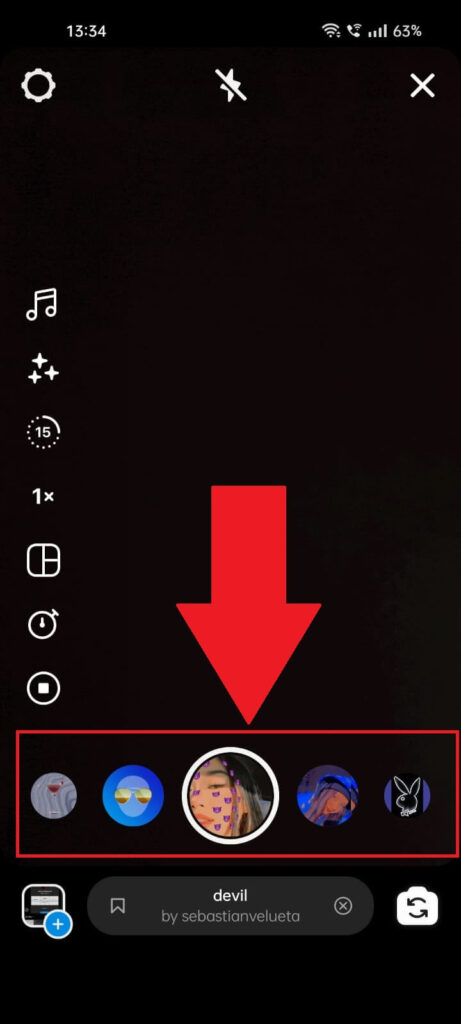
After selecting “Reels“, you’ll be taken to the main reel section, where you can create a… reel. You can apply reels beforehand by scrolling through various filters at the bottom.
Please select the one you like and tap on it to take a photo.
4. Tap on the “Effects” icon
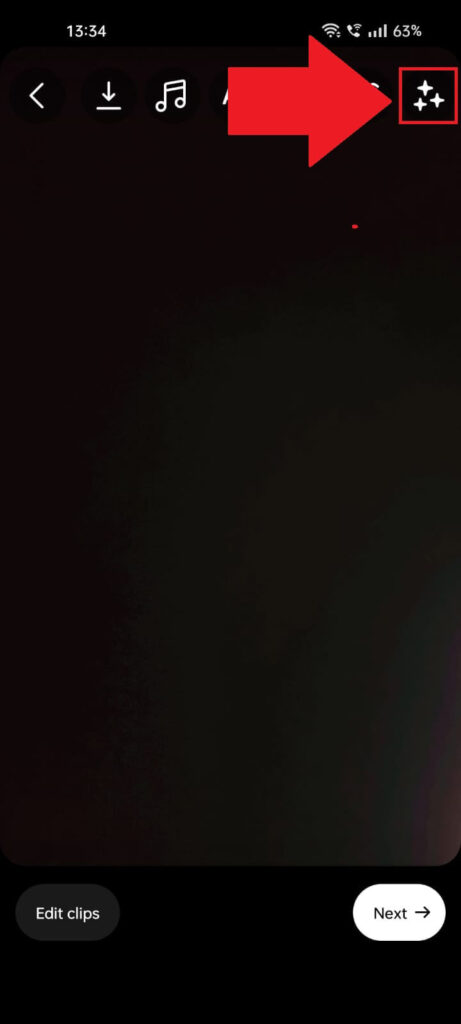
Next, you want to select the “Effects” icon if you need to add other filters or effects to your reel. If not, you can proceed to the next step by tapping “Next.”
For this video, we’ll go over the “Effects” option!
5. Select an effect
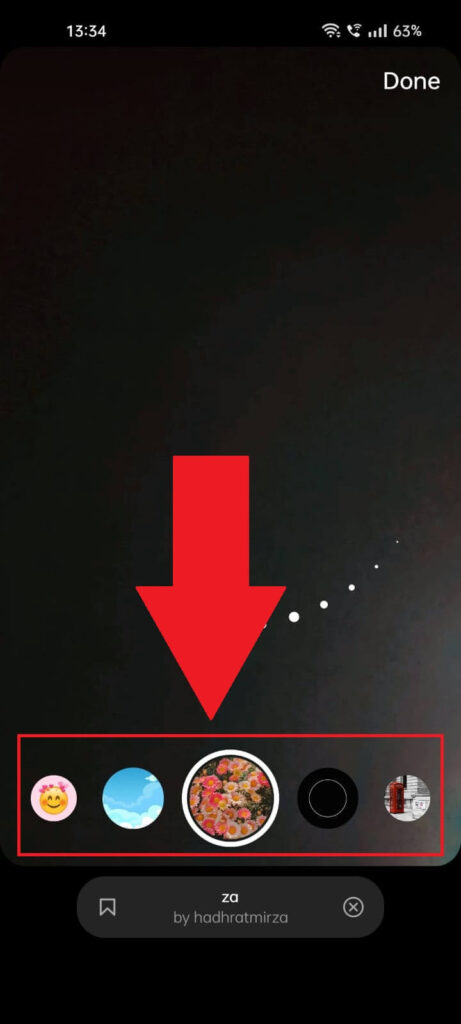
You can choose another effect or filter to apply to your Reel on this page. Once you select the one you like, tap on “Done” in the top right corner to proceed to the next step.
Check out this page if you want to see previously liked Instagram reels.
6. Select “Next“
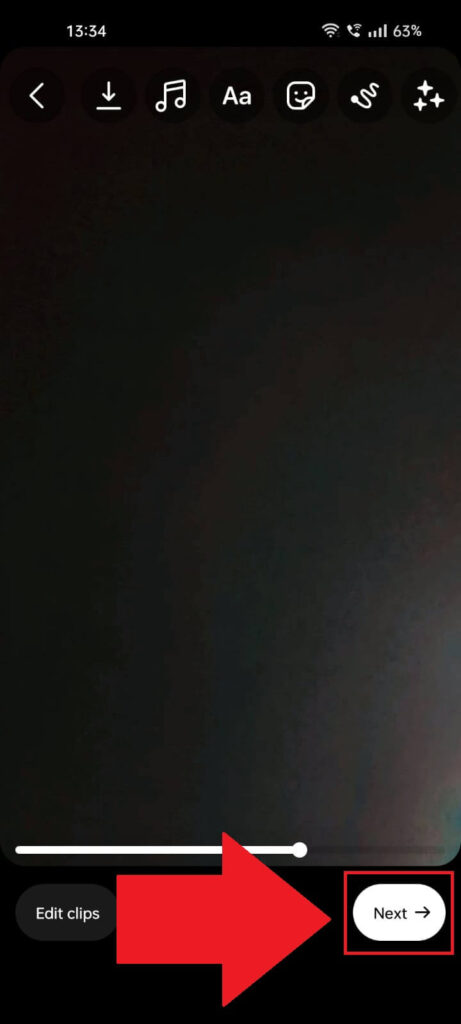
If you don’t want to edit the video, select “Next” to move on to the final step in posting your Reel.
7. Post the Reel
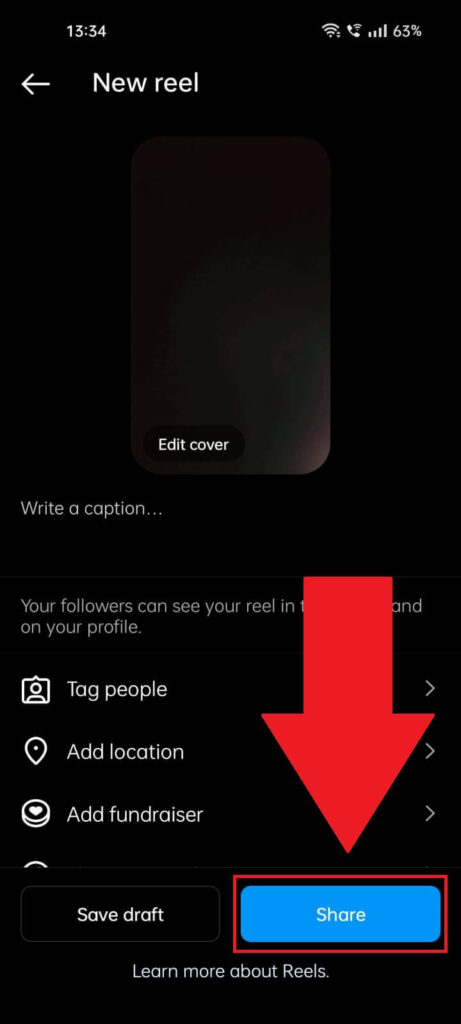
Now that you’ve created your Instagram Reel, all you need to do is post it. Here’s a simple guide to help you share your Reel with the world.
Steps to Post Your Instagram Reel
- Tag People: Tap on “Tag People” to add friends or relevant accounts to your Reel. This can help increase engagement and reach.
- Add a Location: Select “Add Location” to tag the place where your Reel was created. This is great for reaching a local audience or sharing travel experiences.
- Write a Catchy Caption: Write an engaging caption that grabs attention. Use hashtags relevant to your content to increase visibility.
- Select “Share”: Once you’ve added all the details, tap “Share” to post your Reel on Instagram. Your Reel will appear in your followers’ feeds, on your profile, and possibly on the Explore page.
That’s It!
Posting a Reel on Instagram is that simple. With these steps, you can share your creative videos and engage with your audience easily.
Need More Help?
If you’re confused about any of the steps or need more help with Instagram Reels, let me know in the comments below! I’m here to help.
Can you add filters to existing reels?
Sadly, no. Instagram doesn’t let you add any effects or filters to an existing reel you’ve already posted.
This option exists for normal videos but not for reels, as far as I know. However, Instagram may add this feature in the future because many users are demanding it.
Until then, I recommend using your preferred filters before posting the reel, or you’ll need to reshoot the reel to add a new filter.
And if it’s a unique reel with specific footage you can’t reproduce, it’ll be a shame to have missed the chance to add a good reel.
Hopefully, Instagram will add the option to edit filters in the future and add filters to them!
I also recommend thinking twice before posting a reel vs. a video. Unlike a reel, you can fully edit a video even after posting it.
What is a reel on Instagram?
There’s a difference between reels, stories, and videos on Instagram. They’re not the same, users don’t interact the same with them, and it’s worth knowing about these differences.
Here are the main perks of Instagram reels:
– They have access to more music libraries
– You can use more editing tools
– You have access to more filters
– You can use audio from other creators
– You can create remixes on your reels
Reels allow you to do more things than you’d be able to on regular videos and photos.
However, a disadvantage is that you can’t edit reels as in-depth as you’d want after posting them.