Do you want to know who saved your Instagram post? That’s impossible. Instagram doesn’t have that feature.
However, you can find out how many people have saved your post. You still won’t know who they are, but you at least have a number.
You’ll need to switch to your business account and go to “Insights.” There, you’ll see how many people have saved your Instagram post.
An unofficial way of finding out who saved your post is to ask your followers directly. But this method is not very reliable.
Read below for more information!
How Can I See How Many People Saved My Instagram Post?
To see how many people saved your Instagram post, you’ll need to switch to your business account from your personal account. Your personal account doesn’t have the “Insights” feature.
Attention – Skip to Step 11 if you’ve already set up your business account and you know how to switch to it.
Summary: In my article, I explain that Instagram does not allow users to see who saved their posts, as the platform prioritizes user privacy.

However, you can see the total number of saves your post has received by switching to a business account and accessing the "Insights" tab.

While you can't directly find out who saved your post, you can try asking your followers through a story. Keep in mind, though, that there's no guarantee everyone will respond.
Related: How to Solve ”We’ll Try Again When There Is a Better Connection” On Instagram?
Related: How to Add Music to Instagram Story Without the Music Sticker?
Related: What Did Pit Viper Say on Instagram?

Follow the steps below to switch to your business account:
- Open Instagram and tap on your profile picture
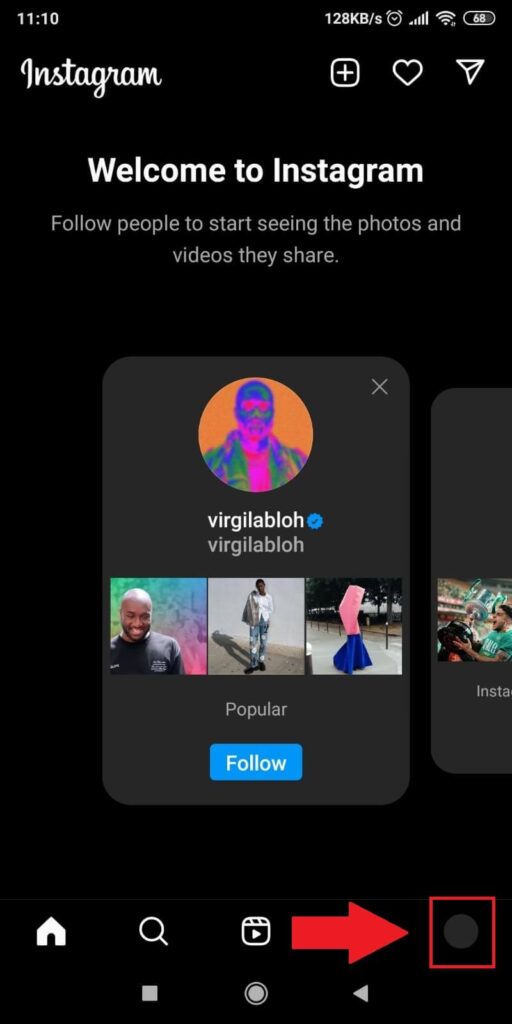
To switch to your personal account, you must open your settings first. But to do that, you need to go to your profile page.
When you open Instagram, look at your profile picture’s bottom bar. It’s in the bottom-right corner.
Select the profile picture to open your profile page. Once you’re there, follow the steps below!
- Tap on the Menu icon and then select “Settings”
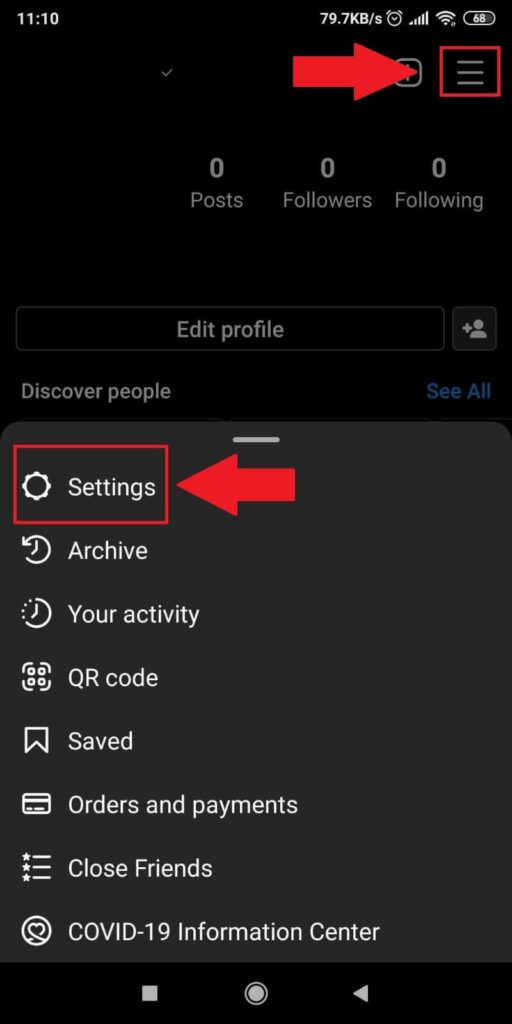
Look for the Menu icon on your profile page in the top-right corner. Tap on it to open a new menu at the bottom of the screen.
In that menu, tap on the “Settings” option, the first on the list.
The other options on this list will help you customize a few settings on Instagram, such as payments, activities, and looking at your archived content.
- Select “Account”
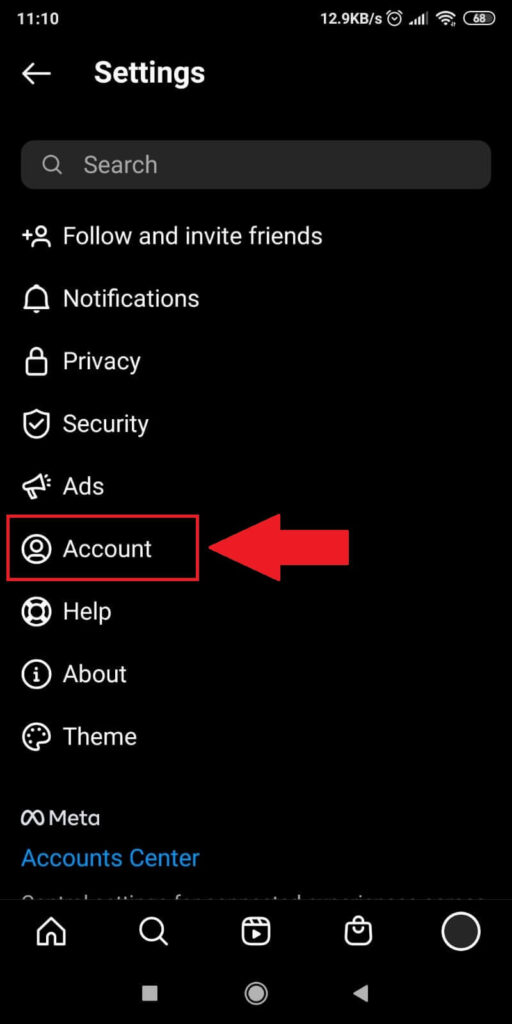
Once you open the “Settings” tab, you’ll see multiple options, such as “Follow and invite friends,” “Notifications,” “Privacy,” “Security,” and more.
Look for the “Account” option and select it. It should be the 6th option on the list.
You don’t need to log out from your Instagram account to switch to your business account.
This switch happens in your Instagram account.
- Tap on “Switch to Professional Account”
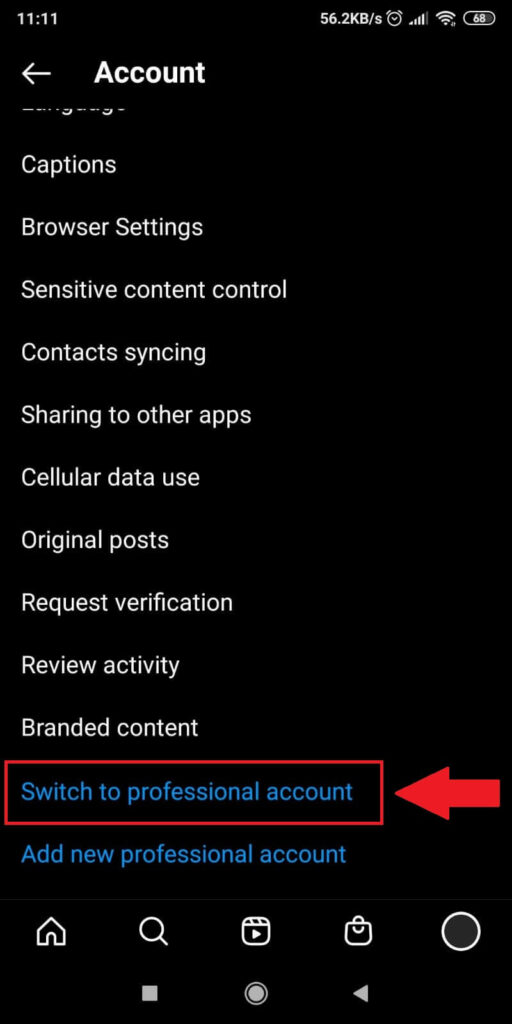
In the “Account” options, scroll down to the bottom until you see 2 blue options:
- Switch to Professional Account
- Add New Professional Account
Tap on “Switch to Professional Account” and continue with the steps below. The process is lengthier, but it shouldn’t take more than a few seconds.
- Tap on “Continue”
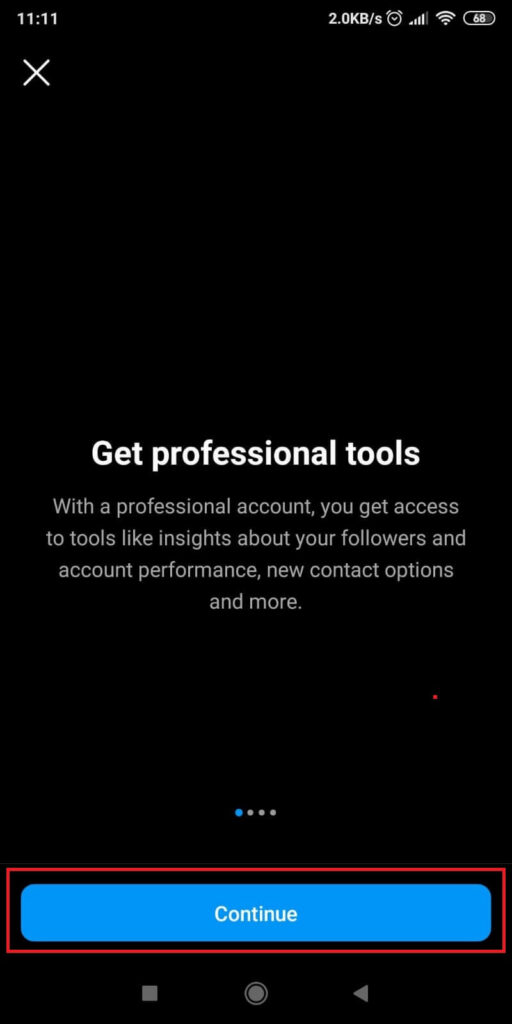
This screen will appear if you’ve never accessed your professional/business account.
You’ll be notified about the perks of a business account and what you can do with it. Read through these pages and then tap on “Continue” until you get to the next screen.
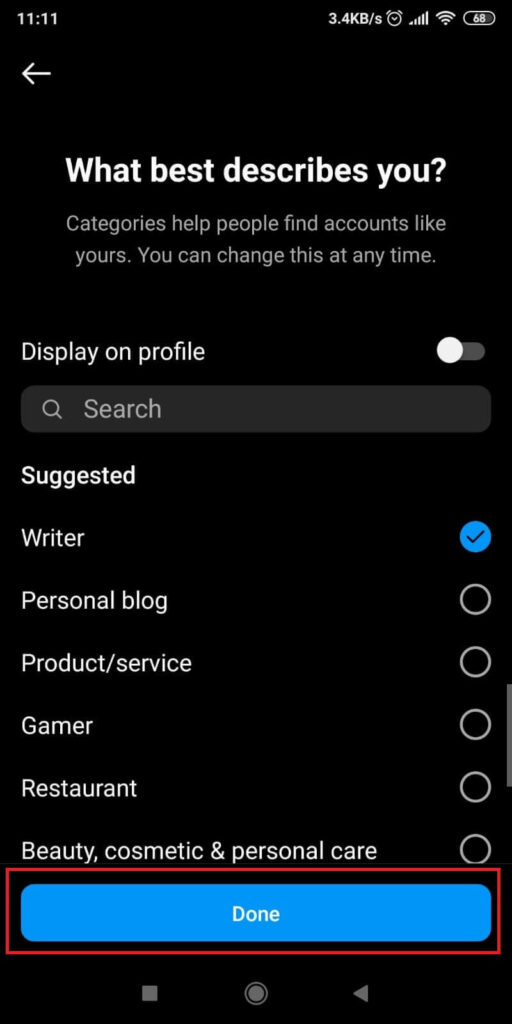
- Select your niche and tap on “Continue”
Now, you need to set up your professional account. If you’ve already done this, skip to Step 11.
On this page, you’ll be able to select your business niche. For this article, we’ll go with “Writer,” but you can choose anything that best describes you.
It doesn’t matter if you’re not going to be using your professional account. If you only want to see how many people saved your post, choose whatever you want on this step.
- Choose “Business” and “Next”
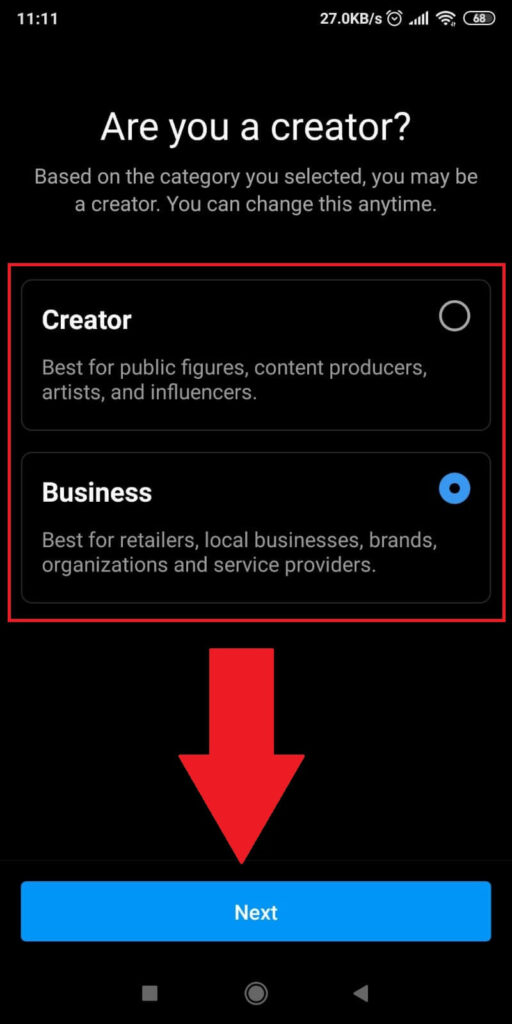
On this page, you’ll be asked to select what account you want to continue – a Creator or Business account.
Choose “Business” and then select “Next.” This will take you to other steps in customizing your business account.
Proceed with the next steps!
- Enter your contact info (or not) and hit “Next”
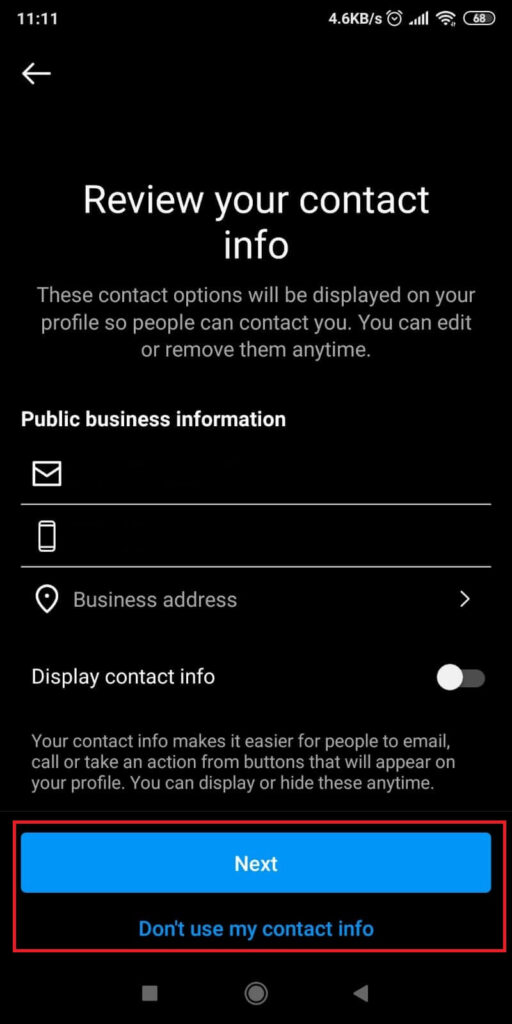
In this step, you’ll be asked for your business contact information. If you don’t have a business, select “Don’t use my contact info” at the bottom.
If you plan to use this business account later, enter your contact information and hit “Next”.
Again, this step doesn’t matter if you won’t use your business account for anything.
- Tap on “Don’t Connect to a Facebook Page Now”
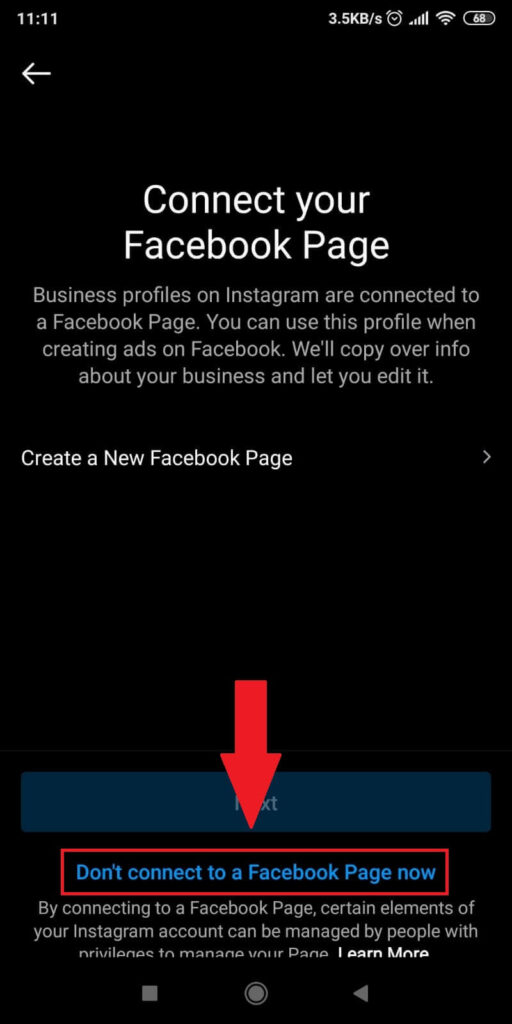
Instagram will now ask you to connect to your Facebook business page if you have one.
If you don’t, select “Don’t Connect to a Facebook Page Now.” This will take you to the next step of the process.
- Tap on the “X” button
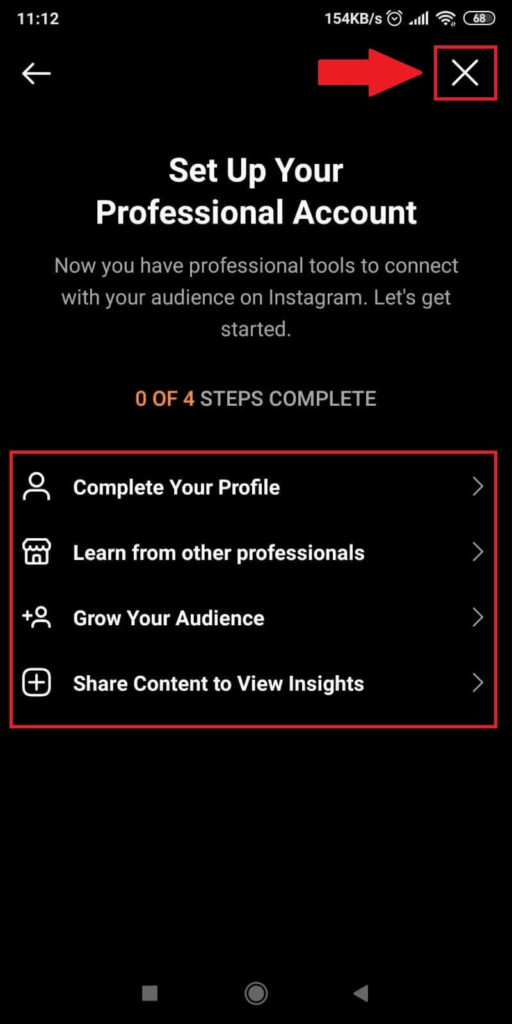
At this point, you’re at the end of the set-up procedure. Tap on the “X” button in the top-right corner of the screen to proceed.
Assuming you don’t want to set up anything more on your professional account, of course.
- Go to your Instagram Feed, find the post, and tap on “View Insights”
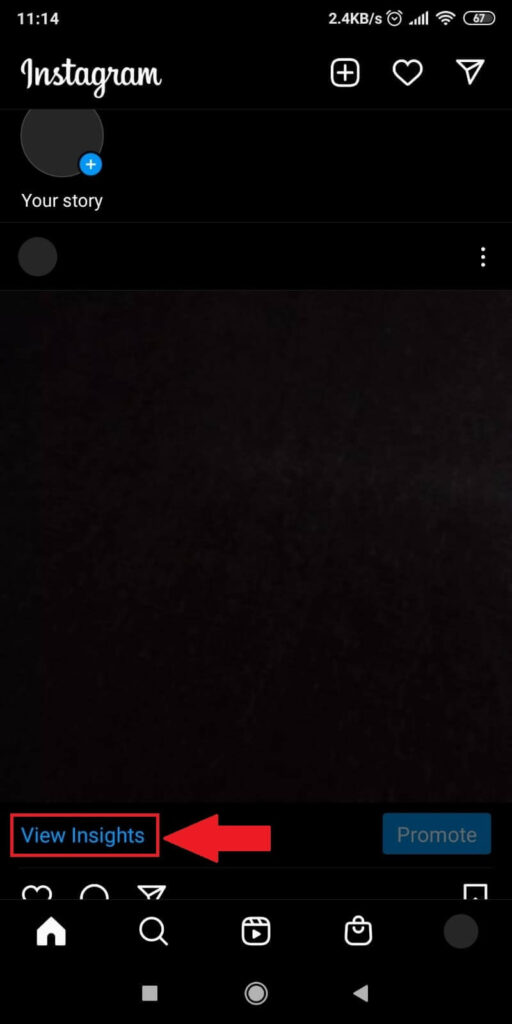
Now you’ve switched to your professional/business account. Go to your Feed, see a post, and tap “View Insights.”
It works on any post, no matter how old it is. For this article, we’ve created a random black-screen post.
- Check how many people saved your post
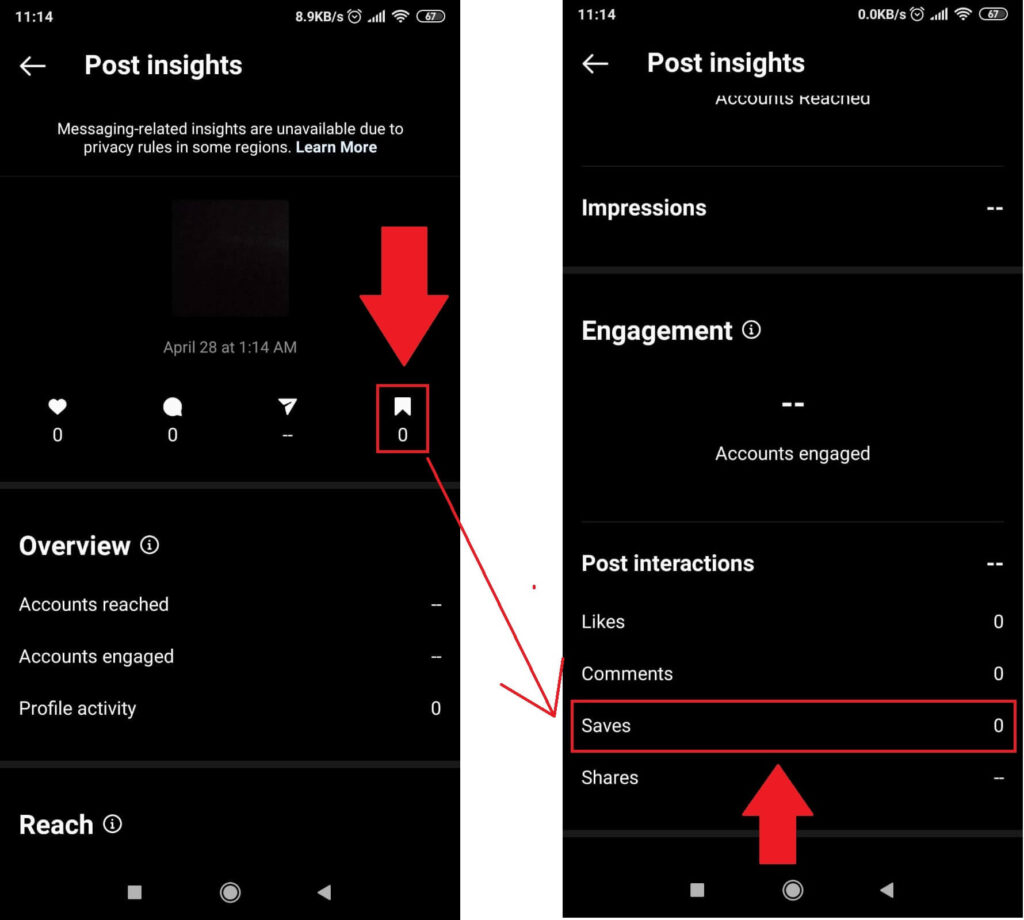
On the “Post Insights” page, you’ll see the date you posted the post and how many likes, comments, and messages you have.
You also see how many people saved your post (see image above). If you scroll down, you’ll see a more detailed interface.
This page is great for creators and business owners to check how their Instagram posts are faring in terms of engagement.
Is There Any Way to See Who Saved my Instagram Post?
Officially, no. Instagram is big on privacy and doesn’t divulge the identities of those who saved your posts.
But this doesn’t stop you from asking your followers who among them saved your post.
The best way to do this is to create a story with the post and in the caption, say something like “Who saved this post?”.
Follow the steps below to do this:
- Tap on the “+” button on your Feed and select “Story”
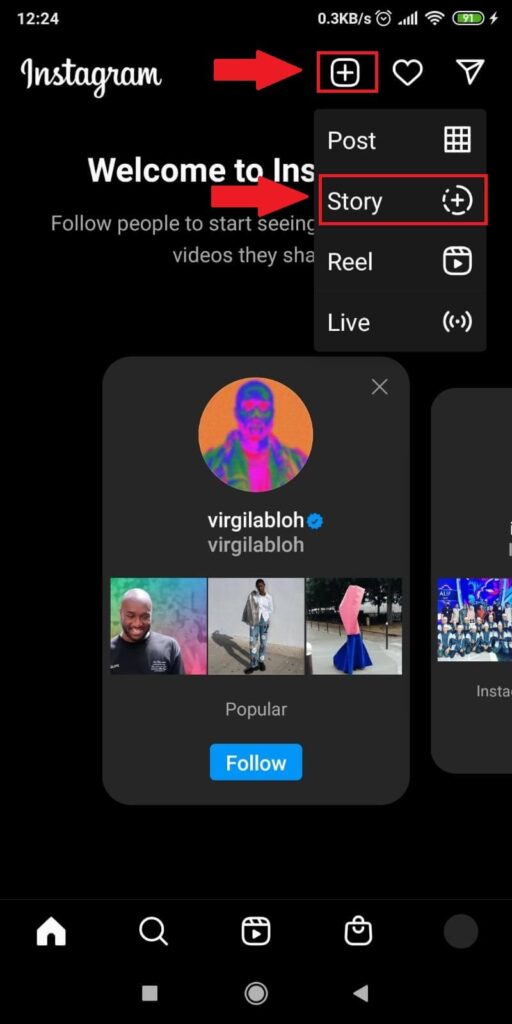
On your Feed, look at the top of the screen for the + button. Tap on it to reveal multiple options.
Select “Story” from the list. This allows you to post a story and ask your followers who saved your post.
- Tap on the “Text” icon
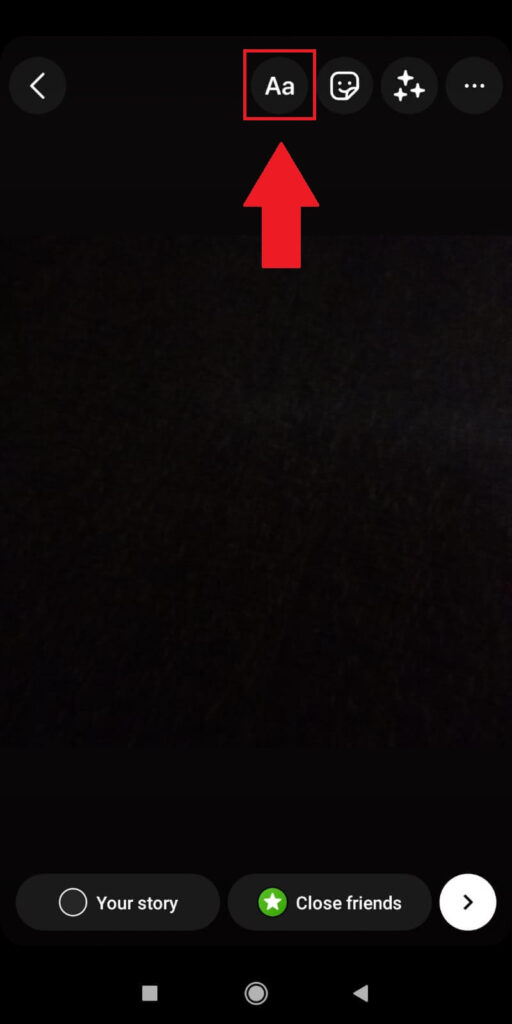
After you select the post you’re interested in, tap on the “Text” icon and then write something like “Who saved this post?”.
Or, you can give more details and make your post more polished by adding engaging text like “Hey guys, I was just wondering who saved this post, since I saw you liked it a lot!”
- Tap on “Your Story”
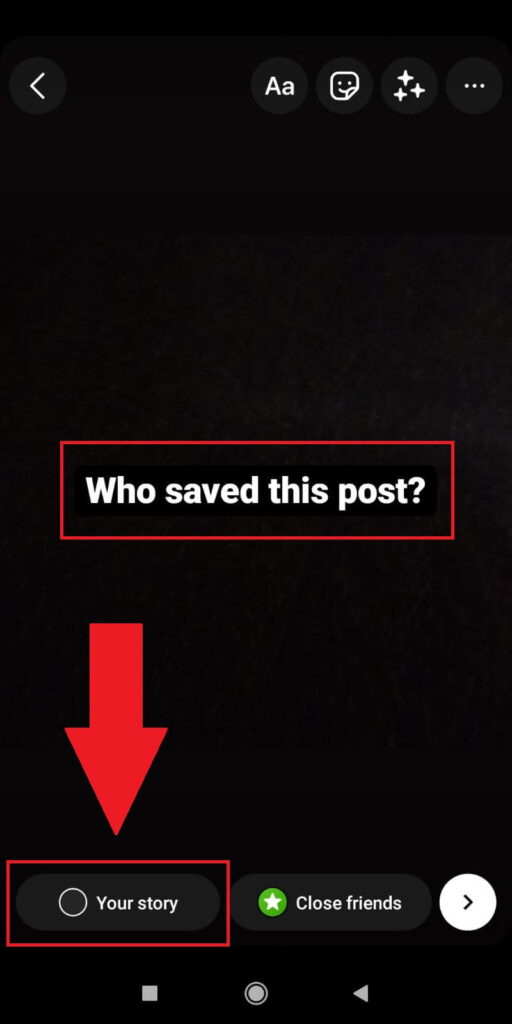
Now that you’ve added a caption with the “Who saved this post?” question, you can post it as a story.
Look in the bottom-left corner for the “Your story” button and tap on it. This will automatically post it as a story.
- Wait for answers
Now it’s all a waiting game. Your followers will reply and tell you themselves whether they’ve saved your story or not.
But you don’t have any guarantees that everyone who saved your post will reply to your story.
That’s why this solution isn’t very efficient. But there’s no other way to find out who saved your Instagram post.
Conclusion
Seeing who saved your Instagram posts could help you get to know your audience better. Or spy on them.
Sadly, Instagram doesn’t allow you to see this. It upholds every user’s privacy, which is why you won’t even receive a notification when someone saves your post.
You can see how many people have saved your post by going to the “Insights” tab on every post.
As for finding out the identity of those people, there’s no direct way of doing that.
You can ask your followers through a story, but there’s no guarantee everyone who saved your post will tell you that.