Unfortunately, you can’t fully remove the “Suggested” feature on Messenger. What you can do, instead, is remove suggestions from non-friends.
To do that:
- Open Messenger
- Tap on your profile picture
- Go to “Phone contacts“
- Select “Upload contacts“
- Select “Turn off“
- Go to “Manage contacts“
- Select “Delete all contacts“
This will keep your “Suggested” section active, but you’ll only receive suggestions from Facebook friends. I’d say that’s a good compromise considering it’s the only thing you CAN do…
Confused by all these steps above? Don’t worry, below I’ll give you a detailed breakdown and will add screenshots as well that will make it easier for you to follow along.
As for every guide I create for you, I will manually check out the problem and go through all the solutions. Based on that, I’ve created the below write-up and images. 🙂

Step 1: Tap on Your Profile Picture
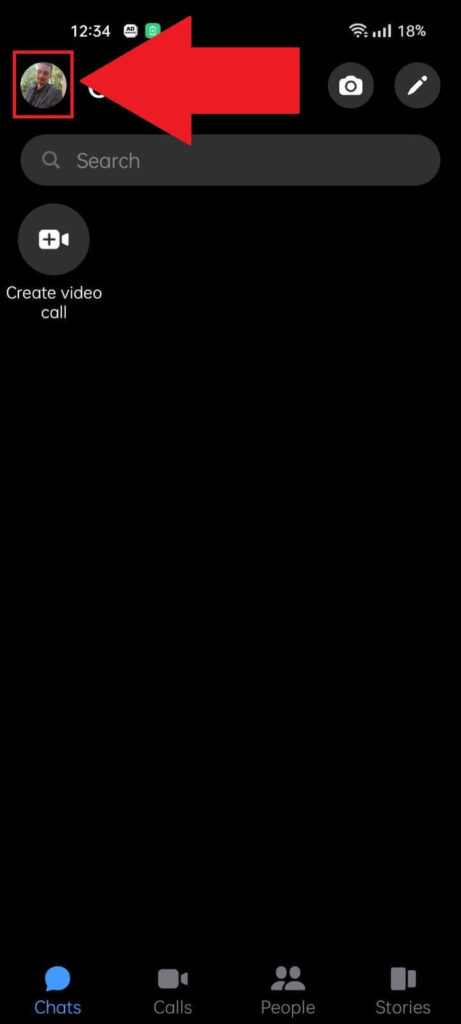
The very first thing you should do is open the Messenger app. Once you are logged in, you should look in the top-left corner for your profile picture. And then lastly, tap on your profile picture.
This will open your Messenger settings page!
Step 2: Select “Phone Contacts“
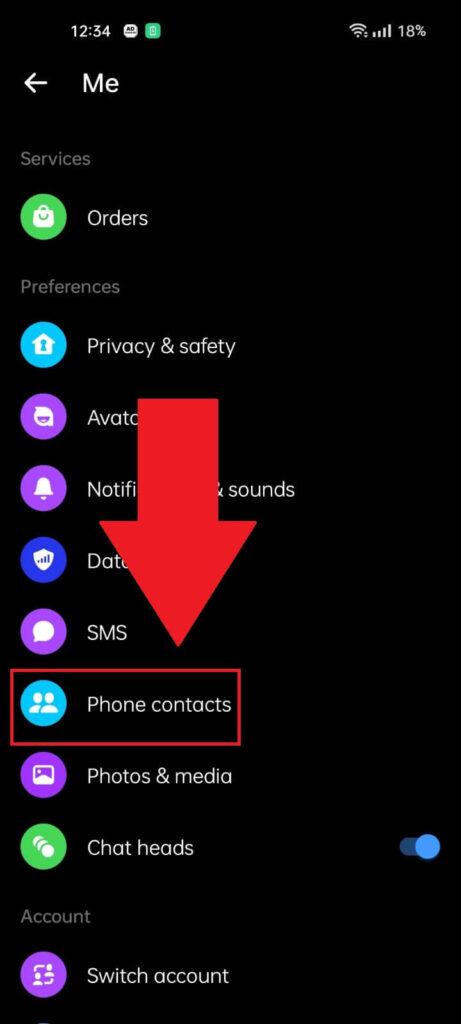
After tapping on your profile picture in the top-left corner, scroll down until you find the “Phone contacts” option and select it.
Step 3: Select “Upload contacts“
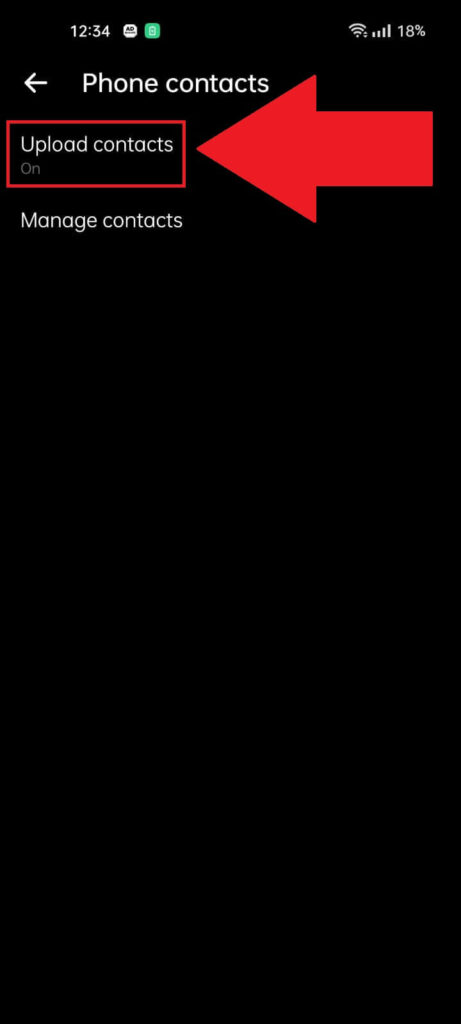
After you open the “Phone contacts” page, you’ll see two options, “Upload contacts” and “Manage contacts”.
Select the first option – “Upload contacts“. This step is necessary because you don’t want Messenger to re-upload your contacts after you delete your current ones, right? Right!
Step 4: Select “Turn Off“
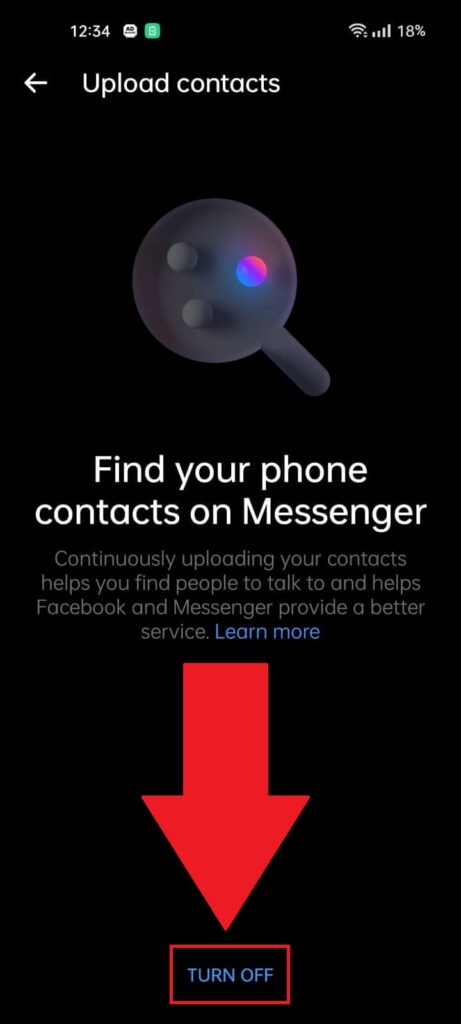
You are now on the “Upload contacts” page.
Here, select the “TURN OFF” button to disable the automatic contact upload on Messenger, which will stop the app from fumbling with your contacts all the time.
Step 5: Go to “Manage Contacts“

After you stop Messenger from re-uploading your contacts, return to the previous page and select “Manage contacts“. Now we’re getting down to business!
Step 6: Select “Delete all contacts“
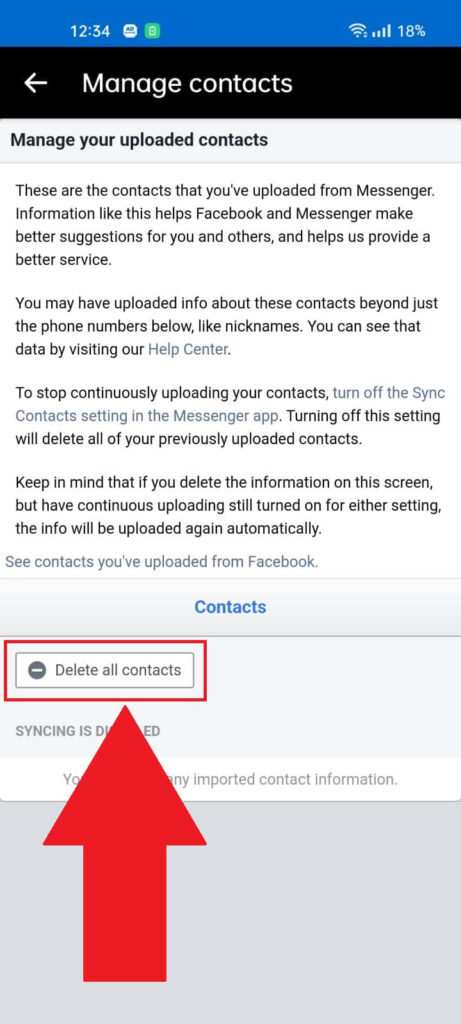
The “Manage contacts” page will explain the contacts you’ve added on Messenger and how they can interact with you.
To delete the phone contacts from Messenger, select “Delete all contacts” at the bottom of the page. And you’re done. What a journey, right?
The “Suggestions” tab won’t show people who aren’t your friends on Facebook anymore. Instead, you’ll only receive suggestions from your Facebook friends or people you’ve messaged on Messenger.
You can also see unsent messages on Messenger – just follow the linked guide.
If you have any questions or suggestions, comment below, and I’ll try to help you. Until then, stick around for other guides on your favorite social media platforms!
And if you have managed to read this guide until the very end (you are one of the few! 😀 ), then maybe also check out my write-up on how to fix the “You have been temporarily blocked from performing this action” Messenger error.